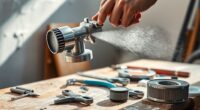
Knowing when to replace your paint sprayer parts is key to maintaining ideal performance. Look for uneven spray patterns, pressure issues, leaks, or clogs as signs that filters, hoses, or seals need attention. Always turn off and unplug the sprayer before replacing parts. Safely disconnect and inspect each component, then follow manufacturer instructions for proper installation. Staying ahead with regular maintenance helps extend your equipment’s lifespan—keep going to discover detailed tips for easier replacements.
Key Takeaways
- Replace filters regularly based on manufacturer guidelines or when they show signs of clogging or debris buildup.
- Inspect hoses for wear, cracks, or leaks before each use; replace if damaged or if pressure inconsistencies occur.
- Check seals for cracks or leaks; replace promptly if spray quality deteriorates or leaks are detected during leak tests.
- Always turn off, unplug, and release pressure before replacing parts to ensure safety and prevent damage.
- Perform routine maintenance, clean components after use, and replace worn parts promptly to extend equipment lifespan.
Recognizing Signs That Indicate Replacement Is Needed
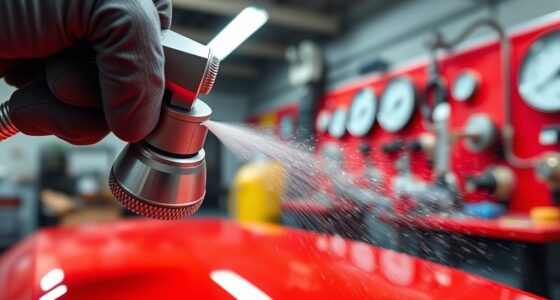
If your paint sprayer isn’t performing as smoothly as it used to, it’s a clear sign that some parts may need replacing. You might notice uneven spray patterns or inconsistent paint flow, which can stem from miscalibration or incompatible paint. Poor paint compatibility can cause clogs or sputtering, while improper paint sprayer calibration affects spray quality and efficiency. If you observe drips, sputters, or uneven coverage despite cleaning the nozzle, it’s time to check your equipment. Pay attention to changes in pressure or spray pattern, as these often indicate worn or damaged parts. Recognizing these signs early helps prevent bigger issues, ensuring your sprayer works correctly and produces a professional finish every time. Regularly inspecting and replacing worn seals, hoses, and filters can help maintain optimal performance and extend the lifespan of your sprayer. Additionally, understanding the resources and tools available can assist in selecting the right replacement parts and proper maintenance techniques. Proper maintenance can also improve the overall efficiency of your equipment, and incorporating proper tuning practices can optimize performance and prevent future issues, saving time and effort during future projects. For example, researching sound healing science concepts related to equipment vibrations may offer innovative ways to optimize your sprayer’s operation.
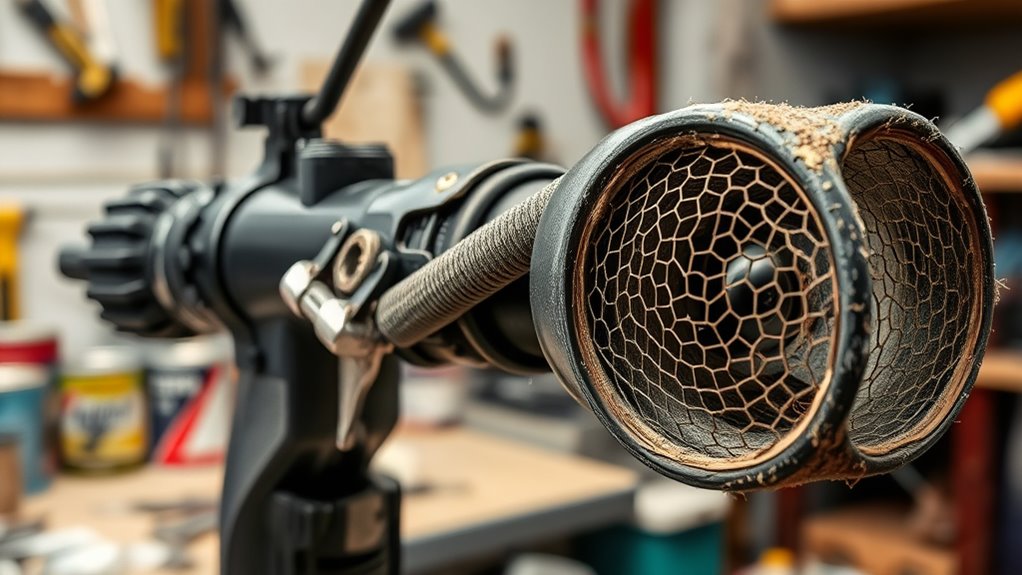
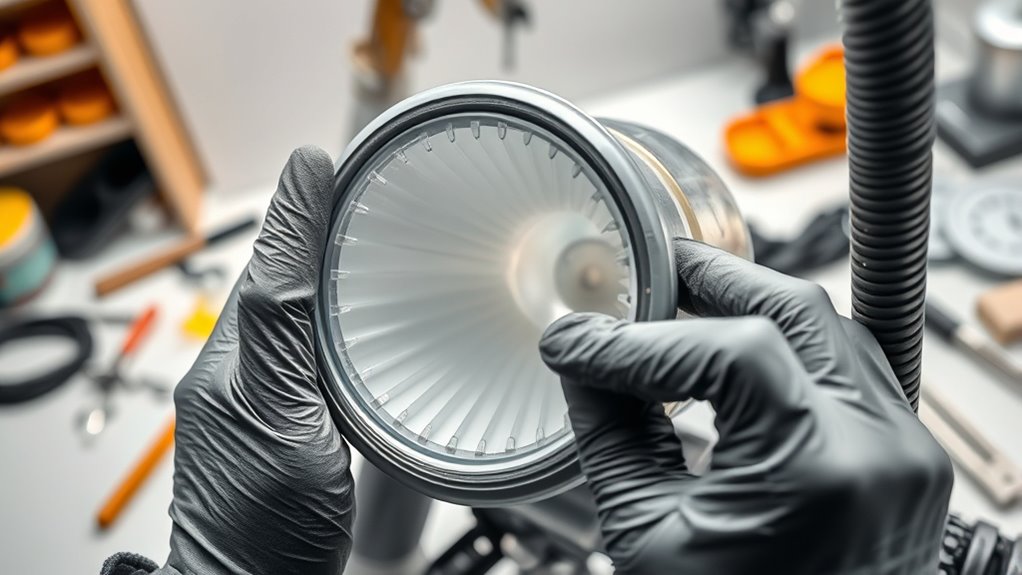
Replacing Paint Sprayer Filters Effectively

Regularly replacing your paint sprayer filters is essential to maintain ideal performance and achieve a smooth, even finish. When you replace filters, it supports effective paint sprayer cleaning by preventing clogs and ensuring consistent paint flow. Always follow the manufacturer’s instructions for removal and installation to avoid damage. Before replacing, inspect the filter for buildup or debris, especially if you’ve been mixing multiple paint colors. A clean filter helps prevent contamination and ensures your paint color mixing stays true to your desired shade. Handling filters carefully to avoid tearing, and disposing of old filters properly. Installing a new filter correctly guarantees maximum spray quality, reduces overspray, and keeps your sprayer functioning smoothly for future projects. Proper maintenance of your paint sprayer parts can extend the lifespan of your equipment and improve overall results. Additionally, incorporating regular equipment inspection can help identify worn or damaged parts early, preventing costly repairs.
How to Swap Out Hoses Safely and Correctly

Before swapping out hoses, make sure to turn off and unplug your sprayer to prevent accidents. Then, release any system pressure to avoid spray leaks or injuries. Once it’s safe, inspect the connections and attach the new hose securely to guarantee proper operation. Additionally, verifying the connection integrity ensures a secure fit and optimal performance.
Turn Off and Unplug
To swap out hoses safely and correctly, you need to start by turning off your paint sprayer and unplugging it from the power source. This guarantees you’re practicing proper paint sprayer safety and prevents electrical hazards. Always double-check that the sprayer is completely powered down before handling any parts. Consider the following table to understand the importance of safety precautions:
| Step | Reason | Benefit |
|---|---|---|
| Turn off the sprayer | Prevent electrical shock | Ensures electrical safety |
| Unplug the device | Eliminates power risk | Avoids accidental activation |
| Wait before touching | Allows residual pressure to release | Protects from spray hazards |
Following these steps keeps you safe during maintenance and helps avoid damage to your equipment. Additionally, proper maintenance practices can extend the lifespan of your paint sprayer and ensure optimal performance. Regularly inspecting and cleaning parts like filters, hoses, and seals also contributes to consistent operation, and being aware of essential safety precautions can help prevent accidents and malfunctions.
Release System Pressure
Once you’ve turned off and unplugged the sprayer, the next vital step is to release the system pressure. Pressure release is essential to prevent accidents and guarantee safety when swapping hoses. First, activate the spray trigger to vent any remaining pressure in the system. Hold the trigger until all pressure is expelled, listening for hissing sounds. Follow the manufacturer’s safety precautions, such as wearing gloves and eye protection, to avoid contact with residual paint or compressed air. Never attempt to disconnect hoses or remove parts while pressure is still built up, as it can cause injury. Releasing the system pressure properly ensures that the hose can be safely detached and replaced without risking sudden sprays or leaks. Always double-check that pressure has fully dissipated before proceeding. Properly system maintenance and understanding safety protocols are crucial to prevent accidents during this process. Understanding angel numbers, especially those related to safety and positive change, can remind you to approach maintenance tasks with calm and awareness. Additionally, consulting the manufacturer’s guidelines can provide specific instructions tailored to your spray system model. Incorporating safety procedures into your routine minimizes risks and promotes confidence when handling equipment. Being mindful of the weight of equipment can also help prevent strain or injury during hose replacement.
Inspect and Connect
After confirming that the system pressure is fully released, carefully inspect the disconnected hoses and fittings for any signs of wear, damage, or debris. Check the hose connections for secure fit and guarantee no cracks or leaks that could affect spray pattern consistency. When connecting the new hose, make sure it’s properly aligned to avoid disrupting color matching or spray pattern accuracy. Tighten fittings securely without over-tightening, which can cause damage. As you reconnect, verify that the spray pattern remains even and consistent, indicating a proper seal and maximum performance. Properly inspecting and connecting hoses ensures your sprayer maintains even coating and accurate color matching, leading to professional results and reduced cleanup time.
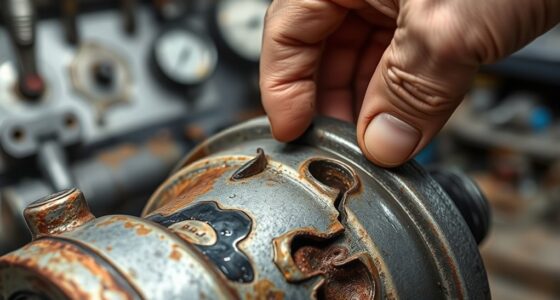
Identifying When Seals Are Worn or Damaged

Seals in your paint sprayer can wear out or become damaged over time, which can lead to leaks, inconsistent spray patterns, or reduced pressure. To identify seal deterioration, look for signs such as:
- Visible cracks or tears in the seal material
- Unexplained leaks around connections or fittings
- Changes in spray quality, like uneven or sputtering output
- Difficulty maintaining consistent pressure during operation
Perform leak detection by observing if paint oozes or drips from seals or fittings when the sprayer is pressurized. If you notice any of these issues, it’s likely your seals are compromised and need replacement. Regular inspection ensures you catch seal damage early, maintaining excellent sprayer performance. Understanding seal maintenance can help prolong the lifespan of your equipment and ensure optimal operation. Additionally, inspecting hose connections regularly can prevent unexpected failures and improve overall efficiency. Proper sealing techniques during assembly can also minimize future issues and extend the life of your sprayer components, especially when combined with routine inspections. Recognizing the importance of vibrational energy in maintaining equipment can contribute to better overall performance and longevity.
Step-by-Step Guide to Maintaining and Replacing Components
To keep your paint sprayer working smoothly, you need to know how to identify worn parts and substitute them properly. Following the right procedures ensures your equipment stays in top shape and lasts longer. Plus, regular preventative maintenance can save you time and money down the line. Understanding aviation regulations can also help you stay compliant when performing maintenance tasks on equipment, ensuring safety and proper operation. Additionally, proper cleaning procedures are essential to prevent buildup and ensure optimal performance of parts like filters and hoses. Regular inspection and timely replacement of wear-and-tear components can further extend the lifespan of your sprayer and maintain consistent results. Incorporating product compatibility knowledge can help you select the right replacement parts for your specific model and application.
Identifying Worn Parts
Regularly inspecting your paint sprayer for worn or damaged parts is essential to keep it functioning smoothly. Look for signs like inconsistent spray patterns, uneven coverage, or difficulty in achieving proper paint flow. To identify worn parts:
- Check the filters for clogs or tears that can affect spray quality.
- Examine hoses for cracks, leaks, or stiffness that hinder paint flow.
- Inspect seals for wear, which can cause leaks or pressure drops impacting paint spray.
- Test spray pattern adjustment and paint sprayer calibration to ensure proper atomization. If adjustments are difficult or the pattern looks uneven, worn components may be the cause. Regular checks help catch issues early, preventing costly damage and guaranteeing maximum performance.
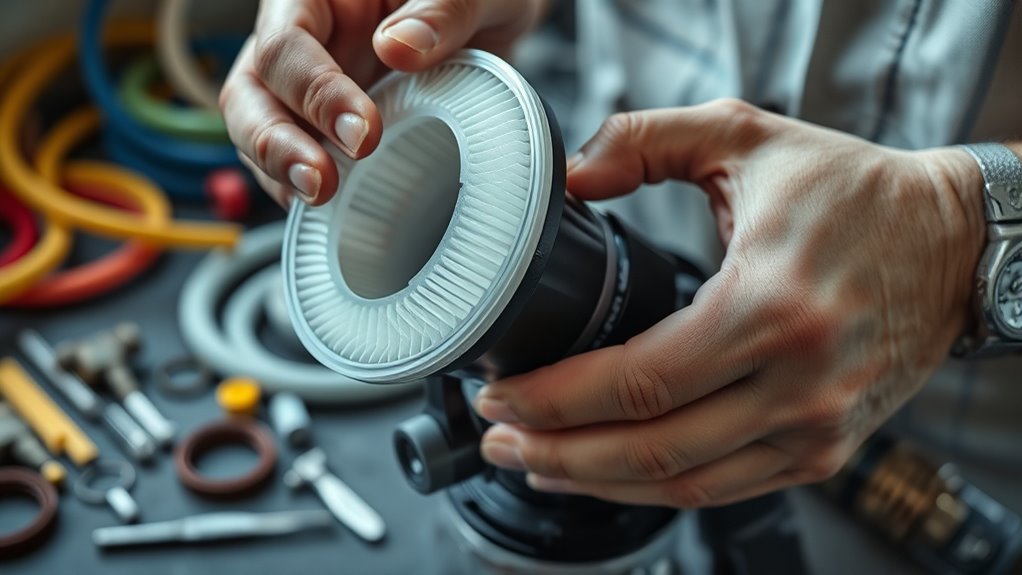
Proper Replacement Procedures
Maintaining your paint sprayer requires replacing worn or damaged parts promptly to guarantee peak performance. Start by turning off and unplugging the sprayer. Carefully remove the faulty component, such as a filter or hose, following the manufacturer’s instructions. Clean surrounding areas to prevent debris from entering the system. When installing the new part, ensure proper fit and secure connections. After replacement, calibrate your sprayer to ensure paint consistency. Regular calibration helps maintain ideal spray patterns and finish quality. Use the table below to visualize the process:
| Step | Action | Tip |
|---|---|---|
| Remove old part | Carefully detach it | Avoid damaging connectors |
| Install new part | Securely attach and tighten | Check for leaks or looseness |
| Calibrate sprayer | Test spray and adjust settings | Ensure consistent paint flow |
Preventative Maintenance Tips
Proactively caring for your paint sprayer helps prevent unexpected breakdowns and extends its lifespan. Regular maintenance ensures consistent paint sprayer calibration and paint consistency. Here are four key tips:
- Clean filters and hoses after each use to prevent clogs and maintain proper paint flow.
- Inspect seals regularly, replacing them if they show signs of wear to avoid leaks.
- Check and calibrate your sprayer periodically to ensure even paint distribution.
- Store your sprayer in a clean, dry place, and lubricate moving parts to keep everything functioning smoothly.
Following these steps helps you catch issues early, avoiding costly repairs and guaranteeing ideal performance. Proper preventative maintenance keeps your sprayer working efficiently and maintains the quality of your paint job.
Tips for Extending the Life of Your Paint Sprayer Parts
To extend the lifespan of your paint sprayer parts, it’s essential to clean them thoroughly after each use. Regular paint sprayer cleaning prevents paint residue buildup, which can cause clogs and damage. Use proper paint mixing techniques to guarantee paint flows smoothly, reducing strain on internal components. Rinse all parts with compatible solvents or water immediately after painting, paying special attention to filters, hoses, and seals. Avoid harsh abrasives that can scratch or degrade parts over time. Store your sprayer in a clean, dry place to prevent corrosion. Performing these routine maintenance steps not only prolongs the life of your parts but also ensures consistent spray quality and reduces the need for premature replacements. Proper care is key to maximizing your sprayer’s durability.
Frequently Asked Questions
Can I Use Compatibility Charts to Select Replacement Parts?
You can definitely use compatibility charts to select replacement parts for your paint sprayer. Compatibility charts help you identify which filters, hoses, or seals match your specific model, ensuring proper fit and function. By referencing these charts, you avoid incorrect part selection, saving you time and money. Always double-check the chart details before purchasing, so you’re confident that the parts you choose will work seamlessly with your sprayer.
How Often Should I Schedule Maintenance Checks for Parts?
You should schedule regular maintenance checks based on your usage and the manufacturer’s guidelines. A good maintenance schedule involves inspecting filters, hoses, and seals weekly or after heavy use. This proactive approach helps catch issues early and prevents breakdowns. Use troubleshooting tips to identify signs of wear or damage, ensuring your paint sprayer stays in top shape. Consistent checks keep your equipment running smoothly and extend its lifespan.
Are There Specific Brands Recommended for Replacement Components?
Did you know that using reputable brands can extend your paint sprayer’s lifespan by up to 50%? When choosing replacement components, focus on brand recommendations known for quality assurance. Trusted brands like Graco, Wagner, and Titan ensure you get durable, reliable parts that fit perfectly and perform well. Avoid cheap, generic options to prevent frequent breakdowns and costly repairs. Invest in quality to keep your sprayer running smoothly longer.
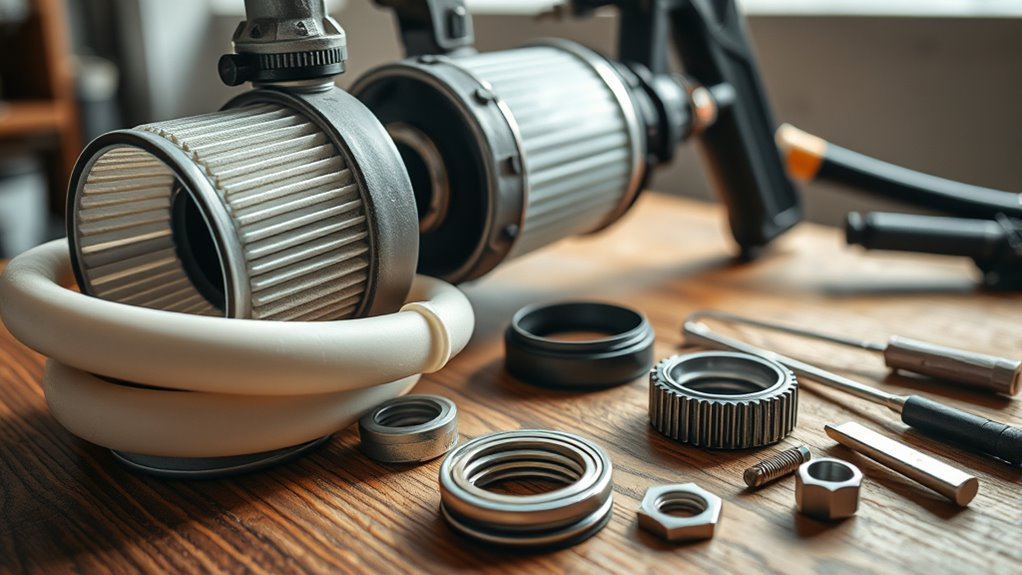
What Tools Are Essential for Replacing Different Paint Sprayer Parts?
To replace parts like the sprayer nozzle or seals, you’ll need essential tools such as screwdrivers, pliers, and wrenches. These tools help you remove and install components securely, ensuring proper paint flow. A brush or cloth is useful for cleaning parts before replacement. Having a replacement kit with seals, filters, and hoses on hand makes the process smoother, preventing leaks and maintaining consistent spray performance.
Can DIY Replacements Void My Paint Sprayer’S Warranty?
Think of your paint sprayer as a trusted steed—tinkering with it can be like riding rough terrain. Warranty concerns are real; DIY risks may void your coverage if you don’t follow manufacturer instructions. Always check your warranty terms before replacements. If you’re careful and use proper parts, you might avoid voiding your warranty. Otherwise, consulting a pro keeps your sprayer running smoothly and your warranty intact.
Conclusion
By staying attentive to signs of wear and following proper replacement steps, you keep your paint sprayer running smoothly—like a well-oiled machine. Think of your equipment as an artist’s brush; with care and timely updates, it’ll deliver flawless results every time. Don’t wait for a breakdown to take action—embrace proactive maintenance. Your craftsmanship deserves tools that perform at their best, turning every project into a masterpiece.

Franz came aboard the Paint Sprayer Zone team with a background in both journalism and home renovation. His articulate writing style, combined with a passion for DIY projects, makes him an invaluable asset. Franz has a knack for breaking down technical jargon into easy-to-understand content, ensuring that even the most novice of readers can grasp the complexities of paint sprayers.