To spray crown molding without drips, start by thoroughly preparing your paint—strain and mix it well, and thin it slightly if needed. Next, clean and dry the surface to guarantee smooth application. Practice your technique with light, even strokes, keeping the sprayer 8-12 inches from the molding. Use multiple thin coats and maintain a steady hand to prevent pooling. For more tips on achieving a flawless finish, keep exploring how proper technique and prep make all the difference.
Key Takeaways
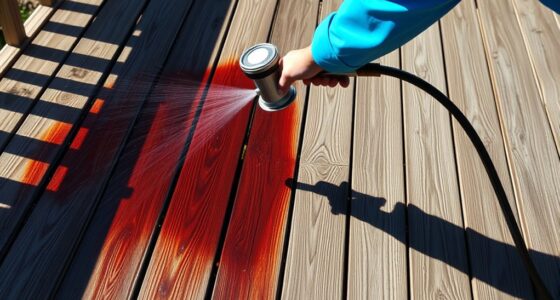
- Maintain a consistent 8-12 inch distance from the molding to prevent excess paint buildup.
- Apply multiple thin coats, allowing each to dry before adding the next for smooth coverage.
- Use smooth, overlapping strokes with steady speed to avoid pooling and drips.
- Practice on scrap surfaces to perfect your technique and identify potential issues early.
- Keep the sprayer’s pressure and distance consistent, and pause to wipe excess paint if pooling occurs.

Spraying crown molding can give your home a sleek, professional finish, but controlling drips often feels challenging. To achieve a smooth, drip-free coat, you need to focus on proper paint preparation and mastering brush techniques, even if you’re primarily using a sprayer. Start by thoroughly preparing your paint; strain it to remove any lumps or debris that could clog your sprayer or cause uneven application. Mix the paint well and, if necessary, thin it slightly with the manufacturer-recommended solvent. Proper paint preparation ensures a consistent flow and helps prevent excess paint buildup, which can lead to drips.
Proper paint prep prevents drips and ensures a smooth, professional finish on crown molding.
Before you begin spraying, it’s essential to practice good brush techniques, even if you plan to use a sprayer. Using a brush to test your paint flow and coverage allows you to get a feel for the paint’s consistency. Light, even brush strokes help you understand the paint’s behavior and how it adheres to surfaces. This preparation step is vital because it helps you identify issues like uneven thickness or excessive buildup that could cause drips when applying with the sprayer. It also gives you a chance to smooth out the surface and ensure the crown molding is clean, dry, and free from dust or grease, which could interfere with paint adhesion.
When you start spraying, hold the sprayer at a consistent distance from the molding, usually about 8-12 inches. Keep your hand steady and use smooth, overlapping strokes to distribute the paint evenly. Apply thin coats rather than trying to cover everything in one pass; multiple light layers reduce the risk of drips and runs. If you notice any pooling or dripping during spraying, pause and wipe off excess paint with a cloth or adjust your spray pattern. Remember, controlling drips is often about patience and technique—rushing can cause uneven coverage and runs.
Throughout the process, keep in mind that your spray technique is just as important as your initial paint prep. Maintain a consistent speed and distance, and avoid lingering too long in one spot. If you’re concerned about drips, consider doing a test run on a scrap piece or a hidden section first. Additionally, understanding the importance of contrast ratio can help you evaluate how your paint layer will appear under different lighting conditions, ensuring a professional-looking finish. By combining thorough paint preparation with disciplined spray techniques, you’ll be able to achieve a flawless, drip-free finish on your crown molding. It takes practice, but with attention to detail, your project will look polished and professional.
Frequently Asked Questions
What Type of Spray Gun Is Best for Crown Molding?
You should choose a HVLP spray gun for crown molding because it offers control and minimizes overspray. Look for a spray gun type with a small nozzle size, such as 1.3mm or 1.5mm, to achieve smooth, even coverage. HVLP guns with adjustable airflow help you fine-tune the spray, preventing drips. Using the right nozzle size and gun type guarantees a professional finish without excess paint pooling or dripping.
How Long Should I Wait Between Coats?
You should wait about 1 to 2 hours between coats, depending on your paint’s consistency and environmental conditions. Use brush techniques to check if the previous coat is dry; if it feels tacky, give it more time. Ensuring the paint is properly thinned helps it dry faster and reduces drips. Patience between coats guarantees a smooth, professional finish without drips or runs.
Can I Use Water-Based Paint for Spraying?
They say, “A little water goes a long way,” and that’s true when using water-based paint for spraying. You can definitely use it, but make sure to adjust your paint consistency for smooth application. Use proper brush techniques to thin the paint if needed, and keep your spray gun at the right distance to avoid drips. Water-based paints dry faster and clean up easily, making your project more manageable.
How Do I Prevent Overspray on Adjacent Surfaces?
To prevent overspray on adjacent surfaces, you should tape protection around those areas and guarantee proper surface preparation. Carefully tape off edges and nearby fixtures to keep paint where it belongs. Use a steady, controlled spray, maintaining the right distance from the surface. Proper surface preparation helps the paint adhere better, reducing the chance of overspray. Taking these steps keeps your project clean and professional-looking.
What Safety Equipment Is Necessary During Spraying?
You need protective gear like a mask, goggles, and gloves to stay safe while spraying. Don’t forget a proper ventilation setup to keep fumes at bay, ensuring you don’t breathe in harmful particles. These precautions might seem minor, but overlooking them could lead to health issues. Stay alert and prepared; your safety is worth every effort. The right gear makes all the difference between a safe project and a risky mistake.
Conclusion
Now, imagine your crown molding gleaming flawlessly, the smooth finish catching the light perfectly. With steady hands and the right spray technique, you’ll glide over every curve, leaving behind a sleek, drip-free coat. No splatters, no mess—just a polished look that transforms your space. When you master these tips, your project becomes a work of art, shining beautifully like a well-placed gem. Get ready to enjoy that flawless crown molding you’ve always envisioned.

Franz came aboard the Paint Sprayer Zone team with a background in both journalism and home renovation. His articulate writing style, combined with a passion for DIY projects, makes him an invaluable asset. Franz has a knack for breaking down technical jargon into easy-to-understand content, ensuring that even the most novice of readers can grasp the complexities of paint sprayers.