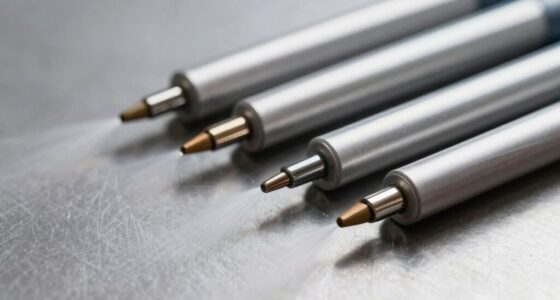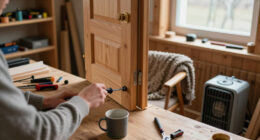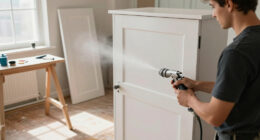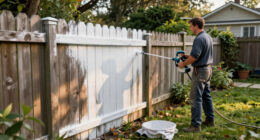
To fix dry spray texture quickly without stripping, try spraying a lightly tinted joint compound or knockdown mixture over the uneven areas using a spray gun or roller. Keep your application smooth and even, blending it into the surrounding surface. Once it dries, lightly sand for a seamless finish. If you want step-by-step tips on achieving the best results, continue exploring how to tackle this repair efficiently and professionally.

Get tools and workshop supplies delivered free — and shop member deals
- Fast, free delivery on millions of items
- Access to Prime Big Deal Days deals on October 6–7
- Prime Video, Amazon Music and more included
Key Takeaways
- Lightly sand or buff the uneven areas to smooth out the texture without removing existing spray.
- Apply a thin, even coat of joint compound or texture spray over the rough spots for quick correction.
- Use a spray gun to reapply a matching texture, blending it into the existing finish seamlessly.
- Feather the edges of the new texture into the surrounding surface to prevent noticeable transitions.
- Allow the repaired area to dry completely, then lightly sand for a uniform, professional finish.

Have you ever wondered how to add a unique, textured finish to your walls or ceilings? Dry spray texture offers a quick and effective way to do just that, especially if you’re looking to fix imperfections or update a room without the mess and effort of stripping old paint. Before you start, understanding proper application techniques and safety precautions is essential to achieve a professional-looking finish and keep yourself safe throughout the process.
To begin, you’ll want to gather the right tools and materials. A spray gun designed for texture application, a hopper or compressor, and the dry spray mix itself are essential. When preparing your mixture, follow the manufacturer’s instructions carefully to ensure consistency. The application technique involves holding the spray gun at a steady distance—usually around 18 to 24 inches from the surface. Keep your movements even and controlled, sweeping across the wall or ceiling in overlapping passes. This consistency in your technique helps prevent uneven patches or drips, giving you a uniform texture.
Safety precautions should never be overlooked. Dry spray mixes often contain fine particles that can become airborne, posing inhalation risks. Always wear a dust mask or respirator rated for fine particulates, and use goggles or safety glasses to protect your eyes. Adequate ventilation is critical; open windows and doors, and consider using fans to circulate fresh air into the workspace. Protect your floors and furniture with drop cloths, and wear old clothing or coveralls to avoid staining. If you’re working in a confined space, take extra care with ventilation and personal protective equipment. Remember, safety isn’t just about your health—it’s also about ensuring the job gets done right without unnecessary setbacks.
Applying dry spray texture isn’t overly complicated once you get the hang of it. Maintain consistent spray pressure, keep your gun movements smooth, and avoid stopping mid-spray, which can cause irregular spots. If you notice areas that are too rough or too smooth, you can adjust your technique on the fly or lightly sand the surface afterward for the desired finish. The key to success lies in patience and even application—rushing can lead to uneven textures that are difficult to correct later.
As an affiliate, we earn on qualifying purchases.
Frequently Asked Questions
Can Dry Spray Texture Be Applied Over Existing Textured Ceilings?
Yes, you can apply dry spray texture over existing textured ceilings if you guarantee texture compatibility. First, prepare the surface by cleaning and lightly sanding to promote adhesion. Check that the existing texture isn’t too thick or uneven, which could affect the new application. Proper surface preparation is key to achieving a seamless finish, so take your time to ensure the existing ceiling is ready for the new dry spray texture.
How Long Does a Dry Spray Texture Job Typically Last?
A dry spray texture job typically lasts between 5 to 10 years, depending on your home’s environment and maintenance. To maximize durability, keep humidity levels stable and avoid excessive cleaning or scrubbing. Regularly inspect for chips or damage, and touch up small areas promptly. Proper maintenance tips will help extend the lifespan and keep your textured ceiling looking fresh and appealing for years to come.
Is There a Risk of Damaging the Drywall During Repair?
You won’t risk damaging the drywall if you follow proper repair techniques; it’s like walking on a tightrope. Carefully feather the edges and use the right tools to avoid drywall damage. If you’re gentle and precise, the repair stays seamless. Just remember, rushing can cause more issues, so take your time. With patience, you can fix the texture without harming the drywall, keeping your wall looking perfect.
What Are the Safety Precautions When Applying Dry Spray Texture?
When applying dry spray texture, you should wear personal protective equipment like masks, goggles, and gloves to stay safe. Guarantee good ventilation and airflow in the area to prevent inhaling dust or fumes. Keep the workspace well-ventilated, open windows, and use fans if needed. These precautions help protect your health and make the application safer and more effective. Always follow manufacturer instructions for best results.
Can Dry Spray Texture Be Used in High-Humidity Areas?
Yes, you can use dry spray texture in high-humidity areas, but humidity concerns require careful application techniques. To prevent issues like poor adhesion or curing problems, make sure the room is well-ventilated and humidity levels are lower before application. Use a fast-drying spray and apply in thin, even coats. This helps the texture dry properly and reduces the risk of mold or mildew growth in humid environments.
Conclusion
Now that you know how to fix dry spray texture quickly without stripping, you can save time and maintain your walls’ look. Imagine a homeowner who noticed uneven patches after a DIY project; by lightly sanding and reapplying a thin layer of spray texture, they achieved a flawless finish in no time. With these simple tricks, you’ll handle any dry spray mishap effortlessly—restoring your walls’ smoothness and saving you from costly rework.
Fall Picks
fall essentials
As an affiliate, we earn on qualifying purchases.