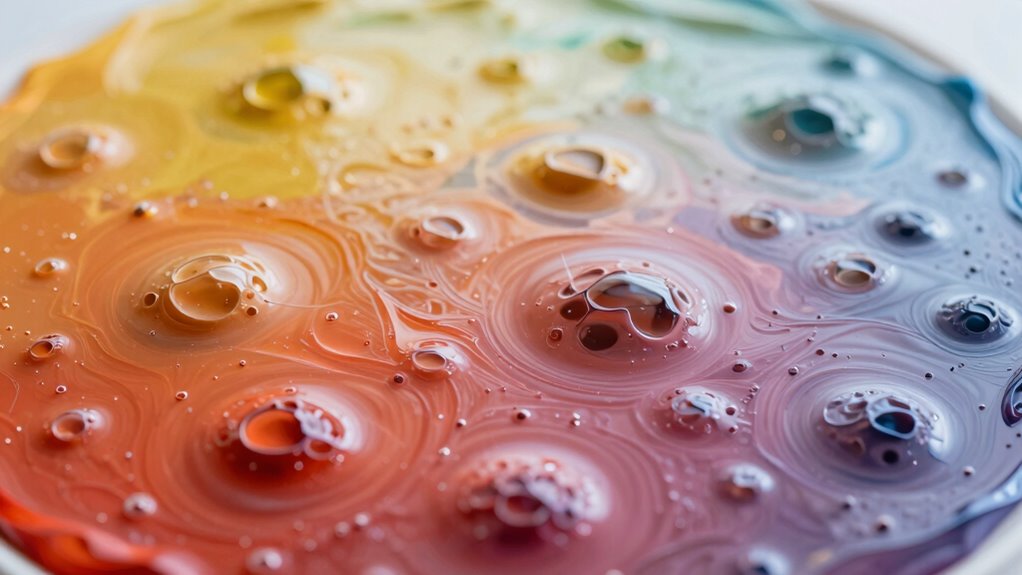
Solvent pop happens when tiny craters or bubbles appear on your freshly painted surface because trapped solvent vapor escapes after application. This typically occurs if your paint is too thick, sprayed too quickly, or you don’t allow enough drying time between coats. Environmental factors like high humidity or temperature also influence it. To avoid this, you should consider your paint formulation and technique. Continue exploring to understand more about preventing solvent pop and achieving a flawless finish.
Key Takeaways
- Solvent pop appears as tiny craters or bubbles caused by trapped vapor escaping after painting.
- It occurs when solvent vapor is trapped beneath the paint film during rapid drying.
- Improper spraying technique or thick coats can trap solvents, leading to late-stage craters.
- Environmental factors like high humidity and temperature slow evaporation, increasing solvent pop risk.
- Using formulations designed for airbrushing and proper drying times helps prevent solvent pop from forming.
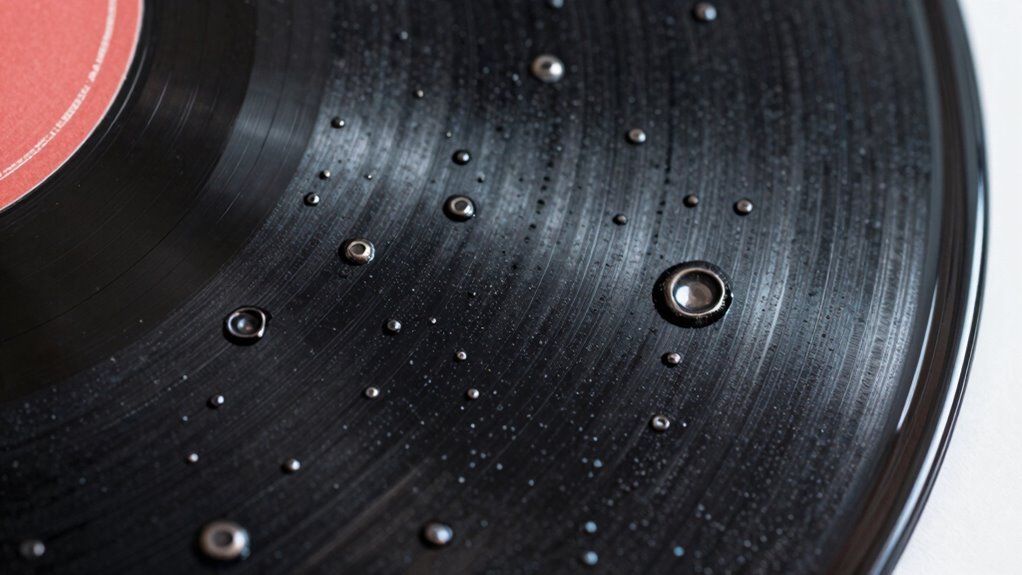
If you’ve ever noticed small, shimmering bubbles or tiny craters on a freshly sprayed paint surface, you’ve encountered solvent pop. This phenomenon occurs when trapped solvent vapor escapes the paint film after application, creating those noticeable imperfections. Understanding why solvent pop happens is essential for achieving smooth, flawless finishes, especially when working with airbrush techniques. Your choice of paint formulation plays a significant role here, as different paints contain varying solvents and additives that influence how they behave during and after spraying.
Solvent pop causes tiny bubbles on painted surfaces due to trapped vapor escaping after spraying.
When you’re using an airbrush, the fine control of spray allows for detailed work, but it also makes you more susceptible to issues caused by improper paint formulation. Some paints have rapid drying times or contain solvents that tend to vaporize quickly, increasing the chance of trapping solvent beneath the surface. If the paint’s formulation isn’t suited to your application conditions, you might see tiny bubbles forming as the solvent tries to escape. To minimize this, it’s crucial to select paints designed for airbrush use—these typically have balanced formulations that reduce the risk of solvent pop.
Your airbrush techniques also influence whether solvent pop occurs. Applying paint too thickly, spraying too quickly, or holding the nozzle too close can trap solvents and cause uneven drying. Conversely, using proper technique—such as light, even coats with adequate drying time between layers—allows the solvent to evaporate gradually and evenly. Proper thinning of your paint is imperative here; if the formulation calls for a specific reducer or thinner, stick to it. Over-thinning can lead to excessive solvent evaporation, while under-thinning might cause the paint to be too thick, trapping solvents beneath the surface.
Controlling environmental factors is equally important. High humidity and temperature can alter paint drying times, making solvent vapors more likely to become trapped. When working with airbrush techniques, maintaining a consistent, controlled environment helps guarantee proper solvent evaporation. Additionally, giving each layer sufficient flash time before applying the next prevents solvents from getting trapped and forming those unwanted craters. Moreover, understanding the paint formulation and how it affects drying behavior can help you choose the right products for your project.

Vallejo – Airbrush Thinner for Acrylic Paints 200 ml (6.76 fl.oz.)
Airbrush thinner has been specifically developed for acrylic paints with airbrush application in mind. This thinner optimizes the…
As an affiliate, we earn on qualifying purchases.
As an affiliate, we earn on qualifying purchases.
Frequently Asked Questions
Can Solvent Pop Be Completely Avoided With Proper Techniques?
Yes, you can nearly eliminate solvent pop with proper application techniques and environmental control. By applying coatings in thin, even layers and allowing adequate curing time, you reduce trapped solvents that cause pop. Maintaining ideal temperature and humidity levels during application also helps prevent these tiny craters from forming later. While you might not eliminate it entirely, careful attention to these factors considerably lowers the chances of solvent pop occurring.
Does the Type of Solvent Affect the Likelihood of Pop Formation?
Yes, the type of solvent affects the likelihood of pop formation because different solvents have unique solvent chemistry that influences how they interact with paint formulations. Some solvents evaporate faster or cause more rapid curing, increasing the risk of solvent pop. Choosing appropriate solvents and understanding their chemistry helps you control evaporation rates, reduce trapped gases, and minimize tiny craters in your finish. Proper solvent selection is key for a smooth, flawless coat.
How Long Does It Typically Take for Solvent Pop to Appear?
Solvent pop usually appears within a few hours to several days after coating, but timing variability depends on factors like film thickness, temperature, and solvent evaporation rate. You might see these tiny craters sooner if conditions promote rapid solvent evaporation, or later if the environment slows curing. Keep an eye on your project’s appearance and drying conditions, as these appearance factors influence exactly when solvent pop becomes visible.
Are Some Paints More Prone to Developing Solvent Pop Than Others?
Did you know that solvent pop occurs in about 15% of automotive paint jobs? Some paints are more prone to developing solvent pop due to their paint chemistry, which affects how quickly solvents evaporate. Faster evaporation can trap gases beneath the surface, creating tiny craters. So, when choosing paint, consider formulations that balance solvent evaporation rates to minimize the risk of solvent pop forming later.
Can Solvent Pop Be Repaired Without Repainting the Entire Surface?
Yes, you can repair solvent pop without repainting the entire surface. Start with thorough surface preparation by gently sanding the affected area to smooth out the tiny craters. Then, use a compatible paint touch-up to carefully match the original finish. Proper surface prep guarantees the new paint adheres well and blends seamlessly, minimizing the appearance of solvent pop and restoring your surface’s smoothness without a full repaint.

Portable Colorimeter,Touch Screen Color Analyzer for Paint & Coating,Real-Time Digital Color Data Display,APP/PC Connect,Type-C Charging,W/Carry Bag
Superior Measurement Precision & Stability: Features dual-optical path structure and nanometer integrated spectral device, achieving measurement repeatability ΔE*ab…
As an affiliate, we earn on qualifying purchases.
As an affiliate, we earn on qualifying purchases.
Conclusion
So, while solvent pop might seem like a small glitch in your project, it’s really just a gentle reminder that even the finest details can whisper secrets. By understanding its subtle signals, you can smooth out these tiny surprises before they bloom into bigger issues. Embrace the knowledge, stay attentive, and you’ll keep your work looking flawless. After all, sometimes the quietest signs hold the most valuable lessons in your creative journey.
Rust-Oleum 248903 Automotive High Heat Spray Paint, 12 oz, Flat Black
Ideal for use on automotive parts and surfaces subject to intermittent high heat up to 2000°F
As an affiliate, we earn on qualifying purchases.
As an affiliate, we earn on qualifying purchases.

KCNKCN Mini HVLP Air Spray Gun Kit, with 0.8mm & 1.0mm Nozzles&125cc Cup, Small Automotive Paint Sprayer, Paint Guns Touch Up Detail Spot Repair, for House Painting, Furniture, Cars
INTEGRATED CONTROLS: Three precise adjustments: circular/elliptical spray pattern control, material flow control, and air flow control to perfectly…
As an affiliate, we earn on qualifying purchases.
As an affiliate, we earn on qualifying purchases.