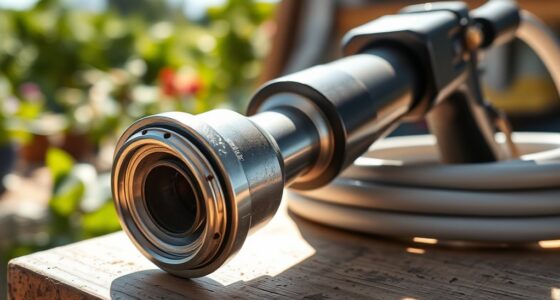

To remove and replace a suction tube, first gather your supplies, explain the procedure to the patient if needed, and wash your hands thoroughly. Gently disconnect the old tube without forcing it, checking for any resistance or clogs. Insert the new tube carefully, ensuring it’s secure, kink-free, and properly positioned. Test the suction, monitor the patient, and keep equipment clean. For detailed step-by-step instructions, continue through the process to verify safe and effective handling.
Key Takeaways
- Gently disconnect the old suction tube from the source, checking for resistance or clogs before removal.
- Prepare the new tube and ensure all supplies are sterile, accessible, and ready for replacement.
- Insert the new suction tube carefully, avoiding kinks, and confirm proper placement and connection.
- Test suction function and monitor the patient for comfort, respiratory changes, or adverse reactions.
- Clean, inspect, and maintain suction equipment regularly to ensure safety and proper functioning.

Have you ever needed to remove and replace a suction tube? If so, you know it’s a task that requires careful attention to detail and proper technique. Understanding the different types of suction tubes available is essential before you begin. There are several types, including Yankauer suction tips, flexible catheter tubes, and closed-system suction devices. Each type serves a specific purpose and has unique features, so knowing which one you’re working with helps you handle it safely and effectively. For example, Yankauer tips are rigid and often used for oral suction, while flexible catheters are more versatile for tracheal suctioning. Being familiar with these options allows you to select the right tool and avoid unnecessary complications.
When removing and replacing a suction tube, safety should be your top priority. Before starting, ensure you have all necessary supplies at hand—such as gloves, the replacement tube, and disinfectant if needed. Start by explaining the procedure to the patient if applicable, and wash your hands thoroughly. When detaching the old tube, gently disconnect it from the suction source, making sure not to apply excessive force that could damage the equipment or cause discomfort. If you encounter resistance, don’t force it; instead, check for potential clogs or kinks in the tube that may be causing the issue. This is where common troubleshooting tips come into play. For example, if the tube is clogged, you might need to flush it with sterile saline or replace it entirely if cleaning isn’t effective. Proper understanding of contrast ratio and how it impacts image quality can also help in selecting the optimal equipment for clear visibility during procedures.
As you insert the new suction tube, ensure it’s properly positioned and secure. Confirm that the connection is airtight and that the tube is free of kinks or obstructions. During the process, keep an eye out for signs of resistance or difficulty, which could indicate problems like a blocked lumen or improper placement. If you notice any issues, troubleshoot immediately—this might mean repositioning the tube or inspecting for damage. Always monitor the patient’s response throughout, watching for discomfort or changes in respiratory status. Once the new tube is in place, test the suction to confirm it’s functioning correctly. Proper maintenance, including regular cleaning and inspection of your suction equipment, helps prevent common issues and prolongs device lifespan.
Frequently Asked Questions
How Often Should I Inspect the Suction Tube for Damage?
You should inspect the suction tube regularly, following the recommended inspection schedule. During each check, look for signs of damage such as cracks, leaks, or blockages. If you notice any damage signs, replace the tube immediately to guarantee proper functioning and safety. Consistent inspections help prevent complications, so make it a routine part of your maintenance to keep the suction system working effectively.
Can I Replace the Suction Tube Myself or Need a Professional?
Replacing a suction tube is like fixing a leaky faucet—you can often do it yourself, but professional assistance guarantees everything’s done correctly. If you’re comfortable with basic medical equipment and follow instructions carefully, a DIY replacement might work. However, if you’re unsure or encounter difficulties, it’s best to seek professional help. This guarantees safety and proper function, preventing potential complications down the line.
What Safety Precautions Are Necessary During Replacement?
You should wear personal protective gear like gloves and goggles to stay safe during replacement. Make sure you’re familiar with emergency procedures in case of accidental spills or injuries. Always work in a well-ventilated area and handle the suction tube gently to avoid damage. If you’re unsure or uncomfortable, it’s best to consult a professional to guarantee safety and proper technique.
Are There Compatible Replacement Parts for Different Models?
Think of compatible parts like puzzle pieces that fit perfectly together. Yes, there are compatible replacement parts for different models, but you need to check for model compatibility first. Always verify that the replacement part matches your device’s specifications to guarantee proper function. Using the right compatible parts prevents issues and keeps your equipment running smoothly, like a key fitting snugly into its lock.
How Do I Troubleshoot if the New Suction Tube Doesn’T Work Properly?
If your new suction tube isn’t working properly, start by checking for blockages or debris that may need suction tube maintenance. Confirm it’s properly connected and seated. If issues persist, consider alternative suction methods like manual or hand-held pumps. Always verify compatibility with your device and inspect for cracks or damage. Troubleshooting these aspects helps improve suction performance and ensures safe, effective operation.
Conclusion
Now that you know how to remove and replace a suction tube, you’re better equipped to handle maintenance safely. Did you know that regular inspections can reduce equipment failures by up to 30%? Staying proactive not only extends your device’s lifespan but also guarantees peak performance. So, keep an eye on your suction tube, follow these steps carefully, and enjoy peace of mind knowing you’re maintaining your equipment effectively.

Franz came aboard the Paint Sprayer Zone team with a background in both journalism and home renovation. His articulate writing style, combined with a passion for DIY projects, makes him an invaluable asset. Franz has a knack for breaking down technical jargon into easy-to-understand content, ensuring that even the most novice of readers can grasp the complexities of paint sprayers.