If paint isn’t sticking in one spot, surface contamination is likely the cause. Start by inspecting for dirt, grease, oil, or residues and verify the surface is clean, dry, and properly prepped. Use gentle cleaners, test adhesion with tape, and consider hidden damages or mold. In cases of persistent issues, professional help might be needed. Keep going, and you’ll discover detailed steps to troubleshoot and prevent future problems effectively.
Key Takeaways
- Thoroughly clean and degrease the surface to remove oils, dirt, and residues before painting.
- Inspect for hidden contaminants or damage using light, tactile checks, and environmental sensors.
- Test surface adhesion with painter’s tape and conduct small patch tests prior to full painting.
- Use appropriate primers to seal surfaces and prevent contaminants from affecting adhesion.
- Seek professional testing and assessment if issues persist despite proper cleaning and preparation.
Why Surface Contaminants Cause Paint to Fail Locally
Surface contaminants can critically undermine paint adhesion, often causing failures that appear as localized issues. When you skip proper surface preparation, contaminants like oil, grease, or dirt remain on the surface, preventing the paint from bonding effectively. These impurities create a barrier that weakens the adhesion between the paint and the substrate. As a result, the paint may peel, blister, or flake off in specific spots, rather than failing uniformly. Proper surface preparation ensures you remove these contaminants before painting, promoting better adhesion. Ignoring this step can lead to costly rework and compromised durability of your finish. Recognizing the importance of surface prep helps you achieve a smooth, long-lasting paint job and prevents the frustration of localized paint failure.
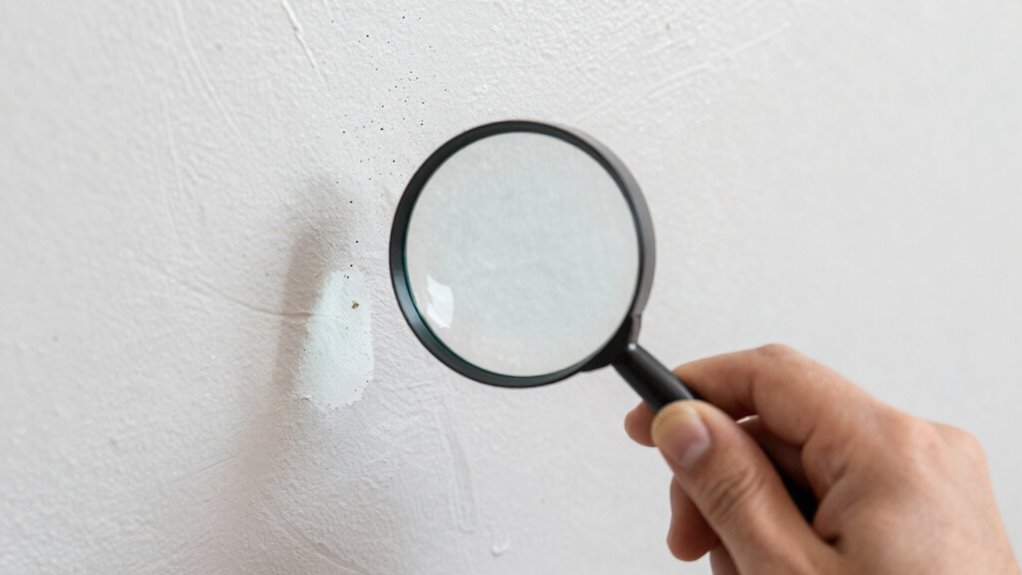
How to Inspect the Surface for Hidden Contaminants
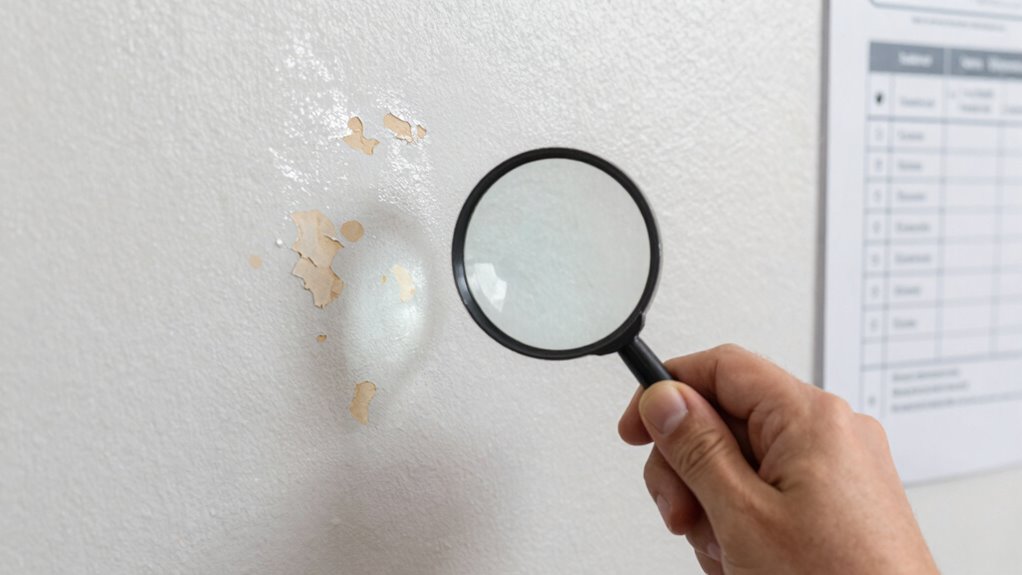
To spot hidden contaminants, start by examining the surface’s texture and look for any damage or irregularities. Next, check for residues or substances that shouldn’t be there, as they can compromise paint adhesion. Being thorough in these checks helps guarantee you catch issues before painting begins. Additionally, inspecting the surface for contamination sources can prevent future paint failures and ensure a smooth finish. Recognizing environmental factors that contribute to surface contamination can further aid in maintaining a clean and properly prepared surface. Understanding how luxury materials respond to various contaminants can also guide your inspection process to achieve optimal results. It’s also beneficial to consider how local climate effects might influence the presence of surface contaminants, ensuring a comprehensive surface assessment. Incorporating smart home sensors can help detect environmental pollutants or humidity levels that contribute to contamination issues.
Surface Texture and Damage
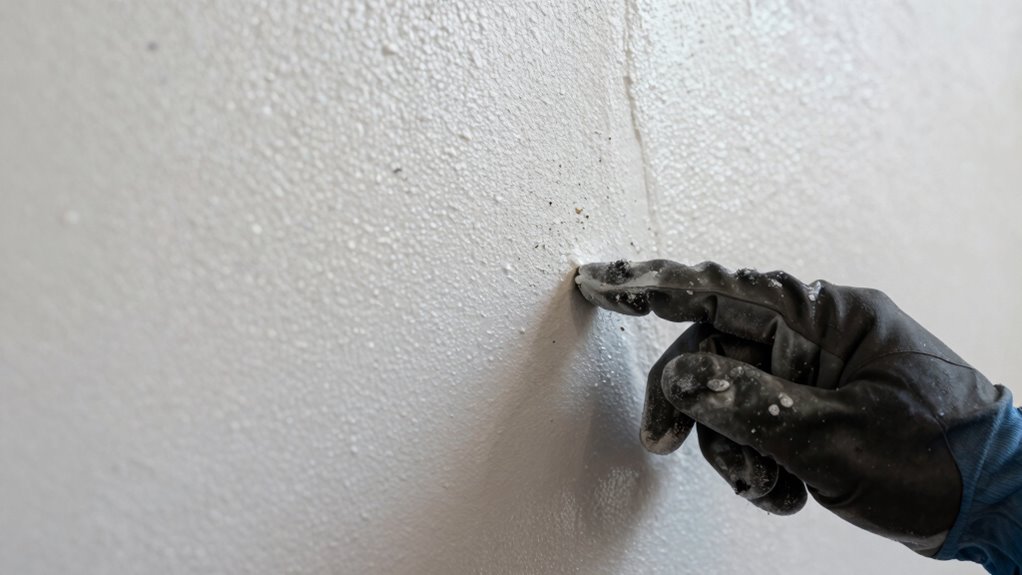
Carefully examining the texture and appearance of the painted surface can reveal hidden contaminants or damage that might compromise the coating’s integrity. Look for texture issues such as rough patches, pitting, or inconsistencies that suggest underlying problems. Surface damage like cracks, chips, or blistering may indicate previous impacts or improper preparation. These issues can hide contaminants or create spots where paint won’t adhere properly. Use a bright light to highlight surface irregularities and run your hand over the surface to feel for roughness or unevenness. Address any surface damage before proceeding, as these flaws can trap dirt or oils beneath the paint. Proper surface inspection can help identify potential issues early, preventing future peeling or failure. Identifying and correcting texture issues and damage ensures a clean, smooth foundation for suitable paint adhesion. Additionally, paying attention to contaminant detection techniques can further improve the chances of a successful coating job. When inspecting, consider the surface texture for any signs of contamination or damage that may require cleaning or repair. Regularly inspecting the surface for contamination sources can help maintain a pristine coating environment over time.
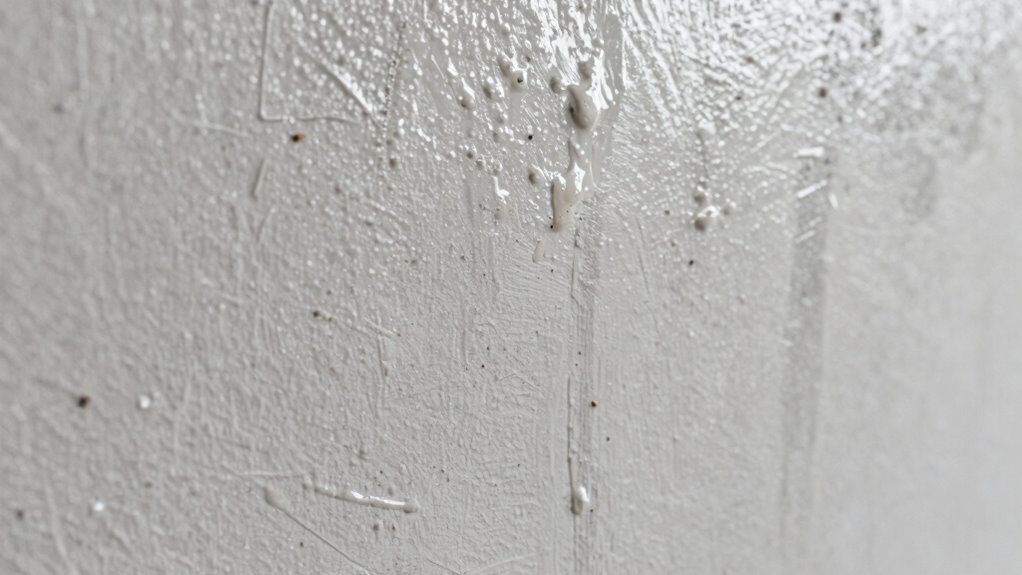
Residue and Contaminant Checks
Have you checked the painted surface for hidden residues or contaminants that might not be visible at first glance? Look closely for chemical residues left from cleaners, oils, or previous coatings, as they can interfere with adhesion. Use a clean, lint-free cloth dampened with a solvent recommended for your surface to wipe down the area. Also, examine for biological contaminants like mold, mildew, or algae, which can appear as discoloration or surface growths. These biological agents can compromise paint bonding and durability. Conduct a thorough inspection, paying attention to crevices, corners, and textured areas where contaminants tend to hide. Removing both chemical residues and biological contaminants guarantees a clean surface, promoting proper surface preparation and a lasting finish. Proper surface preparation is essential for ensuring the longevity and quality of your paint job. Additionally, understanding the importance of a proper surface preparation can significantly impact the longevity and quality of your paint job. Recognizing artistic influences such as Western art movements can also deepen your appreciation of the surface qualities and textures involved in your project.
Common Contaminants That Keep Paint From Sticking
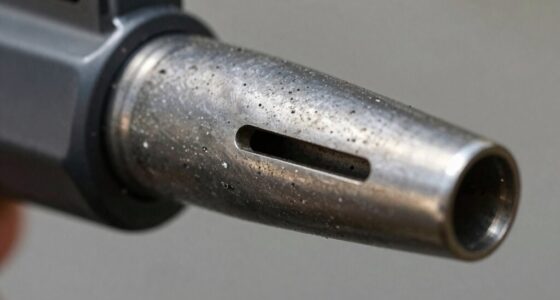
Contaminants on the surface can prevent paint from adhering properly, leading to peeling or uneven finishes. Common contaminants include dirt, grease, oil, mold, mildew, and wax. These substances create a barrier that compromises paint durability and surface adhesion. Even small traces of oil or grease from fingerprints or machinery can considerably weaken the bond. Mold and mildew, often found in humid environments, also interfere with paint’s ability to stick, causing peeling over time. Dust and dirt particles settle on surfaces and can be mistaken for a clean background, but they hinder proper adhesion. Recognizing these contaminants is key to ensuring a long-lasting, smooth paint job. Proper cleaning techniques are essential to remove these substances effectively. Surface preparation is a critical step that influences the success of your painting project and overall finish quality. Ensuring surface cleanliness through thorough cleaning can significantly improve adhesion and durability of the paint. Additionally, understanding the role of air purifier maintenance dos and don’ts can help prevent airborne contaminants from settling on surfaces during cleaning and painting, ensuring a cleaner environment for optimal results. Removing these substances before painting is essential for ideal surface adhesion and improved paint durability. Regularly inspecting your environment for airborne pollutants and taking steps to reduce their presence can also contribute to a cleaner, healthier painting surface.
How to Clean the Surface to Remove Contaminants
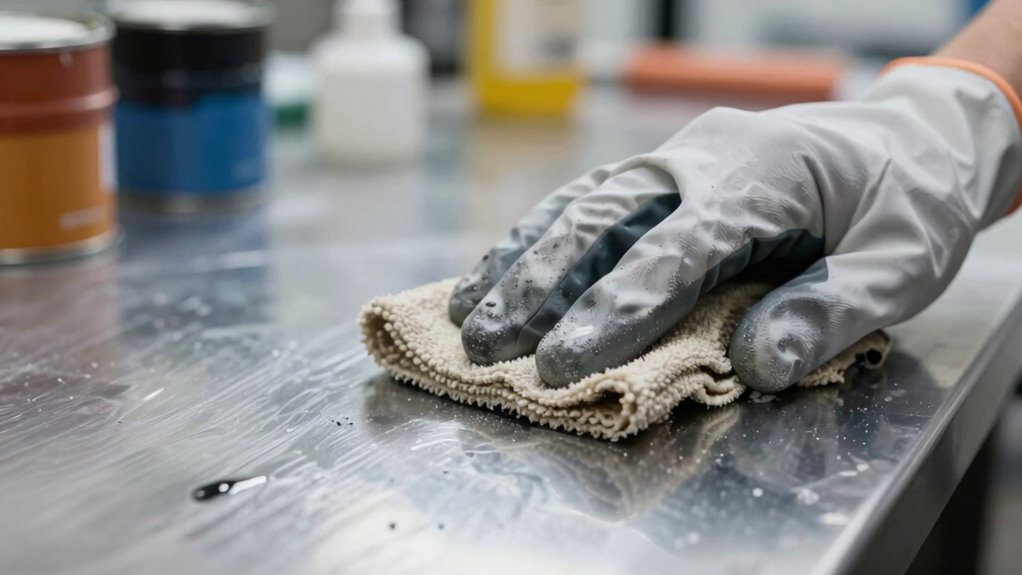
To effectively remove contaminants, you need to focus on proper surface preparation techniques and use the right cleaning solutions. Start by cleaning the surface thoroughly to eliminate dirt, grease, or other residues that can interfere with paint adhesion. Choosing the appropriate cleaning methods guarantees a smooth, contaminant-free surface ready for painting. Additionally, understanding the food safety principles involved in cleaning can help prevent future contamination issues. Incorporating cleaning schedules and routine maintenance practices can further reduce the risk of contaminants affecting your project.
Surface Preparation Techniques
Wondering how to guarantee your surface is truly clean before painting? Proper surface preparation is key. Start with surface sanding to remove old paint, roughen the surface, and improve adhesion. After sanding, make certain all dust and debris are thoroughly cleaned off. This creates a better base for primer application, which helps seal the surface and prevent future adhesion issues.
| Step | Purpose |
|---|---|
| Sanding | Removes old paint, creates grip |
| Cleaning | Eliminates dust, oils, and residues |
| Primer | Seals surface, enhances adhesion |
Skipping these steps can trap contaminants, leading to peeling or uneven paint. Taking the time to properly prepare your surface ensures a smooth, lasting finish.
Effective Cleaning Solutions
A thorough cleaning is essential to remove dust, oils, and residues that can interfere with paint adhesion. Use the right cleaning solutions to guarantee a clean surface that promotes proper paint bonding. Start with a gentle degreaser or mild detergent to eliminate oils and dirt, especially on smooth or glossy surfaces. For stubborn contaminants, consider using a specialized cleaner compatible with your surface primers. Rinse thoroughly with clean water and allow the surface to dry completely. Avoid harsh solvents that might leave residues or damage the surface. Proper cleaning creates an ideal base for applying surface primers, which further improve paint bonding. Skipping or rushing this step can lead to adhesion problems, so take your time to clean meticulously and ensure a contaminant-free surface for lasting results.
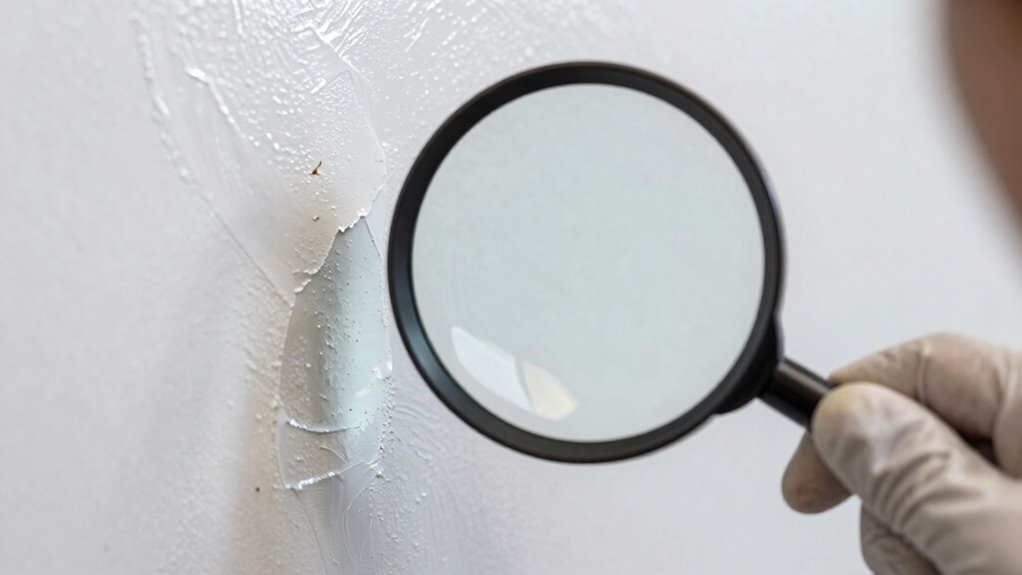
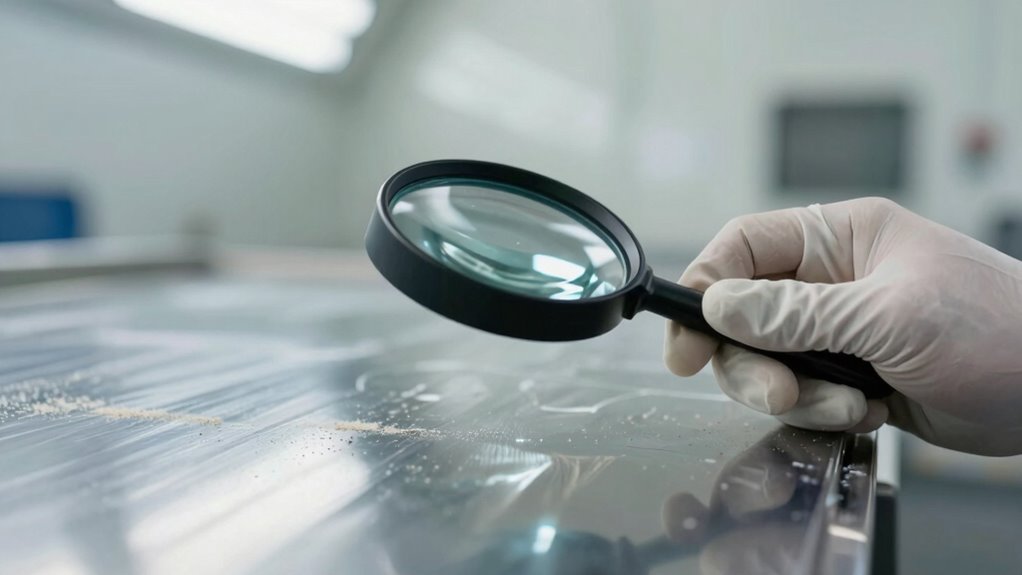
How to Test If Your Surface Is Ready for Paint

Before applying paint, it is essential to verify that your surface is properly prepared. Start by testing the surface’s adhesion; press a small piece of painter’s tape firmly onto it, then peel it off quickly. If paint or debris comes off with the tape, the surface isn’t ready. Next, make certain that the surface is clean, dry, and free of grease or dust. Proper primer application can improve adhesion if needed. When mixing paint, follow the manufacturer’s instructions thoroughly to achieve a consistent consistency that adheres well. Conduct a test patch in an inconspicuous area, allowing it to dry completely. If the paint adheres smoothly without peeling or bubbling, your surface is ready for the final coat. This process helps prevent future adhesion issues and guarantees a professional finish.
Tips to Prevent Surface Contamination in the Future
Keeping your surfaces free from contaminants before painting sets the stage for a flawless finish. To improve paint adhesion, always clean surfaces thoroughly, removing dust, grease, and oils. Use a degreaser or mild detergent, and rinse well. Applying a high-quality surface primer creates a barrier that helps prevent future contamination and enhances paint adhesion. Ensure the primer is suitable for your surface type and allows proper drying time. Store paints and primers in a clean, dry area to avoid dust or dirt settling on them. Cover nearby furniture and floors during preparation, and handle materials with clean tools. Regularly inspect your workspace for potential sources of contamination, and clean your tools after each use. Incorporating proper cleaning techniques can further reduce the risk of surface contamination. Using professional-grade products can help ensure a more reliable and durable finish. Being mindful of contamination sources in your workspace can help prevent issues before they start. Additionally, avoiding toilet paper disposal issues near your workspace can prevent accidental contamination from dust or debris. These steps minimize future issues, ensuring your paint job looks perfect and lasts longer.
When to Call a Professional for Persistent Problems
Persistent paint problems that don’t resolve despite your best efforts often indicate underlying issues that require professional expertise. If you’ve tried cleaning, prepping, and repainting without success, it’s time to seek a professional assessment. A specialist can identify hidden contamination sources or surface issues that aren’t visible to the untrained eye. They may use advanced testing techniques to analyze the surface and detect chemical residues, mold, or other pollutants causing adhesion problems. Calling in a professional ensures you get an accurate diagnosis and tailored solutions, preventing further damage or wasted effort. Don’t delay if problems persist—professional assessment and advanced testing are vital steps to effectively resolve stubborn contamination issues and guarantee your paint sticks properly.
Frequently Asked Questions
Can Environmental Factors Affect Surface Contamination Levels?
Yes, environmental factors can considerably affect surface contamination levels. External elements like dust, mold, pollen, or moisture contribute to contamination sources, impacting your surface’s cleanliness. Environmental impacts such as humidity, temperature fluctuations, and airborne particles can increase contamination risks. You need to control these factors to prevent contamination buildup, ensuring your surface remains clean and paint adheres properly. Monitoring environmental conditions helps you identify and minimize contamination sources effectively.
Are There Specific Paints More Resistant to Contamination Issues?
Think of specialized paint as your paint’s superhero cape—designed for high resistance. Yes, some paints are more resistant to contamination issues, especially those formulated for harsh environments. Look for options labeled as contamination-resistant or with added sealants. These paints often feature advanced polymers that create a barrier, helping prevent surface contamination from sticking. Choosing the right specialized paint can markedly improve adhesion and longevity on problem surfaces.
How Long Should I Wait After Cleaning Before Painting?
You should wait at least 24 hours after cleaning before painting to ensure proper paint adhesion. During this time, the surface needs to dry completely, which helps prevent contamination issues that can cause peeling or bubbling. Proper surface preparation is essential; make sure the area is fully dry and free of any residue or moisture. Rushing this step can compromise the paint’s ability to adhere, leading to long-term problems.
Does Humidity Influence Surface Contamination and Paint Adhesion?
Yes, humidity considerably influences surface contamination and paint adhesion. High humidity causes moisture infiltration and surface moisture, which can weaken the paint’s bond. When the air is damp, moisture remains on the surface, preventing proper adhesion. To guarantee good results, wait until the humidity drops and the surface is dry before painting. Using a dehumidifier or working in a controlled environment can help you attain ideal conditions.
What Tools Are Best for Detecting Hidden Contaminants?
Imagine peering beneath a fresh coat, searching for invisible troublemakers. Use a moisture meter to detect hidden moisture, a surface tester for primer compatibility issues, and UV light to reveal contamination sources like oils or mold. These tools help you identify unseen contaminants that sabotage adhesion. By catching these issues early, you guarantee your paint bonds properly, creating a flawless finish that lasts.
Conclusion
Now that you know how to spot and remove surface contaminants, your paint project should turn out flawless—no more surprises like a stubborn spot that won’t stick. Remember, even in the age of knights and castles, clean surfaces made all the difference. If problems persist after your efforts, don’t hesitate to call in a pro. With these tips, you’re well on your way to a smooth, lasting finish that’ll impress even the most discerning eye.