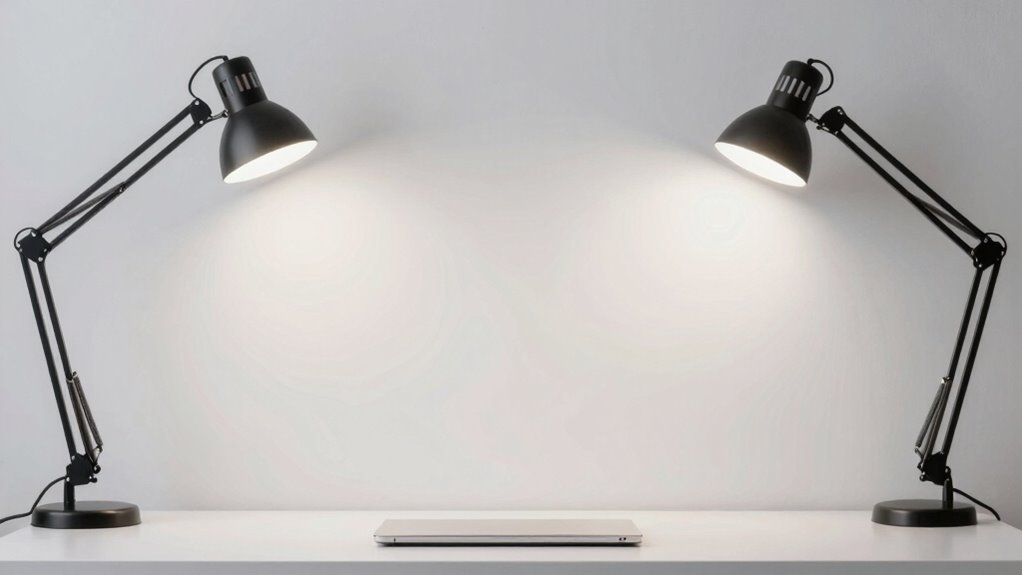
To eliminate shadow lines and reveal defects early, position your lights at angles that cast minimal shadows while highlighting surface flaws. Use multiple diffuse sources from different directions to create even illumination and reduce harsh shadows. Adjust lighting to avoid direct glare and reflections that hide imperfections. Properly angled lighting enhances surface textures and exposes cracks or dents early in inspection. Keep exploring strategies to optimize your setup and improve defect detection.
Key Takeaways
- Position lights at shallow angles to cast shadows that accentuate surface irregularities without creating harsh shadows.
- Use multiple diffused light sources from different angles to evenly illuminate surfaces and minimize shadow lines.
- Avoid direct frontal lighting; instead, angle lights to highlight textures and imperfections while reducing shadowing.
- Incorporate indirect or reflected lighting to soften shadows and reveal defects more clearly.
- Adjust light distance and intensity to balance illumination, preventing harsh shadows and glare that obscure defect details.
Why Shadow Lines Hurt Your Inspection Accuracy

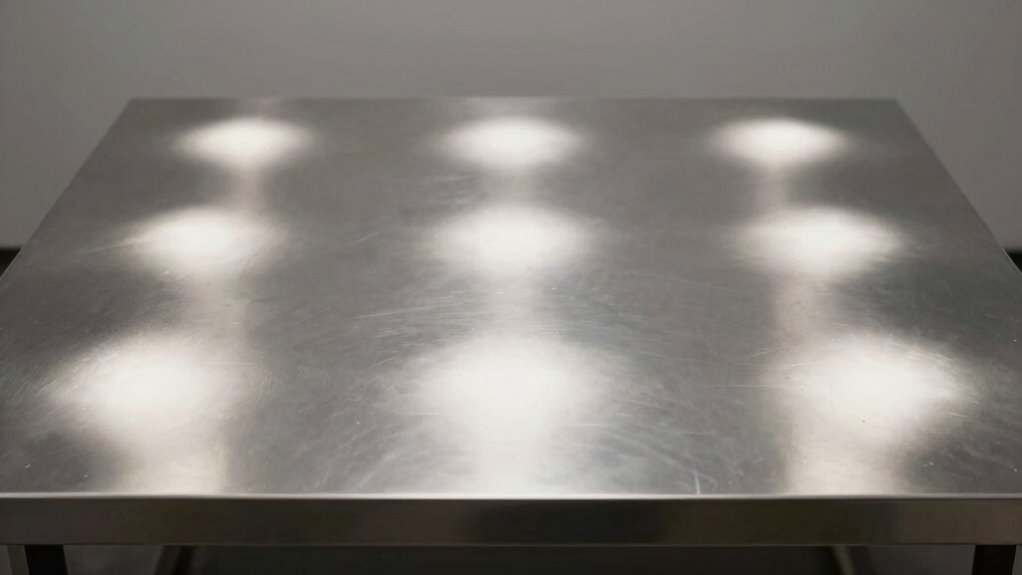
Shadow lines can substantially impair your inspection accuracy because they obscure surface details and create false impressions of defects. This shadow illusion tricks your eyes into seeing issues that aren’t actually there, leading to false positives or missed flaws. When lighting creates harsh light contrast, shadows become more pronounced, masking fine surface features. These misleading shadows distort the true condition of the product, causing you to misjudge its quality. By relying on inconsistent shadow lines, you risk overlooking critical defects or wasting time investigating harmless imperfections. Proper understanding of how shadow lines form helps you recognize and eliminate these visual distortions. Reducing shadow illusions through controlled lighting ensures you can accurately interpret surface conditions, making your inspections more reliable and effective. Additionally, understanding the role of contrast ratio in lighting setups can help you optimize illumination to minimize unwanted shadows and improve defect detection. Recognizing the impact of lighting angles on shadow formation allows for better control over inspection environments, resulting in clearer, more accurate assessments. An awareness of how diffused lighting reduces harsh shadows can further enhance inspection accuracy and defect visibility. Utilizing adjustable light positioning can also help you achieve more even illumination, minimizing shadows and improving defect detection.
Why Proper Lighting Angles Matter in Product Inspection

Proper lighting angles are essential to see surface flaws clearly and avoid missed defects. With ideal light positioning, you can reduce shadows and highlight imperfections more effectively. Using shadow mitigation techniques helps guarantee your inspection is accurate and thorough. Additionally, understanding how different lighting angles can influence the visibility of surface defects is crucial for early detection. Incorporating lighting optimization strategies enhances defect detection capabilities and minimizes the risk of overlooking critical flaws. Recognizing the impact of lighting angles on surface appearance allows for more precise and reliable inspections.
Optimal Light Positioning
The angle at which you position your lighting plays a crucial role in revealing surface defects during product inspections. Proper placement enhances color contrast, making flaws like scratches or dents more visible. You should aim to position lights at an angle that reduces glare while highlighting surface irregularities. Avoid direct, frontal lighting, as it can wash out details and diminish defect visibility. Additionally, consider ambient lighting conditions; too much ambient light can obscure subtle flaws, so controlling or adjusting it ensures excellent contrast. By aligning your lighting at the right angles, you create shadows and highlights that expose imperfections early. This strategic positioning allows you to detect issues quickly, ensuring quality control remains efficient and thorough. Proper lighting angles are key to early defect detection and accurate inspections. Understanding how lighting angles influence surface visibility can further improve inspection accuracy and visual contrast enhancement, especially when considering the impact of cultural symbolism on visual perception. Recognizing the importance of lighting techniques in visual inspection can lead to more consistent and reliable quality assessments.
Shadow Mitigation Techniques
Adjusting lighting angles is essential for minimizing shadows that can conceal surface defects during inspections. Proper techniques help control shadow patterns and reduce lighting shadows that obscure critical details. Use multiple light sources from different angles to evenly illuminate surfaces, preventing harsh shadows that hide flaws. Diffused lighting can soften shadows, making surface irregularities more visible. Avoid positioning lights directly overhead or at extreme angles, which often create elongated or darkened shadows. Instead, experiment with angles to find the most suitable position that minimizes shadows while highlighting surface features. Consistent, well-planned lighting setups considerably improve defect detection, ensuring that shadow patterns don’t mask issues and that lighting shadows don’t distort the true surface condition. This approach enhances inspection accuracy and product quality.
Highlighting Surface Flaws
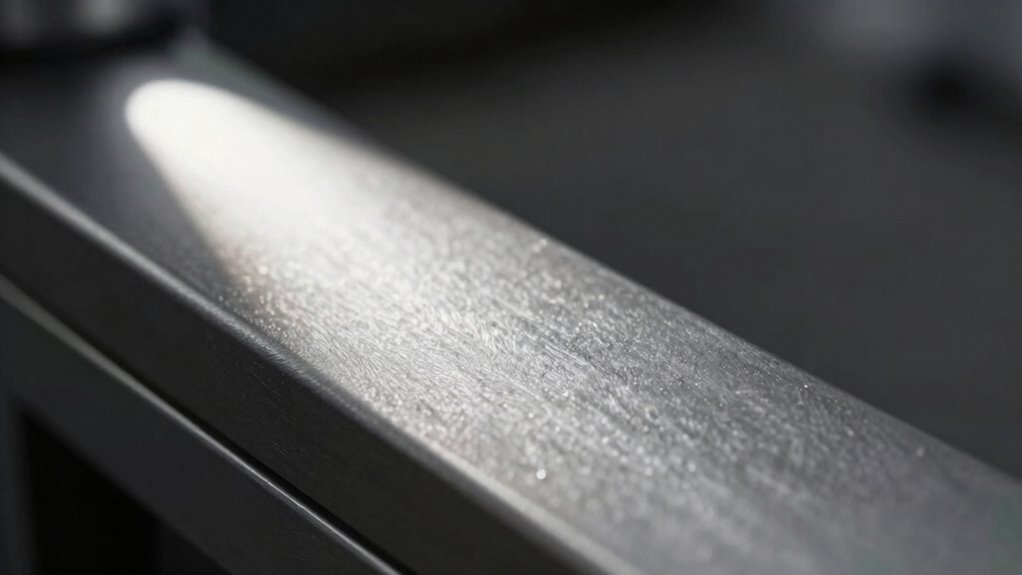
Lighting angles play an essential role in revealing surface flaws during inspections because they determine how light interacts with irregularities. Proper angles cast shadows and highlights that accentuate surface texture differences, making cracks, pits, and dents easier to detect. When inspecting for surface flaws, choose lighting that emphasizes these irregularities without washing out details. Additionally, the right angle helps verify color consistency across the product, revealing inconsistencies caused by surface damage or manufacturing errors. By adjusting lighting to highlight subtle surface variations, you can identify issues early, ensuring quality and reducing rework. Remember, the goal is to create contrast between flawless areas and flaws, making imperfections stand out clearly for accurate assessment. Effective lighting techniques help optimize inspection accuracy and surface defect detection.
How Lighting Direction Affects Surface Reflection and Flaw Visibility
The angle of your light source considerably influences how surface reflections appear and how flaws become visible. By adjusting the lighting direction, you can control reflection dynamics to highlight imperfections more effectively. Understanding these principles helps you choose the right technique for ideal flaw detection. Additionally, selecting appropriate lighting equipment can optimize the visibility of surface defects during inspections.
Impact of Light Angle
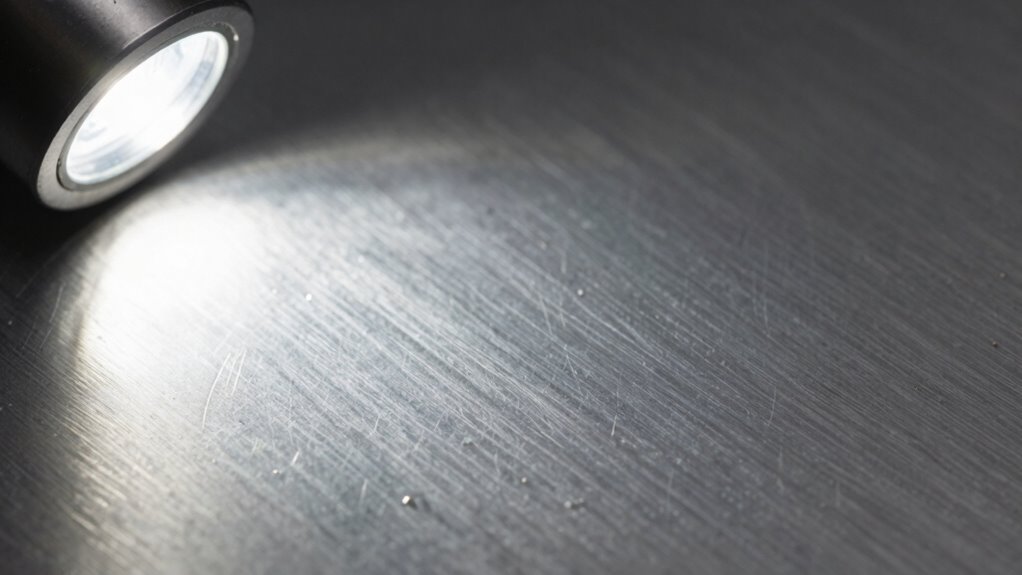
Since the angle of illumination directly influences how surface reflections appear, changing the light direction can make flaws more or less visible. When you adjust the light angle, you alter the way color contrast interacts with the surface, highlighting or hiding defects. Light coming from a shallow angle can cast subtle shadows that reveal surface irregularities, while a more direct overhead light minimizes contrast, hiding flaws. Ambient illumination also plays a role; softer, diffuse light reduces harsh reflections, making defects harder to see. To effectively detect surface flaws, experiment with different angles to find the balance that maximizes flaw visibility without introducing misleading reflections. Understanding how light angle impacts reflection helps you identify issues early and ensures thorough inspection.
Surface Reflection Dynamics
Adjusting the direction of illumination directly influences how surface reflections behave, which in turn affects flaw visibility. Proper reflection control highlights or minimizes surface texture variations, making defects easier or harder to see. When light strikes at shallow angles, reflections become more diffuse, revealing subtle surface irregularities. Conversely, direct lighting can produce sharp reflections, masking minor flaws but emphasizing larger imperfections. By understanding surface reflection dynamics, you can choose lighting angles that enhance flaw detection without creating distracting glare. This control over reflections allows you to optimize lighting setups for various surface textures, ensuring surface defects are evident early. Mastering how surface reflections respond to different illumination directions is key to achieving accurate and efficient defect detection. Additionally, awareness of how surface reflection properties change with lighting angles can help prevent misinterpretation of surface imperfections. Recognizing the role of lighting angle in reflection behavior enables more precise assessments of surface quality and flaw detection. Properly managing reflection behavior is essential for early defect identification and quality assurance in various inspection scenarios. Furthermore, understanding how lighting conditions influence reflection patterns can assist in developing more consistent inspection protocols. Recognizing the impact of lighting angles on reflection behavior improves overall defect detection accuracy and reduces false positives.
Flaw Detection Techniques
Lighting direction plays a crucial role in surface flaw detection by influencing how reflections reveal or conceal imperfections. Proper lighting enhances color contrast, making flaws stand out against the surrounding surface. For example, oblique angles can cast shadows that highlight surface texture irregularities, revealing cracks or dents early. Bright, directed light can accentuate differences in surface texture, helping you identify subtle defects that might otherwise go unnoticed. Adjusting the angle helps you optimize the visibility of surface flaws by emphasizing reflections that reveal inconsistencies. Proper lighting setup is essential for achieving accurate flaw detection, as it allows you to control how surface features are highlighted. Additionally, understanding the importance of light positioning enables you to tailor the illumination to specific surface types and defect characteristics. By controlling the lighting direction, you can improve flaw detection accuracy, ensuring surface imperfections are identified promptly. This technique is essential in quality control, reducing the risk of defective products reaching the end-user.
Techniques to Minimize Shadow Lines With Proper Lighting
To effectively minimize shadow lines, positioning your light sources carefully is essential. Proper lighting reduces harsh shadows that can hide defects and enhances visibility. Consider these techniques:
- Use multiple light sources at different angles to diffuse shadows, creating even illumination and reducing sharp lines.
- Adjust ambient lighting, incorporating soft, background light that balances color contrast and minimizes dark spots.
- Opt for lighting with adjustable intensity and direction to fine-tune the setup, ensuring shadows are minimized without washing out details.
- Incorporate proper wall surface preparation techniques, such as smooth priming and consistent finishes, to further reduce the visibility of imperfections caused by lighting angles.
- Additionally, understanding the relationship between lighting angles and defect visibility can help you choose the optimal setup for early defect detection, especially when considering lighting techniques that emphasize surface features. Being mindful of lighting position can also prevent unwanted glare or reflections that may obscure surface flaws.
Picking the Best Light Source and Position for Inspection
To effectively reveal defects, you need to position your light source carefully and choose the right type. The ideal angle can highlight surface flaws, while the appropriate light guarantees clarity. Getting these details right makes your inspection more accurate and reliable.
Optimal Light Positioning
Choosing the right light source and positioning is essential for effective defect inspection. Proper placement guarantees you highlight surface flaws without casting misleading shadows. To optimize lighting, consider these key factors:
- Position your light at angles that minimize shadow lines while enhancing defect visibility.
- Use consistent lighting color to improve contrast and speed up inspection.
- Adjust the light’s distance to balance illumination and prevent glare, increasing inspection speed.
Choosing Appropriate Light Type
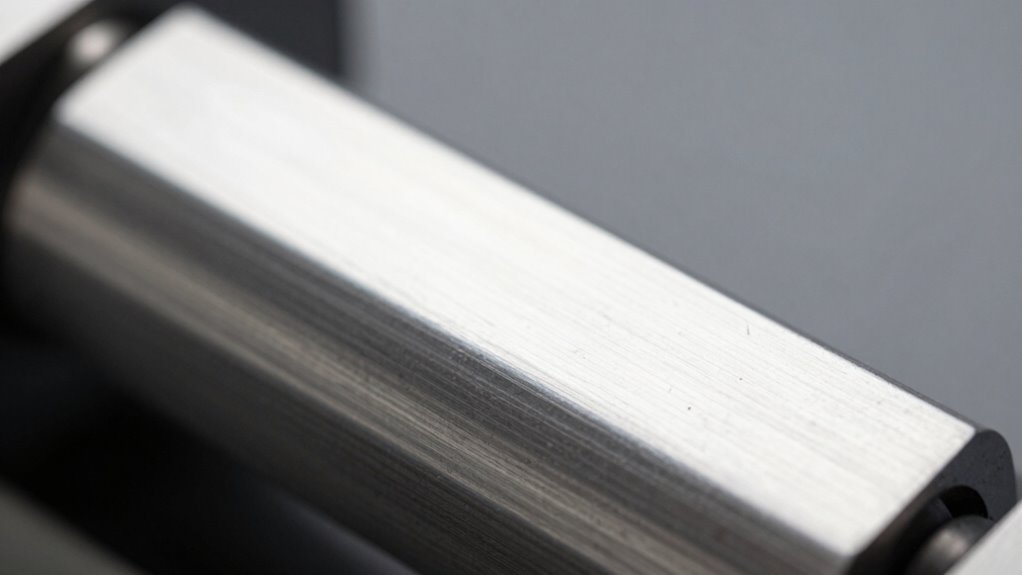
Selecting the appropriate light source is crucial for revealing surface defects clearly and accurately. Different material properties respond uniquely to various lighting types; for example, shiny metals may require diffuse lighting to minimize glare, while textured plastics benefit from direct, angled illumination. Consider the color contrast between the defect and the surrounding surface—using light with a specific color temperature can enhance visibility. LED lights are versatile, offering adjustable intensity and color, making them ideal for detailed inspections. Incandescent or halogen lights produce warmer tones, which may highlight certain flaws better. Your goal is to choose a light type that maximizes defect visibility based on the material’s properties and enhances contrast, allowing for early defect detection without false positives.
Adjusting Lighting Angles to Spot Hidden Flaws

Adjusting the angle of your lighting is essential for uncovering hidden flaws that might otherwise go unnoticed. Proper angles can create shadows that emphasize surface irregularities, making defects more visible. To optimize your inspection:
- Position your light at a low angle to increase shadow depth, highlighting surface inconsistencies.
- Use targeted lighting to enhance color contrast, revealing subtle discolorations or flaws.
- Incorporate ambient lighting carefully—avoid overly diffuse light that washes out details, but make sure it doesn’t create glare or mask defects.
Top Mistakes That Create Shadow Lines During Inspection
One common mistake that leads to misleading shadow lines during inspection is improper positioning of your light source. When your lighting angle isn’t aligned correctly, material distortions can cast exaggerated shadows or hide defects altogether. Ignoring established inspection protocols can also cause inconsistent results, making shadow lines appear where none exist or obscuring actual flaws. Poor lighting angles can emphasize surface irregularities that aren’t defects, leading to false positives. Conversely, they may fail to highlight genuine issues, risking overlooked problems. To avoid these mistakes, verify your lighting setup is consistent and follows best practices. Proper positioning minimizes misleading shadows, helps reveal true material distortions, and ensures your inspection results are accurate and reliable.
Using Adjustable Lights for Consistent Inspection Conditions
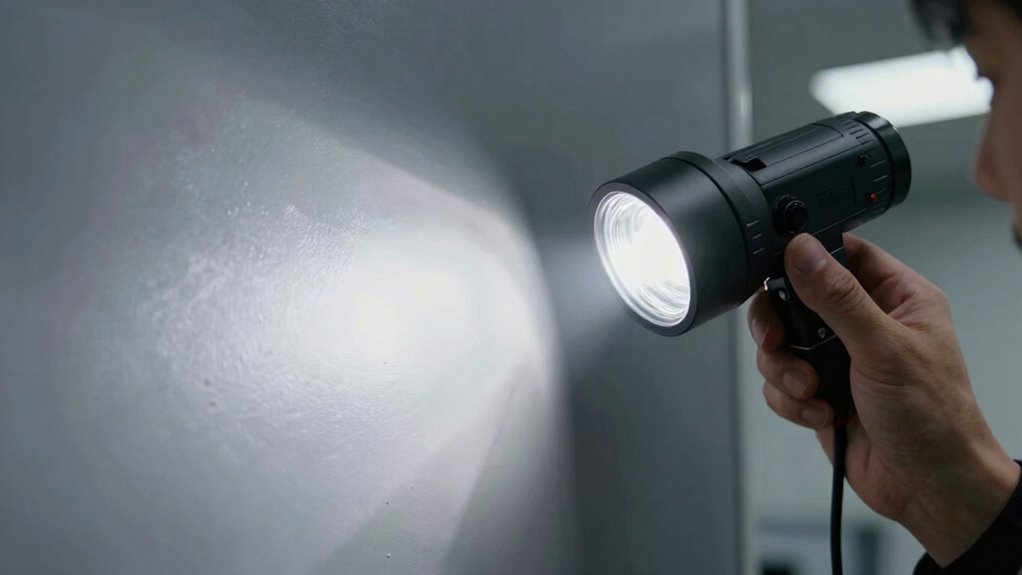
Using adjustable lights is essential for maintaining consistent inspection conditions, especially when detecting subtle defects. Proper control over lighting angles helps you optimize color contrast and minimize ambient lighting interference. To achieve this, consider these key strategies:
- Adjust light angles to highlight surface variations, enhancing defect visibility.
- Use dimmable lights to control brightness and prevent glare or washout.
- Position lights to reduce ambient lighting effects, ensuring shadows are eliminated and details stand out clearly.
Troubleshooting Shadow Lines in Different Environments
Even with carefully positioned adjustable lights, shadow lines can still appear unexpectedly in different environments, complicating defect detection. Variations in workspace geometry, surface reflectivity, or material translucency can cause unpredictable shadow casting. To troubleshoot, adjust the lighting angle to minimize harsh shadows, experimenting with different directions until shadows soften or disappear. Enhancing light diffusion helps spread illumination evenly, reducing sharp shadow lines caused by direct light. Use diffusers or indirect lighting to minimize shadow casting and improve visibility of defects. Keep in mind that environmental factors like ambient light and surface texture influence shadow formation. Regularly recalibrate your lighting setup for each environment, ensuring maximum light diffusion and reducing the chances of shadow lines obscuring defects.
Best Practices for Lighting in Automated and Manual Inspections
Effective lighting is crucial for both automated and manual inspections, as it directly impacts defect visibility and inspection accuracy. To optimize results, focus on these best practices:
Proper lighting enhances defect detection and inspection accuracy in both manual and automated processes.
- Make certain strong color contrast between the object and background to highlight defects clearly.
- Use uniform lighting to minimize shadows and reflections, maintaining consistent background uniformity.
- Adjust lighting angles to reduce shadow lines, revealing surface irregularities without glare or dark spots.
Frequently Asked Questions
How Do Shadow Lines Impact Overall Product Quality Assessment?
Shadow lines can considerably impact your overall product quality assessment by affecting shadow detection and defect visibility. When shadows obscure defects, you might miss critical flaws, leading to overlooked issues. Proper lighting angles help minimize unwanted shadows, ensuring defects are clearly visible. By reducing shadow lines, you improve defect detection accuracy, streamline quality checks, and ensure products meet standards, ultimately enhancing product quality and customer satisfaction.
Can Shadow Lines Be Completely Eliminated in All Inspection Environments?
Shadow lines can’t be completely eliminated in all inspection environments because lighting optimization has limits based on setup, surface properties, and ambient conditions. However, you can minimize their impact to improve defect visibility by adjusting angles, diffusers, and light sources. Proper lighting techniques focus on reducing shadows, ensuring defects are more visible, and maintaining high-quality assessments, even if some shadow lines remain unavoidable in certain environments.
What Are the Cost Implications of Implementing Advanced Lighting Solutions?
Investing in advanced lighting solutions can increase your inspection costs by approximately 20%, but the benefits outweigh the expense. A thorough cost analysis shows that equipment investment reduces false positives by 30%, saving you time and resources. While initial costs may seem high, improved defect detection early on minimizes rework and scrap, ultimately boosting your quality control efficiency and profitability in the long run.
Are There Industry Standards for Optimal Lighting Angles During Inspection?
Yes, industry standards for ideal lighting angles during inspection exist, guiding you to guarantee thorough defect detection. You should follow established lighting standards and inspection guidelines that recommend specific angles to minimize shadows and enhance visibility of surface imperfections. By adhering to these standards, you improve inspection accuracy and early defect detection, ultimately reducing costs and improving quality control. Proper lighting angles are essential for consistent, reliable inspection results.
How Does Operator Experience Influence Shadow Line Detection and Management?
Your experience greatly impacts your ability to detect and manage shadow lines during inspections. With proper operator training, you develop sharper skills in recognizing subtle defect indicators, adjusting lighting angles effectively, and minimizing shadows. Continuous skill development enhances your confidence and precision, enabling you to quickly identify issues early. As you gain experience, you become more adept at optimizing lighting conditions, ensuring consistent quality control and reducing the risk of overlooked defects.
Conclusion
By mastering proper lighting angles, you can critically reduce shadow lines and catch defects early. It’s easy to think that lighting isn’t vital, but ignoring it risks missing flaws that could compromise quality. With adjustable lights and mindful positioning, you guarantee consistent, accurate inspections every time. Remember, investing a little effort in proper lighting now saves you from costly errors later—so don’t overlook its importance; your quality standards depend on it.