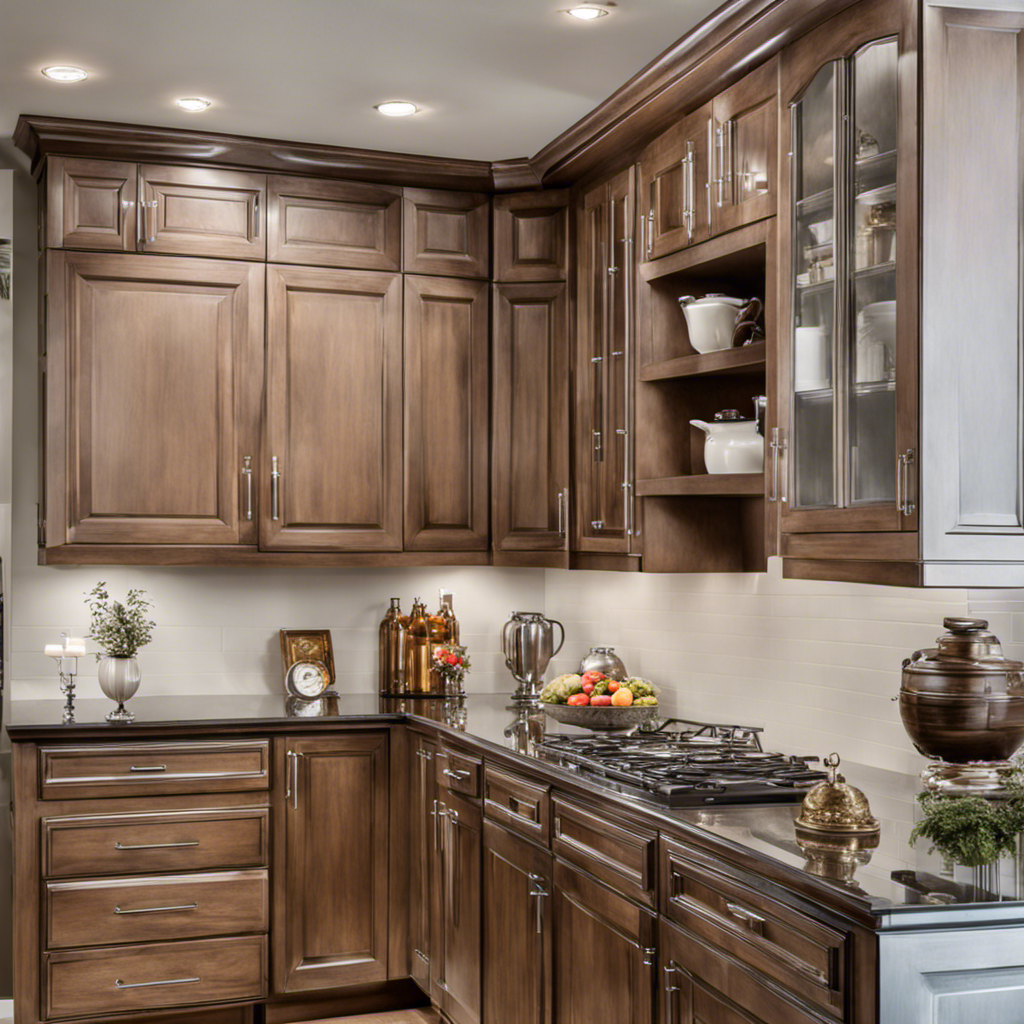
I have always wanted to modernize the appearance of my kitchen cabinets, but the idea of hand-sanding and painting them seemed overwhelming. That’s when I found out how effective it is to use an airless sprayer.
With this game-changing tool, I was able to achieve a professional finish in no time. In this article, I’ll walk you through the step-by-step process of how to paint cabinets with an airless sprayer.
Get ready to transform your kitchen with ease and efficiency.
Key Takeaways
- Choose a sprayer that is compatible with the size of your cabinets and the type of paint you’ll be using.
- Properly prepare the cabinets by cleaning them thoroughly and sanding them to remove imperfections.
- Select high-quality paint and primer specifically designed for wood surfaces.
- Take precautions to protect surrounding areas by using painter’s tape and drop cloths.
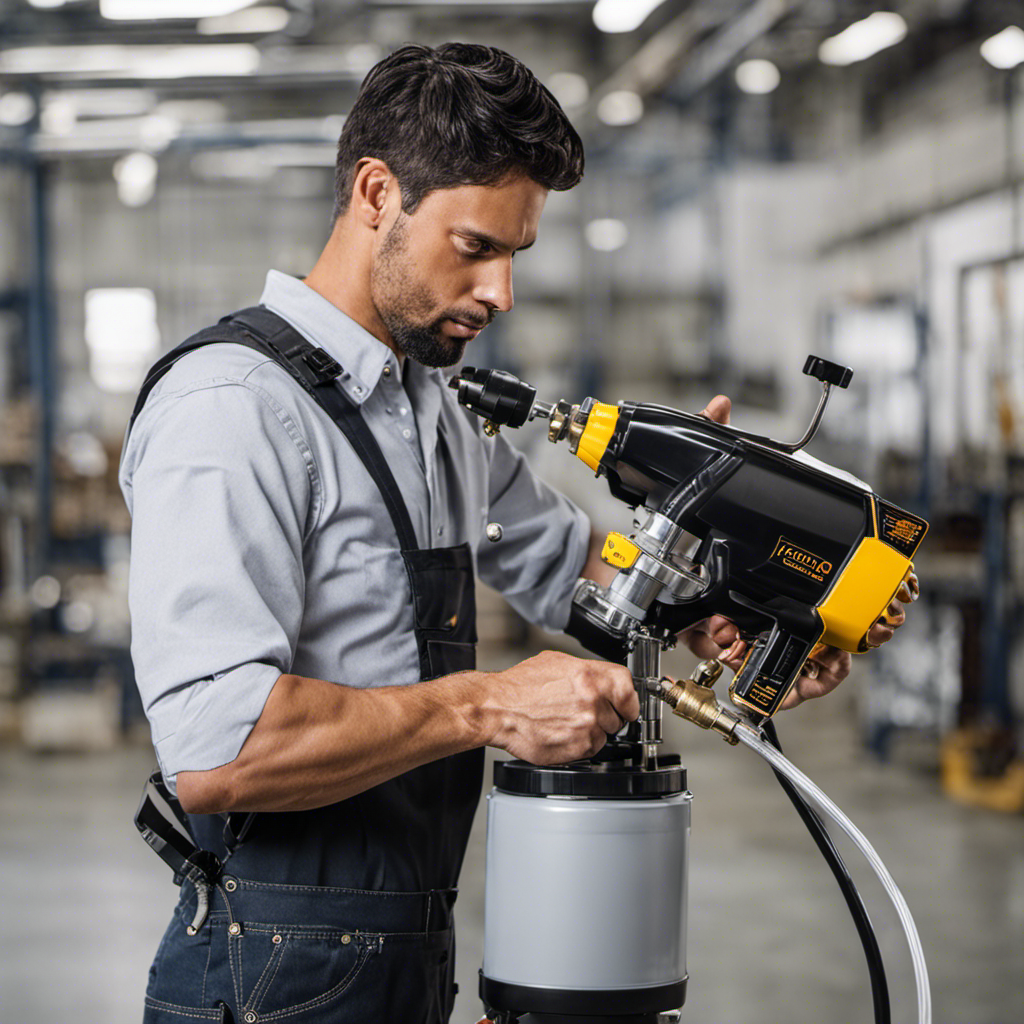
Choosing the Right Airless Sprayer
To choose the right airless sprayer, you’ll want to consider factors such as the size of your cabinets and the type of paint you’ll be using.
The size of your cabinets will determine the power and capacity you’ll need in a sprayer. For smaller cabinets, a compact sprayer will suffice, while larger cabinets may require a more powerful model.
When it comes to the type of paint, you’ll want to ensure that the sprayer you choose is compatible with the paint you’ll be using. Additionally, selecting the right nozzle is crucial for achieving a smooth and even finish.
Once you have chosen the right sprayer, it is important to maintain it properly to ensure its longevity and optimal performance.
Now that you have selected the perfect airless sprayer, let’s move on to preparing your cabinets for painting.
Preparing Your Cabinets for Painting
Before you start, make sure you’ve properly cleaned and sanded the cabinets. Surface cleaning is crucial to remove any dirt, grease, or grime that can affect the paint’s adhesion. Use a mild detergent and warm water to wipe down the cabinets, ensuring all surfaces are thoroughly cleaned.
Once the cabinets are clean, it’s time to sand them. Sanding helps to create a smooth surface for the paint to adhere to. Start by using medium-grit sandpaper to remove any rough areas or imperfections. Then, switch to fine-grit sandpaper to achieve a smooth finish. Remember to sand in the direction of the wood grain to avoid damaging the surface.
With the cabinets cleaned and sanded, you’re now ready to move on to selecting the right paint for cabinets.
Selecting the Right Paint for Cabinets
Once you’ve finished cleaning and sanding, you’ll want to consider the type of paint that will work best for your cabinets.
When it comes to painting cabinets, choosing the right primer is essential. Look for a primer specifically designed for use on wood surfaces, as this will provide the best adhesion and durability.
Additionally, opt for a high-quality paint that is specifically formulated for cabinets. This type of paint will have excellent coverage and durability, ensuring that your cabinets look great for years to come.
Keep in mind that the drying and curing process is crucial for achieving a professional finish. Allow each coat of paint to dry completely before applying the next one, and give the final coat ample time to cure before using your cabinets. This will ensure that the paint adheres properly and doesn’t chip or peel.
Moving forward, properly masking and protecting surrounding areas is vital to prevent any accidental overspray or damage to adjacent surfaces.
Properly Masking and Protecting Surrounding Areas
When it comes to properly masking and protecting surrounding areas during a paint job, there are a few key points to keep in mind.
First, using tape and coverings is essential to prevent paint from getting on surfaces you don’t want to be painted.
Furniture and floors should also be covered or moved out of the way to avoid any accidental damage.
Lastly, it’s important to avoid overspray damage by being mindful of the direction and intensity of the spray, as well as using shields or barriers when necessary.
Tape and Coverings
To protect your countertops and floors, it’s important to use painter’s tape and drop cloths. Here are some tips for properly masking and protecting your surrounding areas during cabinet painting:
-
Use high-quality painter’s tape that is specifically designed for delicate surfaces. Apply the tape along the edges of countertops, walls, and any other surfaces that you want to keep paint-free.
-
Use drop cloths or plastic sheeting to cover the floors and furniture in the room. Make sure they are securely taped down to prevent any accidental spills or drips.
-
Remove any furniture or decor items from the area to create a clear workspace.
-
Take the time to properly clean and prepare the surfaces you’ll be painting to ensure the best adhesion and finish.
Now that your countertops and floors are protected, let’s move on to how to protect your furniture and floors during the cabinet painting process.
Furniture and Floors
Make sure you’re using drop cloths or plastic sheeting to cover your furniture and floors during the cabinet painting process. This is an essential step in furniture refinishing to ensure that no paint drips or spills damage your valuable pieces. Drop cloths provide a thick layer of protection, while plastic sheeting can be taped down for a more secure cover.
When it comes to floors, especially hardwood or carpeted surfaces, it’s important to provide adequate floor protection. Lay down the drop cloths or plastic sheeting and secure them with tape to prevent any accidental paint splatters. By taking the time to protect your furniture and floors, you can avoid costly and time-consuming damage.
Now, let’s move on to how to avoid overspray damage during the cabinet painting process.
Avoid Overspray Damage
You’ll want to ensure that you cover nearby surfaces with plastic sheeting or drop cloths to prevent any overspray from damaging them. Here are some tips for avoiding overspray damage:
- Use painter’s tape to secure the plastic sheeting or drop cloths in place.
- Pay attention to the direction of the spray and position yourself accordingly.
- Hold the sprayer at a consistent distance from the surface being painted to control the spray coverage.
- Start spraying from the top and work your way down to prevent paint drips.
- Move the sprayer in smooth, even motions to achieve an even coat.
By following these tips, you can prevent paint drips and ensure that the spray coverage is controlled.
Now let’s move on to setting up and adjusting the airless sprayer.
Setting Up and Adjusting the Airless Sprayer
Before starting, ensure that the airless sprayer is properly set up and adjusted for optimal performance. Troubleshooting common airless sprayer issues is essential to ensure a smooth painting process.
Firstly, check for any clogs or blockages in the spray gun, hose, or nozzle. Clear any obstructions to maintain a consistent and even flow of paint.
Additionally, ensure that the spray pressure is set correctly. Best practices for adjusting spray pressure involve starting with a low pressure setting and gradually increasing it until the desired coverage is achieved. This helps prevent over-spraying and ensures an even application of paint.
Once the airless sprayer is properly set up and adjusted, you can move on to applying the first coat of paint, creating a solid foundation for a professional cabinet refinishing project.
Applying the First Coat of Paint
To achieve an even and professional finish, start by ensuring that the first coat of paint is applied smoothly and evenly with the correct amount of pressure. Here are some important tips to keep in mind:
- Choose the right paint colors that complement your cabinets and enhance the overall look of your space.
- Make sure to properly mix the paint before starting to ensure consistency and uniformity.
- Apply the paint in thin, even coats to avoid drips or pooling.
- Allow sufficient drying time between coats to ensure proper adhesion and prevent smudging or smearing.
- Use a high-quality brush or roller to achieve a smooth and flawless finish.
By following these steps, you’ll be on your way to transforming your cabinets with a fresh coat of paint.
Once the first coat is dry, it’s time to move on to the next crucial step of sanding and preparing for the second coat.
Sanding and Preparing for the Second Coat
After applying the first coat of paint, it’s important to sand and prepare the cabinets for the second coat. Choosing the right sandpaper is key to achieving a smooth finish. I recommend using a fine-grit sandpaper, around 220 to 320 grit, to lightly sand the surface. This will help remove any imperfections and create a rough surface for the second coat to adhere to.
Once the cabinets are sanded, it’s time to apply a primer. Finding the right primer is crucial for achieving a professional-looking finish. Look for a high-quality primer that is specifically designed for use on cabinets. This will ensure good adhesion and a smooth finish.
With the cabinets sanded and primed, we can now move on to applying the final coat of paint, which will give our cabinets a beautiful, durable finish.
Applying the Final Coat of Paint
Once the primer is dry, it’s time to grab a brush or roller and start applying the final coat of paint. This step will bring your cabinets to life and give them a beautiful, finished look. Here are some key points to keep in mind during the final coat application:
- Start from the top and work your way down to avoid drips.
- Apply the paint in thin, even coats for a smooth finish.
- Allow each coat to dry completely before applying the next one.
- Use a high-quality paint that is specifically formulated for cabinets.
- Consider using a paint sprayer for a professional-looking finish.
Drying time is crucial during this step. It is recommended to wait at least 24 hours before touching or using the cabinets to ensure the paint has fully cured.
Once the final coat is dry, you can move on to cleaning and maintaining your airless sprayer, ensuring it stays in good condition for future projects.
Cleaning and Maintaining Your Airless Sprayer
Make sure you clean and maintain your airless sprayer regularly to keep it in good working condition. Cleaning your airless sprayer is crucial for its optimal performance. After each use, start by flushing out any remaining paint by running water or a cleaning solution through the system.
Remove the spray tip and filter and clean them thoroughly with a brush or a cleaning solution. Pay attention to any clogs or debris that may have accumulated. Inspect the hoses for any signs of wear or damage and replace them if necessary. Additionally, regularly check the pump packings for leaks and replace them as needed.
Troubleshooting common issues, such as uneven spray pattern or loss of pressure, might require cleaning or replacing specific parts. Proper cleaning and maintenance will ensure that your airless sprayer lasts longer and performs at its best.
Now, let’s move on to some tips and tricks for achieving a professional finish without any hassle.
Tips and Tricks for a Professional Finish
When it comes to achieving a professional finish with an airless sprayer, proper surface preparation is key. By taking the time to thoroughly clean and sand the surface, you can ensure that the paint adheres properly and creates a smooth, flawless finish.
Additionally, adjusting the spray pattern on your sprayer allows you to customize the application for different surfaces and achieve the desired coverage and texture.
These two key points are essential for achieving professional results with your airless sprayer.
Proper Surface Preparation
Before you start painting, ensure that you have properly prepared the surface of the cabinets. Here are some important steps to follow for proper surface preparation:
- Use sanding techniques to smooth out any imperfections or rough areas on the cabinets.
- Clean the cabinets thoroughly to remove any dust, grease, or dirt that may affect the paint adhesion.
- Apply a primer to the cabinets to create a smooth and even surface for the paint to adhere to.
- Allow the primer to dry completely before moving on to the painting process.
- Sand the primer lightly to ensure a smooth finish and remove any brush marks.
By following these steps, you will ensure that your cabinets are properly prepared for painting.
Now, let’s move on to the next section where we will discuss adjusting spray patterns for a professional-looking finish.
Adjusting Spray Patterns
To achieve a professional-looking finish, it’s important to adjust the spray patterns on your airless sprayer. Adjusting spray patterns involves two main factors: spray pressure and troubleshooting spray patterns.
First, you need to adjust the spray pressure according to the paint viscosity and desired coverage. Higher pressure creates a finer mist for smoother finishes, while lower pressure is suitable for thicker paints. It’s crucial to test the spray pattern on a scrap surface before starting your project to ensure it’s even and consistent.
If you notice an uneven pattern, there are a few troubleshooting steps to take. Check for clogged or worn-out spray tips, clean or replace them if necessary. Also, make sure the spray gun is held at the correct distance from the surface and move it in a steady, overlapping motion to achieve a uniform finish.
Frequently Asked Questions
Can I Use an Airless Sprayer for Painting Other Surfaces Besides Cabinets?
Yes, you can definitely use an airless sprayer for painting surfaces other than cabinets. It is commonly used for walls and furniture as well. It provides efficient and even coverage.
How Long Does It Take for the Paint to Dry on Cabinets After Using an Airless Sprayer?
I can speed up drying time for cabinet paint by using an airless sprayer. To achieve a smooth finish, I follow these tips: proper surface preparation, thinning the paint, and applying thin coats.
Are There Any Specific Safety Precautions I Should Take When Using an Airless Sprayer to Paint Cabinets?
When using an airless sprayer to paint cabinets, it’s important to take safety precautions. Make sure to wear protective goggles, gloves, and a mask. Also, ensure proper ventilation in the area you’re working in.
Can I Use Water-Based Paint With an Airless Sprayer for Cabinets?
Yes, you can use water-based paint with an airless sprayer for cabinets. It has several advantages, such as being low VOC and easy to clean up. To achieve a smooth finish, make sure to thin the paint properly and apply multiple thin coats.
How Do I Prevent Overspray When Using an Airless Sprayer to Paint Cabinets?
To prevent overspray when using an airless sprayer for cabinet painting, I recommend adjusting the spray pattern and pressure, using masking tape to protect surrounding areas, and practicing proper technique to ensure efficient and accurate coverage.
Conclusion
After following these steps, painting cabinets with an airless sprayer becomes a breeze.
The right sprayer and paint, along with proper preparation and masking, are crucial for a professional finish.
With a little sanding and a final coat, your cabinets will transform into a stunning focal point in your space.
Don’t forget to clean and maintain your sprayer for future projects.
Get ready to enjoy the satisfaction of a job well done and the beauty of your newly painted cabinets.

Franz came aboard the Paint Sprayer Zone team with a background in both journalism and home renovation. His articulate writing style, combined with a passion for DIY projects, makes him an invaluable asset. Franz has a knack for breaking down technical jargon into easy-to-understand content, ensuring that even the most novice of readers can grasp the complexities of paint sprayers.