
To feather old paint edges quickly, start by cleaning and lightly sanding the transition area to guarantee good adhesion. Use a two-grit approach: first, choose a coarser grit to blend and smooth the edge without damaging the surface. Then switch to a finer grit to create a seamless, even finish. Proper technique and patience are key. Keep going for detailed steps and pro tips to master a flawless blend efficiently.
Key Takeaways
- Start by cleaning and lightly sanding the edge to ensure proper adhesion and a smooth transition.
- Use coarse grit sandpaper (150) to carefully blend the old paint into the surface without damaging it.
- Switch immediately to fine grit sandpaper (220-320) to smooth out the feathered edge for a seamless transition.
- Work with gentle, overlapping strokes to create a natural, barely noticeable blend between old and new paint.
- Test on a small area first to perfect your technique and avoid uneven edges or streaks.
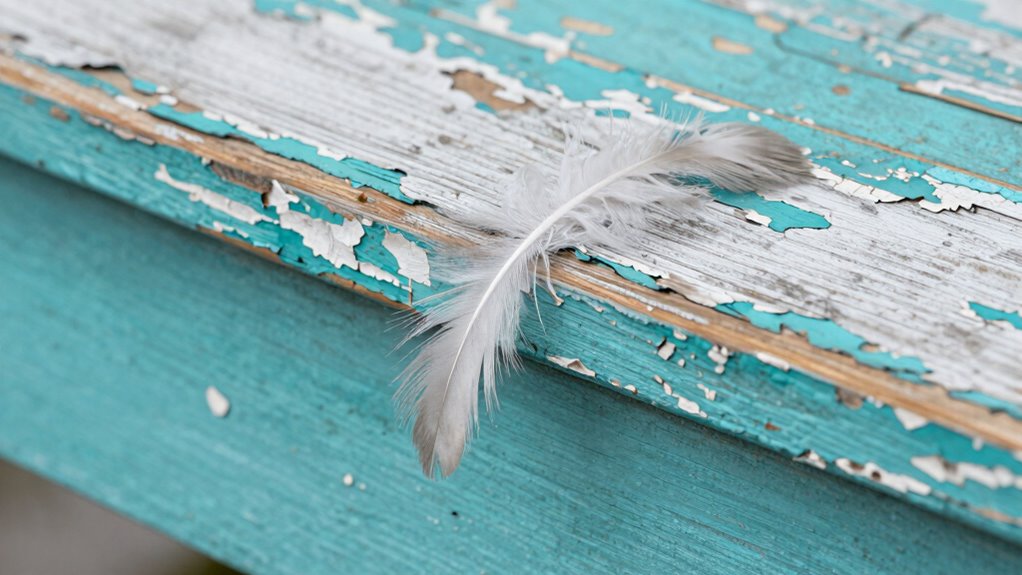
Prepare Your Surface for Feathering Old Paint Edges

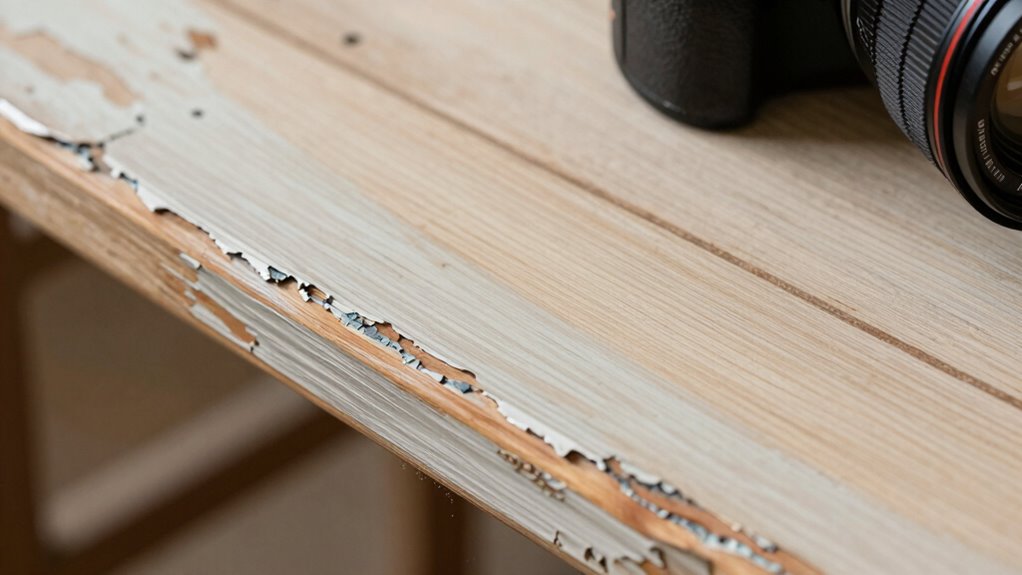
Before you begin feathering old paint edges, it’s essential to prepare the surface properly. Start with paint removal to eliminate loose or chipped paint, making a clean, even area. Use a scraper or sandpaper to smooth out rough spots and create a seamless *gradation*. Once the surface is clean, apply a primer to help the new paint adhere better and prevent stains or old colors from bleeding through. Primer application also creates a uniform base, making feathering easier and more effective. Make sure the surface is dry and free of dust before proceeding. Proper surface preparation techniques are crucial for achieving a flawless finish. Incorporating innovative European cloud servers can streamline your project management and ensure your tools and resources are always accessible, even on-site. Understanding paint adhesion strategies is essential for a durable and smooth feathering result. Taking these steps sets the foundation for a flawless finish.
Why Proper Feathering Creates a Smooth, Clean Finish
Proper feathering is essential because it guarantees that the shift between old and new paint is seamless and barely noticeable. When you feather edges correctly, you create a smooth transition that prevents harsh lines or uneven textures. This technique improves paint adhesion by blending new paint into the existing surface, reducing the risk of peeling or chipping later. Surface priming plays a vital role here, as it prepares the area for optimal adhesion and helps the paint bond evenly. Without proper feathering, you risk a patchy, unprofessional finish that draws attention to the repaired area. By taking the time to feather edges carefully, you ensure a clean, polished look that lasts and looks natural, making your paint job appear flawless. Additionally, understanding the significance of proper surface preparation can further enhance the durability and appearance of your painted surface, especially when using techniques like the two-grit method for faster results. Incorporating repeatable tests can also help you achieve consistent, professional results every time—especially when combined with proper technique for optimal outcomes. Mastering these steps is key to achieving a professional finish that stands the test of time.
How to Choose the Best Sandpaper Grits for Feathering
Choosing the right sandpaper grit is key to achieving smooth, seamless feathered edges. Start with a finer grit, like 220 or 320, to gently blend the old paint without damaging the surface. For initial smoothing, a medium grit such as 150 can remove rough spots. Consider your paint’s sheen; glossy surfaces require finer grit to prevent scratches that may show through the finish. The type of brush you use also affects your sanding approach—stiff brushes may need coarser grit, while soft brushes work better with finer grit. Always test on a small area first. By selecting the appropriate grit level and considering your paint’s sheen and brush type, you ensure a professional, even blend for your feathering project. Using proper piercing care and hygiene techniques can help maintain the integrity of your work, especially if you’re working near sensitive areas. Biography Finder can provide insights into various surfaces and finishes to help inform your sanding choices.
Step-by-Step: Feathering Old Paint Edges Using the Two-Grit Method

To start feathering old paint edges, you need to prepare the surface properly. Once it’s ready, you’ll apply the two-grit technique, beginning with a coarser grit and finishing with a finer one. This step-by-step process helps create a smooth progression and a seamless repair. Be sure to follow the proper sanding techniques to avoid damaging the surrounding paint or creating uneven surfaces.
Preparing the Surface
Before you start feathering the edges, it’s essential to prepare the surface properly. Begin by cleaning the area thoroughly to remove dirt, grease, and loose paint, making sure to use good brush techniques for smooth work. Lightly sanding the edges helps create a rough surface, which improves paint adhesion. Be careful to feather the sanding so the transition between old and new paint is seamless. Remove any dust with a damp cloth before starting. If the existing paint is peeling or flaking, scrape it away completely. Proper preparation ensures the new feathered edge bonds well and minimizes future peeling or chipping. Additionally, considering Free Floating techniques can help achieve a more natural and seamless transition. Taking these steps sets a solid foundation for effective feathering, making your repair look professional and long-lasting.
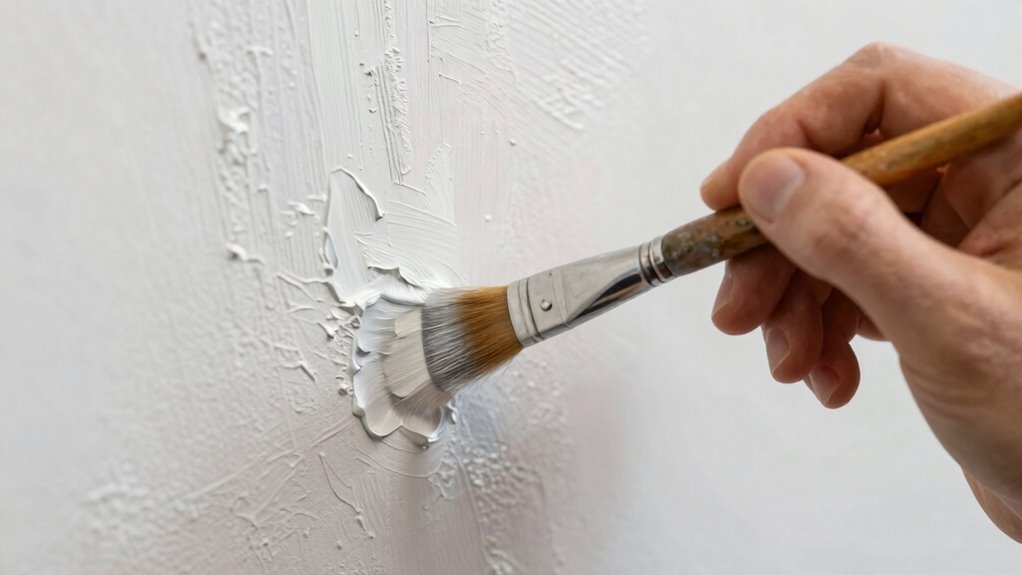
Applying the Two-Grit Technique
Applying the two-grit technique begins by selecting two different sandpapers—usually a coarser grit for initial feathering and a finer grit for smoothing the edges. Start with the coarse grit, using gentle, consistent brush techniques to carefully blend the old paint into the exposed surface. Keep the brush at a slight angle to control the feathering and avoid damaging nearby areas. Confirm paint compatibility by testing the new paint on a small section first; it should adhere smoothly without peeling or bubbling. Once you’ve feathered the edges with the coarse grit, switch to the finer grit for a smoother finish. This step helps blend the transition seamlessly, creating a clean, professional look without visible brush strokes or rough edges. Incorporating proper sound vibrations can also enhance your painting process by promoting relaxation and focus, making the task more enjoyable.
Common Mistakes to Avoid When Feathering Paint Edges
Avoid rushing the feathering process, as it can lead to uneven edges. Don’t use too many paint layers at once, which can create a bulky, noticeable shift. Also, make sure you properly prepare the surface; skipping this step can cause poor adhesion and uneven blending. Additionally, pay attention to cleaning appliances and systems to ensure your tools are functioning properly, which helps achieve a smooth finish. To maintain consistent results, consider paint consistency and how it affects blending. Being mindful of paint application techniques can also contribute to a more seamless feathering effect. Incorporating nanotechnology advancements into your tools and paints can further enhance the precision and quality of feathering.
Rushing the Feathering Process
Rushing the feathering process often leads to uneven paint edges and visible streaks, making your finished job look unprofessional. When you hurry, you might neglect proper brush techniques, resulting in harsh lines instead of smooth progressions. Additionally, choosing the wrong paint types or skipping proper blending can cause edges to dry too quickly or not blend properly. To avoid these mistakes:
- Take your time with brush techniques, using light, even strokes for seamless blending.
- Use compatible paint types that dry at similar rates to prevent streaking or peeling.
- Allow sufficient drying time between feathering gradations to ensure smooth progressions.
Patience is key—facilitating causes uneven edges and forces you to redo work, wasting time and effort. Focus on controlled, deliberate movements for the best results.
Using Excessive Paint Layers
Using too many paint layers when feathering edges can quickly create a messy, uneven finish. Applying excessive paint makes it difficult to blend the old and new layers smoothly, which can disrupt color matching. When layers are thick, the transition zone may appear lumpy or streaky, defeating the purpose of feathering. Additionally, too many coats can cause the paint to peel or crack over time, especially if the underlying surface isn’t properly prepared. Instead, focus on thin, even layers, allowing each to dry thoroughly before applying the next. This approach guarantees better color matching and avoids the buildup that leads to peeling. Keep your coats light and controlled, and you’ll achieve a seamless, professional-looking edge without risking damage or uneven texture.
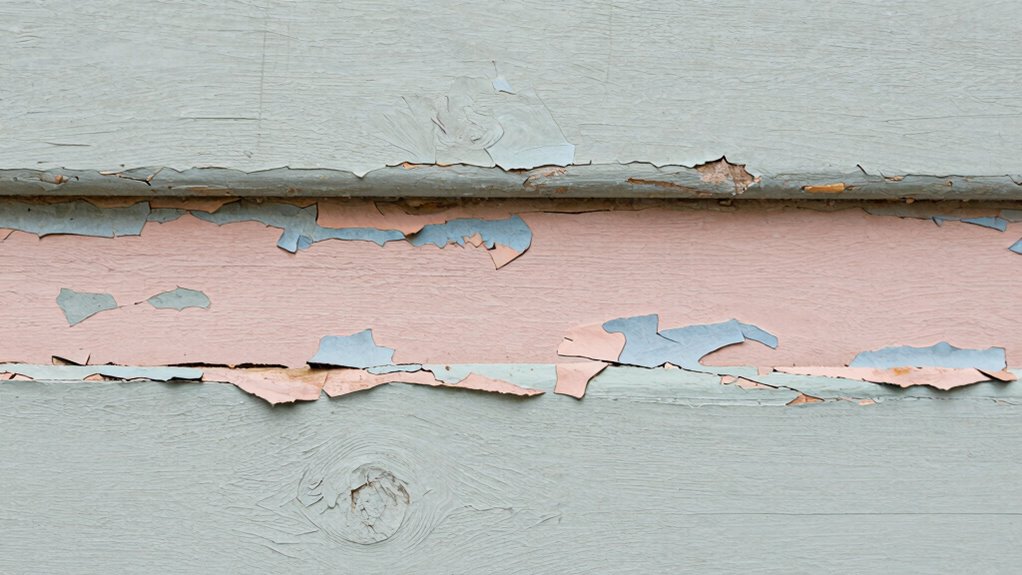
Ignoring Surface Preparation
Before you start feathering paint edges, neglecting proper surface preparation can cause your efforts to fall flat. Surface contamination, like dirt, grease, or loose paint, can prevent good paint adhesion. Without cleaning and sanding, new paint may peel or fail to blend seamlessly. To avoid common mistakes:
- Skipping cleaning routines that remove dirt and oils.
- Failing to sand rough or glossy surfaces for better paint grip.
- Overlooking the importance of priming damaged or uneven areas.
- Ignoring surface preparation that ensures the longevity and quality of your paint job.
These steps ensure the surface is ready, promoting ideal adhesion and a smooth finish. Ignoring surface prep leads to imperfect feathering, increased touch-ups, and a less durable result. Proper prep is essential for seamless blending and lasting paint edges.
Tips for Blending and Finishing for a Seamless Look
Achieving a seamless look when blending old paint edges requires careful attention to detail and patience. Start by using gentle brush techniques, applying light, overlapping strokes to blend the new paint into the existing finish smoothly. Be mindful of your brush pressure to avoid streaks or uneven patches. Proper color matching is essential; mix your paint carefully to match the surrounding area as closely as possible before you begin. Test the color on a hidden spot to guarantee accuracy. As you work, blend outward from the edge, gradually tapering your strokes to eliminate hard lines. Take your time, and don’t rush the process—this guarantees a natural, seamless transition that makes the repair virtually invisible.
Troubleshooting Feathering Problems: Fixing Common Issues
Troubleshooting feathering problems often involves identifying the specific issue and adjusting your technique accordingly. If your feathered edges are uneven or peeling, focus on your brush techniques and paint adhesion. To fix common issues: 1. Ensure your brush is clean and loaded with the right amount of paint—too much causes drips, too little results in uneven edges. 2. Use gentle, consistent strokes to blend edges smoothly, avoiding heavy pressure that can disturb existing paint. 3. Allow proper drying time between coats to improve paint adhesion and prevent peeling or feathering inconsistencies. Additionally, proper surface preparation and understanding paint adhesion techniques can significantly minimize feathering problems. Incorporating professional services or consulting with experienced painters can also help achieve more precise edges and reduce feathering issues. Moreover, understanding the importance of surface preparation ensures better paint adherence and a smoother finish.
Frequently Asked Questions
Can the ‘Two-Grit’ Method Be Used on Textured Surfaces?
Yes, you can use the ‘two-grit’ method on textured surfaces, but you need to adapt your abrasive techniques. Start with a coarser grit to break through the paint without damaging the texture, then switch to a finer grit for smoothness. Be gentle and steady, applying even pressure. This approach helps feather old paint edges quickly while respecting the unique contours of textured surfaces.
How Long Does the Feathering Process Typically Take?
The feathering process usually takes about 15 to 30 minutes, depending on how thick the paint is and how quickly it dries. You should wait until the paint feels dry to the touch but isn’t fully cured before sanding. Use fine sanding tools to gently blend the edges, ensuring a smooth finish. Keep in mind, proper paint drying time is essential for effective feathering and avoiding damage to the surface.
Is Special Equipment Needed for Feathering Old Paint Edges?
Think of feathering old paint edges like smoothing a rough stone into a polished gem—you don’t need fancy tools, just the right technique. For this, you don’t require special equipment, but safety precautions are a must. Wear a mask and gloves, and use fine-grit sandpaper or a sanding sponge to gently blend the edges. These simple tools help you achieve a seamless look without risking injury or damage.
Can This Method Be Applied to Exterior Paint Surfaces?
You can apply the ‘Two-Grit’ method to exterior paint surfaces, but keep in mind that exterior durability and weather resistance are vital. Use the technique to smooth edges, but make certain you select grit types suitable for outdoor conditions, such as coarser for initial smoothing and finer for finishing. Properly prepping and sealing the surface will help maintain the paint’s resilience against weather, guaranteeing long-lasting results.
What Safety Precautions Should Be Taken During Sanding?
Imagine dust swirling in the air like tiny snowflakes—protect yourself by wearing a mask and goggles to prevent inhaling debris. Always make certain proper ventilation to keep dust from settling in your lungs. Use dust protection gear, like a respirator, and keep the workspace well-ventilated by opening windows or using fans. These precautions help you stay safe while sanding, avoiding respiratory issues and keeping your environment healthier.
Conclusion
Think of feathering paint like smoothing ripples in a pond—you want the surface to flow seamlessly. When you master the two-grit method, you’re effectively erasing harsh edges, creating a flawless finish. I once watched a homeowner transform a chipped corner into a near-invisible seam, like magic. With patience and the right tools, you can turn rough patches into a smooth, professional-looking surface that’s almost too perfect to notice.