
I’ve always been fascinated by the power and efficiency of airless paint sprayers. They make DIY painting projects much easier and faster.
But I also know that using one can be intimidating if you’ve never tried it before. That’s why I’ve put together this article to guide you through the process of using an airless paint sprayer.
From safety precautions to cleaning and troubleshooting, I’ll cover everything you need to know to achieve professional-looking results.
Let’s get started!
Key Takeaways
- Wear safety goggles and a respirator mask
- Ensure proper setup and ventilation for safety
- Choose the right paint and thinning ratios
- Adjust spray pattern, pressure, and technique for optimal results
Safety Precautions
Before you start using the airless paint sprayer, make sure you’re wearing safety goggles and a respirator mask. Safety gear is essential when working with any type of paint sprayer to protect yourself from potential hazards.
These goggles will shield your eyes from any paint particles or debris that may be released during the spraying process. The respirator mask is necessary to filter out any harmful fumes or chemicals that may be present in the paint.
In addition to wearing the proper safety gear, it is also important to ensure proper ventilation in the area where you will be using the sprayer. This will help to dissipate any fumes or overspray, creating a safer and healthier working environment.
Now that you have taken the necessary safety precautions, let’s move on to preparing the paint sprayer.
Preparing the Paint Sprayer
To get started, make sure you’ve properly prepared the paint sprayer. Maintaining your paint sprayer is essential for optimal performance and longevity. Here are some maintenance and troubleshooting tips to keep in mind:
| Maintenance Tips | Troubleshooting Tips |
|---|---|
| Clean the sprayer thoroughly after each use | Check for clogs in the nozzle or hose |
| Lubricate the moving parts regularly | Ensure the paint is properly thinned for the sprayer |
| Inspect and replace worn or damaged parts | Adjust the pressure settings if the spray pattern is uneven |
Regularly maintaining your paint sprayer will ensure smooth operation and prevent any potential issues. However, if you encounter any problems, such as clogs or uneven spray patterns, refer to the troubleshooting tips above. Now, let’s move on to the next section about choosing the right paint and thinning it properly.
Choosing the Right Paint and Thinning
Now that we’ve covered maintenance and troubleshooting tips for your paint sprayer, let’s focus on how to choose the right paint and properly thin it.
When it comes to choosing the right paint colors, there are a few things to consider.
-
Consider the room: Think about the purpose of the room and the mood you want to create. Lighter colors can make a room feel more spacious, while darker colors can add warmth and coziness.
-
Think about the lighting: Natural and artificial lighting can affect how paint colors appear. Consider how the light will interact with the paint color you choose.
-
Test the color: Before committing to a large area, test the paint color on a small section of the wall. This will allow you to see how the color looks in the specific lighting conditions of your space.
-
Choose the right thinners: Different paint types require different thinners. Acrylic paints, for example, typically require water as a thinner, while oil-based paints may require mineral spirits. Always refer to the paint manufacturer’s instructions for the recommended thinning ratio.
Now that we’ve discussed choosing the right paint colors and thinners, let’s move on to setting up the paint sprayer for optimal performance.
Setting Up the Paint Sprayer
Once you’ve gathered all the necessary materials, it’s important to familiarize yourself with the different parts of the paint sprayer.
Before starting, make sure you have your cleaning equipment nearby, as cleaning the sprayer after use is crucial for its longevity.
Begin by identifying the spray gun, hose, and pump. Familiarize yourself with the settings, such as the nozzle size and the pressure control knob.
To ensure safety, it’s essential to work in a well-ventilated area. Proper ventilation helps prevent the inhalation of harmful fumes.
Once you are comfortable with the setup and have taken the necessary safety precautions, it’s time to move on to adjusting the spray pattern and pressure.
This step will allow you to achieve the desired finish and coverage.
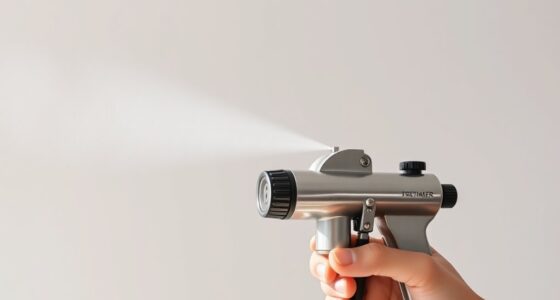
Adjusting the Spray Pattern and Pressure
When it comes to achieving a professional-looking paint job, two key factors to consider are the spray pattern and pressure control.
Understanding spray pattern techniques allows for more precise application, whether you’re aiming for a wide fan or a narrow stream.
Additionally, mastering pressure control tips ensures that you have the right amount of force behind your spray, preventing drips and ensuring even coverage.
In this discussion, I will delve into these important aspects of using a paint sprayer and provide valuable insights to help you achieve flawless results.
Spray Pattern Techniques
To achieve a smooth and even finish, try adjusting your distance and speed when using an airless paint sprayer. Here are some spray pattern techniques to help you achieve the desired results:
-
Distance control: Maintain a consistent distance between the sprayer and the surface being painted. This will help control the size and density of the spray pattern.
-
Speed control: Adjust your speed based on the paint thickness and the desired coverage. Moving too fast can result in a thin, uneven coat, while moving too slowly can cause drips and runs.
-
Overlapping strokes: To ensure complete coverage, overlap each pass by 50%. This will prevent any gaps or streaks in the paint.
-
Angle control: Experiment with different angles to find the one that provides the best coverage. Holding the sprayer at a 90-degree angle to the surface usually works well.
By mastering these spray pattern control techniques, you’ll be well on your way to achieving professional-looking results.
Now, let’s move on to some pressure control tips.
Pressure Control Tips
Make sure you adjust the pressure settings on your sprayer to achieve the desired paint flow and avoid overspray or clogging. Proper pressure control is essential for a successful paint job. Here are some pressure control techniques to help you troubleshoot any pressure issues you may encounter:
| Pressure Setting | Paint Flow | Result |
|---|---|---|
| Low pressure | Low paint flow | Thin, uneven coat |
| Medium pressure | Moderate flow | Smooth, consistent coat |
| High pressure | High paint flow | Thick, heavy coat |
If you’re experiencing issues with pressure, such as inconsistent flow or excessive overspray, here are some troubleshooting tips:
- Check the sprayer’s manual for recommended pressure settings for your specific paint.
- Clean or replace any clogged filters or nozzles.
- Ensure the sprayer is properly primed before starting.
- Adjust the pressure gradually to find the optimal setting for your paint and surface.
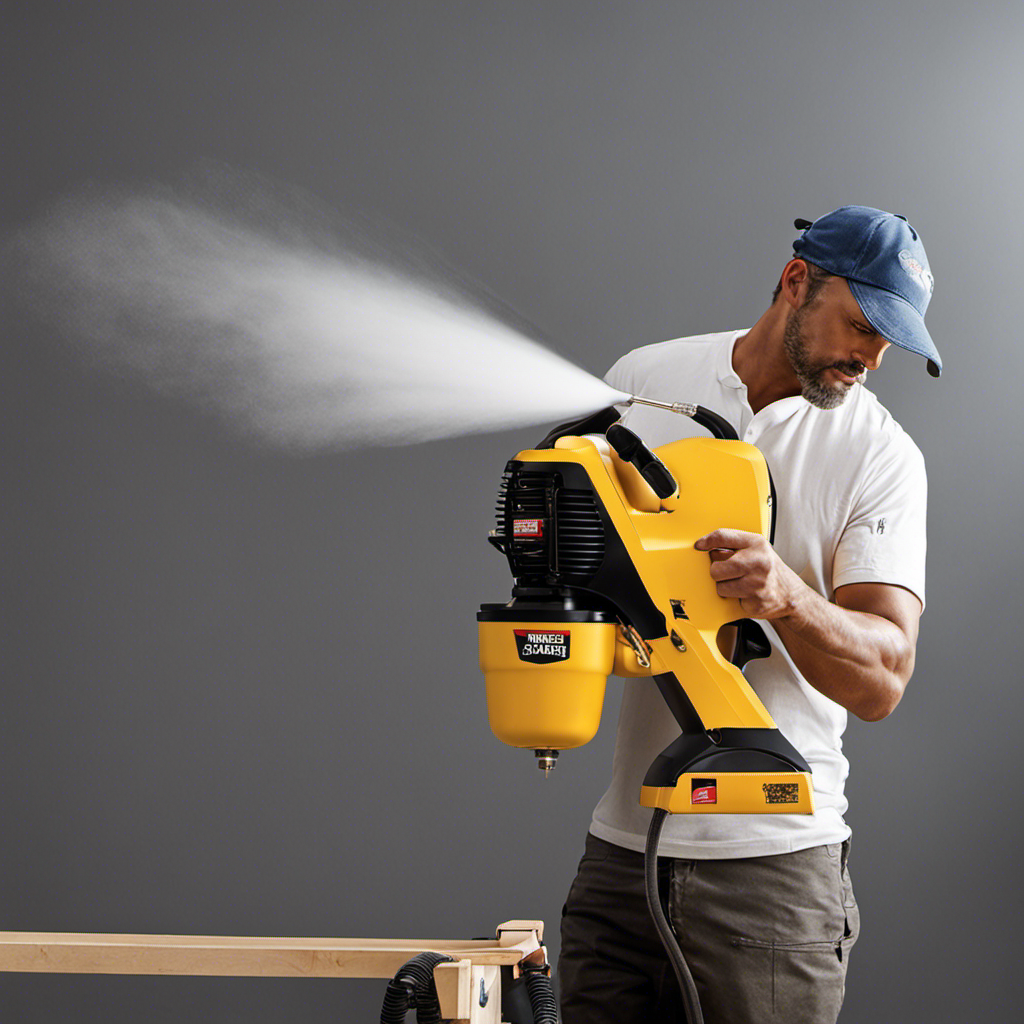
Techniques for Spraying
When it comes to achieving a smooth and even paint job, mastering the techniques of spraying angles and distance is crucial.
By understanding the proper angles and distances to hold the sprayer, you can ensure that the paint is evenly distributed and applied to the desired surface.
Additionally, being able to adjust the spray pattern allows for greater control and versatility in painting various surfaces and achieving different finishes.
Spraying Angles and Distance
Remember to maintain a consistent distance of 12-18 inches from the surface and hold the sprayer at a 90-degree angle to ensure even coverage. This is crucial for achieving optimal spray coverage and minimizing overspray.
Here are some key tips to keep in mind:
-
Start from the top: Begin spraying from the top of the surface and work your way down. This helps prevent any drips or runs.
-
Overlap each pass: To ensure complete coverage, overlap each pass by about 50%. This helps eliminate any gaps or unevenness.
-
Keep a steady pace: Move the sprayer at a consistent speed, neither too fast nor too slow. This helps maintain a uniform coating.
-
Practice with a test board: Before starting on your project, practice on a test board to get a feel for the sprayer and adjust your technique if needed.
By following these techniques, you can achieve professional-looking results.
Now, let’s move on to adjusting the spray pattern for more versatility in your painting process.
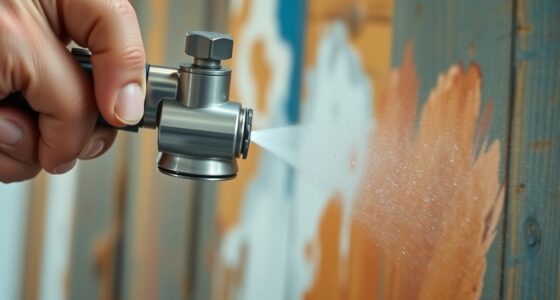
Adjusting Spray Pattern
To achieve a wider or narrower spray pattern, simply twist the nozzle on the sprayer. This adjustment is crucial for achieving the desired coverage and finish when using an airless paint sprayer. By adjusting the spray nozzle, you can control the width and intensity of the paint spray.
To make the pattern narrower, twist the nozzle clockwise, and for a wider pattern, twist it counterclockwise. It’s important to note that different sprayers may have different mechanisms for adjusting the spray pattern, so it’s essential to refer to the manufacturer’s instructions.
Regular maintenance of the spray gun is also vital for optimal performance. This includes cleaning the nozzle and filter regularly, lubricating any moving parts, and checking for any wear or damage. Proper spray gun maintenance will ensure consistent and high-quality results.
Now, let’s move on to the section about cleaning and maintenance.
Cleaning and Maintenance
Make sure you regularly clean the nozzle and filter of your airless paint sprayer to maintain its optimal performance. Here are some cleaning tips and a maintenance schedule to keep your sprayer in top shape:
-
Clean the nozzle after each use: Remove any paint residue by soaking the nozzle in a cleaning solution and scrubbing it with a brush.
-
Flush the system regularly: Run clean water or a cleaning solution through the sprayer to remove any leftover paint or debris.
-
Check the filter: Clean or replace the filter according to the manufacturer’s instructions to prevent clogs and ensure a smooth paint flow.
-
Store properly: After cleaning, store your sprayer in a clean and dry place to prevent damage and maintain its longevity.
By following these cleaning tips and sticking to a regular maintenance schedule, you can ensure that your airless paint sprayer will always be ready for your next painting project.
Now, let’s move on to troubleshooting and common issues with airless paint sprayers.
Troubleshooting and Common Issues
Having trouble with your airless paint sprayer? Let’s troubleshoot some common issues that may be affecting its performance. If your sprayer is not working properly, there are a few troubleshooting tips you can try before calling for professional help.
First, check the spray tip for any clogs or blockages. Clean it thoroughly with warm water or a cleaning solution if necessary.
Next, ensure that the paint is properly mixed and not too thick. Thin it down if needed.
Additionally, make sure the paint sprayer is properly primed before use.
If you are experiencing uneven spray patterns, check the pressure settings and adjust them accordingly.
Finally, always remember to clean and maintain your sprayer regularly to prevent any future issues.
Frequently Asked Questions
Can I Use an Airless Paint Sprayer for All Types of Paints and Coatings?
Yes, you can use an airless paint sprayer for all types of paints and coatings. The benefits of using an airless paint sprayer include faster application, smoother finish, and the ability to cover larger areas quickly.
How Long Does It Take for the Paint to Dry After Using an Airless Paint Sprayer?
Using an airless paint sprayer can be like a magic wand for your walls. To speed up drying, increase ventilation and use a dehumidifier. To prevent drips and runs, hold the sprayer at a consistent distance and keep a steady hand.
Can I Use an Airless Paint Sprayer Indoors?
Yes, you can use an airless paint sprayer indoors. However, it is important to take certain precautions. Make sure the area is well-ventilated, cover furniture and floors, and follow proper airless paint sprayer maintenance for optimal results.
How Far Should I Hold the Spray Gun From the Surface Being Painted?
When using an airless paint sprayer, it’s important to hold the spray gun at the appropriate distance from the surface being painted. This ensures even coverage and prevents overspray.
Is It Necessary to Wear a Mask or Respirator When Using an Airless Paint Sprayer?
When using an airless paint sprayer, it is important to prioritize safety precautions. Wearing a mask or respirator is necessary to protect yourself from inhaling paint particles and harmful fumes.
Conclusion
In conclusion, using an airless paint sprayer can be a game-changer for any DIY enthusiast.
The power and efficiency of this tool allow for quick and seamless painting, transforming any surface with ease.
As the paint effortlessly glides onto the surface, it creates a smooth and flawless finish, like a gentle breeze brushing against your skin.
With the right techniques and maintenance, this powerful tool can become an invaluable asset in your DIY arsenal.
So, grab your airless paint sprayer and let your creativity soar, as you bring your painting projects to life.

Franz came aboard the Paint Sprayer Zone team with a background in both journalism and home renovation. His articulate writing style, combined with a passion for DIY projects, makes him an invaluable asset. Franz has a knack for breaking down technical jargon into easy-to-understand content, ensuring that even the most novice of readers can grasp the complexities of paint sprayers.