If your airless finish looks bad, it’s likely due to poor surface preparation rather than the paint itself. Dust, grease, or uneven textures can cause streaks and blotchiness, making the finish look uneven. Skipping or rushing cleaning, sanding, and drying will prevent proper paint adhesion and smoothness. Using the right tools and techniques also matters. Ultimately, a well-prepared surface leads to a professional-looking result—stay with us to learn how to get it right.
Key Takeaways
- Inadequate surface preparation, such as dirt or grease, causes poor paint adhesion and uneven finish.
- Applying thick coats with an airless sprayer leads to drips, runs, and blotchy results.
- Not maintaining consistent spray distance or technique creates streaks and inconsistent coverage.
- Using improper or worn-out tools can result in uneven spray patterns and rough surfaces.
- Rushing the drying process between coats causes poor leveling and a rough, unattractive finish.

Have you ever applied an airless finish only to be disappointed by its uneven, blotchy appearance? If so, you’re not alone. Many people blame the paint itself, but often the culprit lies elsewhere—specifically in your brush technique and surface preparation. Even with the best paint, poor preparation and improper application can ruin the final look. The good news is, fixing these issues is straightforward once you understand what went wrong.
Proper surface preparation is essential for achieving a smooth finish and can significantly influence the overall result. Start by examining your surface preparation. This step is critical because any dust, grease, or uneven texture can cause the paint to behave unpredictably. If the surface isn’t properly cleaned and sanded, the paint won’t adhere evenly, leading to blotchiness and streaks. Before you begin, thoroughly wash the area with a degreaser or mild detergent to remove dirt and oils. After drying, lightly sand the surface to smooth out any imperfections and create a better grip for the paint. Skipping or rushing through this step often results in an uneven finish because the paint can’t level out properly on a rough or contaminated surface.
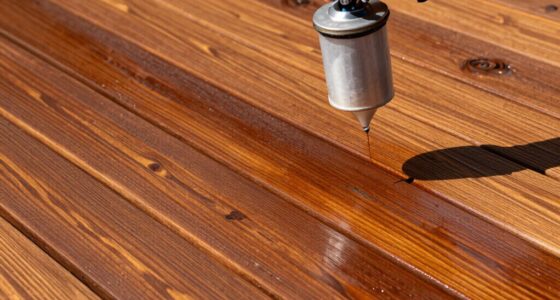
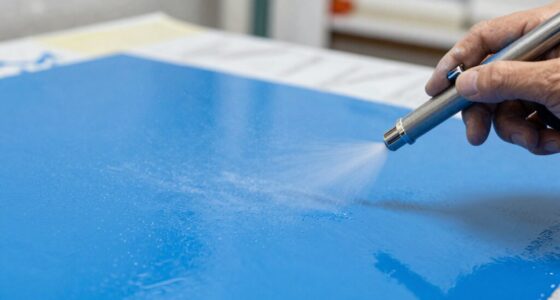
Next, focus on your brush technique—even if you’re using an airless sprayer, the principles of good application still apply. Many overlook the importance of the right brush or roller for touch-ups or corners, or they fail to maintain a consistent technique. When applying paint, use smooth, overlapping strokes, and avoid pressing too hard, which can cause uneven absorption and streaks. If you’re working in sections, keep a wet edge by blending each new pass into the previous one before it dries. This prevents lap marks that can cause a patchy appearance. When using an airless sprayer, hold the nozzle at a consistent distance from the surface and move steadily to avoid heavy spots or thin areas.
Another common mistake is rushing through the process or applying too thick a coat at once. Thick coats are more prone to drips, runs, and uneven drying, all of which contribute to a blotchy finish. Instead, apply multiple thin coats, allowing each to dry thoroughly before adding the next. This approach gives the paint enough time to level out and develop a smooth, uniform appearance.
Frequently Asked Questions
How Long Should I Prime Before Using the Airless Sprayer?
You should wait at least 24 hours after primer application before using your airless sprayer, ensuring it’s fully dry. Proper spray technique, like maintaining consistent distance and overlapping strokes, helps achieve a smooth finish. Rushing the process can cause uneven coverage or paint issues. Take your time during primer application, and double-check that it’s dry before spraying, so your final result looks professional and flawless.
Does Ambient Temperature Affect the Finish Quality?
Think of ambient temperature as the weather’s mood, directly influencing your paint’s drying time and finish quality. If it’s too cold, the temperature impact slows paint drying, leading to uneven coverage or runs. On hot days, paint may dry too quickly, causing a rough finish. Maintaining consistent, moderate temperatures helps guarantee your airless sprayer delivers a smooth, professional-looking coat without surprises.
Can I Fix an Uneven Airless Paint Finish?
Yes, you can fix an uneven airless paint finish. Start by checking the paint thickness using a gauge, ensuring it’s consistent across the surface. Then, lightly sand the uneven areas to smooth out any drips or thin spots. Proper surface preparation is key—clean the surface thoroughly and remove any debris. Afterward, apply a thin, even coat, and let it dry completely before evaluating if additional touch-ups are needed.
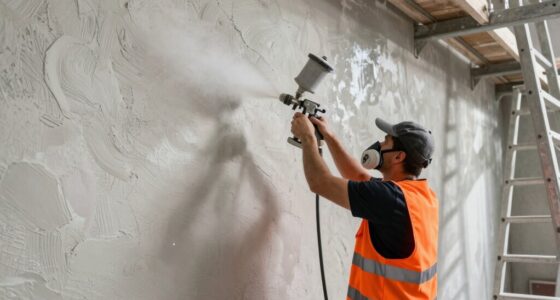
What Safety Precautions Are Needed During Spraying?
Safety isn’t optional when spraying; it’s your first line of defense. You need protective gear like masks, goggles, and gloves to shield against fumes and overspray. Equally important, make certain proper ventilation measures are in place—open windows, use fans—to prevent inhaling hazardous particles. While the spray’s power is impressive, it’s crucial to prioritize safety, so stay alert, follow manufacturer instructions, and never compromise on protective precautions during spraying.
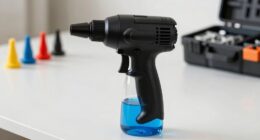
How Do I Clean the Sprayer After Use?
To clean your sprayer after use, first turn off the machine and release pressure. Use a paint stripper if residue remains, making sure all paint is softened for easy removal. Rinse the sprayer thoroughly with water or solvent, then check and calibrate the sprayer to guarantee proper flow for next time. Regular cleaning prevents clogs and maintains peak performance, giving you a smooth finish every time.
Conclusion
Remember, a bad finish isn’t just about the paint—it’s about preparation, technique, and patience. If you rush or overlook these steps, your airless finish will suffer, no matter how expensive the paint. Think of it like building a house on a shaky foundation; no matter how beautiful the walls, it won’t stand the test of time. Take your time, do it right, and your finish will look flawless—because quality work is always worth the effort.