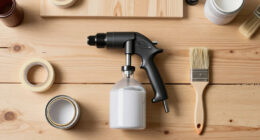

If your paint sprayer isn’t spraying, the issue could be a clogged nozzle or spray tip, bad filters, or air leaks. Pressure settings that are too high or low, pump or motor problems, or incompatible paint and thinning can also cause blockages. Sometimes, seals and gaskets wear out or assembly issues disrupt flow. Regular maintenance and proper setup help prevent this. Keep going to discover more tips to fix your sprayer effectively.
Key Takeaways
- Check for clogged or damaged spray tips, nozzles, or filters and clean or replace them as needed.
- Inspect air supply hoses and connections for leaks, kinks, or blockages that hinder airflow.
- Verify that the pump, motor, and other mechanical parts are functioning properly and free of jams or debris.
- Ensure the paint is compatible, properly thinned, and that seals and gaskets are intact and not leaking.
- Confirm all components are correctly assembled, secured, and maintained to prevent leaks, clogs, or pressure issues.

WORKPRO 700W Airless Paint Sprayer, 2900PSI High Efficiency Thinning-Free Electric Paint Sprayer with Extension Rod, Paint Sprayer for Home Interior, Exterior, Furniture, Fence & Ceilings
EFFICIENT SPRAY, LESS WORK: Powered by a 700W motor, this airless paint sprayer delivers up to 2900 PSI...
As an affiliate, we earn on qualifying purchases.
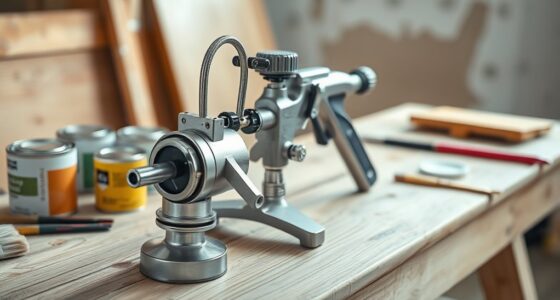
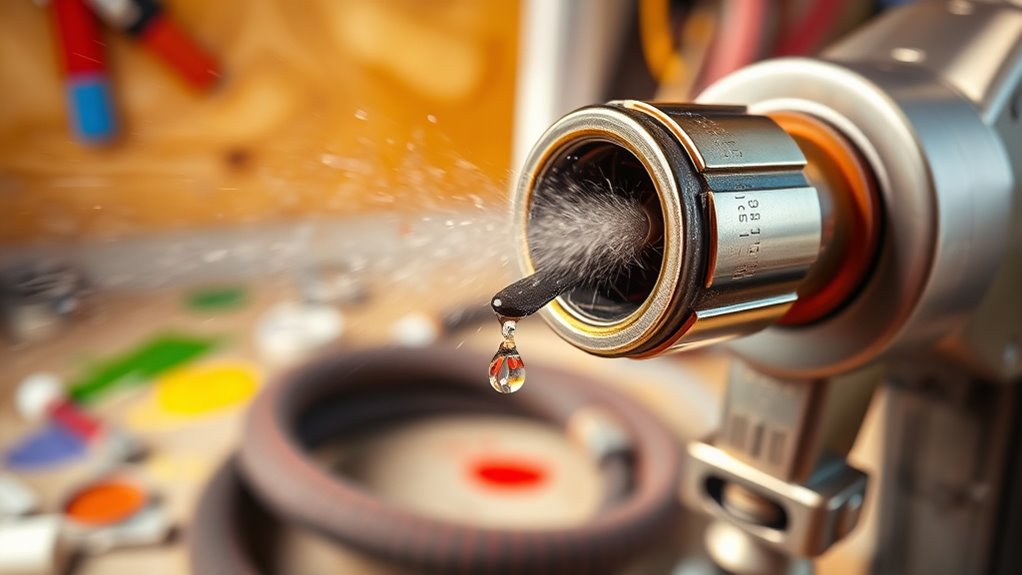
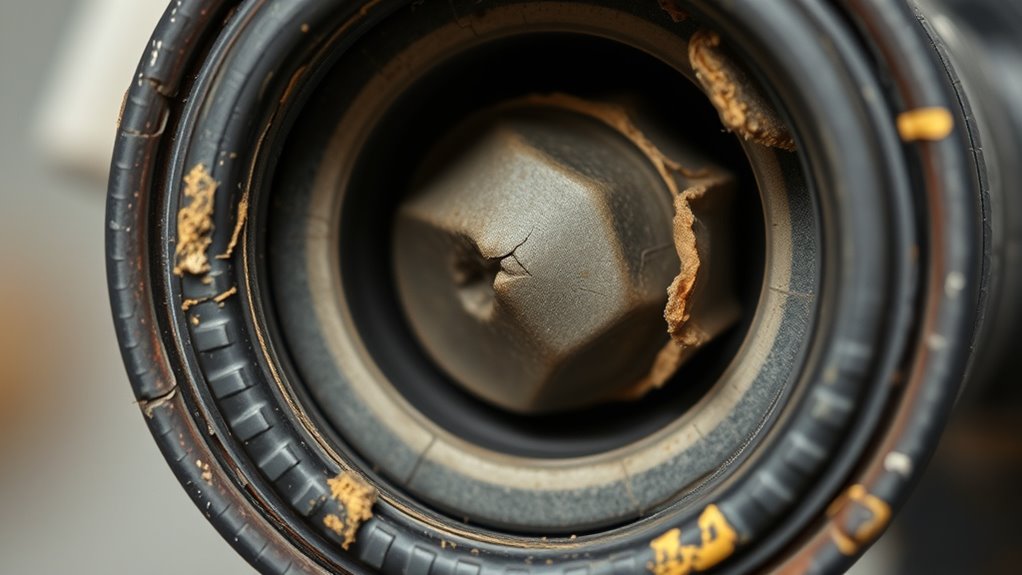
Clogged Nozzle or Spray Tip
Have you checked the nozzle or spray tip for blockages? A clogged nozzle or spray tip is a common reason your paint sprayer stops spraying properly. Start by inspecting the spray tip for paint buildup or debris. If it’s clogged, try cleaning it with a brush or soaking it in solvent. If cleaning doesn’t work, consider nozzle replacement to restore proper flow. Sometimes, the spray tip needs adjustment to ensure even spray pattern and prevent blockages. Carefully tighten or realign the spray tip, making sure it’s seated correctly. Regular maintenance including cleaning and inspecting components can prevent future clogs. Additionally, understanding performance tuning can help you identify and address underlying issues that affect equipment efficiency. Proper equipment care and understanding of your equipment can extend its lifespan and improve performance. A thorough inspection of all components can reveal hidden issues that might be affecting spray quality. Also, paying attention to manufacturer guidelines can help you follow the best practices for keeping your sprayer in optimal condition. Addressing these issues quickly will help you get back to painting smoothly without the frustration of a non-spraying sprayer.

VEVOR 750W Stand Airless Paint Sprayer, 3000PSI High Efficiency Electric Airless Sprayer, Fine and Even Painting Effect, Handheld Paint Sprayers for Home Interior and Exterior Furniture and Fences
Efficient Painting: Our stand airless paint sprayer is equipped with a powerful 750W motor, capable of delivering up...
As an affiliate, we earn on qualifying purchases.
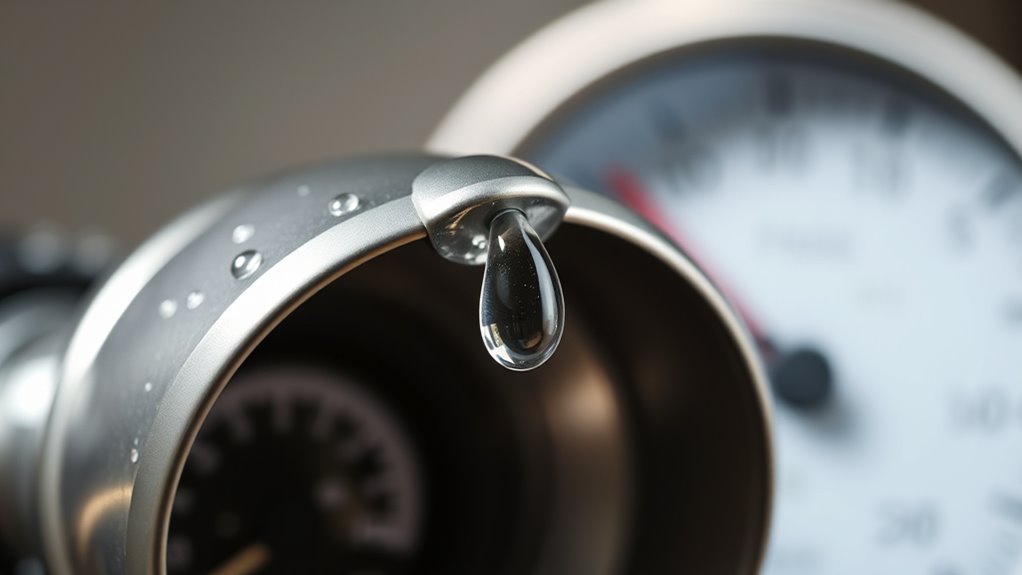
Air Supply Blockages or Leaks
A blocked or leaking air supply can cause your paint sprayer to stop spraying properly, even if the nozzle is clean. Insufficient or inconsistent air pressure from supply hoses can lead to poor spray patterns or no spray at all. Check for kinks, cracks, or leaks in the supply hoses, as these can reduce airflow. Ensure all connections are tight and secure, preventing leaks that compromise pressure. If you notice a drop in air pressure during operation, it often indicates a blockage or leak somewhere in the air supply system. Replacing damaged hoses or sealing leaks can restore proper airflow. Maintaining a steady and adequate air supply is essential for consistent, smooth spraying results. Understanding air pressure and flow is crucial for troubleshooting and ensuring optimal performance of your sprayer. Additionally, regular inspection and cleaning of filters can prevent blockages that impede airflow and maintain the efficiency of your equipment. Properly functioning air supply components help maintain consistent pressure and improve overall spray quality. Regular maintenance of air hoses and connections can prevent future issues and ensure reliable operation.

Graco Magnum 257025 Project Painter Plus Paint Sprayer
Ideal for projects up to 5 gallons in size, allowing you to tackle a range of projects every...
As an affiliate, we earn on qualifying purchases.
Incorrect Pressure Settings
Incorrect pressure settings are a common cause of paint sprayers not functioning properly. If your spray isn’t working, check the pressure gauge to verify it’s set correctly. Too high or too low spray settings can prevent proper atomization and flow. Adjust the pressure according to the manufacturer’s recommendations for your specific paint and project. A pressure gauge helps you monitor and fine-tune these settings accurately. If the pressure is too low, the paint may not spray at all; if it’s too high, you might get overspray or drips. Always test your pressure before starting to confirm smooth, even application. Correct pressure settings are essential for ideal spray patterns and a professional finish. Proper Kia Tuning can also influence how well your equipment performs, ensuring optimal results.

Graco Airless Paint Sprayer | DIY Designed for Interior or Exterior Projects | TrueCoat One TrueAirless Electric Sprayer 26DTC1
ALWAYS-ON DESIGN – Continuous operation keeps the sprayer primed and ready to spray at all times, so you...
As an affiliate, we earn on qualifying purchases.
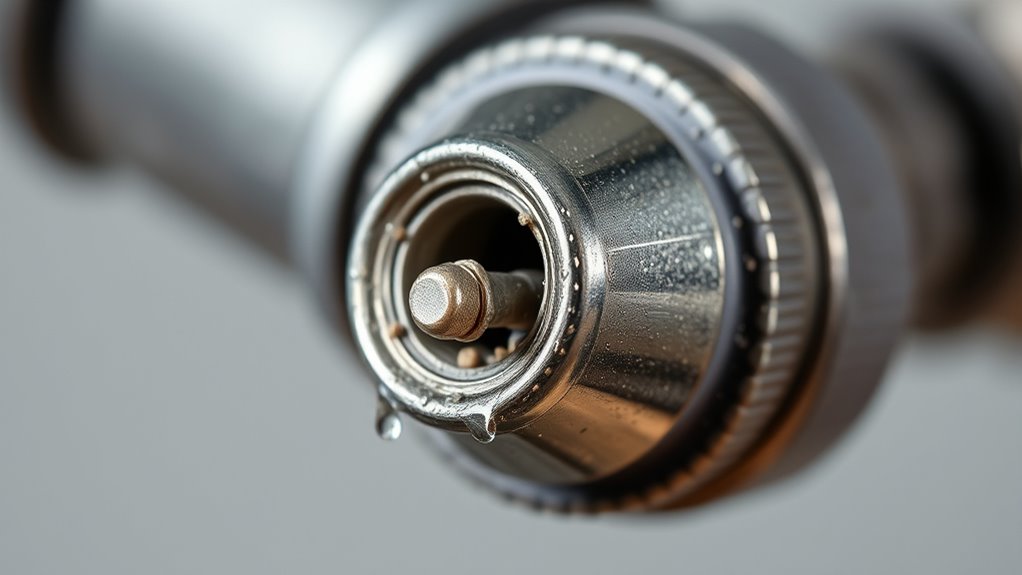
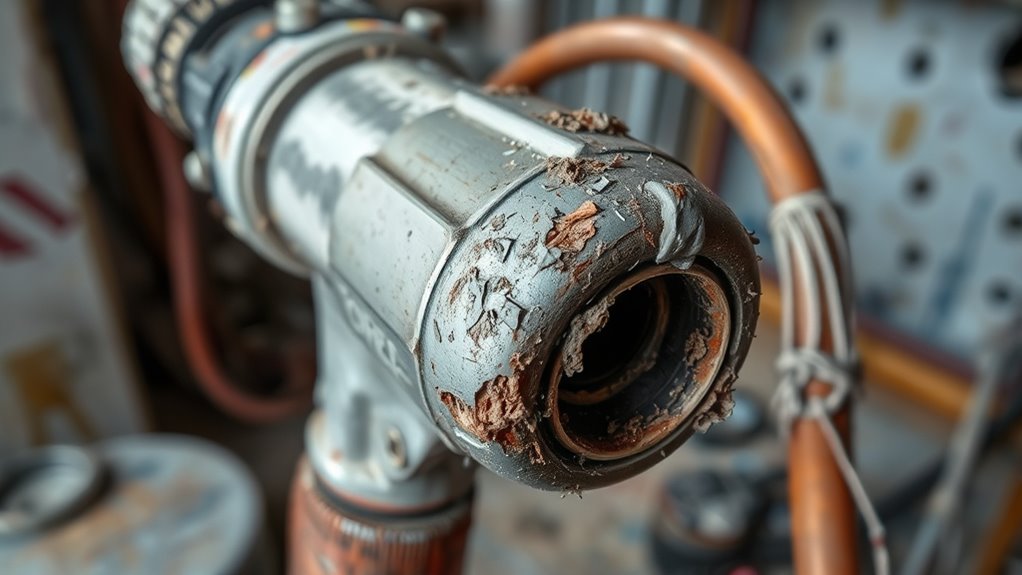
Blocked or Dirty Intake Filter
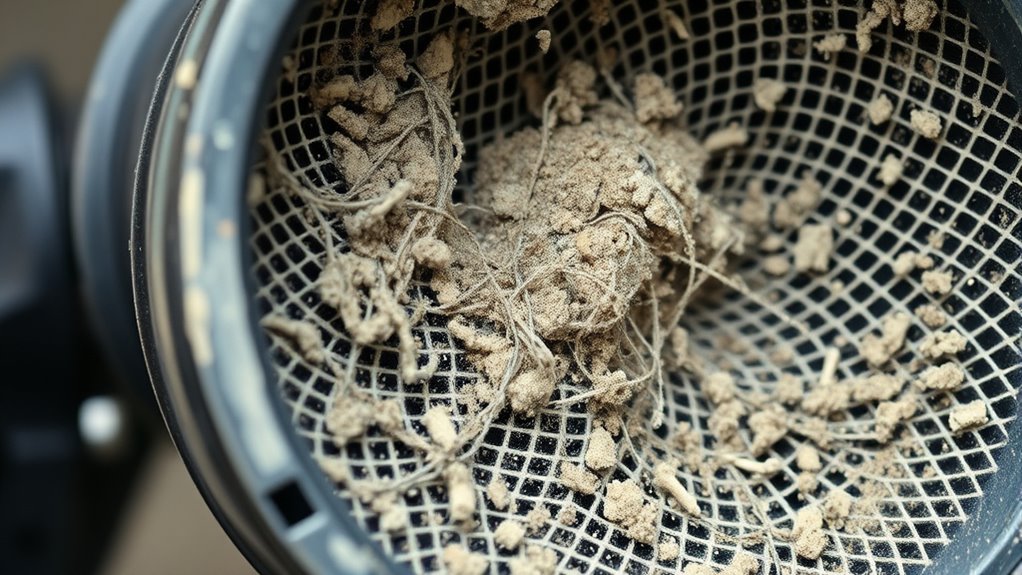
A clogged or dirty intake filter can prevent your sprayer from working properly. You should check the filter’s placement to make certain it’s installed correctly. If it’s dirty, cleaning or replacing it usually restores proper flow.
Filter Clogging Causes
When your paint sprayer isn’t spraying properly, a clogged or dirty intake filter is often the culprit. Over time, debris, dried paint, or dust can accumulate, causing clogs that hinder flow. Poor filter maintenance or neglecting clog prevention leads to restricted paint passage and uneven spray patterns. To avoid this, regularly check and clean your filter. Additionally, incorporating mindfulness and regular maintenance into your yoga practice can improve overall focus and reduce stress, which may help in maintaining equipment better. Understanding the importance of automation in business can also inspire you to set up more efficient maintenance routines to prevent such issues. Proper knowledge of headphone types and troubleshooting can empower you to address minor equipment problems quickly and effectively. Regularly inspecting and replacing filters according to manufacturer recommendations is a key part of preventive maintenance that ensures consistent spray performance. Implementing routine inspections can further help identify potential issues before they impact your spraying process.
Inspect Filter Placement
Regularly inspecting the placement of your intake filter helps guarantee your paint sprayer operates smoothly. If the filter is blocked or misplaced, it can restrict paint flow, causing uneven spray or no spray at all. Check that the filter is properly seated and free of debris or buildup. A dirty or clogged filter can also affect your spray technique, leading to uneven application of your chosen paint color. Make sure the filter isn’t damaged, and replace it if necessary. Ensuring correct filter placement helps maintain consistent pressure and flow, so your spray pattern stays even. Proper hydrocolloid technology supports the overall health of your sprayer, preventing blockages that hinder performance and ensuring you achieve a professional-looking finish. Additionally, keeping abreast of AI security developments can help you understand how emerging safety measures may influence equipment safety standards. Regular maintenance and inspection of filters are essential for optimal paint sprayer function, reducing downtime and repair costs. Moreover, understanding filter placement best practices can significantly prolong your equipment’s lifespan and improve application quality. Staying informed about filter technology advancements can also help in selecting the best replacement parts to enhance your sprayer’s efficiency.
Clean or Replace Filter
If your paint sprayer isn’t spraying properly, a clogged or dirty intake filter is often the culprit. Performing a filter inspection can help determine if dirt or debris is blocking the flow. If the filter looks dirty or damaged, it’s time for a filter replacement. Regular cleaning keeps your sprayer running smoothly and prevents uneven spray patterns. To clean the filter, remove it carefully and wash with warm, soapy water—make sure it’s completely dry before reinstalling. If cleaning doesn’t restore proper flow, replacing the filter is the best solution. Keep an eye on the filter’s condition, especially if you’re working in dusty environments. Doing so ensures your sprayer stays in top shape and sprays evenly every time. Additionally, AI discoveries are transforming how equipment like paint sprayers are designed and maintained, leading to smarter and more efficient tools. Proper maintenance includes understanding the importance of filters, which are essential for optimal performance and longevity of your equipment. Maintaining clean filters is also crucial for preventing clogged nozzles and ensuring a consistent spray pattern. Regularly checking and replacing filters can help avoid unnecessary downtime and keep your projects on schedule.
Pump or Motor Malfunctions
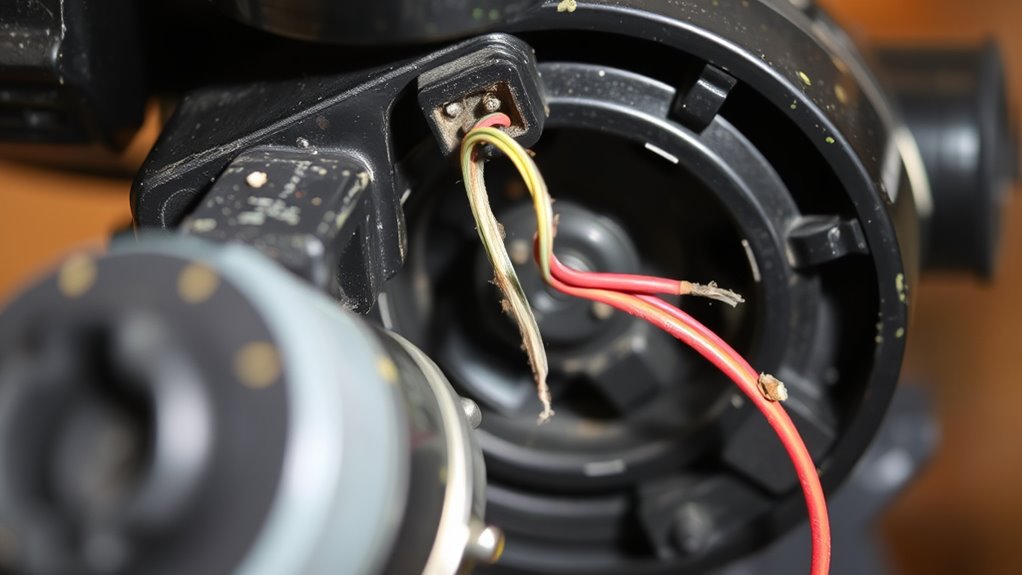
If your paint sprayer isn’t working, the issue could be with the pump or motor. Power supply problems or mechanical failures can cause the sprayer to stop functioning properly. Identifying these malfunctions early can help prevent further damage and get your sprayer back in action.
Power Supply Issues
Power supply issues are a common cause of paint sprayers not functioning properly, often stemming from pump or motor malfunctions. If your sprayer isn’t turning on or losing power mid-use, check the power source first. Confirm your battery is compatible with your sprayer model, as incompatible batteries can cause inconsistent performance. Also, a power surge might have damaged the motor or electrical components, so inspect your power supply and consider using a surge protector.
- Verify the battery compatibility before use
- Use a surge protector to prevent damage
- Check for loose or damaged power cords
Addressing these issues can restore proper function and prevent future power-related problems.
Mechanical Failure Risks
Mechanical failures in the pump or motor are common reasons a paint sprayer stops functioning properly. Hydraulic failure can occur if the pump’s internal components become clogged or worn, preventing proper fluid flow. Mechanical jamming is another frequent issue, often caused by debris or dried paint that blocks the mechanism, leading to motor strain or burnout. If your sprayer’s motor overheats or stalls, it’s likely due to these mechanical problems. Regular maintenance, such as cleaning filters and inspecting parts, helps prevent jamming and hydraulic issues. If you notice unusual noises or inconsistent spray patterns, check for signs of mechanical jamming or hydraulic failure. Addressing these risks promptly can restore your sprayer’s performance and prolong its lifespan.
Using the Wrong Type of Paint or Thinner

Using the wrong type of paint or thinner can cause your sprayer to clog or fail to spray properly. If the paint isn’t compatible with your sprayer, or if you haven’t applied proper thinning techniques, you’ll notice uneven spray patterns or blockages. Always check paint compatibility before starting, and follow manufacturer recommendations for thinning.
Consider these common issues:
- Using oil-based paint in a sprayer designed for latex, causing clogging.
- Skipping proper thinning, resulting in thick paint that won’t pass through the nozzle.
- Using incompatible thinners that alter paint consistency or cause separation.
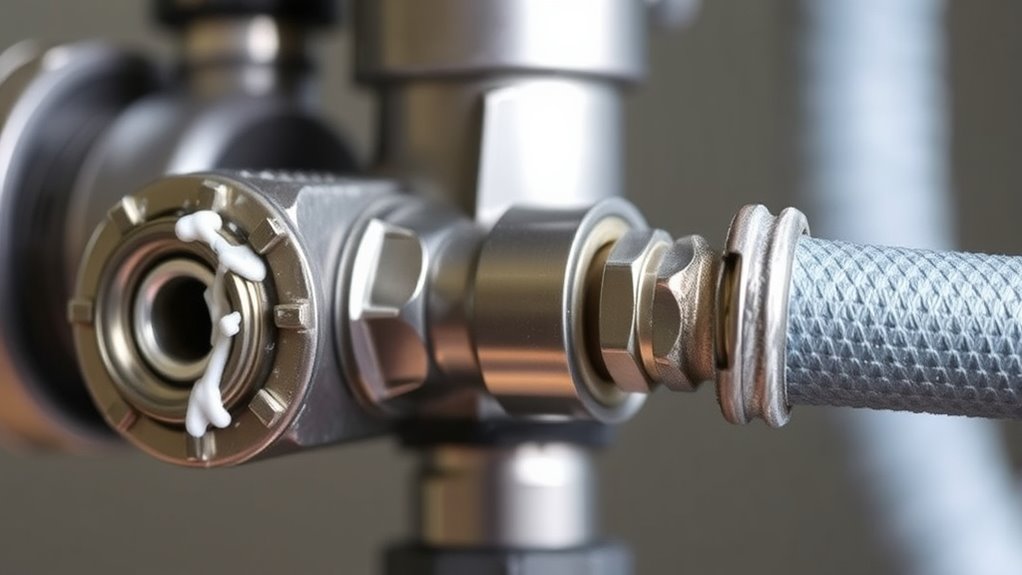
Worn or Damaged Seals and Gaskets
Worn or damaged seals and gaskets can considerably disrupt your paint sprayer’s performance by causing leaks and pressure loss. When seal damage occurs, it allows paint or air to escape, reducing spray consistency and pressure. Gasket failure often results from wear over time or exposure to harsh solvents, leading to improper sealing. If you notice leaks around the gasket areas or inconsistent spray patterns, inspecting these parts is essential. Replacing worn or cracked seals and gaskets restores proper pressure and prevents leaks that hinder spraying. Regular maintenance and timely replacements help avoid seal damage and gasket failure, ensuring your sprayer functions efficiently. Keeping these parts in good condition maintains consistent spray quality and prevents downtime caused by seal or gasket issues.
Improper Assembly or Connection Issues
Leaks or inconsistent spray patterns often stem from improper assembly or connection issues. If your paint sprayer isn’t working correctly, check for assembly errors or connection problems. Sometimes, parts aren’t secured tightly, causing leaks or uneven spray. Misaligned components can also disrupt paint flow. To fix this:
- Ensure all parts are assembled according to the manufacturer’s instructions
- Tighten all connections securely, but avoid over-tightening
- Verify that hoses and fittings are properly attached and seated
Taking the time to double-check your setup can prevent many common spraying issues. Proper assembly and connection are vital for consistent spray patterns, so don’t overlook this step. Correctly assembled parts help your sprayer operate smoothly and efficiently.
Lack of Maintenance or Wear and Tear
Over time, lack of regular maintenance can cause your paint sprayer to lose efficiency or stop working altogether. Without consistent equipment inspection and cleaning, wear and tear build up, clogging nozzles or damaging internal parts. This reduces spray quality and can cause blockages. To prevent this, perform regular maintenance—clean filters, check hoses, and lubricate moving parts.
| Issue | Solution |
|---|---|
| Clogged nozzles | Clean or replace spray tips |
| Worn seals | Inspect and replace if damaged |
| Blocked filters | Clean or replace filters |
| Loose connections | Tighten fittings and connections |
| Worn internal parts | Schedule repairs or replacements |
Regular equipment inspection helps catch issues early, ensuring your sprayer works smoothly.
Frequently Asked Questions
How Do I Identify a Clogged Nozzle Quickly?
To identify a clogged nozzle quickly, start by observing your paint flow. If the spray pattern is uneven or stops altogether, it’s likely due to a nozzle blockage. Remove the nozzle and inspect it closely for paint buildup or debris. Use a small brush or needle to clear any obstruction. Ensuring the nozzle is clean restores proper paint flow and prevents future nozzle blockage issues.
What Are Common Signs of Air Leaks in a Sprayer?
You notice signs of air leaks in your sprayer when it makes hissing sounds, has inconsistent spray patterns, or loses pressure quickly. Check your air compressor connections for leaks, and verify the paint viscosity isn’t too thick, which can cause the sprayer to struggle. Tighten fittings and replace damaged hoses if needed. Addressing these issues helps maintain proper airflow, ensuring your paint sprayer works efficiently and smoothly.
How Do I Adjust Pressure Settings Correctly?
Imagine you’re about to perfect your project, and suddenly, your sprayer isn’t performing. You need to adjust the pressure settings to guarantee proper pressure regulation, which directly affects spray consistency. Start by consulting your sprayer’s manual for ideal pressure ranges. Then, turn the pressure control knob slowly until you see a steady, even spray. Regular adjustments help maintain consistent results and prevent issues like sputtering or uneven coverage.
Which Filters Should I Regularly Clean or Replace?
For proper spray pattern and consistent performance, you should regularly clean or substitute the paint sprayer filters. Focus on the inlet filter, which prevents debris from clogging the system, and the nozzle filter, which ensures an even spray. Regular filter maintenance keeps your sprayer functioning smoothly, prevents clogs, and maintains a uniform spray pattern. Check your manufacturer’s guidelines for specific intervals to keep your sprayer in top shape.
When Should I Replace Seals and Gaskets?
You should replace seals and gaskets when you notice signs of deterioration, such as leaks, cracks, or brittleness. Regular gasket replacement prevents air or paint leaks and guarantees ideal spray performance. If your paint sprayer isn’t functioning properly or if seals show visible damage, it’s time for a gasket replacement. Doing so maintains proper pressure and prevents costly repairs, keeping your sprayer working smoothly and efficiently.
Conclusion
When your paint sprayer won’t spray, it’s frustrating. But remember, a simple clog or leak can be the culprit, not a broken machine. Just like a well-maintained tool, your sprayer needs care to perform. So before assuming the worst, check the nozzle, filters, and connections. Sometimes, fixing a minor issue makes all the difference—turning a silent, stubborn sprayer into your trusty painting partner again.

Franz came aboard the Paint Sprayer Zone team with a background in both journalism and home renovation. His articulate writing style, combined with a passion for DIY projects, makes him an invaluable asset. Franz has a knack for breaking down technical jargon into easy-to-understand content, ensuring that even the most novice of readers can grasp the complexities of paint sprayers.