Connect with us

Paint Sprayers FAQs

What Do You Need to Use With an Airless Paint Sprayer

Published

on

An image showcasing an airless paint sprayer, surrounded by essential accessories such as a pressure regulator, spray gun, hose, and a paint bucket with a strainer, for a comprehensive blog post on the necessary equipment to use with an airless paint sprayer

As an experienced DIY enthusiast, I have found the incredible benefits of using an airless paint sprayer. This tool is like magic, effortlessly transforming worn-out walls and surfaces.

But before you embark on your painting adventure, there are a few key essentials you’ll need to ensure a successful outcome. From safety equipment to the right paint and accessories, this article will guide you through everything you need to use with an airless paint sprayer.

Let’s dive in and get your project started with confidence!

Key Takeaways

  • Respirator and goggles are essential safety equipment for using an airless paint sprayer.
  • The paint sprayer consists of a spray gun, hose, motor, filters, and tip, which work together to deliver paint onto the surface.
  • Different types of paint can be used with an airless paint sprayer, including latex paint, oil-based paint, stain, primer, and specialty paints.
  • Proper paint preparation, such as straining, mixing, cleaning the surface, and adjusting pressure, is crucial for achieving a flawless finish with the sprayer.

Safety Equipment

You should always wear the appropriate safety equipment when using an airless paint sprayer. Safety should be your top priority to prevent any accidents or health risks.

Advertisement

One essential piece of safety equipment is a respirator. This will protect your respiratory system from inhaling any paint fumes or particles that could be harmful.

Goggles are also crucial to shield your eyes from any splatters or overspray. It’s important to choose goggles that provide a snug fit and have adequate ventilation to prevent fogging up.

By wearing a respirator and goggles, you’ll be ensuring your safety while operating the airless paint sprayer.

Now that we’ve covered the necessary safety equipment, let’s move on to the next section about the paint sprayer itself.
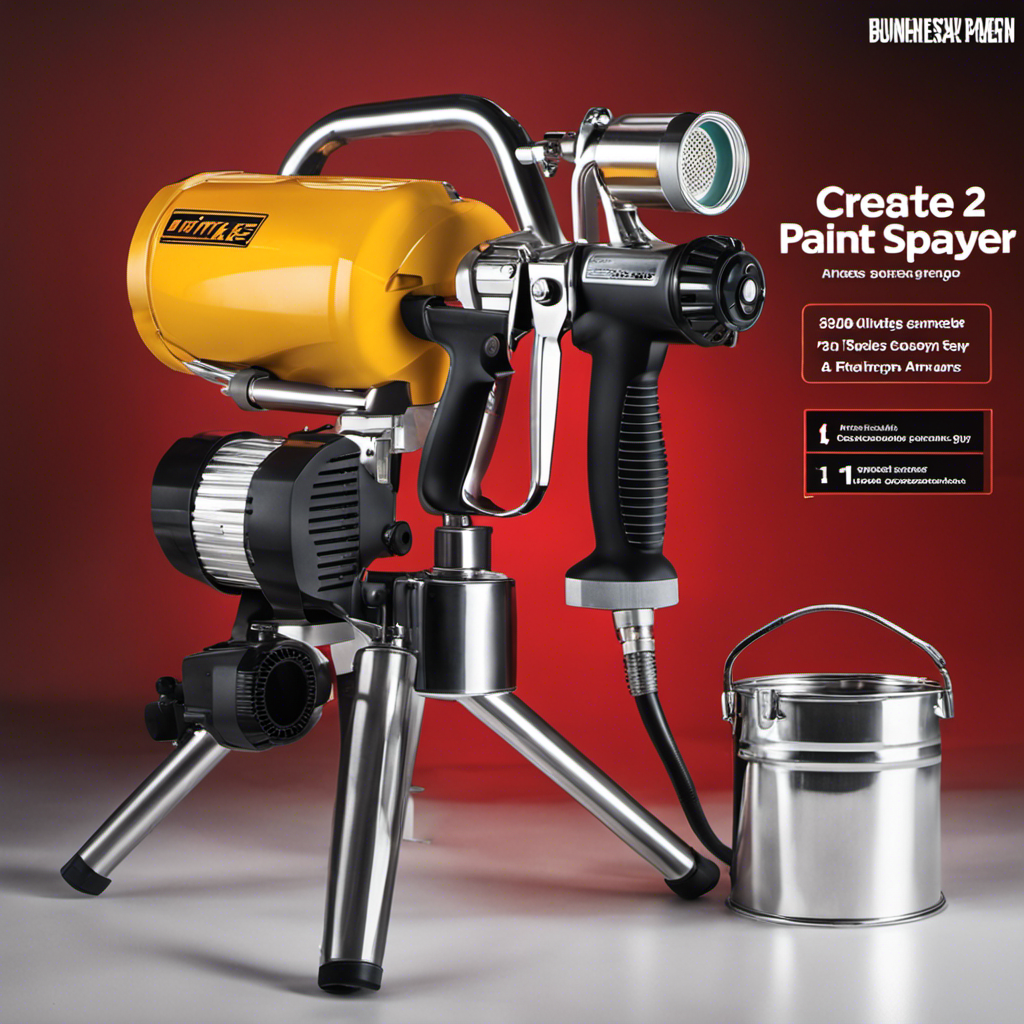
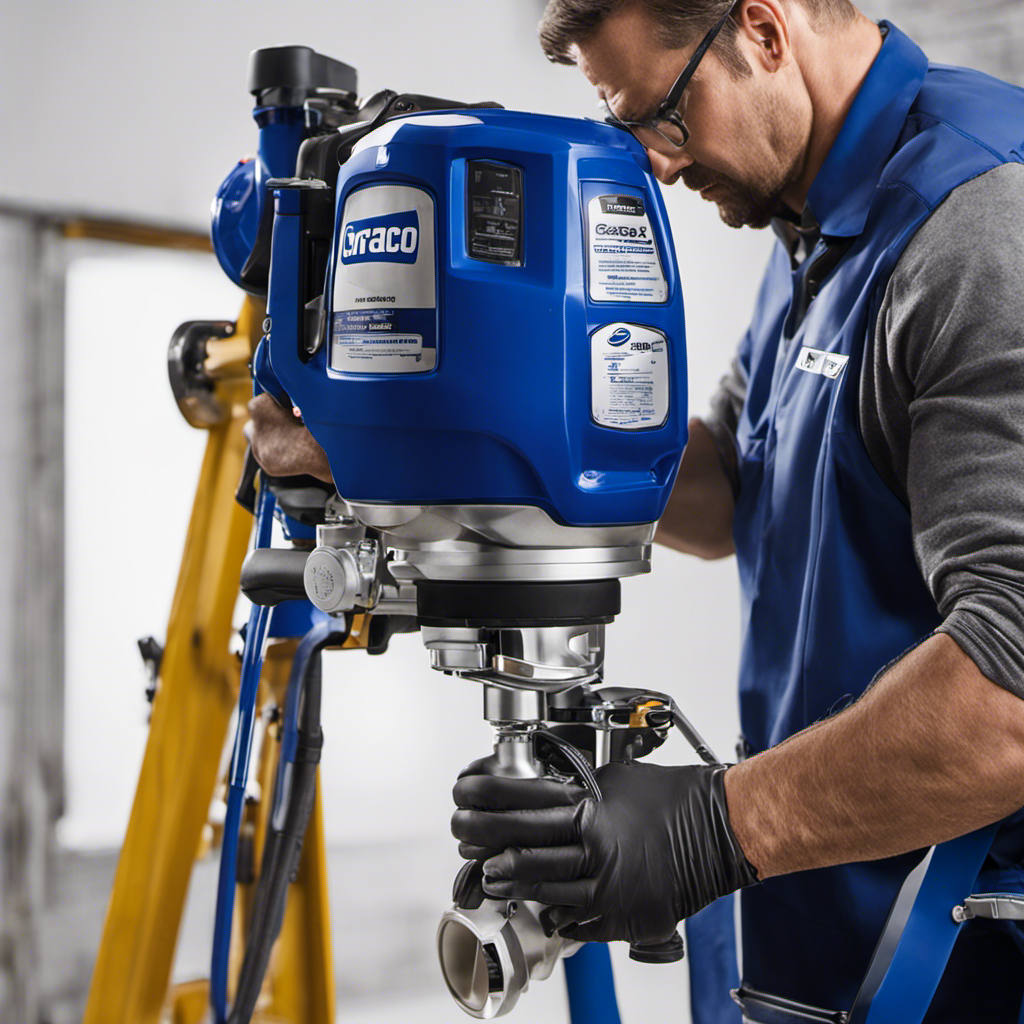
Paint Sprayer

The recommended equipment for operating an airless paint sprayer includes a spray gun, hose, and motor.

Advertisement

To give you a clear picture of how a paint sprayer works, here are five key components you’ll need:

  • Spray Gun: The spray gun is the tool that delivers the paint onto the surface. It has a trigger to control the flow of paint and a nozzle to adjust the spray pattern.

  • Hose: The hose connects the spray gun to the motor. It carries the paint from the motor to the gun, allowing for easy maneuverability.

  • Motor: The motor powers the paint sprayer and creates the necessary pressure to atomize the paint for smooth application.

  • Filters: Paint sprayers usually have filters to prevent debris and impurities from clogging the spray gun or nozzle.

  • Tip: The tip, also known as the nozzle, determines the size and shape of the spray pattern. It can be interchangeable to achieve different results.

Now that you have an understanding of the paint sprayer equipment, let’s dive into the world of paint application.

Paint

When it comes to using a paint sprayer, it’s important to choose the right paint type for optimal results. Different sprayers may require different types of paint, such as latex or oil-based.

Advertisement

Additionally, proper paint preparation is crucial for achieving a smooth finish. This involves cleaning and priming the surface, as well as thinning the paint if necessary.

Paint Types for Sprayer

To achieve the best results with an airless paint sprayer, it’s important to consider the paint types that can be used. Here are some options to consider:

  • Latex Paint: This type of paint is water-based and dries quickly, making it ideal for indoor projects.
  • Oil-based Paint: This paint provides a durable finish and is commonly used for outdoor projects.
  • Stain: If you’re looking to enhance the natural beauty of wood, stains are a great option.
  • Primer: Applying a primer before painting can improve adhesion and create a smooth surface.
  • Specialty Paints: From metallic finishes to textured coatings, there are specialty paints available for unique projects.

When using an airless paint sprayer, it’s essential to ensure proper sprayer maintenance and practice effective paint application techniques. By doing so, you can achieve professional-looking results and save time and effort in the process.

Now, let’s move on to the next section about proper paint preparation.

Proper Paint Preparation

For the best results, make sure you properly prepare the paint before using an airless sprayer. Proper paint preparation is crucial for achieving a smooth and professional finish.

Before loading the paint into the sprayer, it is important to strain it to remove any impurities or debris that could clog the sprayer nozzle. This can be done using a mesh strainer or a paint filter.

Advertisement

Additionally, the paint should be thoroughly mixed to ensure consistent color and texture throughout the application process.

Surface preparation is equally important. The surface should be clean, dry, and free of any dirt, dust, or grease. It is also recommended to sand the surface lightly to create a smooth and even base for the paint.

By following these paint application techniques and surface preparation steps, you can ensure a flawless finish with your airless sprayer.

To further optimize your paint application, it is important to adjust the pressure regulator on your airless sprayer.

Pressure Regulator

Make sure you adjust the pressure regulator on the airless paint sprayer to achieve the desired spray pattern. The pressure control is essential for ensuring a smooth and even application of paint.

Advertisement

Here are some key factors to consider when adjusting the pressure regulator:

  • Nozzle size: Choose the appropriate nozzle size for the type of paint you’re using and the desired spray pattern.

  • Pressure setting: Start with a low pressure setting and gradually increase it until you achieve the desired spray pattern.

  • Distance from the surface: Maintain a consistent distance between the sprayer and the surface to ensure an even application.

  • Paint viscosity: Thicker paints may require higher pressure settings, while thinner paints may need lower pressure.

  • Test spray: Always perform a test spray on a scrap surface to check the spray pattern and make any necessary adjustments.

With the pressure regulator properly adjusted, you can now move on to using an extension pole for those hard-to-reach areas.

Extension Pole

Grab the extension pole to easily reach those difficult areas while painting.

An extension pole is a versatile tool that can greatly enhance your painting technique. It allows you to extend your reach, making it easier to paint high ceilings, walls, and even the exterior of your home.

The extension pole attaches securely to the handle of your paint sprayer, giving you better control and stability while painting. This tool is especially useful when working on large projects or areas that are hard to reach, such as behind furniture or in tight corners.

Advertisement

By using an extension pole, you can save time and effort by avoiding the need for ladders or scaffolding.

Now, let’s move on to the next important component of an airless paint sprayer: the tip or nozzle.

Tip or Nozzle

The tip or nozzle is an essential component of an airless paint sprayer that determines the spray pattern and flow rate of the paint. It affects the quality and efficiency of the paint application. Here are five key points to consider about the tip or nozzle:

  • Tip Size: The size of the tip determines the paint flow rate and the thickness of the paint application. Smaller tips are suitable for thinner paints, while larger tips are better for thicker paints.

  • Spray Pattern: The tip determines the shape and width of the spray pattern. It can be adjusted to produce a narrow or wide pattern, depending on the surface being painted.

  • Material Compatibility: Different tips are designed for specific materials, such as latex or oil-based paints. It is important to choose a tip that is compatible with the type of paint being used.

  • Wear and Tear: The tip can wear out over time due to the high-pressure paint flow. Regular inspection and replacement of worn-out tips are necessary to ensure optimal performance.

  • Cleaning: After each use, the tip should be thoroughly cleaned to remove any dried paint residue. This prevents clogging and ensures a consistent paint flow.

With the tip or nozzle properly set up, the next crucial component to consider is the hose.

Hose

Once you’ve chosen the right tip or nozzle, it’s important to ensure that the hose is properly connected and functioning. Hose maintenance is crucial for the smooth operation of an airless paint sprayer.

Advertisement

Begin by inspecting the hose for any signs of wear or damage. Replace any worn or damaged parts immediately to avoid leaks or interruptions in paint flow.

Additionally, it’s important to choose the right hose length for your needs. Longer hoses can be more cumbersome to maneuver, but they allow for greater reach. On the other hand, shorter hoses are more manageable but may require frequent repositioning. Consider your preference and the size of the project before selecting the appropriate hose length.

Now, let’s move on to the next section and discuss the importance of using a suitable cleaning solution for your airless paint sprayer.

Cleaning Solution

To effectively clean your equipment, make sure you have the appropriate cleaning solution ready. Cleaning an airless paint sprayer is essential for its proper maintenance and longevity. Here are some maintenance tips and a few items you’ll need:

  • Cleaning Solution: A specialized cleaning solution specifically designed for airless paint sprayers is crucial for effective cleaning.
  • Bucket: A sturdy bucket is necessary to mix and hold the cleaning solution.
  • Brushes: Use brushes with stiff bristles to scrub away any paint residue or debris.
  • Safety Equipment: Don’t forget to wear gloves and safety goggles to protect yourself during the cleaning process.
  • Water Source: You’ll need access to a water source to rinse off the equipment after cleaning.

Now that your equipment is clean, let’s move on to the next step: preparing drop cloths to protect the surrounding area.

Drop Cloths

Now that your equipment is clean, it’s important to prepare drop cloths to protect the surrounding area. Drop cloths are an essential tool in painting techniques as they help prevent paint splatters and drips from damaging floors, furniture, or other items in the vicinity.

Advertisement

Before starting any painting project, it is crucial to ensure that the surface is properly prepared. This involves cleaning, sanding, and priming the area to ensure a smooth and even finish. Once the surface is ready, lay down drop cloths to catch any paint that may accidentally fall or splatter. These protective coverings can be made of various materials such as canvas or plastic and come in different sizes to suit your needs.

Now that the drop cloths are in place, it’s time to grab your stir stick and prepare the paint.

Stir Stick

When it comes to achieving a smooth and professional-looking paint job, the importance of paint consistency cannot be overstated. Having the right consistency ensures that the paint flows evenly and adheres properly to the surface.

In order to achieve the perfect consistency, there are a few mixing technique tips that can be helpful. First, stirring the paint in a figure-eight motion can help to evenly distribute the pigments and binders. This motion also helps to prevent air bubbles from forming in the paint.

Second, gradually adding small amounts of water or thinner can help to adjust the consistency of the paint. This is especially useful if the paint is too thick and needs to be thinned out. It’s important to add the water or thinner slowly, stirring the paint as you go, until you reach the desired consistency.

Advertisement

Lastly, choosing the right stir stick is crucial for effectively mixing the paint. Opting for a sturdy stick that is long enough to reach the bottom of the paint can and has a flat edge for scraping the sides will make the mixing process much easier and more efficient.

Paint Consistency Importance

Make sure you’re using the correct paint consistency with your airless paint sprayer to achieve smooth and even coverage. The paint consistency plays a crucial role in the success of your paint application and the drying process.

Here are five important things to keep in mind when it comes to paint consistency:

  • Thinning: Depending on the type of paint and the manufacturer’s recommendations, you may need to thin the paint before using it in the sprayer.

  • Testing: Always test the paint consistency before starting your project to ensure it flows smoothly through the sprayer without clogging or spitting.

  • Adjusting: If the paint is too thick, add small amounts of water or paint thinner until you achieve the desired consistency.

  • Straining: To avoid clogs and uneven spray patterns, strain the paint before pouring it into the sprayer.

  • Mixing: Stir the paint thoroughly to ensure an even consistency and eliminate any lumps or clumps.

Now, let’s move on to some mixing technique tips for optimal results.

Mixing Technique Tips

To achieve optimal results, it’s important to follow proper mixing techniques when preparing your paint for application. Start by gathering the necessary mixing tools, such as a stir stick or a paint mixer attachment for a power drill. These tools will help you thoroughly blend the paint and ensure a consistent color and texture.

Advertisement

When mixing, pay attention to the paint viscosity, which refers to how thick or thin the paint is. If the paint is too thick, it may be difficult to spray evenly, while if it is too thin, it may run or drip. By properly mixing the paint, you can adjust the viscosity to the desired level.

Now, let’s move on to choosing the right stick for the job.

Choosing the Right Stick

Ensure you have the right stick by checking its length and material. A proper paint stick is essential for effective paint mixing. Here are five key factors to consider when choosing the right stick:

  • Length: The stick should be long enough to reach the bottom of the paint can, ensuring thorough mixing.
  • Material: Opt for a sturdy stick made of wood or plastic, as these materials are durable and resistant to chemical reactions.
  • Shape: Look for a stick with a flat end, allowing you to scrape the sides and bottom of the can effectively.
  • Graduations: Some sticks have measurement markings, making it easier to measure precise amounts of paint and mix ratios.
  • Ergonomics: Consider a stick with a comfortable grip to reduce fatigue during prolonged mixing sessions.

Frequently Asked Questions

Can I Use Any Type of Paint With an Airless Paint Sprayer?

Yes, you can use various types of paint with an airless paint sprayer. However, it is best to use paints that are specifically labeled as suitable for airless sprayers. Follow recommended practices for optimal results.

Do I Need to Wear a Mask When Using an Airless Paint Sprayer?

Should I wear a mask when using an airless paint sprayer? Yes, for the love of your lungs! And don’t forget gloves to protect your hands from paint splatters. Opt for long sleeves and pants too, because fashion and safety go hand in hand.

How Often Should I Clean the Tip or Nozzle of an Airless Paint Sprayer?

To maintain the longevity of an airless paint sprayer and prevent clogs in the tip or nozzle, it is important to regularly clean the tip. I recommend cleaning it after each use for optimal performance.

Advertisement

Can I Use an Extension Pole With Any Type of Airless Paint Sprayer?

Yes, you can use an extension pole with most airless paint sprayers. It allows you to reach high places easily. However, be aware that using an extension pole may require different spraying techniques for optimal results.

What Safety Precautions Should I Take When Using a Pressure Regulator With an Airless Paint Sprayer?

When using a pressure regulator with an airless paint sprayer, it’s important to take safety measures. Pros include better control and reduced overspray, but cons include potential pressure loss and additional equipment needed.

Conclusion

In conclusion, when using an airless paint sprayer, it is essential to have the right equipment to ensure a smooth and efficient painting process.

Safety equipment, like goggles and gloves, will protect you from any potential hazards.

The paint sprayer itself is the main tool needed, along with paint and a pressure regulator to control the flow.

Advertisement

An extension pole is useful for reaching high areas, while a hose allows for easy maneuverability.

Don’t forget a cleaning solution to maintain the sprayer’s longevity.

Lastly, drop cloths and a stir stick will help keep your workspace clean and organized.

As they say, ‘preparation is key,’ and having these items ready will ensure a successful painting experience.

Advertisement

Continue Reading
Advertisement

Paint Sprayers FAQs

How to Put Oil in Graco Airless Paint Sprayer

Published

on

By

An image featuring a close-up shot of a Graco airless paint sprayer's oil fill port, with a hand pouring oil from a container specifically designed for the sprayer into the port

I found that 80% of the problems with Graco airless paint sprayers stem from low oil levels.

To keep your sprayer running smoothly and avoid costly repairs, it’s essential to know how to properly add oil.

In this article, I’ll guide you step-by-step through the process of adding oil to your Graco airless paint sprayer.

With the right tools, techniques, and maintenance tips, you can extend the lifespan of your sprayer and achieve professional-quality results every time.

Key Takeaways

  • Oil lubricates internal components, reducing friction and wear.
  • Proper oil maintenance prevents rust and corrosion.
  • Maintaining the right oil level ensures consistent performance.
  • Using the recommended oil type ensures optimal operation.

Understanding the Importance of Oil in Your Graco Airless Paint Sprayer

Advertisement

Understanding the importance of oil in your Graco airless paint sprayer is crucial for proper maintenance and optimal performance. Choosing the right type of oil is essential to ensure that your paint sprayer operates smoothly and efficiently. Graco recommends using a high-quality, non-detergent oil specifically designed for airless sprayers.

Regularly maintaining the oil in your paint sprayer offers several benefits. Firstly, it helps to lubricate the internal components, reducing friction and wear. This prolongs the lifespan of your sprayer and ensures consistent performance. Secondly, proper oil maintenance helps to prevent rust and corrosion, keeping your equipment in excellent condition. Lastly, maintaining the right oil level ensures that your paint sprayer operates at its best, delivering a consistent spray pattern and reliable results.

Now, let’s move on to the tools and supplies needed for adding oil to your Graco airless paint sprayer.

Tools and Supplies Needed for Adding Oil to Your Graco Airless Paint Sprayer

To add oil to your Graco airless paint sprayer, you’ll need a few tools and supplies.

First, you will need a small funnel to ensure that the oil goes into the right place without any spills or mess.

Advertisement

Additionally, having a clean cloth or rag is crucial to wipe away any excess oil and keep your sprayer in pristine condition.

As for supplies, you will need a high-quality lubricating oil that is specifically designed for airless paint sprayers. It’s important to use the right type of oil to ensure optimal performance and longevity of your equipment.

Once the oil is added, you can move on to the next step in the process, which involves preparing your paint sprayer for oil application by following a step-by-step guide.

Step-by-Step Guide: Preparing Your Paint Sprayer for Oil Application

Advertisement

First, make sure you have all the necessary tools and supplies ready for preparing your paint sprayer for oil application.

The oil application process is an important part of regular maintenance for your graco airless paint sprayer.

To begin, turn off the sprayer and unplug it from the power source.

Next, remove the spray tip and guard, followed by the prime valve and suction tube.

Inspect these parts for any signs of damage or wear, and replace if necessary.

Advertisement

Clean the parts thoroughly with a brush and solvent, ensuring all paint residue is removed.

Once cleaned, lubricate the parts with a few drops of oil, making sure to distribute it evenly.

Locating the Oil Fill Port in Your Graco Airless Paint Sprayer

When it comes to maintaining and operating a Graco airless paint sprayer, knowing the location of the oil fill port is crucial. The oil fill port is typically located on the top or side of the sprayer, near the pump assembly.

To ensure easy access for oil filling, it is important to familiarize yourself with the specific model of your sprayer and its oil fill port location.

Oil Fill Port Location

The oil fill port is typically located near the top of the Graco airless paint sprayer. It serves as the entry point for adding oil to the machine, ensuring smooth operation and longevity.

Advertisement

Proper maintenance of the oil fill port is essential to prevent clogs and ensure optimal performance. To maintain the oil fill port, it is recommended to clean it regularly using a soft brush or cloth to remove any debris or residue.

Additionally, a small amount of lubricating oil can be applied to the port to keep it lubricated and prevent rust or corrosion.

Easy Oil Filling Process

To easily fill your machine with oil, all you need to do is locate the oil fill port and gently pour the oil into it.

Here are some easy oil maintenance and oil application tips for your Graco airless paint sprayer:

  1. Use the correct oil: It is important to use the oil recommended by Graco for your specific model. Using the wrong oil can cause damage to the machine.

  2. Check the oil level regularly: Before each use, check the oil level to ensure it is at the recommended level. If the oil is low, add more to prevent damage to the pump.

  3. Use a funnel: When pouring the oil into the fill port, use a funnel to prevent spills and ensure accurate pouring.

  4. Clean the oil fill port: Before adding new oil, make sure the fill port is clean and free from any debris or contaminants.

By following these easy oil maintenance and application tips, you can ensure the smooth operation and longevity of your Graco airless paint sprayer.

Advertisement

Now let’s move on to choosing the right type of oil for your machine.

Choosing the Right Type of Oil for Your Graco Airless Paint Sprayer

You should consider which type of oil is right for your Graco Airless Paint Sprayer. Choosing the right oil viscosity and understanding oil additives are key factors in ensuring optimal performance and longevity of your sprayer. The table below provides a guide to help you select the appropriate oil for your specific needs.

Oil Viscosity Recommended Usage Oil Additives
Low Cold weather Anti-wear
Medium General use Rust inhibitors
High Hot weather Detergents

When selecting the oil viscosity, take into account the temperature conditions in which you will be using the sprayer. Additionally, consider any specific additives that may enhance the performance or protect against certain issues. Now that you have chosen the right oil for your Graco Airless Paint Sprayer, let’s discuss the proper techniques for adding oil without compromising the functionality of your sprayer.

Proper Techniques for Adding Oil to Your Graco Airless Paint Sprayer

Before adding oil to your Graco Airless Paint Sprayer, it’s important to know the proper techniques to ensure optimal functionality. Here are four common mistakes to avoid and the proper techniques to follow:

  1. Using the wrong type of oil: Make sure to use the recommended oil specified in the user manual to prevent damage to your sprayer.

  2. Overfilling the oil reservoir: Only fill the reservoir up to the designated level to avoid oil leakage or pressure issues.

  3. Neglecting to clean the oil filler cap: Before adding oil, clean the filler cap to prevent dirt or debris from contaminating the oil.

  4. Not checking the oil level regularly: It’s important to regularly check the oil level and top it up when necessary to maintain proper lubrication and prevent damage to the sprayer.

By following these proper techniques, you can ensure that your Graco Airless Paint Sprayer operates smoothly and efficiently.

Advertisement

Now let’s move on to how to check and maintain the oil level in your sprayer…

How to Check and Maintain the Oil Level in Your Graco Airless Paint Sprayer

Now, let’s focus on checking and maintaining the oil level in your Graco sprayer. Proper oil maintenance is crucial for the optimal performance and longevity of your airless paint sprayer.

To ensure the oil level is adequate, follow these steps:

  1. Start by locating the oil level indicator on your Graco sprayer. It is usually located near the pump assembly.

  2. Check the oil level by referring to the indicator. It should be within the recommended range, typically marked as ‘Full’ or ‘Add.’

  3. If the oil level is low, add the appropriate amount of oil recommended by the manufacturer. Use a funnel to avoid spills.

By regularly checking and maintaining the oil level, you can prevent damage to the pump and ensure smooth operation of your Graco airless paint sprayer.

Moving on to tips and tricks for extending the lifespan of your Graco airless paint sprayer with regular oil maintenance…

Advertisement

Tips and Tricks for Extending the Lifespan of Your Graco Airless Paint Sprayer With Regular Oil Maintenance

To maximize the lifespan of your Graco sprayer and keep it running smoothly, remember to regularly maintain the oil level as recommended. Here are some tips and tricks for extending the lifespan of your Graco airless paint sprayer through regular oil maintenance:

  1. Follow the manufacturer’s guidelines: Graco provides specific instructions for oil maintenance, including the type of oil to use and the recommended intervals for oil changes. Adhering to these guidelines will ensure optimal performance and longevity.

  2. Check the oil level regularly: It’s important to monitor the oil level in your sprayer to prevent damage from running it with insufficient lubrication. Make it a habit to check the oil level before each use and top it up if necessary.

  3. Use high-quality oil: Using the right type of oil is crucial for ensuring proper lubrication. Graco recommends using their own brand of oil or a high-quality equivalent that meets their specifications.

  4. Keep the oil clean: Contaminated oil can negatively impact the performance of your sprayer and cause premature wear and tear. Regularly check for any debris or particles in the oil and replace it if necessary.

By following these maintenance tips, you can extend the lifespan of your Graco airless paint sprayer and keep it operating at its best.

Now, let’s dive into troubleshooting common issues when adding oil to your Graco airless paint sprayer.

Troubleshooting Common Issues When Adding Oil to Your Graco Airless Paint Sprayer

One common issue when adding oil to your Graco sprayer is an incorrect oil level. It is important to ensure that the oil level is at the appropriate level to avoid any potential problems with your sprayer. To help you troubleshoot this issue and understand the best practices for adding oil to your Graco airless paint sprayer, I have created a table below:

Troubleshooting Issue Possible Cause Best Practice
Incorrect oil level Overfilling or underfilling the oil reservoir Check the owner’s manual for the correct oil level and fill accordingly
Oil leakage Loose or damaged oil cap or seal Inspect the oil cap and seal for any damage or looseness, and replace if necessary
Oil contamination Mixing different types of oil or using old oil Use only the recommended oil and replace it regularly to avoid contamination

Frequently Asked Questions

Can I Use Any Type of Oil in My Graco Airless Paint Sprayer?

Yes, you can use different types of oil suitable for Graco airless paint sprayers. Proper oil maintenance is crucial for optimal performance. Follow the manufacturer’s guidelines to ensure you are using the correct oil.

Advertisement

How Often Should I Check the Oil Level in My Paint Sprayer?

I check the oil level in my paint sprayer regularly to ensure proper maintenance. It’s important to follow the recommended checking frequency to prevent any issues with the equipment.

Can I Overfill the Oil in My Graco Airless Paint Sprayer?

Yes, you can use too much oil in your Graco airless paint sprayer. Overfilling can lead to excessive lubrication, which can cause the equipment to malfunction and potentially damage the internal components.

What Should I Do if I Accidentally Spill Oil on My Paint Sprayer?

If I accidentally spill oil on my paint sprayer, I would immediately clean it to prevent any damage. I would carefully wipe off the excess oil, use a mild detergent to remove any residue, and ensure proper maintenance to avoid future spills.

Can I Use a Different Brand of Oil in My Graco Airless Paint Sprayer?

Yes, you can use a different brand of oil in your Graco airless paint sprayer. However, it is important to ensure oil compatibility with the sprayer to avoid any damage or malfunction.

Conclusion

In conclusion, adding oil to your Graco Airless Paint Sprayer is a crucial step in maintaining its performance and longevity.

Advertisement

Just like a well-oiled machine, your paint sprayer needs proper lubrication to function smoothly.

By following the step-by-step guide and using the right type of oil, you can ensure that your sprayer operates at its best.

Remember to regularly check and maintain the oil level to avoid any issues.

With proper oil maintenance, your Graco Airless Paint Sprayer will continue to deliver flawless results, just like a finely tuned engine.

Advertisement

Continue Reading

Paint Sprayers FAQs

When to Replace the Filters in Airless Paint Sprayer

Published

on

By

An image of an airless paint sprayer, with a close-up view of its filters covered in thick, clogged paint residue

When it comes to maintaining an airless paint sprayer, one crucial point to emphasize is the regular replacement of filters. This practice greatly enhances the machine’s performance and longevity.

As a professional painter, I understand the importance of keeping the filters in optimal condition. In this article, we will explore the signs that indicate it’s time to replace the filters, how often they should be replaced, and the different types of filters available.

Additionally, I will share tips for proper maintenance and common mistakes to avoid.

Let’s dive in and ensure your airless paint sprayer stays in top shape!

Key Takeaways

  • Regularly replacing filters improves performance and lifespan of airless paint sprayer.
  • Signs that your filters need to be replaced include uneven spray patterns, clogging in the spray tip, decreased paint flow, and excessive pressure build-up.
  • Filters should be replaced regularly for optimal performance, and the manufacturer’s recommended replacement schedule should be followed.
  • Understanding the different types of filters and choosing the right one for your needs is important for optimal performance and longevity.

Importance of Regular Filter Replacement

Advertisement

You should regularly replace the filters in your airless paint sprayer because it ensures optimal performance and prevents clogs.

Filter maintenance techniques are crucial for the smooth operation of your paint sprayer. Clean filters play a vital role in maintaining the quality of your paint finish and preventing potential issues.

When the filters are clogged with dirt, debris, or dried paint particles, it can lead to uneven spray patterns, reduced pressure, and even damage to the paint sprayer.

By regularly replacing the filters, you can ensure that your airless paint sprayer operates at its full potential, providing consistent and high-quality results.

Now, let’s explore the signs that your filters need to be replaced, so you can avoid any potential problems down the line.

Advertisement

Signs That Your Filters Need to Be Replaced

If the spray from your machine becomes uneven or clogged, it’s a sign that it’s time to swap out those filters. Regular maintenance of airless paint sprayer filters is crucial for optimal performance and longevity of your equipment. Proper filter care offers several benefits, including improved spray quality, reduced downtime, and extended lifespan of the sprayer. Neglecting filter replacement can lead to costly repairs and diminished productivity.

To determine when filters need to be replaced, it’s important to be aware of the signs indicating their deterioration. Here are some common indicators that your filters are due for a change:

Signs of Filter Replacement
Uneven spray pattern
Clogging in the spray tip
Decreased paint flow
Excessive pressure build-up
Reduced performance

If you notice any of these signs, it’s time to replace your filters to ensure optimal performance. But how often should filters be replaced? Let’s explore this in the next section.

How Often Should Filters Be Replaced

Advertisement

In this discussion, I will address the key points of filter replacement frequency and signs of filter deterioration.

As the user of an airless paint sprayer, it’s important to understand how often filters should be replaced to ensure optimal performance.

Additionally, being able to identify signs of filter deterioration will help you maintain the efficiency and effectiveness of your paint sprayer.

Filter Replacement Frequency

The filter should be replaced regularly to ensure optimal performance of the airless paint sprayer. Maintaining a proper filter replacement schedule is crucial for the longevity and efficiency of the equipment. Here are some best practices for filter maintenance:

  • Regular Inspection:

  • Check the condition of the filter before every use.

  • Look for any signs of clogging or damage.

  • Timely Replacement:

  • Replace the filter based on the manufacturer’s recommended schedule.

  • Consider replacing it more frequently if you work with thick or heavily pigmented paints.

By adhering to a regular filter replacement schedule and following these best practices, you can ensure that your airless paint sprayer operates at its best. Neglecting filter maintenance can result in poor performance and potential damage to the sprayer.

Advertisement

Now, let’s explore the signs of filter deterioration and how to address them.

Signs of Filter Deterioration

Regularly inspecting the filter and looking for signs of clogging or damage helps ensure optimal performance of your equipment. Proper filter maintenance is crucial to extend its lifespan and maintain the efficiency of your airless paint sprayer. One of the first signs of filter deterioration is a decrease in paint flow or pressure. If you notice that the spray pattern is uneven or the paint is not being evenly distributed, it may be a sign that the filter is clogged or damaged.

Additionally, inspect the filter for any visible signs of wear or tear, such as cracks or holes. If you see any of these signs, it is important to replace the filter as soon as possible to avoid further damage to your equipment.

Understanding the different types of filters is the next step in maintaining your airless paint sprayer.

Understanding the Different Types of Filters

You’ll need to familiarize yourself with the different types of filters used in airless paint sprayers. Choosing the right filter for your paint sprayer is crucial in ensuring optimal performance and longevity. There are various types of filter materials available, each with its own unique characteristics and benefits.

Advertisement

Here are two sub-lists to help you understand the different types of filters:

  • Mesh Filters

  • Made from woven wire mesh

  • Ideal for removing larger particles and debris from the paint

  • Paper Filters

  • Made from cellulose or synthetic fibers

  • Offers superior filtration, capturing even the smallest particles

Now that you know the types of filter materials, you can make an informed decision when selecting the right filter for your paint sprayer. It’s important to consider factors such as the type of paint you’ll be using and the desired finish. By choosing the appropriate filter, you can achieve optimal spray pattern and minimize clogs.

Understanding the different types of filters is the first step in ensuring efficient painting results. Next, let’s explore the factors that affect filter lifespan.

Factors That Affect Filter Lifespan

When it comes to the lifespan of filters in an airless paint sprayer, two key factors play a crucial role: usage frequency and duration, as well as the type of paint used.

The more often and longer the sprayer is used, the quicker the filters may become clogged or worn out.

Advertisement

Additionally, different types of paint can have varying levels of viscosity and particulate matter, which can impact the lifespan of the filters.

Usage Frequency and Duration

To ensure optimal performance, it’s important to keep track of how often and for how long you use your airless paint sprayer. Here are some usage tips to help you get the most out of your equipment and avoid common mistakes:

  • Use the sprayer on a regular basis to prevent the paint from drying and clogging the system.
  • Be mindful of the duration of each painting session. Prolonged use can strain the motor and lead to overheating.

By following these usage tips, you can maximize the lifespan of your airless paint sprayer and minimize the need for repairs or replacements.

Now, let’s move on to the next section, where we will discuss the impact of the type of paint used on the performance of your sprayer.

Type of Paint Used

Using the wrong type of paint can negatively affect the performance and functionality of your airless paint sprayer. It is crucial to understand the impact of paint viscosity on the sprayer’s operation.

Different paint finishes have varying viscosity levels, which can determine the compatibility with your airless paint sprayer. High-viscosity paints, such as textured or elastomeric coatings, require a sprayer with a larger pump size and higher pressure capabilities. On the other hand, low-viscosity paints, like stains or lacquers, work well with smaller pumps and lower pressure settings.

Advertisement

Using the wrong viscosity can lead to clogs, uneven spray patterns, and reduced efficiency. Therefore, it is essential to choose the appropriate paint viscosity for your airless paint sprayer to ensure optimal performance.

Transitioning into the next section about ‘diy filter replacement vs. professional maintenance,’ it is crucial to maintain the sprayer’s filters to prevent paint debris from clogging the system.

DIY Filter Replacement Vs. Professional Maintenance

You should consider whether to replace the filters in your airless paint sprayer yourself or hire a professional for maintenance. Here are some points to help you make an informed decision:

  • DIY Filter Replacement:

  • Cost effective: Doing it yourself can save you money on labor costs.

  • Convenience: You can replace the filters at your own pace without relying on someone else’s schedule.

  • Professional Maintenance:

  • Expertise: Professionals have the knowledge and experience to properly replace filters and ensure optimal performance.

  • Warranty protection: Hiring a professional may be necessary to maintain your warranty coverage.

Considering the DIY vs professional approach for filter replacement is crucial for cost-effective maintenance. However, keep in mind that proper maintenance extends beyond filter replacement. It involves regular cleaning and inspection to ensure the filters are functioning efficiently.

Tips for Properly Maintaining Filters

When it comes to maintaining filters for airless paint sprayers, it’s important to understand the frequency at which they should be replaced. Regularly replacing filters ensures optimal performance and prevents clogs or damage to the sprayer.

Advertisement

However, before replacing a filter, it’s worth considering whether cleaning it might be a viable option, as this can help extend its lifespan and save on replacement costs.

Filter Replacement Frequency

The filter’s replacement frequency depends on how frequently you use the airless paint sprayer. If you use it frequently, you may need to replace the filter more often to maintain optimal performance. Regular cleaning is important to ensure that the filter is free from clogs and debris, but there are also benefits to using high-quality filters.

Here are two key points to consider:

  • Regular cleaning: Cleaning the filter regularly helps to remove accumulated paint particles and other contaminants, preventing them from clogging the spray tip. This ensures a smooth and consistent paint application, reducing the risk of uneven coverage or clogged spray patterns.

  • Benefits of high-quality filters: Investing in high-quality filters can significantly improve the performance and efficiency of your airless paint sprayer. These filters are designed to capture even the smallest particles, ensuring a clean and uninterrupted flow of paint. They also tend to have a longer lifespan, reducing the frequency of filter replacements and saving you time and money.

Considering these factors, it is important to find the right balance between cleaning and replacing filters to maintain optimal performance and avoid unnecessary expenses.

Cleaning Vs. Replacing

Now that we have discussed the frequency of filter replacement, let’s delve into the topic of cleaning versus replacing the filters in your airless paint sprayer.

Advertisement

While it is important to replace filters when they become excessively dirty or damaged, there are instances where you can extend their lifespan through proper maintenance. DIY cleaning is a cost-effective option that can help remove debris and prolong the filter’s effectiveness.

Regular filter maintenance involves removing the filter, gently rinsing it with water or a mild detergent, and allowing it to dry completely before reinserting it into the sprayer. However, it is crucial to note that cleaning can only go so far, and eventually, you will need to replace the filter to ensure optimal performance.

Transitioning into the subsequent section, let’s explore some effective ways to extend the lifespan of your filters.

Extending the Lifespan of Your Filters

To extend the lifespan of your filters, you should regularly clean and maintain them. Here are some tips for filter maintenance that can help you save money and ensure optimal performance:

  • Clean the filters regularly by removing any debris or dust particles that may have accumulated on the surface.
  • Use compressed air or a soft brush to gently clean the filters without damaging them.
  • Replace the filters when they become clogged or damaged beyond repair.
  • Consider using cost-effective filter replacement options, such as reusable filters or aftermarket filters that are compatible with your airless paint sprayer.

By following these maintenance tips, you can maximize the lifespan of your filters and avoid unnecessary expenses.

Now let’s move on to the next section and discuss some common mistakes to avoid when replacing filters.

Advertisement

Common Mistakes to Avoid When Replacing Filters

When replacing filters, it’s important to avoid common mistakes that can lead to inefficiency and potential damage. Proper filter maintenance is crucial for the optimal performance of airless paint sprayers. Here are some DIY filter replacement tips to ensure you get the most out of your equipment:

Common Mistakes Tips to Avoid Them
Not replacing filters regularly Replace filters according to the manufacturer’s recommendations. Neglecting to do so can result in reduced efficiency and clogging.
Incorrect installation Follow the instructions provided by the manufacturer to ensure proper installation. Improperly installed filters can lead to leaks and decreased performance.
Using the wrong type of filter Always use filters specifically designed for your airless paint sprayer. Using the wrong filter can lead to poor filtration and potential damage to the equipment.
Not cleaning the filters before replacement Clean the filters thoroughly before installing new ones. This helps maximize their lifespan and ensures efficient performance.

Benefits of Timely Filter Replacement

By timely replacing your filters, you can experience the benefits of improved efficiency and extended equipment lifespan. Regular maintenance is crucial for optimal performance of your airless paint sprayer. Here are the benefits you can expect:

  • Improved Efficiency:

  • Clean filters allow for better airflow, ensuring consistent paint flow and reducing clogs.

  • Increased efficiency means less time wasted on troubleshooting and cleaning, resulting in more productive painting sessions.

  • Extended Equipment Lifespan:

  • Clogged filters strain the motor and other internal components, leading to premature wear and tear.

  • By replacing filters regularly, you can prevent costly repairs and prolong the life of your airless paint sprayer.

To ensure maximum effectiveness, proper filter storage is essential:

  • Store filters in a clean, dry place to prevent dust and moisture buildup.
  • Avoid exposing filters to extreme temperatures or direct sunlight, as this can degrade their performance.

Frequently Asked Questions

Can I Clean and Reuse Airless Paint Sprayer Filters Instead of Replacing Them?

Yes, you can clean and reuse airless paint sprayer filters instead of replacing them, but there are pros and cons. Cleaning can save money, but reused filters may not perform as well as new ones and could lead to clogs or uneven spray patterns.

How Can I Tell if My Filters Are Clogged and Need to Be Replaced?

Regular filter maintenance is crucial to ensure optimal performance. Signs of clogged filters include reduced paint flow, uneven spray pattern, and increased pressure. If these symptoms persist after cleaning, it may be time to replace the filters.

Are There Any Specific Types of Filters That Are More Durable and Have a Longer Lifespan?

Most durable filters for airless paint sprayers are made of high-quality materials like stainless steel or nylon. These filters have a longer lifespan and can withstand the demands of paint spraying applications.

Advertisement

Can I Use Non-Branded or Generic Filters for My Airless Paint Sprayer?

I can use non-branded filters for my airless paint sprayer, but there are pros and cons. It’s important to choose the right filter based on the specific needs of the paint sprayer to ensure optimal performance and longevity.

Should I Hire a Professional to Replace My Filters or Can I Do It Myself?

I can save money by replacing the filters in my airless paint sprayer myself instead of hiring professionals. It’s a simple task that requires minimal effort and can be done regularly for optimal performance.

Conclusion

In conclusion, regular filter replacement is crucial for maintaining the efficiency and longevity of your airless paint sprayer. By recognizing the signs of worn-out filters and understanding the different types available, you can ensure optimal performance.

Proper maintenance and avoiding common mistakes will help extend the lifespan of your filters, saving you time and money in the long run.

So, why wait for clogged filters to hinder your painting project? Take action now and enjoy smooth and flawless results.

Advertisement

Continue Reading

Paint Sprayers FAQs

How to Prepare Paint for Airless Sprayer

Published

on

By

An image showcasing a painter pouring paint into a large container, using a funnel to strain out impurities

In all of my painting projects, my main objective has always been to achieve a perfect result. This has driven me to become skilled in preparing paint for use in an airless sprayer.

In this article, I’ll share my knowledge and expertise on selecting the right paint, preparing it for the sprayer, and setting up the equipment.

I’ll also provide techniques for achieving a smooth paint application and tips for cleaning and maintaining the airless sprayer equipment.

Get ready to elevate your painting game with these precise and detailed steps.

Key Takeaways

  • Consider the viscosity and consistency of the paint for smooth flow and even application.
  • Proper mixing techniques ensure thorough blending and avoid clumps.
  • Filtering the paint removes impurities that can clog the sprayer nozzle.
  • Viscosity affects atomization and spray quality, while consistency ensures even coverage and professional-looking results.

Understanding the Airless Sprayer System

Advertisement

Before you can use an airless sprayer, it’s important to understand how the system works. The airless sprayer is a powerful tool that uses high pressure to atomize paint and create a fine mist for smooth and even application.

To ensure the optimal performance of the airless sprayer, regular maintenance is crucial. This includes cleaning the filters, lubricating the pump, and inspecting the hoses for any signs of wear or damage. Troubleshooting common issues such as clogs or uneven spray patterns is also part of the maintenance process.

By familiarizing yourself with the inner workings of the airless sprayer and implementing proper maintenance, you can ensure its longevity and efficiency.

Now, let’s move on to selecting the right paint for your airless sprayer.

Selecting the Right Paint for Airless Sprayer

When choosing the right paint for your airless sprayer, make sure to consider the type of surface you will be painting. Understanding paint compatibility is crucial to achieve excellent results. Different surfaces require different types of paint to ensure proper adhesion and durability. Here is a helpful table to guide you in selecting the right paint type for your airless sprayer:

Advertisement
Surface Type Recommended Paint Type
Wood Latex or oil-based
Metal Enamel or epoxy
Concrete Acrylic or epoxy

Preparing the Paint for Airless Sprayer

When preparing paint for an airless sprayer, it’s important to consider the paint viscosity and consistency. This will ensure that the paint flows smoothly through the sprayer and provides an even application.

Proper mixing techniques should also be employed to ensure that all the components of the paint are thoroughly blended, avoiding any clumps or inconsistencies.

Additionally, filtering the paint before pouring it into the sprayer can help remove any impurities or debris that could potentially clog the sprayer nozzle and affect the paint application.

Advertisement

Paint Viscosity and Consistency

To ensure optimal results with your airless sprayer, it’s important to pay attention to the viscosity and consistency of the paint. These factors greatly affect the paint drying time and the overall quality of the finish. Here are three key points to consider:

  1. Viscosity: The thickness of the paint plays a crucial role in how well it atomizes and sprays through the nozzle. If the paint is too thick, it can clog the sprayer and result in an uneven application. On the other hand, if the paint is too thin, it may run or drip, leading to a poor finish.

  2. Consistency: Consistency refers to the smoothness and uniformity of the paint. It’s important to ensure that the paint is well mixed and free of lumps or clumps. A consistent paint will provide an even coverage and help achieve a professional-looking result.

  3. Paint Thinning: If the viscosity of the paint is not suitable for the airless sprayer, it may be necessary to thin it. Thinning the paint involves adding a compatible thinner or water to achieve the desired consistency. It’s crucial to follow the manufacturer’s guidelines and recommendations for proper thinning ratios.

Proper Mixing Techniques

Now that you’ve learned about viscosity and consistency, it’s time to discuss proper mixing techniques for achieving the best paint application with your airless sprayer. When it comes to mixing paint, using the right tools and additives can make a big difference in the quality of your finish.

Here are some key techniques to keep in mind:

Mixing Tools:

  • Use a stir stick or paddle attachment on a power drill for efficient mixing.
  • Ensure the mixing tool reaches the bottom of the paint can to properly blend all ingredients.
  • Stir in a circular motion, gradually increasing speed to avoid splashing.

Paint Additives:

  • Additives like flow improvers can enhance the paint’s leveling properties.
  • Thinning agents can be used to adjust viscosity for better sprayability.
  • Follow the manufacturer’s instructions for the correct ratio of additives to paint.

By using the right mixing tools and incorporating paint additives, you can achieve a more consistent and smooth paint mixture. This will ensure better results when using your airless sprayer.

Now, let’s move on to the next section and discuss filtering the paint to further improve its quality.

Advertisement

Filtering the Paint

To improve the quality of your paint mixture, start by filtering it to remove any impurities. Paint filtration is a crucial step in the preparation process that ensures a smooth and flawless finish. Here are three reasons why you should always filter your paint:

  1. Enhanced paint flow: By removing particles and debris, filtering the paint allows for a more consistent flow through the sprayer, preventing clogs and interruptions.

  2. Improved surface appearance: Filtering eliminates impurities that can cause imperfections on your painted surface, resulting in a professional-looking finish.

  3. Longer equipment lifespan: Filtering the paint prevents abrasive particles from entering the airless sprayer, reducing wear and tear on the equipment and extending its lifespan.

Setting Up the Airless Sprayer Equipment

Make sure you’ve got all the necessary equipment ready for setting up the airless sprayer. Start by attaching the sprayer nozzle securely to the gun. This is an important step to ensure proper paint flow and coverage. Check for any leaks or loose connections, as this can cause issues during operation.

Next, ensure that the paint container is properly filled and positioned. Make sure the paint is well mixed and free from any impurities that could clog the sprayer. Troubleshooting common sprayer issues involves checking the pressure settings, ensuring the nozzle is clean and unclogged, and adjusting the spray pattern as needed. These steps will help you achieve optimal results when painting.

Now let’s move on to techniques for achieving smooth paint application without any streaks or drips.

Techniques for Achieving Smooth Paint Application

When it comes to achieving a smooth paint application, there are three key factors to consider: proper paint consistency, preparing the surface, and using effective sprayer technique tips.

Advertisement

First and foremost, ensuring that the paint has the right consistency is crucial for optimal results. This involves following manufacturer guidelines and adjusting the paint with water or a thinning agent if necessary.

Secondly, preparing the surface properly is essential for a smooth and long-lasting finish. This includes cleaning, sanding, and priming the surface to ensure proper adhesion.

Lastly, mastering sprayer technique tips such as maintaining the correct spraying distance, moving in a consistent and even pattern, and avoiding overspray can greatly contribute to achieving a flawless paint application.

Proper Paint Consistency

Achieving the proper paint consistency is crucial for successful airless sprayer application. When it comes to paint mixing, there are a few key factors to keep in mind.

First, make sure to measure the paint and the thinner accurately to achieve the desired consistency.

Advertisement

Second, mix the paint thoroughly to ensure all the pigments are evenly distributed.

Lastly, consider using a paint filtration system to remove any impurities that could clog the sprayer nozzle. This will help prevent blockages and ensure a smooth application.

Now, let’s move on to preparing the surface for painting.

Preparing the Surface

Before starting the painting process, it’s important to ensure that the surface is properly prepared. Surface preparation plays a crucial role in achieving a smooth and long-lasting finish. To achieve the best results, follow these priming techniques:

Surface Type Preparation
Wood Fill any cracks or holes with wood filler. Sand the surface to remove any imperfections. Apply a wood primer to seal and protect the wood.
Metal Clean the surface to remove any dirt or grease. Use a metal primer to prevent rust and promote adhesion.
Drywall Repair any cracks or dents with joint compound. Sand the surface to create a smooth finish. Apply a primer to seal the drywall and ensure proper paint adhesion.
Concrete Clean the surface to remove any dirt or debris. Use a concrete primer to fill any pores or imperfections and promote paint adhesion.
Masonry Clean the surface to remove any dirt or efflorescence. Apply a masonry primer to seal the surface and promote adhesion.

Sprayer Technique Tips

Now that we’ve covered preparing the surface for painting, let’s dive into some sprayer technique tips to ensure a smooth and efficient painting process.

Advertisement

Proper sprayer maintenance is crucial for achieving excellent results. Here are some key tips to keep in mind:

  1. Check for clogs: Before starting, inspect the sprayer for any clogs in the nozzle or hose. Clear them out to avoid uneven spray patterns or blockages.

  2. Adjust pressure: Ensure the sprayer is set to the correct pressure for the type of paint being used. Too high or too low pressure can result in overspray or poor coverage.

  3. Troubleshoot issues: If you encounter any problems like air bubbles or inconsistent spray, refer to the sprayer’s manual for troubleshooting tips or seek professional assistance.

With these sprayer technique tips, you’ll be well-equipped to tackle any painting project.

Now, let’s move on to the next section, where we’ll discuss the cleaning and maintenance of airless sprayer equipment, ensuring its longevity and optimal performance.

Cleaning and Maintenance of Airless Sprayer Equipment

To keep your airless sprayer equipment in good condition, it’s important to regularly clean and maintain it.

Cleaning equipment after each use is crucial to prevent clogs and ensure optimal performance. Start by flushing out any remaining paint from the system by running clean water or solvent through the sprayer.

Advertisement

Disassemble the spray gun and clean all the parts thoroughly. Pay attention to the nozzle, which is prone to clogging. Use a small brush or toothpick to remove any dried paint or debris.

Additionally, troubleshoot any problems you may encounter with your airless sprayer. Common issues include uneven spray patterns, loss of pressure, or leaking. Refer to the manufacturer’s guide for troubleshooting steps or contact customer support for assistance.

Regular cleaning and maintenance will extend the lifespan of your airless sprayer equipment and ensure consistent, high-quality results.

Frequently Asked Questions

How Long Does It Take for the Paint to Dry After Being Sprayed With an Airless Sprayer?

After being sprayed with an airless sprayer, the drying time of paint can vary based on several factors such as humidity, temperature, and type of paint used. It typically takes a few hours to dry completely.

Can an Airless Sprayer Be Used to Paint Textured Surfaces?

An airless sprayer is a useful tool for painting textured surfaces. To achieve the best results, it is important to follow proper airless sprayer maintenance and use the appropriate techniques for painting textured surfaces.

Advertisement

What Safety Precautions Should Be Taken When Using an Airless Sprayer?

Safety measures and important precautions must be followed when using an airless sprayer. Proper ventilation, eye protection, and protective clothing are essential. Additionally, ensuring the sprayer is properly grounded and following manufacturer guidelines is crucial for safe operation.

Can Different Types of Paint Be Mixed Together and Used With an Airless Sprayer?

Oh, the joy of mixing different types of paint for an airless sprayer! But alas, my knowledge tells me that it is not advisable. Stick to one type for optimal compatibility and avoid any potential mishaps.

Is It Necessary to Thin the Paint Before Using It With an Airless Sprayer?

Yes, it is necessary to thin the paint before using it with an airless sprayer. Thinning paint allows for better spray coverage and prevents clogging in the sprayer. It ensures a smooth and even application.

Conclusion

In conclusion, preparing paint for an airless sprayer requires careful attention to detail and knowledge of the equipment. By understanding the airless sprayer system, selecting the right paint, and properly setting up the equipment, you can achieve smooth and professional paint application.

Remember the old saying, ‘A stitch in time saves nine.’ Taking the time to clean and maintain your airless sprayer equipment will ensure its longevity and prevent any future painting mishaps.

Advertisement

So, take the necessary steps to prepare your paint and enjoy a flawless painting experience.

Continue Reading

Trending

Copyright © 2024 Paint Sprayer Zone Affiliate disclaimer As an affiliate, we may earn a commission from qualifying purchases. We get commissions for purchases made through links on this website from Amazon and other third parties.