
When removing popcorn ceilings, your overspray containment plan is key to protecting your home from hazardous asbestos fibers. You should seal off the room with plastic sheeting, creating a secure barrier that prevents dust from spreading. Wetting the ceiling minimizes dust release, while wearing proper protective gear keeps you safe. These steps keep asbestos fibers contained and your house clean. If you’d like to learn more about perfecting your containment strategy, stick with us for helpful tips.
Key Takeaways
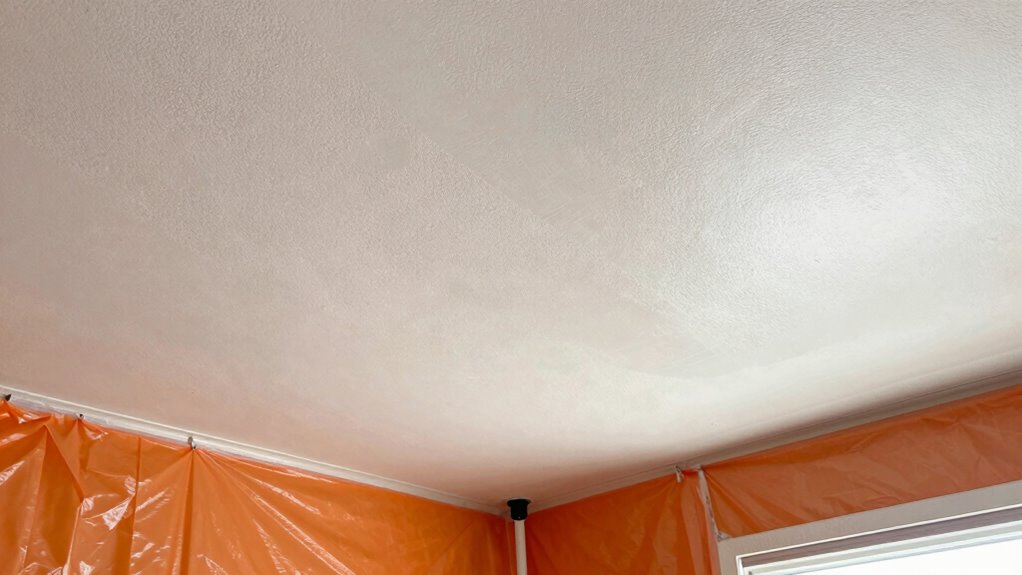
- Use plastic sheeting to fully enclose the work area, preventing overspray from contaminating other parts of the house.
- Seal all vents, doors, and openings with tape to contain dust and debris during popcorn ceiling removal.
- Wet the ceiling surface thoroughly before scraping to minimize dust and overspray dispersal.
- Employ proper containment zones with additional plastic barriers for dust control during removal and cleanup.
- Carefully remove and dispose of contaminated plastic sheeting to prevent fiber escape and ensure safety.

Popcorn ceilings, once a popular choice for hiding imperfections and adding texture to a room, have fallen out of favor in recent years. If you’re considering removing yours, it’s essential to understand the process thoroughly, especially since texture removal can pose health risks if asbestos is present. Many popcorn ceilings installed before the 1980s contain asbestos, a hazardous material linked to serious health issues like lung cancer and mesothelioma. Before starting any removal, you need to have your ceiling tested by a professional to identify asbestos presence. If asbestos is detected, DIY removal isn’t safe; you’ll need certified asbestos abatement specialists to handle the job safely. Attempting to remove asbestos-containing popcorn ceilings without proper precautions can expose you and your family to dangerous fibers, which is why containment and proper disposal are critical.
Removing popcorn ceilings requires professional asbestos testing to ensure safety.
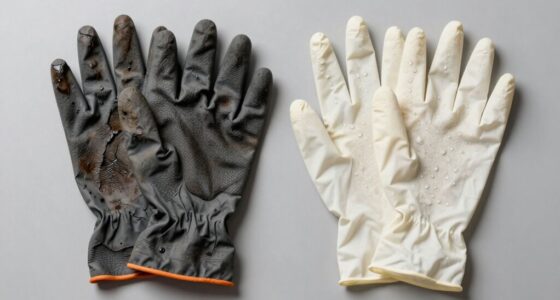
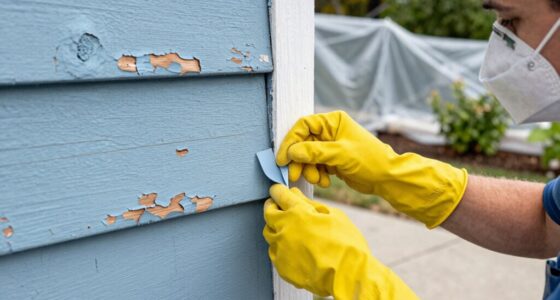
Once you confirm the ceiling is asbestos-free, you can begin the texture removal process. Start by protecting your space; cover floors and furniture with plastic sheeting to contain dust and debris. Wear a high-quality respirator, goggles, and gloves to shield yourself from airborne particles. Wetting the popcorn ceiling with water helps minimize dust during scraping, making the process cleaner and safer. Use a putty knife or a specialized scraper to gently remove the textured material, working in small sections. Be patient—rushing can damage the drywall underneath or create more mess. Proper containment strategies are essential for protecting your home and health during removal.
During removal, dust containment is essential. Use plastic sheeting to create a sealed work area, preventing dust from spreading to other parts of your home. Proper containment not only keeps your living space cleaner but also reduces exposure risks during the cleanup phase. After the popcorn texture is removed, you’ll likely need to skim coat the ceiling with joint compound to create a smooth surface. Sand lightly once dry, and then prime and paint for a fresh, clean look.
This process requires attention to detail and safety precautions, especially regarding asbestos risks. Containment strategies play a fundamental role in protecting your home and health, ensuring that no hazardous fibers escape during removal. While the idea of DIY texture removal can be tempting, understanding the risks and following proper procedures is essential. By taking the right steps, you can effectively eliminate your popcorn ceiling and achieve a modern, sleek finish, all while safeguarding your household from potential asbestos exposure.

ZipWall PY50 Dust Barrier Plastic Sheeting, White 10ft x 50ft, 3 mil
Dust Barrier: This plastic sheeting is the perfect size and thickness for setting up a temporary dust protection…
As an affiliate, we earn on qualifying purchases.
As an affiliate, we earn on qualifying purchases.
Frequently Asked Questions
How Long Does the Overspray Containment Process Typically Take?
The overspray containment process usually takes about a few hours, depending on your home’s size and the complexity of the containment setup. You’ll want to factor in the initial setup, which involves sealing off the area, and the cleanup duration afterward. Proper containment guarantees minimal mess and faster cleanup, so plan for a full day to get everything done thoroughly. This approach keeps your home clean and protects your surfaces effectively.
Is the Containment Plan Suitable for All Popcorn Ceiling Textures?
Think of the containment plan as a versatile shield, but it’s not a one-size-fits-all armor. You’ll find it suitable for most popcorn ceiling textures, yet some unique finishes may challenge its limits. Texture compatibility varies, and containment limitations can arise with intricate patterns or delicate surfaces. It’s best to consult with professionals who can assess your specific ceiling and tailor the plan, ensuring your house stays pristine during the process.
What Are the Costs Associated With Implementing the Containment Plan?
The cost considerations for implementing the containment plan typically range from $300 to $800, depending on your ceiling’s size and the complexity of the job. You should include expenses for plastic sheeting, tape, and protective gear in your budget planning. Keep in mind that investing in proper containment saves money by preventing costly cleanup and damage repairs later, making it a smart choice for your project.
Can the Containment Process Be Done Without Removing the Popcorn Ceiling?
Yes, you can do the containment process without removing the popcorn ceiling, but it’s best to weigh your options. DIY methods might be tempting, but they often lack the precision needed to prevent overspray. Professional services are more reliable, using specialized equipment to contain debris effectively. If you want to protect your home fully, hiring pros ensures the containment is done properly, saving you time and potential damage.
Are There Any Health Risks During the Overspray Containment Process?
Thinking of the containment process like a shield, you’ll be safe from health risks. During overspray containment, there’s little risk of asbestos exposure or airborne particles escaping if professionals follow strict safety protocols. They use sealed barriers and HEPA filters, trapping harmful particles. This minimizes your exposure and keeps your home safe. Rest assured, with trained experts, your health stays protected while they work efficiently.

3M P100 Performance Mold & Lead Paint Removal Respirator, Medium Size, NIOSH-APPROVED P100 Rated Filter, Carbon Layer Helps Reduce Odor Nuisance, Lightweight, Adjustable Head Straps (6297P1-DC)
NIOSH-APPROVED P100 RATED filters for at least 99.97% filtration efficiency against solids and liquid aerosols, as well as…
As an affiliate, we earn on qualifying purchases.
As an affiliate, we earn on qualifying purchases.
Conclusion
By following a solid overspray containment plan, you can protect your home from costly damage and messy cleanup. Did you know that improper popcorn ceiling removal can release up to 10,000 tiny particles into your air? That’s why containment isn’t just a suggestion—it’s crucial. When you take proactive steps, you ensure a safer, cleaner process, saving yourself time and money. Trust in the plan, and your home will stay protected every step of the way.

Homax 6104 Homax Ceiling Texture Scraper
Removes popcorn acoustic ceiling texture
As an affiliate, we earn on qualifying purchases.
As an affiliate, we earn on qualifying purchases.

Flex Seal Draft and Insulation Sealing Tape, Flexible, Rubberized, Weatherproof Strip for Windows, Doors, Vents, Works on Wood, Glass, Tile, Metal, Plastic, Fiberglass, Clear, 2 in x 16 ft, Pack of 1
2” wide coverage – excellent for sealing wide gaps.
As an affiliate, we earn on qualifying purchases.
As an affiliate, we earn on qualifying purchases.