Connect with us

Paint Sprayer Maintenance and Troubleshooting

Revitalizing Your Airless Paint Sprayer: A Comprehensive Guide

Published

on

An image showcasing a worn-out, clogged paint sprayer being meticulously cleaned and repaired

Revitalizing your airless paint sprayer is essentially equivalent to giving it a new lease on life, ensuring optimal functionality and achieving remarkable results.

This comprehensive guide takes you through the step-by-step process of repacking and maintaining your sprayer, from thorough cleaning to choosing the right storage environment.

With detailed instructions on inspection, replacement of worn-out parts, and troubleshooting common issues, this guide will help you breathe new life into your sprayer and create works of art with ease.

Key Takeaways

  • Properly clean all components before repacking to prevent clogs
  • Store the sprayer in a dry and clean environment to protect it
  • Regularly inspect for wear or damage and replace worn-out parts
  • Follow the manufacturer’s instructions for reassembling and testing the sprayer
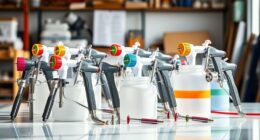
Preparing the Sprayer for Repacking

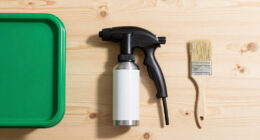
Before repacking the airless paint sprayer, it is important to properly clean all components to prevent clogs and ensure optimal performance.

Advertisement

Cleaning techniques are crucial in maintaining the sprayer’s functionality. Start by disconnecting and releasing pressure from the sprayer to avoid any potential hazards.

Empty the paint container and strain the paint to remove impurities. Then, reassemble the sprayer, making sure all components are aligned and securely tightened.

Test the sprayer by filling the paint reservoir with water and spraying onto a test surface. Look for any irregularities in the spray pattern and troubleshoot any issues that may arise.

Cleaning and Maintenance Tips

To ensure optimal performance and extend the lifespan of the sprayer, regularly inspect for wear or damage and replace worn-out parts. Cleaning and maintenance are essential for preventing clogs and keeping the airless paint sprayer in top condition.

Here are four key cleaning techniques to follow:

Advertisement
  1. Thoroughly clean all components before repacking to prevent clogs and ensure smooth operation.
  2. Use a mesh filter or paint strainer to strain the paint and remove impurities that could clog the sprayer.
  3. Clean the paint container after each use to prevent leftover paint from causing clogs.
  4. Store the sprayer in a clean and dry environment to avoid moisture and dust buildup, which can also lead to clogs.

Choosing the Right Storage Environment

The user should choose a dry and clean storage environment to protect the sprayer from damage. Proper storage is essential for spray gun protection and preventing sprayer damage.

Moisture, dust, and dirt can negatively impact the performance and lifespan of the sprayer. It is recommended to store the sprayer in an upright position to prevent leaks or spills. Additionally, using a dedicated storage case or bag can provide an extra layer of protection.

Regularly inspecting the sprayer for signs of wear or damage is crucial to catch any issues early on. By maintaining a clean and suitable storage environment, the user can ensure that their sprayer remains in optimal condition for future use.

Proper Handling and Storage Techniques

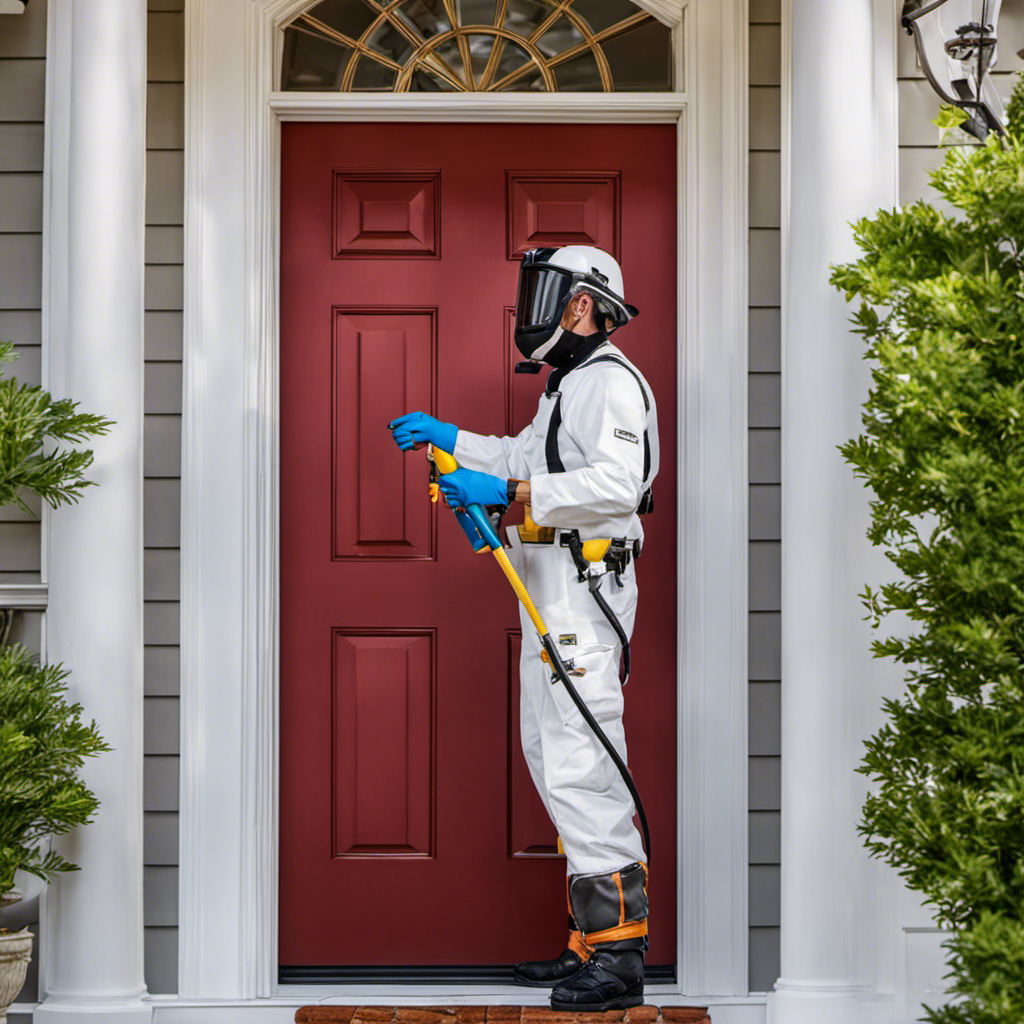
Properly handling and storing the airless paint sprayer ensures optimal performance and longevity. To maintain the sprayer’s functionality, it is essential to follow proper cleaning techniques and prioritize the use of protective gear.

Advertisement

Here are four key points to consider:

  1. Cleaning Techniques: Before repacking the sprayer, clean all components thoroughly to prevent clogs. Use a cleaning brush, paint strainer, and a small bucket to remove any paint or debris. Straining the paint and following local regulations for proper disposal is crucial.

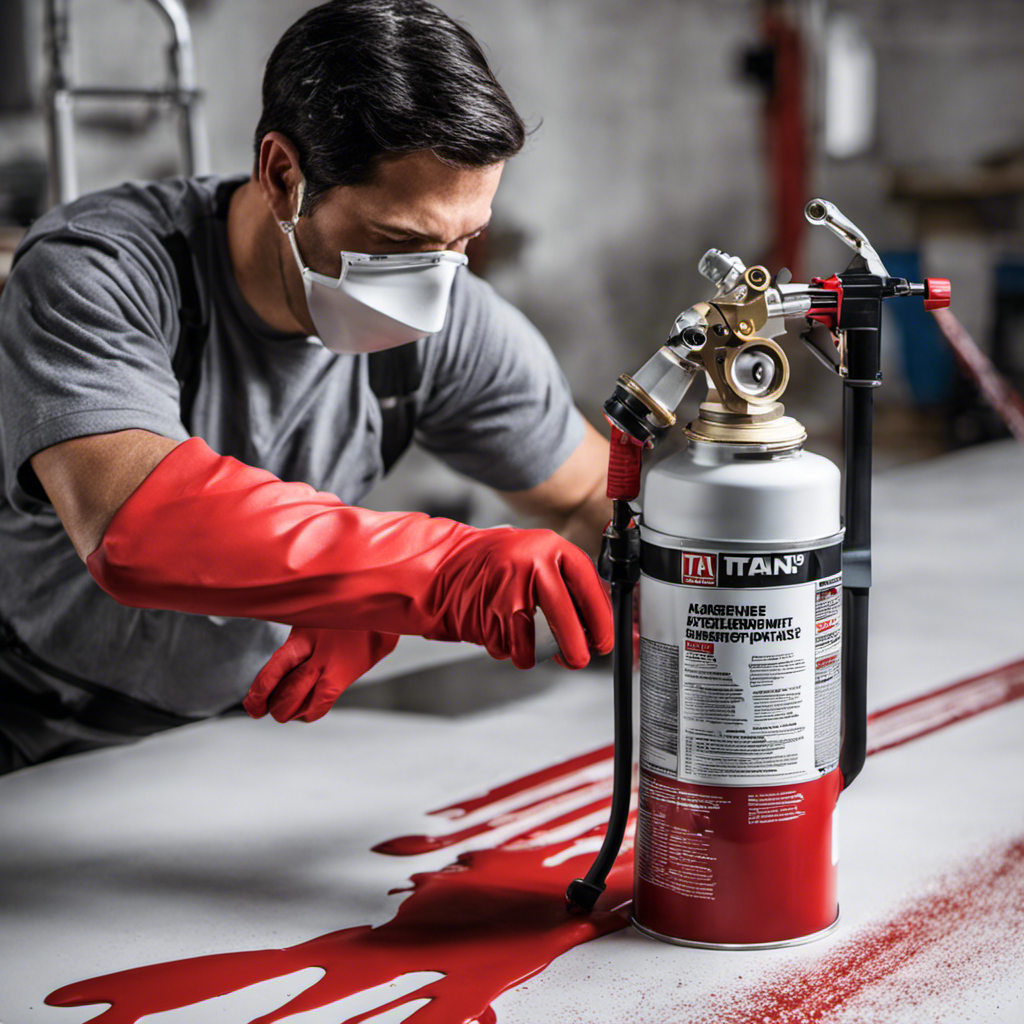
  2. Importance of Protective Gear: When handling the sprayer, it is essential to wear protective gear such as gloves, goggles, and a respirator to ensure personal safety. This will protect against potential hazards like paint splatters or inhalation of harmful fumes.

  3. Storage Environment: Choose a dry and clean storage area to protect the sprayer from moisture, dust, and dirt. Storing the sprayer in an upright position prevents leaks or spills. Consider using a dedicated storage case or bag for added protection.

  4. Regular Maintenance: Regularly inspect the sprayer for wear or damage, and replace worn-out parts to maintain optimal performance and extend its lifespan. This includes tightening screws and fasteners securely to prevent leaks or loose connections.

Inspection and Replacement of Worn-out Parts

Inspecting and replacing worn-out parts is essential for maintaining the optimal performance and longevity of the airless paint sprayer. By regularly inspecting the sprayer, you can identify any worn-out parts that may need to be replaced. Some common inspection techniques include checking for signs of wear, such as cracks, leaks, or excessive corrosion. You should also pay attention to any parts that are not functioning properly, such as a clogged nozzle or a faulty seal. Once you have identified the worn-out parts, it is important to replace them promptly to ensure the sprayer continues to work effectively. This can help prevent any further damage or performance issues and extend the lifespan of your airless paint sprayer.

Inspection Techniques Identifying Worn-Out Parts
Check for signs of wear Cracks, leaks, corrosion
Check for malfunctioning parts Clogged nozzle, faulty seal
Replace worn-out parts promptly Ensure optimal performance, prevent further damage

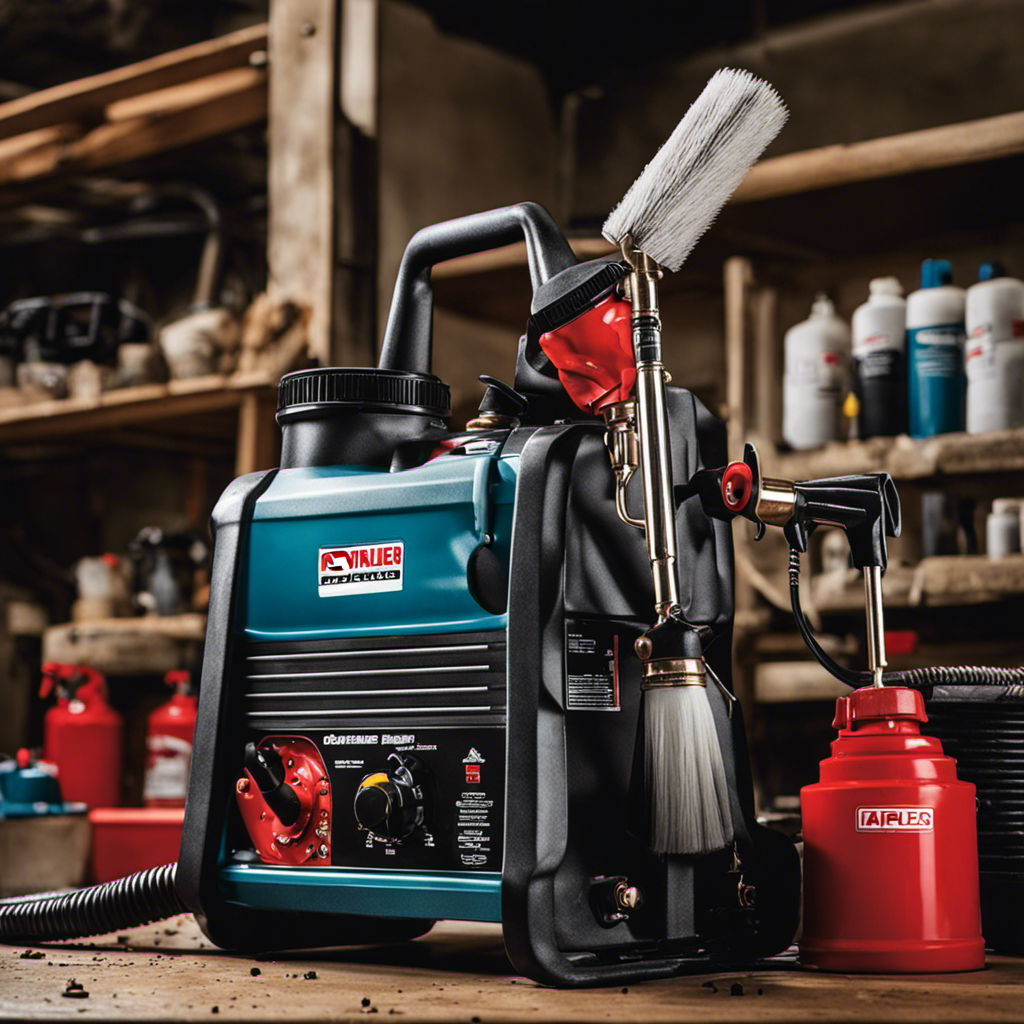
Essential Tools and Materials for Repacking

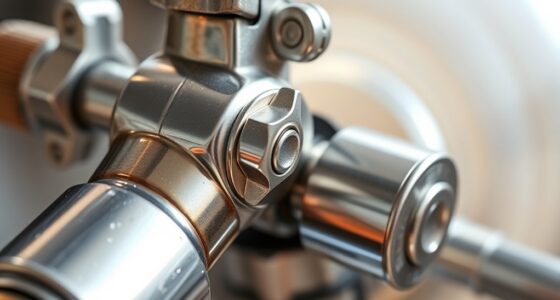
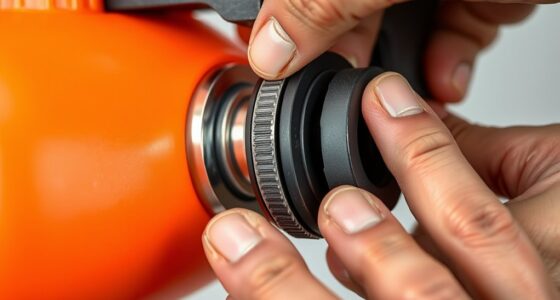
To effectively repack an airless paint sprayer, one must gather the necessary tools and materials. These include a wrench, screwdriver, clean cloth, and packing kit. These items are essential for a smooth and efficient repackaging process.

Advertisement

Additionally, it is crucial to choose the appropriate lubricant for the packing nut to ensure proper functioning of the sprayer. The user manual also plays a vital role in this process as it provides step-by-step instructions and safety guidelines.

It is important to carefully read and follow the instructions outlined in the user manual to avoid any potential damage or accidents. By using the correct tools, selecting the proper lubricant, and referring to the user manual, one can successfully repack their airless paint sprayer and maintain its optimal performance.

Disconnecting and Safely Releasing Pressure

When disconnecting and safely releasing pressure from the airless paint sprayer, it is important to turn off and unplug the sprayer and handle the cord with care to avoid damage. Disconnecting the sprayer prevents electrical hazards and accidental startup. It is recommended to point the sprayer away from yourself and others and engage the trigger lock to prevent accidental spraying. Slowly turning the pressure release valve counterclockwise until you hear a hissing sound releases the pressure and ensures a safe repackaging process. To provide a visual representation of ideas, here is a table outlining the steps for disconnecting and releasing pressure:

Steps
1. Turn off and unplug the sprayer
2. Gently pull the power cord
3. Handle the cord with care
4. Slowly turn the pressure release valve

Emptying the Paint Container

After twisting the paint container counterclockwise to remove it from the sprayer, the user should pour any remaining paint into a suitable container for disposal. Proper disposal procedures are crucial for environmental safety.

Here is a step-by-step guide to emptying the paint container and maintaining it effectively:

Advertisement
  1. Clean the container thoroughly after each use to prevent clogs and ensure smooth operation for future projects.

  2. Strain the paint using a mesh filter to remove impurities and debris, which can cause blockages and affect the paint’s quality.

  3. Follow local regulations and guidelines for proper paint disposal. Dispose of the paint in accordance with the appropriate methods, such as recycling or taking it to a designated disposal facility.

  4. Store the emptied paint container in a safe and dry place, away from extreme temperatures and direct sunlight, to maintain its integrity and prolong its lifespan.

Straining and Disposing of Paint Properly

Straining the paint using a mesh filter and following proper disposal guidelines ensures environmental safety and prevents blockages in the airless paint sprayer.

Straining techniques are crucial in removing impurities from the paint, such as dirt, debris, and dried particles, which can cause clogs and affect the spray pattern. By using a mesh filter, the paint is strained as it flows into the sprayer, ensuring a smooth and consistent application.

Additionally, responsible paint disposal is essential to protect the environment. Following local regulations and guidelines for proper paint disposal ensures that harmful chemicals are not released into the ecosystem. This not only safeguards the environment but also promotes sustainability in the painting process.

Reassembling the Sprayer Components

To reassemble the sprayer components, align the spray gun components (fluid tube, trigger, air cap) for proper fit, ensuring that grooves or notches indicate alignment. Once the components are aligned, tighten the screws and fasteners securely to prevent leaks or loose connections.

Double-check that all parts are correctly assembled before proceeding. In case of any issues, use troubleshooting tips such as checking for clogged nozzles or faulty seals.

Advertisement

After reassembling, fill the paint reservoir with water and turn on the sprayer. Adjust the pressure settings according to the manufacturer’s instructions. Spray water onto a test surface to check for an even and consistent spray pattern.

Look out for sputtering, dripping, or any irregularities in the spray, and troubleshoot accordingly.

Testing and Troubleshooting Common Issues

The user can troubleshoot common issues like clogged nozzles or faulty seals by following the provided tips and guidelines. One of the most effective troubleshooting techniques is to test the spray pattern of the airless paint sprayer. This can help identify any irregularities or inconsistencies in the spray, allowing the user to pinpoint the problem and take appropriate action. To assist with this process, here is a table outlining some common spray pattern issues and their possible causes:

Spray Pattern Issue Possible Cause
Sputtering or Dripping Spray Clogged nozzle or worn-out seal
Uneven Spray or Overspray Improper pressure setting or misaligned components
Paint Splattering or Spattering Faulty seal or worn-out packing nut

Best Practices for Storage and Maintenance

When storing and maintaining an airless paint sprayer, it is important to regularly inspect all components for signs of wear or damage. This ensures that the sprayer stays in optimal condition and prevents any potential issues that may arise during use.

To effectively maintain your airless paint sprayer and prevent clogs, follow these maintenance techniques:

Advertisement
  1. Clean all components thoroughly after each use to remove any paint or debris that could potentially clog the sprayer.

  2. Store the sprayer in a dry and clean environment to protect it from moisture, dust, and dirt that can cause clogs or damage.

  3. Use a dedicated storage case or bag to provide additional protection and keep the sprayer in an upright position to prevent leaks or spills.

  4. Regularly inspect and maintain the sprayer for signs of wear or damage, such as worn-out parts or faulty seals, and replace them as needed to ensure optimal performance.

Repacking Frequency Recommendations

Regularly inspecting the airless paint sprayer for signs of wear or damage is crucial in determining the appropriate frequency for repacking. By conducting regular inspections and maintenance, users can ensure that their sprayer is operating at its optimal level. The repacking interval recommendations may vary depending on the frequency of use and the type of paint being used. A general rule of thumb is to repack the sprayer every 100 to 200 gallons of paint. However, it is important to consult the manufacturer’s guidelines for specific recommendations. The benefits of regular repacking include preventing leaks, maintaining consistent pressure, and extending the lifespan of the sprayer. It also helps to avoid costly repairs and ensures that the sprayer continues to deliver high-quality results.

Benefits of Regular Repacking
Prevents leaks
Maintains consistent pressure
Extends sprayer’s lifespan
Avoids costly repairs
Delivers high-quality results

Ensuring Proper Functionality After Repacking

After repacking your airless paint sprayer, it is crucial to ensure that it functions properly to achieve the desired results. Here are some troubleshooting tips to help you maintain a consistent spray pattern and address any issues that may arise:

  1. Check for clogged nozzles: If you notice a decrease in spray pattern or uneven coverage, the nozzle may be clogged. Use a cleaning brush or pin to clear any blockages.

  2. Adjust pressure settings: Improper pressure can result in sputtering or dripping. Follow the manufacturer’s instructions to adjust the pressure settings accordingly.

  3. Inspect seals and connections: Loose seals or faulty connections can cause leaks or irregular spray patterns. Tighten all screws and fasteners to ensure a secure fit.

  4. Test on a scrap surface: Before starting your project, spray water onto a test surface to check for any irregularities. This will allow you to troubleshoot and make any necessary adjustments before applying paint.

Frequently Asked Questions

FAQ: How Often Should I Repack My Airless Paint Sprayer?

Repacking frequency for airless paint sprayers depends on various factors such as usage, paint type, and maintenance. However, it is generally recommended to repack the sprayer every 6 to 12 months or after every 300 to 500 gallons of paint.

Neglecting regular repacking can lead to common mistakes like clogs, leaks, and decreased performance. By repacking at the right intervals, you can ensure optimal functionality and extend the lifespan of your airless paint sprayer.

FAQ: Can I Use Any Type of Paint With an Airless Paint Sprayer?

Using oil-based paint with an airless paint sprayer requires proper cleaning techniques to ensure optimal performance.

Advertisement

Before switching to oil-based paint, thoroughly clean all components of the sprayer to remove any residue or clogs. This includes the fluid tube, trigger, air cap, and paint container.

Use a cleaning solution recommended by the manufacturer and follow their instructions.

FAQ: How Long Does It Take to Repack an Airless Paint Sprayer?

Repacking an airless paint sprayer can vary in time depending on the individual’s experience and familiarity with the process. Generally, it takes around 30 minutes to an hour to complete the repackaging.

However, it’s important to note that troubleshooting common issues such as clogged nozzles or faulty seals may add additional time.

FAQ: What Should I Do if the Sprayer Is Not Working Properly After Repacking?

If the sprayer isn’t working properly after repacking, there are several troubleshooting tips to consider.

Advertisement

Common issues could include clogged nozzles, faulty seals, or improper pressure settings.

To address these problems, start by checking for any clogs and cleaning the nozzle if necessary.

Inspect the seals for any signs of damage and replace them if needed.

Adjust the pressure settings according to the manufacturer’s instructions.

FAQ: Is There a Specific Type of Lubricant I Should Use for the Packing Nut?

When it comes to the packing nut of an airless paint sprayer, choosing the right lubricant is crucial for optimal performance. It is recommended to use a high-quality lubricant specifically designed for airless paint sprayers.

Advertisement

This will help ensure smooth operation and prevent any potential issues with the packing nut. If you experience any problems with the sprayer after repacking, such as leaks or improper pressure, it is important to troubleshoot the issue thoroughly before assuming it is related to the lubricant used.

Conclusion

In conclusion, this comprehensive guide has provided users with the necessary knowledge and step-by-step instructions to revitalize their airless paint sprayers.

By following the cleaning, maintenance, and storage techniques outlined in this guide, users can ensure optimal performance and extend the lifespan of their sprayers.

Just like a skilled conductor leading an orchestra, these techniques harmoniously come together to create a symphony of efficiency and precision.

So, grab your sprayers and let your creativity flow like a river, knowing that you have the tools and knowledge to maintain and care for your airless paint sprayer with expertise.

Advertisement

Continue Reading
Advertisement

Paint Sprayer Maintenance and Troubleshooting

Maximize Your Airless Paint Sprayer’s Lifespan With These Essential Tips

Published

on

By

An image showcasing a well-maintained airless paint sprayer: a clean nozzle, properly lubricated parts, and a debris-free filter

Are you fed up with your paint sprayer malfunctioning when you need it the most? No need to fret, we’ve got your back!

In this article, we’ll provide you with essential tips to maximize the lifespan of your airless paint sprayer. Imagine a paint sprayer that lasts longer, performs reliably, and saves you time and money.

By following these simple yet effective techniques, you’ll ensure proper storage, regular cleaning, and maintenance, and the use of high-quality replacement parts.

So, let’s dive in and make your airless paint sprayer last for years to come!

Key Takeaways

  • Proper storage and protection: Clean and dry the sprayer before storage, find a cool and dry place, invest in a protective case, and keep it away from extreme temperatures and moisture.
  • Regular cleaning: Clean the spray gun after each use, check and clean the filters regularly, flush out the system, and keep the storage area clean to prevent clogs and blockages.
  • Lubrication: Follow manufacturer’s recommendations for oil type and usage, regularly check oil levels, and apply oil to moving parts for smooth operation.
  • High-quality replacement parts: Invest in durable and reputable replacement parts, replace worn-out or damaged parts promptly, and use genuine parts to maintain performance and reliability.

Proper Storage and Protection

Advertisement

To maximize your airless paint sprayer’s lifespan, follow these steps:

  1. Clean the sprayer thoroughly before storage. Ensure all components are dry.
  2. Find a cool and dry place to store the sprayer.
  3. Proper sprayer maintenance and effective storage techniques are crucial for keeping your equipment in optimal condition.

After each use:

  1. Clean the spray gun and check and clean the filters regularly.
  2. Flush out the entire system with water or a cleaning solution to prevent clogs and blockages.
  3. Lubricate the sprayer with the manufacturer-recommended oil to reduce friction, wear, and corrosion.

Remember to:

  1. Invest in high-quality replacement parts to ensure durability and functionality.
  2. Cheap parts wear out quickly and require frequent replacements.

Thorough Cleaning

Regularly clean the spray gun after each use to prevent clogs and maintain optimal performance. Thorough cleaning techniques are essential to ensure the longevity of your airless paint sprayer.

Start by disassembling the spray gun and removing any paint residue or debris. Use a cleaning solution recommended by the manufacturer and thoroughly clean all the components, including the nozzle and filter.

Pay close attention to the hoses, as they can also become clogged with dried paint. Flush out the entire system with water or the appropriate cleaning solution to ensure all paint particles are removed.

After cleaning, dry all the components thoroughly before reassembling the spray gun. By following these thorough cleaning techniques and using the best cleaning solutions, you can keep your airless paint sprayer in optimal condition and avoid any performance issues.

Regular Filter Maintenance

Advertisement

Ensure you clean and inspect the filters of your airless paint sprayer on a consistent basis to maintain optimal performance. Cleaning the filters regularly is essential to prevent clogs and ensure smooth operation.

The frequency of cleaning will depend on the type and amount of paint being sprayed. As a general rule, it’s recommended to clean the filters after every use or at least once a week for heavy use.

Start by removing the filters from the sprayer and rinse them thoroughly with water or a cleaning solution. Use a soft brush or toothbrush to remove any stubborn debris. Allow the filters to dry completely before reinserting them into the sprayer.

Regularly checking and cleaning the filters will prolong the lifespan of your airless paint sprayer and ensure consistent, high-quality results.

Advertisement

Flushing the System

Flushing the system is an important step in maintaining the performance of your airless paint sprayer. Regular system maintenance ensures optimal performance and prevents clogs or blockages.

To flush the system, start by removing any remaining paint from the sprayer. Then, fill the paint container with a cleaning solution recommended by the manufacturer.

Attach the sprayer to a water source and turn it on. Allow the cleaning solution to flow through the system, flushing out any paint residue or debris. Run the cleaning solution through all components, including the hoses, filters, and nozzle.

Once the cleaning solution runs clear, disconnect the sprayer from the water source and thoroughly rinse the system with clean water.

This flushing technique will help maintain the efficiency and longevity of your airless paint sprayer.

Advertisement

Clean Storage Area

To maintain the cleanliness of your storage area, keep it free from dust or dirt that could potentially enter critical components. Here are some cleaning techniques and tips to prevent dust accumulation:

  • Regularly dust and sweep the storage area to remove any loose dirt or debris.
  • Use a vacuum cleaner with a brush attachment to clean hard-to-reach areas.
  • Wipe down surfaces with a damp cloth to remove any stubborn dust or grime.
  • Consider using air purifiers or dehumidifiers to maintain a clean and dry environment.

Store your airless paint sprayer in a protective case or bag to prevent dust from settling on it. Avoid storing the sprayer in areas prone to moisture or dust, such as basements or garages. Cover the sprayer with a cloth or plastic sheet when not in use to further protect it from dust.

Nozzle and Filter Cleaning

Now that you understand the importance of keeping your storage area clean, let’s move on to the next crucial aspect of maintaining your airless paint sprayer: nozzle and filter cleaning.

Regularly cleaning the nozzle and filters is essential for optimal performance and preventing common nozzle issues.

Advertisement

To start, always follow the manufacturer’s instructions for cleaning the nozzle. Typically, this involves removing the nozzle from the spray gun and soaking it in a cleaning solution or using a specialized cleaning brush to remove any paint residue or debris. Be sure to clean the nozzle thoroughly, as any build-up can lead to clogs or uneven spray patterns.

Additionally, it’s crucial to regularly check and clean the filters. These filters help prevent debris from entering the sprayer and can become clogged over time. Simply remove the filters and rinse them with water or a cleaning solution, ensuring all dirt and debris are removed.

Hose Inspection and Cleaning

Make sure you regularly inspect and clean the hoses of your airless paint sprayer to ensure optimal performance. Here are some troubleshooting tips for hose maintenance:

  • Check for any cracks or leaks in the hoses
  • Inspect the hose fittings for any signs of wear or damage
  • Clean the hoses thoroughly after each use to remove any paint residue or debris
  • Use a soft brush or cloth to clean the exterior of the hoses
  • Flush out the hoses with water or a cleaning solution to remove any clogs or blockages
  • Pay attention to any kinks or twists in the hoses and straighten them out if necessary
  • Replace any damaged or worn-out hoses promptly to prevent further issues
  • Store the hoses in a clean and dry area to prevent them from being exposed to moisture or dust

Lubrication Guidelines

Ensure you consult the manufacturer’s recommendations for the correct oil type to use in your airless paint sprayer. Using the right oil is crucial for optimal performance and longevity. Lightweight mineral-based oil designed for high-pressure applications is typically recommended.

Regularly check the oil level in your sprayer and top up or change the oil as recommended by the manufacturer. Following the proper oiling frequency is important to reduce friction, wear, and corrosion. Apply oil to moving parts to ensure smooth operation, but be cautious not to over-lubricate as it can attract dust and debris.

Regularly check oil levels and refill as needed to maintain the sprayer’s efficiency. By using the appropriate oil and following the recommended lubrication frequency, you can maximize the lifespan of your airless paint sprayer.

Advertisement

Correct Oil Type

Using the recommended lightweight mineral-based oil for high-pressure applications is crucial to ensure optimal performance and longevity of your airless paint sprayer. Choosing the right oil and proper lubrication techniques are essential for maintaining your sprayer.

Here are some key points to consider:

  • Use a lightweight mineral-based oil designed for high-pressure applications.
  • Regularly check the oil level in the sprayer and top up or change it as recommended.
  • Proper oil usage reduces friction, wear, and corrosion in the internal components.
  • Apply oil to the moving parts to ensure smooth operation.
  • Avoid over-lubricating, as it can attract dust and debris.
  • Follow the manufacturer’s guidelines for oiling frequency.
  • Regularly check oil levels and refill as needed.

Regular Oil Level Check

Check the oil level in your sprayer regularly to ensure optimal performance and prevent unnecessary wear and tear.

Regular oil level monitoring is crucial for maintaining the efficiency of your airless paint sprayer. Oil acts as a lubricant, reducing friction and preventing corrosion within the internal components.

By regularly checking the oil level and topping up or changing it as recommended by the manufacturer, you can ensure smooth operation and extend the lifespan of your sprayer.

Regular oil changes are important because over time, the oil can become contaminated with debris and lose its lubricating properties. By staying on top of oil changes, you can prevent damage to the sprayer and avoid costly repairs.

Advertisement

Make it a habit to monitor the oil level in your sprayer and perform regular oil changes to keep it running smoothly.

High-Quality Replacement Parts

When it comes to maintaining your airless paint sprayer, using high-quality replacement parts is essential. Genuine parts offer several benefits that can significantly impact the lifespan and performance of your sprayer.

Here are some reasons why using genuine parts is important:

  1. Superior Durability and Functionality:

    • Genuine parts are designed specifically for your sprayer model, ensuring a perfect fit and optimal performance.
    • They are made from high-quality materials, making them more durable and resistant to wear and tear.
    • Using genuine parts eliminates the risk of leaks or malfunctions, providing a reliable and efficient spraying experience.
  2. Reduced Repairs and Downtime:

    • High-quality replacement parts minimize the need for frequent repairs, saving you time and money.
    • Genuine parts are less likely to fail or break, preventing unexpected project delays.
    • By investing in genuine parts, you can avoid costly downtime and keep your sprayer working at its best.
  3. Maintenance and Reliability:

    • Genuine parts are manufactured to meet the highest standards, ensuring consistent performance and reliability.
    • Regular maintenance, including the use of genuine replacement parts, is crucial for maximizing the lifespan of your sprayer.
    • By following recommended maintenance practices and using genuine parts, you can enjoy a reliable and long-lasting airless paint sprayer.

Importance of Premium Parts

Investing in high-quality replacement parts for your airless paint sprayer is essential for durability and optimal performance. Premium parts offer several benefits. Firstly, they are designed to fit and function perfectly, eliminating leaks or malfunctions that can occur with cheaper alternatives. Additionally, premium parts have a longer lifespan, reducing the need for frequent replacements. When choosing replacement parts, consider reputable manufacturers who offer warranties for their products. Ensure that the replacement parts are compatible with your specific sprayer model. Using genuine parts is crucial to maintain performance and reliability. By investing in high-quality replacement parts, you can minimize repairs, extend the lifespan of your sprayer, and ultimately save time and money in the long run.

Reputable Manufacturers for Replacement Parts

Look for warranties provided by reputable manufacturers to ensure the quality and reliability of replacement parts for your airless paint sprayer.

When it comes to finding reliable suppliers for replacement parts, here are a few things to consider:

Advertisement
  • Warranty coverage: Reputable manufacturers often offer warranties on their replacement parts, giving you peace of mind and assurance that the parts are of high quality and built to last.

  • Reputation: Look for manufacturers with a strong reputation in the industry. Reliable suppliers are known for producing top-notch replacement parts that meet or exceed industry standards.

  • Compatibility: Ensure that the replacement parts you choose are compatible with your specific airless paint sprayer model. Reputable manufacturers provide detailed information about compatibility to help you make the right choice.

Timely Replacement of Worn-Out Parts

To ensure optimal performance, regularly replacing worn-out parts is crucial for keeping your airless paint sprayer running smoothly. Timely replacement of worn-out parts is essential for the proper functioning of your sprayer and to avoid any potential breakdowns during your painting projects.

By replacing worn-out parts in a timely manner, you can prevent further damage to your sprayer and ensure its longevity. Not only does timely replacement of parts help maintain the performance of your sprayer, but it also has numerous maintenance benefits. It reduces the risk of malfunctions, leaks, and inefficient paint application. Additionally, it minimizes the need for costly repairs and downtime, saving you both time and money.

Cost and Time Savings With Proper Maintenance

To ensure maximum longevity and performance from your airless paint sprayer, regular maintenance is crucial. By investing a little time and effort into proper care, you can save yourself both money and time in the long run.

Here are the key reasons why regular maintenance is important and the benefits of investing in a protective case:

  1. Importance of Regular Maintenance:

    • Prevents clogs and blockages, ensuring smooth operation and consistent spray patterns.
    • Reduces friction, wear, and corrosion, extending the lifespan of your sprayer.
    • Protects the sprayer from cold-related issues, such as freezing or damage to seals and valves.
  2. Benefits of Investing in a Protective Case:

    • Shields the sprayer from accidental drops, bumps, and impacts.
    • Guards against dust, moisture, and other environmental factors that can damage critical components.
    • Provides convenient storage and organization for accessories and spare parts.

Frequently Asked Questions

How Often Should I Clean the Spray Gun After Each Use?

To ensure optimal performance, clean the spray gun after each use. This is a crucial step in airless paint sprayer maintenance. Use a cleaning solution recommended by the manufacturer and thoroughly clean all components, including the nozzle and filter.

Regular cleaning prevents clogs and blockages, ensuring smooth operation. By following best practices for cleaning your airless paint sprayer, you can maximize its lifespan and avoid costly repairs.

Advertisement

Can I Use Any Type of Oil for Lubricating the Airless Paint Sprayer?

Yes, you can use any type of oil for lubricating your airless paint sprayer. However, it is important to use the correct oil recommended by the manufacturer for optimal performance and lifespan.

Using the wrong type of oil can lead to friction, wear, and corrosion, causing damage to the internal components. Avoid common mistakes in lubricating airless paint sprayers by consulting the manufacturer’s guidelines and using lightweight mineral-based oil designed for high-pressure applications.

Regularly check the oil level and refill as needed to ensure smooth operation.

How Frequently Should I Check and Clean the Filters?

To extend the lifespan of your airless paint sprayer, it’s important to regularly check and clean the filters. This ensures optimal performance and prevents clogs and blockages. The frequency of checking and cleaning the filters depends on the usage and the type of paint being sprayed.

However, as a general guideline, it is recommended to check and clean the filters after every use or at least once a week for heavy usage. Proper maintenance of the filters will help maximize the lifespan of your airless paint sprayer.

Advertisement

What Are the Benefits of Using High-Quality Replacement Parts?

Using high-quality replacement parts for your airless paint sprayer offers a multitude of benefits. These durable parts ensure proper functionality, eliminating leaks and malfunctions. By investing in premium parts, you can reduce the need for frequent repairs and project downtime.

This not only saves you time but also money in the long run. High-quality replacement parts extend the lifespan of your sprayer, providing reliable performance and enhancing efficiency. So, opt for reputable manufacturers and genuine parts to maximize the durability and longevity of your airless paint sprayer.

How Can Proper Maintenance of the Airless Paint Sprayer Save Me Money and Time in the Long Run?

Proper maintenance of your airless paint sprayer can save you both time and money in the long run. By ensuring proper storage, you protect the sprayer from damage caused by extreme temperatures, moisture, and dust.

Regular maintenance, such as cleaning the spray gun and filters, prevents clogs and blockages that can lead to costly repairs. Using high-quality replacement parts enhances efficiency and reduces project downtime.

Taking these steps will maximize the lifespan of your airless paint sprayer and provide reliable performance.

Advertisement

Conclusion

So there you have it, with these essential tips, you can maximize the lifespan of your airless paint sprayer and enjoy its reliable performance for years to come.

By properly storing and protecting your sprayer, cleaning it thoroughly after each use, and regularly maintaining the filters and system, you can ensure its longevity.

Investing in high-quality replacement parts from reputable manufacturers and timely replacements of worn-out parts will also contribute to cost and time savings.

So take care of your airless paint sprayer and witness the benefits of proper maintenance firsthand.

Advertisement

Continue Reading

Paint Sprayer Maintenance and Troubleshooting

Painting Brick Walls With an Airless Sprayer: a Complete Guide

Published

on

By

An image showcasing an airless sprayer in action, with a skilled painter effortlessly coating a brick wall with smooth, even strokes

Painting brick walls with an airless sprayer can bring them back to life. This comprehensive guide walks you through every step of the process, from preparing the surface to ensuring an even coat.

With the right tools and materials, including a high-quality primer, you can enhance the durability and resistance of your brick walls. Expert tips and safety precautions ensure a smooth finish and a transformation that will leave your walls looking brand-new.

Get ready to bring new vibrancy and timeless beauty to your space.

Key Takeaways

  • Preparation and surface cleaning is essential before painting brick walls with an airless sprayer.
  • Selecting the right paint color and gathering the necessary materials and equipment are crucial for a successful painting project.
  • Cleaning and maintaining the painted brick walls regularly will help them stay in good condition.
  • Priming the walls with a high-quality primer designed for masonry surfaces enhances adhesion, durability, and resistance to moisture and alkali.

Surface Preparation: Tools and Cleaning

The homeowner gathers the necessary tools, including a wire brush, scraper, and power washer, to remove loose paint and dirt from the brick walls. Acquiring these tools is essential for proper cleaning techniques.

Advertisement

Using the wire brush and scraper, the homeowner meticulously removes any loose paint and dirt from the surface of the brick walls. After that, a power washer is used to thoroughly clean the walls, ensuring a clean and smooth surface for painting.

It is important to allow the walls to dry completely before proceeding to the next step. By acquiring the necessary tools and following proper cleaning techniques, the homeowner ensures a clean and well-prepared surface for painting the brick walls.

Selecting the Right Paint Colors and Materials

When selecting paint colors and materials, it is important to consider the desired aesthetic and gather the necessary tools. Choosing paint colors that complement the overall look and feel of the space is crucial for achieving the desired result.

Additionally, having the right materials is essential for a successful painting project. Following a step-by-step guide for surface preparation is also crucial. This includes gathering tools such as a wire brush, scraper, and power washer. It is important to remove loose paint and dirt from the surface using the wire brush and scraper, and then thoroughly clean the area with a power washer.

Once the surface is clean and dry, you can proceed with choosing the appropriate paint color and gathering the necessary materials and equipment like paint, primer, drop cloth, painters tape, and sandpaper.

Advertisement

Essential Equipment for Painting Brick Walls

To achieve a flawless result, one must ensure they have the essential equipment necessary for painting brick walls. This includes proper airless sprayer maintenance and choosing the right paintbrush.

Here are three key items to consider:

  • Well-maintained airless sprayer: Regularly clean and inspect the sprayer to ensure it functions properly. This will ensure consistent paint application and prevent clogging or uneven spraying.

  • High-quality paintbrush: Choose a brush that is suitable for masonry surfaces and the type of paint being used. A good brush will provide smooth and even coverage, allowing for precise detailing and edges.

  • Safety equipment: Protect yourself while painting by wearing safety goggles, gloves, and a mask to prevent inhalation of fumes or particles.

Achieving Even Coverage With an Airless Sprayer

Using an airless sprayer ensures even coverage when painting brick walls. This method is great for achieving consistent results.

Advertisement

However, there are some common issues that may arise when using an airless sprayer. One common issue is overspray, which occurs when the paint is applied too heavily or the sprayer is held too close to the surface. To troubleshoot this issue, adjust the spray nozzle to a narrower setting and maintain a consistent distance from the wall.

Another common issue is clogging of the sprayer tip due to debris or dried paint. To avoid this, strain the paint before pouring it into the sprayer and clean the tip regularly during the painting process.

Proper Technique: Starting From the Top

Starting from the top ensures that the paint is applied evenly and avoids drips or streaks on the brick walls. This technique allows for better control and coverage, ensuring a professional-looking finish.

Advertisement

When starting at the bottom, gravity can cause the paint to run down the wall, leading to uneven application and potential drips. By beginning at the top, the paint can be evenly distributed downwards, avoiding any potential issues.

However, it is important to troubleshoot common issues that may arise when painting brick walls with an airless sprayer. These issues can include clogging of the sprayer nozzle, uneven spray pattern, or overspray.

Cleaning and Maintenance Tips for Painted Brick Walls

Regular cleaning and maintenance is essential for preserving the appearance and longevity of painted brick walls. To keep them looking their best, it’s important to use proper cleaning techniques and know how to remove stubborn stains.

Light dirt can be easily removed with warm water and dish soap. Gently scrub the walls with a soft-bristle brush to avoid damaging the paint.

For stubborn stains, create a solution of white vinegar and water and treat the affected areas. Rinse the walls with clean water to remove any residue.

Advertisement

The Importance of Priming Masonry Surfaces

Priming masonry surfaces is crucial for enhancing adhesion, durability, and resistance to moisture and alkali. A high-quality primer designed for masonry surfaces is essential for paint longevity and a successful painting project.

Without proper priming, paint may not adhere well to the surface, leading to peeling and chipping over time. Primer acts as a barrier, preventing moisture and alkali from seeping into the paint, which can cause it to deteriorate.

However, common issues with primer can occur, such as poor coverage, uneven application, or improper drying. To troubleshoot these problems, ensure the walls are clean and dry before applying primer, use the recommended primer for masonry surfaces, and allow sufficient drying time.

Drying Time for Primer Application

After applying primer to the masonry surfaces, it is important to allow sufficient drying time of approximately 24 hours. This drying time is crucial to ensure that the primer properly adheres to the surface and creates a strong foundation for the paint.

It also allows the primer to fully cure, enhancing its durability and resistance to moisture and alkali. While waiting for the primer to dry, it is essential to protect the surface from any potential damage or contamination.

Advertisement

Additionally, it is worth considering alternative priming methods, such as using a tinted primer or a primer/sealer combination, which can provide additional benefits like improved color coverage or added protection against stains.

Advantages of Primer: Adhesion, Durability, and Resistance

Applying a high-quality primer to masonry surfaces ensures strong adhesion, increased durability, and enhanced resistance to moisture and alkali. The advantages of using primer go beyond these benefits and extend to cost savings, as it helps paint adhere better, reducing the need for multiple coats.

Additionally, primer improves the overall appearance and finish of the painted surface, giving it a smooth and professional look. When it comes to application techniques, primer can be easily applied using a brush, roller, or sprayer, making it suitable for different preferences and skill levels.

Its quick drying time allows for efficient completion of painting projects. Overall, using primer before painting brick walls with an airless sprayer is a wise choice, offering numerous advantages in terms of cost and application techniques.

Expert Tips for a Smooth Paint Finish

To achieve a smooth paint finish on the brick walls, homeowners should consider using a high-quality paint roller for even coverage. This is one of the most important tips for paint application on brick surfaces.

Advertisement

Another common mistake to avoid is using a low-quality roller, which can leave streaks and uneven texture on the walls. It is also essential to choose the right roller nap thickness for the type of brick surface. A thicker nap is typically recommended for rough or textured brick, while a thinner nap works well for smooth brick walls.

Additionally, homeowners should apply the paint in thin, even coats to prevent drips and runs. Taking these tips into consideration can help homeowners achieve a professional-looking smooth paint finish on their brick walls.

Safety Precautions When Using an Airless Sprayer

Using an airless sprayer requires homeowners to wear protective goggles, gloves, and a respirator mask to ensure their safety. The powerful spray of the airless sprayer can create a fine mist of paint particles that can be harmful if inhaled or make contact with the eyes or skin.

To maintain the airless sprayer, regular cleaning is essential to prevent clogs and ensure proper functioning. Troubleshooting common issues like uneven spray pattern or loss of pressure can be resolved by checking for clogs, adjusting the nozzle, or cleaning the filters.

Regular maintenance and troubleshooting will help homeowners achieve a smooth and efficient painting process with their airless sprayer, allowing them to achieve professional-looking results.

Advertisement

The Transformation: Freshly Painted Brick Walls

After taking the necessary safety precautions when using an airless sprayer, the transformation of freshly painted brick walls can be truly remarkable. The impact of color choice cannot be underestimated, as it can completely change the look and feel of a space. Whether it’s a timeless neutral or a bold, vibrant color, a fresh coat of paint can breathe new life into a room. In addition to the aesthetic benefits, there are also practical benefits to consider. Professional painting services can ensure a high-quality finish, saving time and effort for homeowners. They have the expertise to properly prepare the surface, choose the right materials, and apply the paint evenly. The result is a beautifully transformed space that adds value to the home.

The Impact of Color Choice Benefits of Professional Painting Services
Completely changes the look High-quality finish
and feel of a space Saves time and effort
Timeless or vibrant options Expertise in surface preparation
Adds value to the home Proper material selection
Even application of paint

Frequently Asked Questions

How Long Does It Typically Take for Brick Walls to Dry Completely After Cleaning?

Brick walls typically take some time to dry completely after cleaning. The drying time can depend on factors such as weather conditions and the level of humidity. However, using the best cleaning methods for brick walls, such as using a power washer and allowing the walls to air dry, can help expedite the drying process.

It is important to ensure that the walls are thoroughly dry before proceeding with any painting or priming to achieve the best results.

Can I Use a Regular Primer on Brick Walls or Is There a Specific Primer for Masonry Surfaces?

When painting brick walls, it’s important to use the right primer for optimal results. While a regular primer may work on some surfaces, there are specific primers designed for masonry surfaces that are recommended for brick walls.

These masonry primers are specially formulated to enhance adhesion, durability, and resistance to moisture and alkali. By choosing the appropriate primer for brick walls, you can ensure better paint adherence and longevity of the paint job.

Advertisement

How Often Should Painted Brick Walls Be Cleaned and Maintained?

Painted brick walls should be cleaned and maintained regularly to keep them looking their best. The cleaning frequency will depend on the level of dirt and grime buildup, but generally, it is recommended to clean them at least once or twice a year.

To maintain the painted surface, homeowners should use warm water and dish soap to remove light dirt and gently scrub the walls with a soft-bristle brush. Stubborn stains can be treated with a solution of white vinegar and water.

Regular cleaning and maintenance will help preserve the appearance and longevity of the painted brick walls.

Is It Necessary to Apply Multiple Coats of Paint for a Smooth Finish?

Applying multiple coats of paint is necessary for achieving a smooth finish on brick walls. Using a roller or brush may not provide the same level of smoothness as an airless sprayer.

The multiple coats allow for better coverage and a more uniform appearance. The airless sprayer ensures even distribution of paint, resulting in a flawless finish.

Advertisement

Are There Any Potential Risks or Dangers Associated With Using an Airless Sprayer for Painting Brick Walls?

Using an airless sprayer for painting brick walls can pose potential risks and dangers. The high-pressure nature of the sprayer can create a fine mist of paint particles, which can be harmful if inhaled. Additionally, there is a risk of overspray, which can result in paint getting on unintended surfaces.

It is important to take safety precautions, such as wearing protective gear and properly ventilating the area. Proper training and experience with using an airless sprayer is also recommended to minimize these risks.

Conclusion

In conclusion, painting brick walls with an airless sprayer can provide a fresh and updated look to any space. It is important to properly prepare the surface by cleaning and removing loose paint and dirt.

Using the right paint colors and materials, along with a high-quality primer, will ensure long-lasting adhesion, durability, and resistance to moisture and alkali. Following the proper technique and safety precautions when using an airless sprayer is crucial.

An interesting statistic to consider is that painting brick walls can increase a home’s value by up to 5%.

Advertisement

Continue Reading

Paint Sprayer Maintenance and Troubleshooting

Setting Up and Cleaning the Graco 390 Airless Paint Sprayer

Published

on

By

An image capturing the step-by-step process of setting up and cleaning the Graco 390 Airless Paint Sprayer

It is essential to properly prepare and maintain the Graco 390 Airless Paint Sprayer to achieve a high-quality paint job. This paint sprayer is efficient and easy to use thanks to its simple setup and user-friendly features. Understanding how to adjust the spray settings using the pressure control knob, spray gun, and hose will help users meet their specific painting requirements.

Additionally, proper cleaning and maintenance ensure the longevity of the paint sprayer. In this article, we will guide you through the step-by-step process of setting up and cleaning the Graco 390 Airless Paint Sprayer, providing you with the knowledge and confidence to achieve outstanding paint results.

Key Takeaways

  • Inspect all equipment for good condition before assembly
  • Familiarize yourself with adjusting spray pressure for desired coverage
  • Regularly clean and maintain the paint sprayer, including the spray gun
  • Troubleshoot common issues such as paint viscosity, spray pattern, and clogs in the spray tip

Gathering and Unboxing the Necessary Equipment

The user gathers and unboxes the necessary equipment for setting up the Graco 390 Airless Paint Sprayer. Before starting the setup process, it is important to inspect all the equipment to ensure that everything is in good condition.

This includes checking the paint sprayer unit itself, as well as the spray gun, hose, and any additional accessories that may have been included. The unboxing process involves carefully opening the packaging and removing each component from its protective wrapping. It is important to handle the equipment with care to avoid any damage.

Advertisement

Once all the equipment has been unboxed, the user can proceed to the next step of assembling the components and getting ready for painting.

Assembling the Graco 390 Airless Paint Sprayer

To assemble the Graco 390 Airless Paint Sprayer, simply follow the instructions provided by the manufacturer.

Before starting the assembly process, inspect the components of the sprayer to ensure they are in good condition and nothing is missing. This includes checking the spray gun, hose, and pressure control knob.

Once the inspection is complete, understand how the pressure control works. The pressure control knob allows users to adjust the pressure of the paint being sprayed, which affects the coverage and finish of the paint job. Familiarize yourself with this feature to achieve optimal results with your paint sprayer.

Overall, assembling the Graco 390 Airless Paint Sprayer is a straightforward process that can be easily accomplished by following the manufacturer’s instructions.

Advertisement

Preparing the Surface and Adjusting Spray Settings

After gathering the necessary equipment and materials, the user inspects the surface and cleans it thoroughly before adjusting the spray settings for desired coverage. This is an important step in ensuring a smooth and even paint application.

Preparing the surface involves removing any dirt, dust, or debris that may interfere with the paint adhering properly. This can be done by using a broom, vacuum cleaner, or a damp cloth, depending on the type of surface.

Once the surface is clean, the user can then choose the paint color that best suits their preference and the overall aesthetic they want to achieve. It is important to consider factors such as lighting, room size, and personal taste when selecting paint colors.

Advertisement

Cleaning and Maintaining the Graco 390 Airless Paint Sprayer

In order to ensure optimal performance, it is essential for the user to regularly clean and maintain their Graco 390 Airless Paint Sprayer. Cleaning techniques and a recommended maintenance routine are necessary to keep the sprayer in good working condition.

After each use, it is important to disassemble and clean the spray gun thoroughly. This includes removing any remaining paint and debris from the gun’s components. Additionally, the paint sprayer system should be flushed with a cleaning solution to remove any paint residue.

Proper storage and maintenance of the sprayer is also crucial. This involves storing the sprayer in a clean and dry area, and inspecting it regularly for any signs of wear or damage.

Troubleshooting Common Issues With the Paint Sprayer

Advertisement

The user can check the spray tip for clogs and ensure that the paint viscosity and spray pattern are correct in order to troubleshoot common issues with the paint sprayer. Here are some steps to follow in order to identify and fix paint spray pattern issues:

  1. Check paint viscosity: Make sure the paint is properly mixed and thinned according to the manufacturer’s instructions. If the paint is too thick or too thin, it can affect the spray pattern.

  2. Inspect the spray pattern: Use a test board or piece of cardboard to spray a test pattern. Look for any irregularities, such as streaks, splotches, or uneven coverage. This can indicate issues with the spray tip or pressure settings.

  3. Adjust settings and clean the spray tip: If the spray pattern is not satisfactory, adjust the pressure control knob and clean the spray tip to remove any clogs or debris. A clean spray tip and proper pressure settings are essential for a consistent and even spray pattern.

Frequently Asked Questions

How Long Does It Take to Assemble the Graco 390 Airless Paint Sprayer?

Assembling time for the Graco 390 Airless Paint Sprayer depends on the user’s familiarity with the product. On average, it takes about 10-15 minutes to fully assemble the paint sprayer.

The required tools for assembly include a wrench and screwdriver. Users should carefully follow the instructions provided in the manual to ensure proper assembly and functionality of the sprayer.

What Is the Warranty Period for the Graco 390 Airless Paint Sprayer?

The warranty period for the Graco 390 Airless Paint Sprayer is an important aspect to consider. It provides peace of mind and reassurance to the user.

Additionally, knowing the assembly time required for the paint sprayer can help with planning and scheduling painting projects effectively.

Advertisement

These factors, along with the product’s features and performance, contribute to the overall satisfaction and convenience of using the Graco 390 Airless Paint Sprayer.

Can the Graco 390 Airless Paint Sprayer Be Used With Different Types of Paint?

The Graco 390 Airless Paint Sprayer is compatible with various types of paint, including latex, acrylic, and oil-based paints. This versatility allows users to tackle different painting projects with ease.

The advantages of using the Graco 390 Airless Paint Sprayer with different types of paint include efficient and even coverage, reducing the need for multiple coats. Its high-pressure system ensures excellent paint atomization, resulting in a professional finish.

Overall, the Graco 390 Airless Paint Sprayer is a reliable choice for any painting job.

What Is the Recommended Cleaning Solution for the Graco 390 Airless Paint Sprayer?

The recommended cleaning solution for the Graco 390 Airless Paint Sprayer is a mixture of warm water and a mild detergent. This solution effectively removes any residual paint or debris from the sprayer’s components.

Advertisement

It is important to thoroughly clean the spray gun, hose, and other parts after each use to maintain optimal performance. By following proper cleaning techniques and using the recommended cleaning solution, users can ensure the longevity and efficiency of their Graco 390 Airless Paint Sprayer.

How Often Should the Spray Gun of the Graco 390 Airless Paint Sprayer Be Cleaned?

The spray gun of the Graco 390 Airless Paint Sprayer should be cleaned regularly to ensure optimal performance. Cleaning the spray gun helps troubleshoot common issues such as clogs and improper spray patterns.

It is recommended to clean the spray gun after each use to prevent paint residue from building up and affecting the quality of the spray. By maintaining the spray gun properly, users can extend the lifespan of their Graco 390 Airless Paint Sprayer and achieve consistent, professional results.

Conclusion

In conclusion, setting up and cleaning the Graco 390 Airless Paint Sprayer is an essential task for achieving professional paint finishes. Following the step-by-step guide and familiarizing oneself with the equipment ensures smooth operation and efficient painting.

A clean and well-maintained paint sprayer saves time and money in the long run. It also provides exceptional painting results. Embrace the irony of the tedious cleaning process, knowing that it is the key to effortless and stunning paint jobs.

Advertisement

Continue Reading

Trending

Copyright © 2024 Paint Sprayer Zone Affiliate disclaimer As an affiliate, we may earn a commission from qualifying purchases. We get commissions for purchases made through links on this website from Amazon and other third parties.