Connect with us

Paint Sprayer Maintenance and Troubleshooting

The Shelf Life of Oil-Based Paint in an Airless Sprayer: Best Practices and Safety Tips

Published

on

An image showcasing an airless sprayer filled with oil-based paint

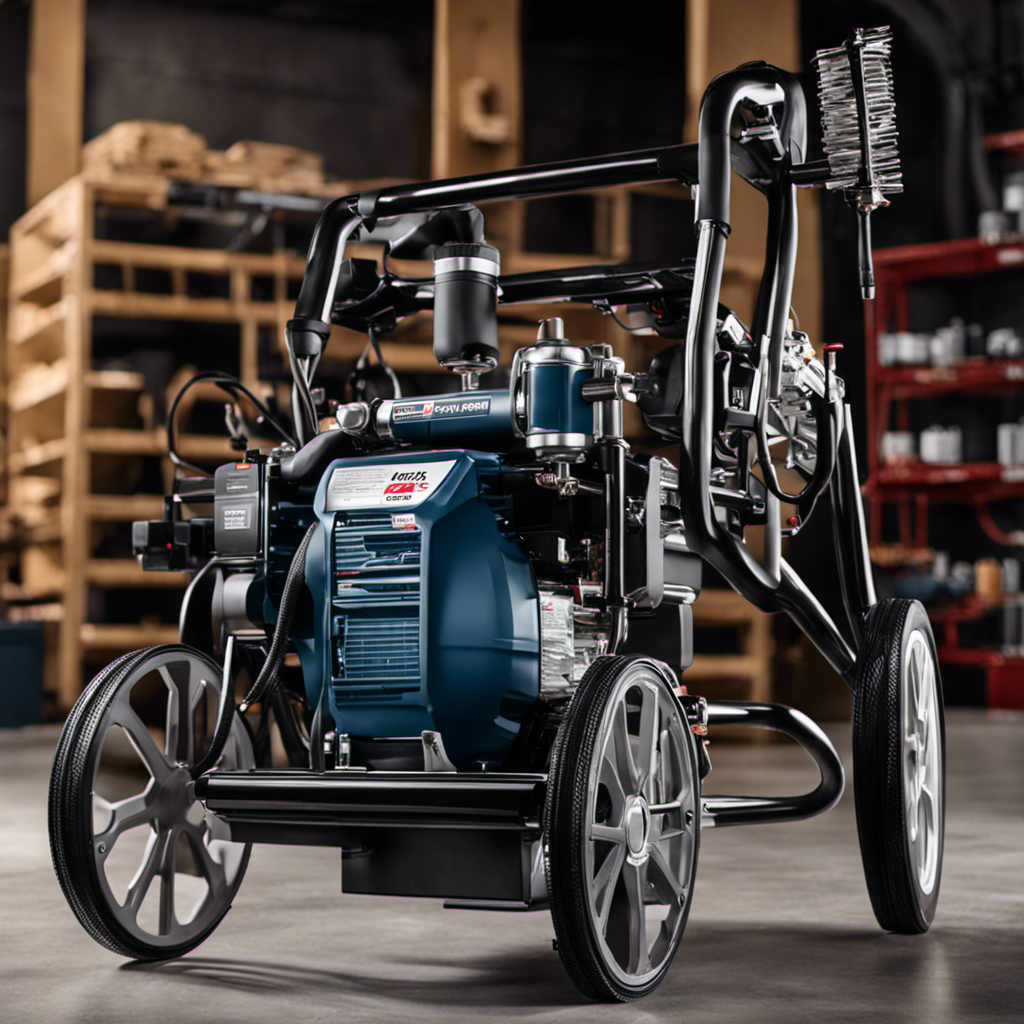
When using an airless sprayer with oil-based paint, it is important to be mindful of its limited effectiveness. Improper storage can result in blockages, uneven spray patterns, and inadequate coverage. Prolonged exposure to oil-based paint can release harmful fumes, which can be detrimental to one’s health.

To ensure the longevity of the paint, it is crucial to follow best practices and safety tips. This article explores the properties of oil-based paint, the importance of proper storage and handling, factors affecting drying time, risks of leaving paint in the sprayer, health hazards, and safety precautions for working with oil-based paint.

Key Takeaways

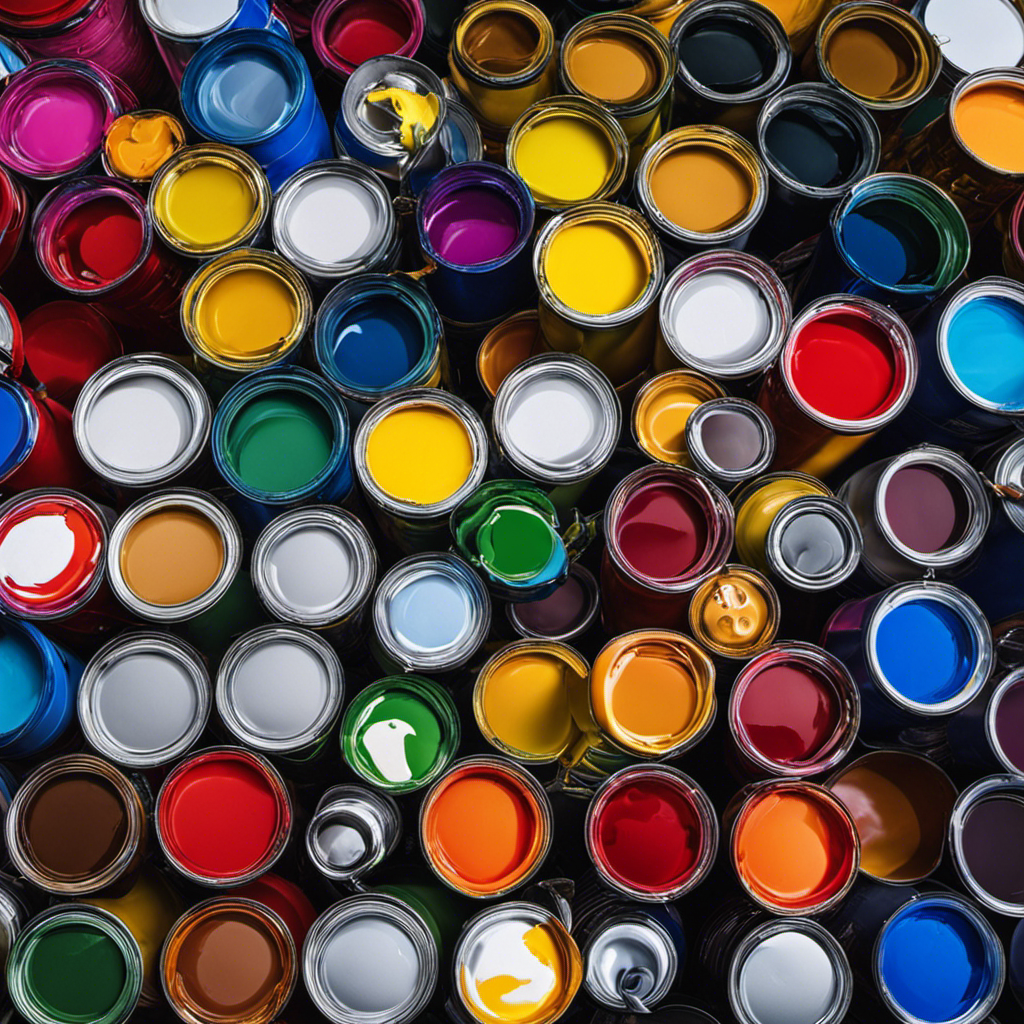
  • Oil-based paint has a slow drying time and is resistant to moisture, making it suitable for high-humidity environments.
  • Factors such as temperature and length of time in the sprayer can affect the shelf life of oil-based paint.
  • Leaving oil-based paint in the sprayer for too long can lead to clogging, health hazards, and compromised paint quality.
  • It is recommended to not leave oil-based paint in the sprayer for more than 24 hours and to properly clean and store the sprayer after each use.

Understanding the Properties of Oil-Based Paint

Oil-based paint is known for its durability and excellent coverage, making it a popular choice for various painting projects.

Understanding paint application techniques is crucial when working with oil-based paint to prevent paint waste and overspray. Unlike water-based paints, oil-based paint has a slow drying time, which allows for smoother application and better blending. This property also makes it resistant to moisture, making it suitable for high-humidity environments or surfaces prone to moisture damage.

Advertisement

To prevent paint waste and overspray, it is important to apply oil-based paint in thin, even coats, using the appropriate tools such as brushes or rollers. Additionally, taking proper precautions such as covering surrounding areas and using masking tape can help minimize overspray and ensure efficient paint application.

The Importance of Proper Storage and Handling

Proper storage and handling are crucial for maintaining the quality and effectiveness of oil-based paint in an airless sprayer. The importance of regular maintenance cannot be overstated when it comes to preventing paint waste.

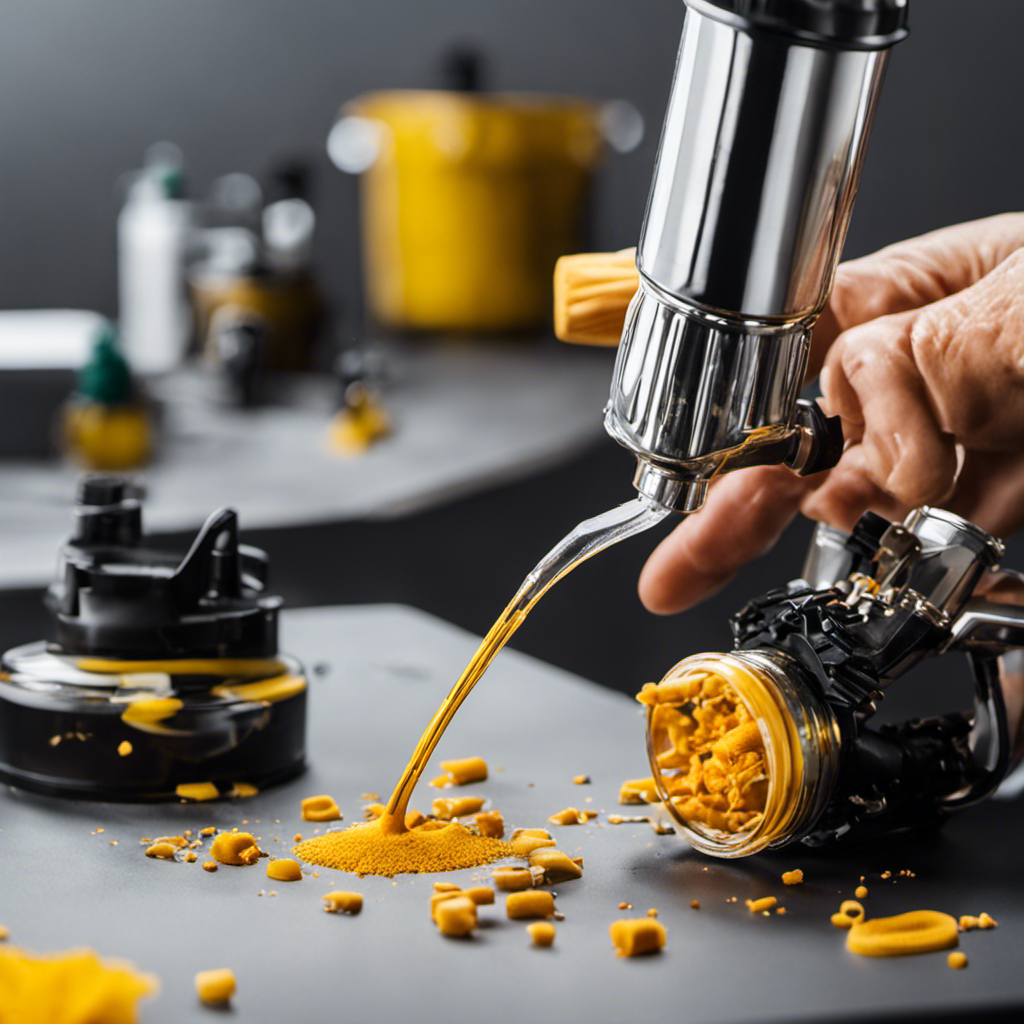
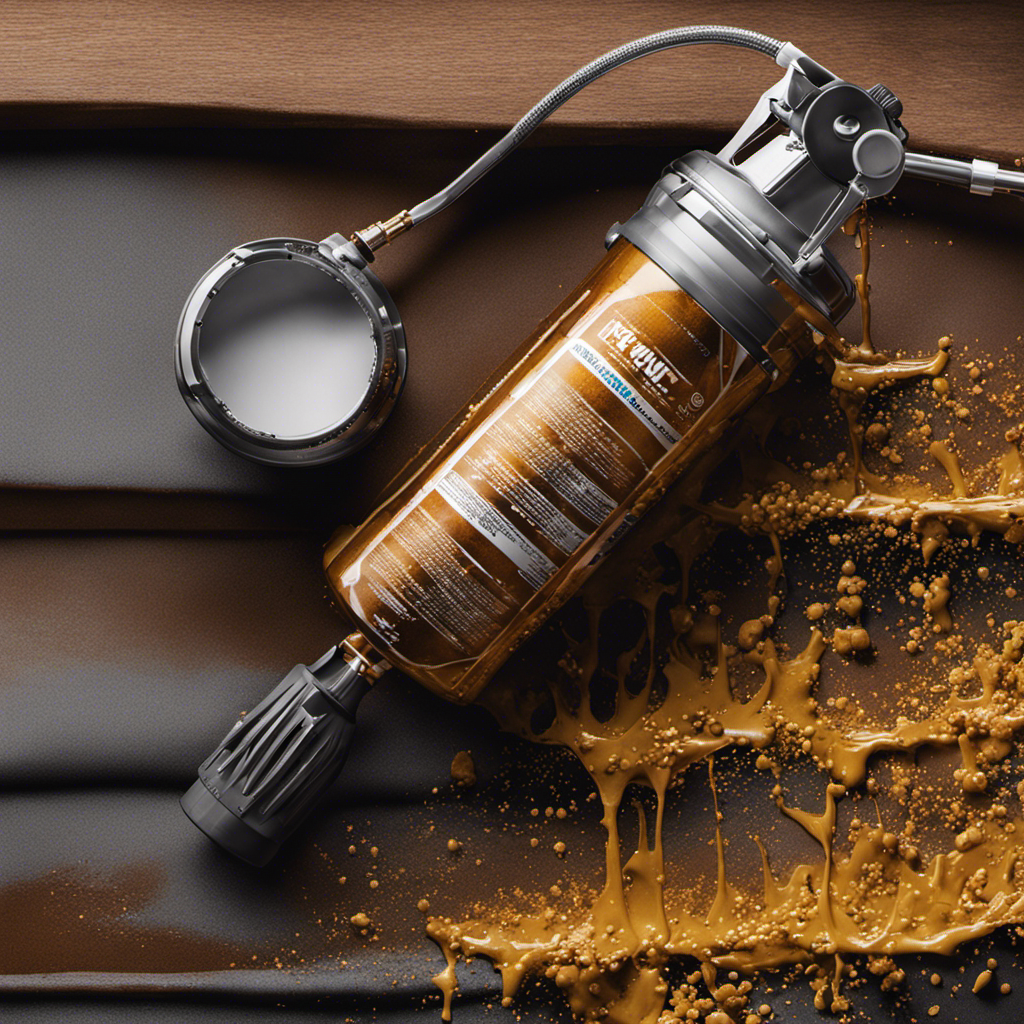
When oil-based paint is left in the sprayer for too long, it can dry out, harden, and clog the nozzle, leading to uneven spray patterns and poor coverage. Additionally, the paint can separate and settle, compromising its overall quality.

To prevent these issues, it is recommended to not leave oil-based paint in the sprayer for more than 24 hours. After this time, the sprayer should be cleaned thoroughly to remove any remaining paint.

Proper cleaning and storage techniques, such as using airtight containers and storing the paint in a cool, dry place, are essential for maintaining the sprayer’s longevity and performance.

Advertisement

Factors Affecting the Drying Time of Oil-Based Paint

Humidity and temperature are key factors that influence how quickly oil-based paint dries. The drying time of oil-based paint can be affected by various factors, including humidity and temperature.

High humidity can slow down the drying process, causing the paint to take longer to dry. In such conditions, it is recommended to use dehumidifiers or air conditioning to create an optimal environment for faster drying.

On the other hand, higher temperatures can accelerate the drying time of oil-based paint, while lower temperatures can slow it down. It is important to ensure that the temperature is within the recommended range for optimal drying.

Advertisement

In addition to humidity and temperature, application techniques also play a role in the drying time of oil-based paint. Proper blending and application techniques can help promote faster drying and prevent uneven drying or streaks. Brushing or rolling the paint in thin, even coats is recommended for better results.

Risks of Leaving Oil-Based Paint in the Sprayer

Leaving the paint in the sprayer for an extended period can result in clogging and poor coverage. It is important to be aware of the risks of prolonged exposure to oil-based paint and the health hazards of fumes.

Stagnant paint can lead to blockages in the sprayer nozzle, causing uneven spray patterns and compromised results. Additionally, oil-based paint contains harmful chemicals that can emit fumes when exposed for too long. Breathing in these fumes can pose serious health risks, including respiratory irritation and long-term damage.

To prevent these risks, it is recommended to not leave oil-based paint in the sprayer for more than 24 hours. Thoroughly clean the sprayer after each use and store the paint in a cool, dry place to maintain its quality and prevent health hazards.

Health Hazards of Exposed Oil-Based Paint

Advertisement

Exposure to fumes emitted by oil-based paint can pose serious health risks, including respiratory irritation and long-term damage.

  • Inhalation of these fumes can lead to immediate symptoms such as coughing, wheezing, and shortness of breath. Prolonged exposure may result in chronic respiratory conditions or even lung cancer.

  • The chemicals present in oil-based paint, such as volatile organic compounds (VOCs), can also cause eye and skin irritation upon contact.

  • Individuals with pre-existing respiratory conditions, such as asthma or allergies, are especially susceptible to the harmful effects of these fumes.

To minimize the health risks associated with oil-based paint:

  • Ensure proper ventilation by opening windows or using fans when working with the paint.

  • Wear protective gear, such as gloves and a respirator, to prevent direct contact and inhalation of fumes.

  • Clean up any spills promptly and dispose of paint containers properly.

How Extended Storage Can Compromise Paint Quality

Extended storage of oil-based paint can lead to a deterioration in its quality over time. The effects of extended storage can result in paint quality degradation, compromising the overall performance and appearance of the paint.

When oil-based paint is stored for long periods, it can begin to separate, settle, and thicken, making it difficult to achieve a smooth and even application. Additionally, exposure to air and moisture during extended storage can cause the paint to oxidize, resulting in a change in color and texture.

Advertisement

To prevent these issues, it is essential to store oil-based paint in a cool, dry place and seal the container tightly to minimize air exposure. Regularly inspect the paint for any signs of contamination or thickening, and dispose of the paint if any changes are noticed.

Recommended Maximum Duration for Paint in the Sprayer

Proper maintenance and timely cleaning are crucial for maintaining the efficiency and longevity of oil-based paint in the sprayer. To ensure optimal performance, follow these recommended cleaning techniques and be aware of the effects of temperature on paint drying time.

  • Clean the sprayer thoroughly after each use using a solvent recommended by the paint manufacturer. This removes any residual paint and prevents clogging or contamination.

  • Store the paint in a cool, dry place to maintain its quality. Extreme temperatures can affect the drying time of the paint, so it’s important to keep it in a climate-controlled environment.

  • Avoid leaving oil-based paint in the sprayer for more than 24 hours. Leaving paint in the sprayer for extended periods can lead to drying out, hardening, and reduced efficiency.

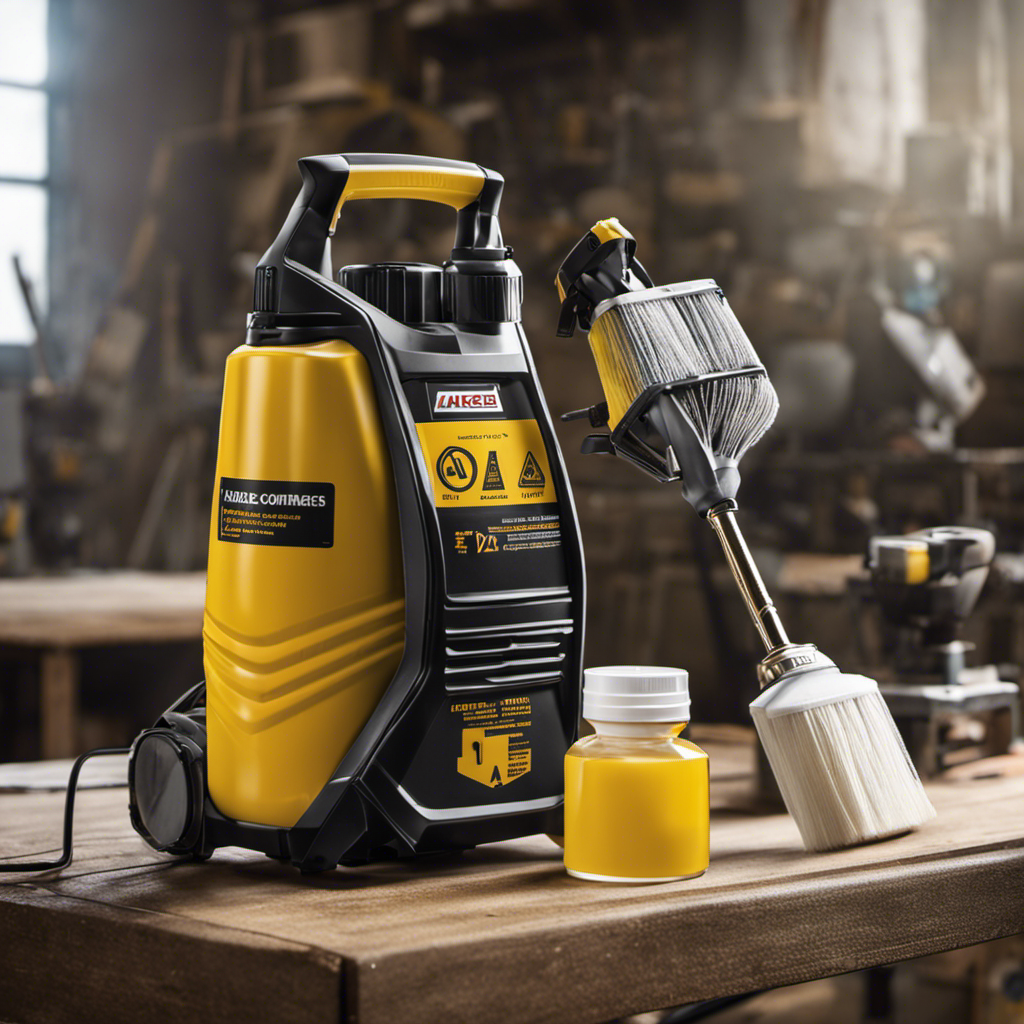
Best Practices for Cleaning the Airless Sprayer

After discussing the recommended maximum duration for leaving paint in the sprayer, the focus now shifts to the best practices for cleaning the airless sprayer.

Proper maintenance and cleaning are crucial to ensuring the longevity and performance of the equipment. Neglecting this aspect can lead to common sprayer maintenance issues such as clogging, poor spray patterns, and reduced efficiency.

The best cleaning techniques involve using a solvent recommended by the paint manufacturer to thoroughly clean the sprayer after each use. This helps remove any leftover paint and prevent potential damage.

Advertisement

Additionally, it is important to check for signs of contamination or thickening periodically. If any changes are noticed, the paint should be disposed of properly.

Choosing the Right Containers for Paint Storage

Choosing the right containers for paint storage is essential to maintain its quality and prevent air exposure and oxidation. When selecting containers for paint storage, consider the following:

  • Material: Opt for metal or glass containers, as they provide better protection against air exposure and oxidation compared to plastic containers.
  • Airtight lids: Ensure that the containers have airtight lids to create a seal and prevent air from entering the container.
  • Size: Use containers that are appropriate for the amount of paint you need to store. Avoid using oversized containers, as they can lead to excess air exposure.

Proper ventilation in the workspace is also crucial when storing paint. Make sure the area has adequate airflow to prevent the accumulation of fumes. This can be achieved by opening windows or using exhaust fans.

Taking these measures will help preserve the quality of the paint and create a safe working environment.

Maintaining a Cool and Dry Environment for Paint

Maintaining a cool and dry environment is crucial for preserving the quality of the paint in storage. Temperature control is essential to prevent the paint from deteriorating and maintaining its optimal consistency. Extreme heat or cold can cause the paint to thicken or separate, leading to clogs and poor spray patterns.

Additionally, moisture buildup can affect the paint’s adhesion and result in mold or mildew growth. To prevent these issues, store the paint in a climate-controlled area with a temperature range of 50-77°F (10-25°C). Avoid storing paint in areas with high humidity or where condensation can occur.

Advertisement

This can be achieved by using dehumidifiers or moisture-absorbing materials in the storage space. Regularly inspect the area for any signs of moisture and address them promptly to maintain the paint’s integrity.

Signs of Contamination or Thickening in Oil-Based Paint

Contamination or thickening in oil-based paint can be identified by changes in texture, such as clumps or lumps, and the presence of foreign particles. To prevent contamination and ensure the quality of your paint, it is important to be able to identify these signs. Here are three key signs to look out for:

  • Clumps or Lumps: If you notice any clumps or lumps in the paint, it may indicate contamination or thickening. These abnormalities can affect the smoothness of the paint application and result in an uneven finish.

  • Foreign Particles: The presence of foreign particles, such as dust, hair, or debris, in the paint can also indicate contamination. These particles can affect the overall quality of the paint and result in imperfections on the painted surface.

  • Changes in Texture: Any noticeable changes in the texture of the paint, such as it becoming thicker or more viscous, can be a sign of contamination or thickening. This can make the paint difficult to work with and result in poor coverage.

Safety Precautions for Working With Oil-Based Paint

Wearing appropriate protective gear is crucial when working with oil-based paint to minimize potential health risks. When handling oil-based paint, it is essential to wear gloves, goggles, and a respirator to protect against skin and eye contact, as well as inhalation of harmful fumes.

Additionally, proper disposal methods should be followed to ensure safety. When disposing of oil-based paint, it is important to check local regulations as they may vary. Often, oil-based paint is considered hazardous waste and should not be poured down drains or disposed of in regular trash. Instead, it should be taken to designated collection sites or hazardous waste facilities.

Proper Ventilation in the Workspace

Proper ventilation is essential in the workspace to ensure adequate airflow and minimize the inhalation of harmful fumes when working with oil-based paint. To maintain workspace safety, consider the following:

Advertisement
  • Install an exhaust system or use fans to remove fumes and provide fresh air circulation.
  • Open windows and doors to create cross ventilation and allow for the dispersal of fumes.
  • Use respiratory protective equipment, such as masks or respirators, to filter out harmful particles.
  • Regularly inspect and maintain ventilation systems to ensure they are functioning properly.
  • Follow safety guidelines and regulations set by your local authorities to ensure proper ventilation standards are met.
  • Educate employees and workers about the importance of proper ventilation and provide training on the correct use of protective equipment.

Sealing the Paint Can to Prevent Air Exposure

To prevent air exposure and maintain the quality of the paint, it is important to tightly seal the can after each use. Proper sealing techniques can significantly extend the shelf life of oil-based paint in an airless sprayer. Here are some alternative storage methods that can help preserve the paint for future use:

Sealing Technique Description Benefits
Plastic Wrap Wrap the opening of the paint can with plastic wrap before securing the lid. Creates an airtight seal, preventing air from entering the can.
Rubber Band Place a rubber band around the lid to provide additional sealing. Enhances the tightness of the seal, reducing air exposure.
Vacuum Sealer Use a vacuum sealer to remove excess air from the paint can before sealing. Minimizes air contact, preventing oxidation and drying out.

Immediate Cleaning of the Airless Sprayer to Prevent Clogging

Regularly cleaning the airless sprayer is vital to prevent clogging and maintain its optimal performance. Immediate cleaning after each use is essential to prevent the buildup of dried paint particles and residue that can lead to clogging. To ensure effective cleaning, follow these best practices:

  • Use a solvent recommended by the paint manufacturer to break down and remove any paint residue.
  • Disassemble the sprayer according to the manufacturer’s instructions to access all the components that may have come into contact with paint.
  • Clean each component thoroughly using a brush or cloth soaked in the solvent, paying close attention to areas prone to clogging, such as the nozzle and filters.
  • Rinse all the components with water to remove any remaining solvent and paint residue.

Frequently Asked Questions

Can Oil-Based Paint Be Stored in Plastic Containers?

Oil-based paint should not be stored in plastic containers. It is recommended to store oil-based paint in glass containers to prevent air exposure and oxidation. Plastic containers may not provide a sufficient barrier against air, leading to paint degradation and reduced quality.

Additionally, the impact of temperature on oil-based paint storage should be considered. Extreme heat or cold can cause the paint to thicken or separate, resulting in clogging or poor spray patterns. Therefore, it is crucial to store oil-based paint in a cool, dry place to maintain its integrity.

How Often Should I Check for Signs of Contamination or Thickening in Oil-Based Paint?

Checking for signs of contamination or thickening in oil-based paint is an essential step in maintaining its quality and preventing issues during application. It’s recommended to regularly inspect the paint for any changes, such as clumps, discoloration, or an off smell.

What Is the Best Way to Dispose of Oil-Based Paint?

The best way to dispose of oil-based paint is to follow proper guidelines and regulations set by your local waste management authorities. This may include taking the paint to a designated hazardous waste facility or participating in a community paint recycling program.

It is important to never dispose of oil-based paint in the regular trash or pour it down the drain, as it can harm the environment. Following best practices for storing oil-based paint and properly cleaning up spills can help minimize waste and ensure safe disposal.

Advertisement

Can I Use Oil-Based Paint in a Sprayer That Has Been Used for Water-Based Paint?

Using a sprayer that has been previously used for water-based paint can lead to cross contamination. The cleaning process is crucial to prevent this.

It’s important to thoroughly clean the sprayer, removing all traces of the water-based paint before using oil-based paint. Failure to do so can affect the quality and performance of the oil-based paint, resulting in uneven application and poor coverage.

Follow the manufacturer’s instructions for proper cleaning to ensure optimal results.

What Are the Potential Health Risks of Inhaling Oil-Based Paint Fumes?

Potential health risks of inhaling oil-based paint fumes include respiratory irritation and long-term damage. Proper ventilation is essential to minimize the inhalation of these fumes. Working in a well-ventilated area and wearing protective gear, such as a respirator, can help reduce the risk.

It is important to seal the paint can tightly after each use to prevent the release of fumes. Additionally, avoiding smoking or eating near the work area is recommended to maintain a safe environment.

Advertisement

Conclusion

In conclusion, proper storage and handling of oil-based paint in an airless sprayer are crucial for optimal performance and safety. By following best practices such as cleaning the sprayer after each use and storing the paint in airtight containers in a cool and dry place, users can extend the shelf life of the paint and prevent issues like clogging and poor coverage.

Additionally, it is important to be aware of the health hazards associated with exposed oil-based paint and to take necessary safety precautions, such as working in a well-ventilated area and wearing protective gear.

An interesting statistic to note is that leaving oil-based paint in the sprayer for too long can lead to a significant decrease in its effectiveness, with studies showing a 30% reduction in coverage and drying time after just one week of exposure.

Continue Reading
Advertisement

Paint Sprayer Maintenance and Troubleshooting

Maximize Your Airless Paint Sprayer’s Lifespan With These Essential Tips

Published

on

By

An image showcasing a well-maintained airless paint sprayer: a clean nozzle, properly lubricated parts, and a debris-free filter

Are you fed up with your paint sprayer malfunctioning when you need it the most? No need to fret, we’ve got your back!

In this article, we’ll provide you with essential tips to maximize the lifespan of your airless paint sprayer. Imagine a paint sprayer that lasts longer, performs reliably, and saves you time and money.

By following these simple yet effective techniques, you’ll ensure proper storage, regular cleaning, and maintenance, and the use of high-quality replacement parts.

So, let’s dive in and make your airless paint sprayer last for years to come!

Key Takeaways

  • Proper storage and protection: Clean and dry the sprayer before storage, find a cool and dry place, invest in a protective case, and keep it away from extreme temperatures and moisture.
  • Regular cleaning: Clean the spray gun after each use, check and clean the filters regularly, flush out the system, and keep the storage area clean to prevent clogs and blockages.
  • Lubrication: Follow manufacturer’s recommendations for oil type and usage, regularly check oil levels, and apply oil to moving parts for smooth operation.
  • High-quality replacement parts: Invest in durable and reputable replacement parts, replace worn-out or damaged parts promptly, and use genuine parts to maintain performance and reliability.

Proper Storage and Protection

Advertisement

To maximize your airless paint sprayer’s lifespan, follow these steps:

  1. Clean the sprayer thoroughly before storage. Ensure all components are dry.
  2. Find a cool and dry place to store the sprayer.
  3. Proper sprayer maintenance and effective storage techniques are crucial for keeping your equipment in optimal condition.

After each use:

  1. Clean the spray gun and check and clean the filters regularly.
  2. Flush out the entire system with water or a cleaning solution to prevent clogs and blockages.
  3. Lubricate the sprayer with the manufacturer-recommended oil to reduce friction, wear, and corrosion.

Remember to:

  1. Invest in high-quality replacement parts to ensure durability and functionality.
  2. Cheap parts wear out quickly and require frequent replacements.

Thorough Cleaning

Regularly clean the spray gun after each use to prevent clogs and maintain optimal performance. Thorough cleaning techniques are essential to ensure the longevity of your airless paint sprayer.

Start by disassembling the spray gun and removing any paint residue or debris. Use a cleaning solution recommended by the manufacturer and thoroughly clean all the components, including the nozzle and filter.

Pay close attention to the hoses, as they can also become clogged with dried paint. Flush out the entire system with water or the appropriate cleaning solution to ensure all paint particles are removed.

After cleaning, dry all the components thoroughly before reassembling the spray gun. By following these thorough cleaning techniques and using the best cleaning solutions, you can keep your airless paint sprayer in optimal condition and avoid any performance issues.

Regular Filter Maintenance

Advertisement

Ensure you clean and inspect the filters of your airless paint sprayer on a consistent basis to maintain optimal performance. Cleaning the filters regularly is essential to prevent clogs and ensure smooth operation.

The frequency of cleaning will depend on the type and amount of paint being sprayed. As a general rule, it’s recommended to clean the filters after every use or at least once a week for heavy use.

Start by removing the filters from the sprayer and rinse them thoroughly with water or a cleaning solution. Use a soft brush or toothbrush to remove any stubborn debris. Allow the filters to dry completely before reinserting them into the sprayer.

Regularly checking and cleaning the filters will prolong the lifespan of your airless paint sprayer and ensure consistent, high-quality results.

Advertisement

Flushing the System

Flushing the system is an important step in maintaining the performance of your airless paint sprayer. Regular system maintenance ensures optimal performance and prevents clogs or blockages.

To flush the system, start by removing any remaining paint from the sprayer. Then, fill the paint container with a cleaning solution recommended by the manufacturer.

Attach the sprayer to a water source and turn it on. Allow the cleaning solution to flow through the system, flushing out any paint residue or debris. Run the cleaning solution through all components, including the hoses, filters, and nozzle.

Once the cleaning solution runs clear, disconnect the sprayer from the water source and thoroughly rinse the system with clean water.

This flushing technique will help maintain the efficiency and longevity of your airless paint sprayer.

Advertisement

Clean Storage Area

To maintain the cleanliness of your storage area, keep it free from dust or dirt that could potentially enter critical components. Here are some cleaning techniques and tips to prevent dust accumulation:

  • Regularly dust and sweep the storage area to remove any loose dirt or debris.
  • Use a vacuum cleaner with a brush attachment to clean hard-to-reach areas.
  • Wipe down surfaces with a damp cloth to remove any stubborn dust or grime.
  • Consider using air purifiers or dehumidifiers to maintain a clean and dry environment.

Store your airless paint sprayer in a protective case or bag to prevent dust from settling on it. Avoid storing the sprayer in areas prone to moisture or dust, such as basements or garages. Cover the sprayer with a cloth or plastic sheet when not in use to further protect it from dust.

Nozzle and Filter Cleaning

Now that you understand the importance of keeping your storage area clean, let’s move on to the next crucial aspect of maintaining your airless paint sprayer: nozzle and filter cleaning.

Regularly cleaning the nozzle and filters is essential for optimal performance and preventing common nozzle issues.

Advertisement

To start, always follow the manufacturer’s instructions for cleaning the nozzle. Typically, this involves removing the nozzle from the spray gun and soaking it in a cleaning solution or using a specialized cleaning brush to remove any paint residue or debris. Be sure to clean the nozzle thoroughly, as any build-up can lead to clogs or uneven spray patterns.

Additionally, it’s crucial to regularly check and clean the filters. These filters help prevent debris from entering the sprayer and can become clogged over time. Simply remove the filters and rinse them with water or a cleaning solution, ensuring all dirt and debris are removed.

Hose Inspection and Cleaning

Make sure you regularly inspect and clean the hoses of your airless paint sprayer to ensure optimal performance. Here are some troubleshooting tips for hose maintenance:

  • Check for any cracks or leaks in the hoses
  • Inspect the hose fittings for any signs of wear or damage
  • Clean the hoses thoroughly after each use to remove any paint residue or debris
  • Use a soft brush or cloth to clean the exterior of the hoses
  • Flush out the hoses with water or a cleaning solution to remove any clogs or blockages
  • Pay attention to any kinks or twists in the hoses and straighten them out if necessary
  • Replace any damaged or worn-out hoses promptly to prevent further issues
  • Store the hoses in a clean and dry area to prevent them from being exposed to moisture or dust

Lubrication Guidelines

Ensure you consult the manufacturer’s recommendations for the correct oil type to use in your airless paint sprayer. Using the right oil is crucial for optimal performance and longevity. Lightweight mineral-based oil designed for high-pressure applications is typically recommended.

Regularly check the oil level in your sprayer and top up or change the oil as recommended by the manufacturer. Following the proper oiling frequency is important to reduce friction, wear, and corrosion. Apply oil to moving parts to ensure smooth operation, but be cautious not to over-lubricate as it can attract dust and debris.

Regularly check oil levels and refill as needed to maintain the sprayer’s efficiency. By using the appropriate oil and following the recommended lubrication frequency, you can maximize the lifespan of your airless paint sprayer.

Advertisement

Correct Oil Type

Using the recommended lightweight mineral-based oil for high-pressure applications is crucial to ensure optimal performance and longevity of your airless paint sprayer. Choosing the right oil and proper lubrication techniques are essential for maintaining your sprayer.

Here are some key points to consider:

  • Use a lightweight mineral-based oil designed for high-pressure applications.
  • Regularly check the oil level in the sprayer and top up or change it as recommended.
  • Proper oil usage reduces friction, wear, and corrosion in the internal components.
  • Apply oil to the moving parts to ensure smooth operation.
  • Avoid over-lubricating, as it can attract dust and debris.
  • Follow the manufacturer’s guidelines for oiling frequency.
  • Regularly check oil levels and refill as needed.

Regular Oil Level Check

Check the oil level in your sprayer regularly to ensure optimal performance and prevent unnecessary wear and tear.

Regular oil level monitoring is crucial for maintaining the efficiency of your airless paint sprayer. Oil acts as a lubricant, reducing friction and preventing corrosion within the internal components.

By regularly checking the oil level and topping up or changing it as recommended by the manufacturer, you can ensure smooth operation and extend the lifespan of your sprayer.

Regular oil changes are important because over time, the oil can become contaminated with debris and lose its lubricating properties. By staying on top of oil changes, you can prevent damage to the sprayer and avoid costly repairs.

Advertisement

Make it a habit to monitor the oil level in your sprayer and perform regular oil changes to keep it running smoothly.

High-Quality Replacement Parts

When it comes to maintaining your airless paint sprayer, using high-quality replacement parts is essential. Genuine parts offer several benefits that can significantly impact the lifespan and performance of your sprayer.

Here are some reasons why using genuine parts is important:

  1. Superior Durability and Functionality:

    • Genuine parts are designed specifically for your sprayer model, ensuring a perfect fit and optimal performance.
    • They are made from high-quality materials, making them more durable and resistant to wear and tear.
    • Using genuine parts eliminates the risk of leaks or malfunctions, providing a reliable and efficient spraying experience.
  2. Reduced Repairs and Downtime:

    • High-quality replacement parts minimize the need for frequent repairs, saving you time and money.
    • Genuine parts are less likely to fail or break, preventing unexpected project delays.
    • By investing in genuine parts, you can avoid costly downtime and keep your sprayer working at its best.
  3. Maintenance and Reliability:

    • Genuine parts are manufactured to meet the highest standards, ensuring consistent performance and reliability.
    • Regular maintenance, including the use of genuine replacement parts, is crucial for maximizing the lifespan of your sprayer.
    • By following recommended maintenance practices and using genuine parts, you can enjoy a reliable and long-lasting airless paint sprayer.

Importance of Premium Parts

Investing in high-quality replacement parts for your airless paint sprayer is essential for durability and optimal performance. Premium parts offer several benefits. Firstly, they are designed to fit and function perfectly, eliminating leaks or malfunctions that can occur with cheaper alternatives. Additionally, premium parts have a longer lifespan, reducing the need for frequent replacements. When choosing replacement parts, consider reputable manufacturers who offer warranties for their products. Ensure that the replacement parts are compatible with your specific sprayer model. Using genuine parts is crucial to maintain performance and reliability. By investing in high-quality replacement parts, you can minimize repairs, extend the lifespan of your sprayer, and ultimately save time and money in the long run.

Reputable Manufacturers for Replacement Parts

Look for warranties provided by reputable manufacturers to ensure the quality and reliability of replacement parts for your airless paint sprayer.

When it comes to finding reliable suppliers for replacement parts, here are a few things to consider:

Advertisement
  • Warranty coverage: Reputable manufacturers often offer warranties on their replacement parts, giving you peace of mind and assurance that the parts are of high quality and built to last.

  • Reputation: Look for manufacturers with a strong reputation in the industry. Reliable suppliers are known for producing top-notch replacement parts that meet or exceed industry standards.

  • Compatibility: Ensure that the replacement parts you choose are compatible with your specific airless paint sprayer model. Reputable manufacturers provide detailed information about compatibility to help you make the right choice.

Timely Replacement of Worn-Out Parts

To ensure optimal performance, regularly replacing worn-out parts is crucial for keeping your airless paint sprayer running smoothly. Timely replacement of worn-out parts is essential for the proper functioning of your sprayer and to avoid any potential breakdowns during your painting projects.

By replacing worn-out parts in a timely manner, you can prevent further damage to your sprayer and ensure its longevity. Not only does timely replacement of parts help maintain the performance of your sprayer, but it also has numerous maintenance benefits. It reduces the risk of malfunctions, leaks, and inefficient paint application. Additionally, it minimizes the need for costly repairs and downtime, saving you both time and money.

Cost and Time Savings With Proper Maintenance

To ensure maximum longevity and performance from your airless paint sprayer, regular maintenance is crucial. By investing a little time and effort into proper care, you can save yourself both money and time in the long run.

Here are the key reasons why regular maintenance is important and the benefits of investing in a protective case:

  1. Importance of Regular Maintenance:

    • Prevents clogs and blockages, ensuring smooth operation and consistent spray patterns.
    • Reduces friction, wear, and corrosion, extending the lifespan of your sprayer.
    • Protects the sprayer from cold-related issues, such as freezing or damage to seals and valves.
  2. Benefits of Investing in a Protective Case:

    • Shields the sprayer from accidental drops, bumps, and impacts.
    • Guards against dust, moisture, and other environmental factors that can damage critical components.
    • Provides convenient storage and organization for accessories and spare parts.

Frequently Asked Questions

How Often Should I Clean the Spray Gun After Each Use?

To ensure optimal performance, clean the spray gun after each use. This is a crucial step in airless paint sprayer maintenance. Use a cleaning solution recommended by the manufacturer and thoroughly clean all components, including the nozzle and filter.

Regular cleaning prevents clogs and blockages, ensuring smooth operation. By following best practices for cleaning your airless paint sprayer, you can maximize its lifespan and avoid costly repairs.

Advertisement

Can I Use Any Type of Oil for Lubricating the Airless Paint Sprayer?

Yes, you can use any type of oil for lubricating your airless paint sprayer. However, it is important to use the correct oil recommended by the manufacturer for optimal performance and lifespan.

Using the wrong type of oil can lead to friction, wear, and corrosion, causing damage to the internal components. Avoid common mistakes in lubricating airless paint sprayers by consulting the manufacturer’s guidelines and using lightweight mineral-based oil designed for high-pressure applications.

Regularly check the oil level and refill as needed to ensure smooth operation.

How Frequently Should I Check and Clean the Filters?

To extend the lifespan of your airless paint sprayer, it’s important to regularly check and clean the filters. This ensures optimal performance and prevents clogs and blockages. The frequency of checking and cleaning the filters depends on the usage and the type of paint being sprayed.

However, as a general guideline, it is recommended to check and clean the filters after every use or at least once a week for heavy usage. Proper maintenance of the filters will help maximize the lifespan of your airless paint sprayer.

Advertisement

What Are the Benefits of Using High-Quality Replacement Parts?

Using high-quality replacement parts for your airless paint sprayer offers a multitude of benefits. These durable parts ensure proper functionality, eliminating leaks and malfunctions. By investing in premium parts, you can reduce the need for frequent repairs and project downtime.

This not only saves you time but also money in the long run. High-quality replacement parts extend the lifespan of your sprayer, providing reliable performance and enhancing efficiency. So, opt for reputable manufacturers and genuine parts to maximize the durability and longevity of your airless paint sprayer.

How Can Proper Maintenance of the Airless Paint Sprayer Save Me Money and Time in the Long Run?

Proper maintenance of your airless paint sprayer can save you both time and money in the long run. By ensuring proper storage, you protect the sprayer from damage caused by extreme temperatures, moisture, and dust.

Regular maintenance, such as cleaning the spray gun and filters, prevents clogs and blockages that can lead to costly repairs. Using high-quality replacement parts enhances efficiency and reduces project downtime.

Taking these steps will maximize the lifespan of your airless paint sprayer and provide reliable performance.

Advertisement

Conclusion

So there you have it, with these essential tips, you can maximize the lifespan of your airless paint sprayer and enjoy its reliable performance for years to come.

By properly storing and protecting your sprayer, cleaning it thoroughly after each use, and regularly maintaining the filters and system, you can ensure its longevity.

Investing in high-quality replacement parts from reputable manufacturers and timely replacements of worn-out parts will also contribute to cost and time savings.

So take care of your airless paint sprayer and witness the benefits of proper maintenance firsthand.

Advertisement

Continue Reading

Paint Sprayer Maintenance and Troubleshooting

Painting Brick Walls With an Airless Sprayer: a Complete Guide

Published

on

By

An image showcasing an airless sprayer in action, with a skilled painter effortlessly coating a brick wall with smooth, even strokes

Painting brick walls with an airless sprayer can bring them back to life. This comprehensive guide walks you through every step of the process, from preparing the surface to ensuring an even coat.

With the right tools and materials, including a high-quality primer, you can enhance the durability and resistance of your brick walls. Expert tips and safety precautions ensure a smooth finish and a transformation that will leave your walls looking brand-new.

Get ready to bring new vibrancy and timeless beauty to your space.

Key Takeaways

  • Preparation and surface cleaning is essential before painting brick walls with an airless sprayer.
  • Selecting the right paint color and gathering the necessary materials and equipment are crucial for a successful painting project.
  • Cleaning and maintaining the painted brick walls regularly will help them stay in good condition.
  • Priming the walls with a high-quality primer designed for masonry surfaces enhances adhesion, durability, and resistance to moisture and alkali.

Surface Preparation: Tools and Cleaning

The homeowner gathers the necessary tools, including a wire brush, scraper, and power washer, to remove loose paint and dirt from the brick walls. Acquiring these tools is essential for proper cleaning techniques.

Advertisement

Using the wire brush and scraper, the homeowner meticulously removes any loose paint and dirt from the surface of the brick walls. After that, a power washer is used to thoroughly clean the walls, ensuring a clean and smooth surface for painting.

It is important to allow the walls to dry completely before proceeding to the next step. By acquiring the necessary tools and following proper cleaning techniques, the homeowner ensures a clean and well-prepared surface for painting the brick walls.

Selecting the Right Paint Colors and Materials

When selecting paint colors and materials, it is important to consider the desired aesthetic and gather the necessary tools. Choosing paint colors that complement the overall look and feel of the space is crucial for achieving the desired result.

Additionally, having the right materials is essential for a successful painting project. Following a step-by-step guide for surface preparation is also crucial. This includes gathering tools such as a wire brush, scraper, and power washer. It is important to remove loose paint and dirt from the surface using the wire brush and scraper, and then thoroughly clean the area with a power washer.

Once the surface is clean and dry, you can proceed with choosing the appropriate paint color and gathering the necessary materials and equipment like paint, primer, drop cloth, painters tape, and sandpaper.

Advertisement

Essential Equipment for Painting Brick Walls

To achieve a flawless result, one must ensure they have the essential equipment necessary for painting brick walls. This includes proper airless sprayer maintenance and choosing the right paintbrush.

Here are three key items to consider:

  • Well-maintained airless sprayer: Regularly clean and inspect the sprayer to ensure it functions properly. This will ensure consistent paint application and prevent clogging or uneven spraying.

  • High-quality paintbrush: Choose a brush that is suitable for masonry surfaces and the type of paint being used. A good brush will provide smooth and even coverage, allowing for precise detailing and edges.

  • Safety equipment: Protect yourself while painting by wearing safety goggles, gloves, and a mask to prevent inhalation of fumes or particles.

Achieving Even Coverage With an Airless Sprayer

Using an airless sprayer ensures even coverage when painting brick walls. This method is great for achieving consistent results.

Advertisement

However, there are some common issues that may arise when using an airless sprayer. One common issue is overspray, which occurs when the paint is applied too heavily or the sprayer is held too close to the surface. To troubleshoot this issue, adjust the spray nozzle to a narrower setting and maintain a consistent distance from the wall.

Another common issue is clogging of the sprayer tip due to debris or dried paint. To avoid this, strain the paint before pouring it into the sprayer and clean the tip regularly during the painting process.

Proper Technique: Starting From the Top

Starting from the top ensures that the paint is applied evenly and avoids drips or streaks on the brick walls. This technique allows for better control and coverage, ensuring a professional-looking finish.

Advertisement

When starting at the bottom, gravity can cause the paint to run down the wall, leading to uneven application and potential drips. By beginning at the top, the paint can be evenly distributed downwards, avoiding any potential issues.

However, it is important to troubleshoot common issues that may arise when painting brick walls with an airless sprayer. These issues can include clogging of the sprayer nozzle, uneven spray pattern, or overspray.

Cleaning and Maintenance Tips for Painted Brick Walls

Regular cleaning and maintenance is essential for preserving the appearance and longevity of painted brick walls. To keep them looking their best, it’s important to use proper cleaning techniques and know how to remove stubborn stains.

Light dirt can be easily removed with warm water and dish soap. Gently scrub the walls with a soft-bristle brush to avoid damaging the paint.

For stubborn stains, create a solution of white vinegar and water and treat the affected areas. Rinse the walls with clean water to remove any residue.

Advertisement

The Importance of Priming Masonry Surfaces

Priming masonry surfaces is crucial for enhancing adhesion, durability, and resistance to moisture and alkali. A high-quality primer designed for masonry surfaces is essential for paint longevity and a successful painting project.

Without proper priming, paint may not adhere well to the surface, leading to peeling and chipping over time. Primer acts as a barrier, preventing moisture and alkali from seeping into the paint, which can cause it to deteriorate.

However, common issues with primer can occur, such as poor coverage, uneven application, or improper drying. To troubleshoot these problems, ensure the walls are clean and dry before applying primer, use the recommended primer for masonry surfaces, and allow sufficient drying time.

Drying Time for Primer Application

After applying primer to the masonry surfaces, it is important to allow sufficient drying time of approximately 24 hours. This drying time is crucial to ensure that the primer properly adheres to the surface and creates a strong foundation for the paint.

It also allows the primer to fully cure, enhancing its durability and resistance to moisture and alkali. While waiting for the primer to dry, it is essential to protect the surface from any potential damage or contamination.

Advertisement

Additionally, it is worth considering alternative priming methods, such as using a tinted primer or a primer/sealer combination, which can provide additional benefits like improved color coverage or added protection against stains.

Advantages of Primer: Adhesion, Durability, and Resistance

Applying a high-quality primer to masonry surfaces ensures strong adhesion, increased durability, and enhanced resistance to moisture and alkali. The advantages of using primer go beyond these benefits and extend to cost savings, as it helps paint adhere better, reducing the need for multiple coats.

Additionally, primer improves the overall appearance and finish of the painted surface, giving it a smooth and professional look. When it comes to application techniques, primer can be easily applied using a brush, roller, or sprayer, making it suitable for different preferences and skill levels.

Its quick drying time allows for efficient completion of painting projects. Overall, using primer before painting brick walls with an airless sprayer is a wise choice, offering numerous advantages in terms of cost and application techniques.

Expert Tips for a Smooth Paint Finish

To achieve a smooth paint finish on the brick walls, homeowners should consider using a high-quality paint roller for even coverage. This is one of the most important tips for paint application on brick surfaces.

Advertisement

Another common mistake to avoid is using a low-quality roller, which can leave streaks and uneven texture on the walls. It is also essential to choose the right roller nap thickness for the type of brick surface. A thicker nap is typically recommended for rough or textured brick, while a thinner nap works well for smooth brick walls.

Additionally, homeowners should apply the paint in thin, even coats to prevent drips and runs. Taking these tips into consideration can help homeowners achieve a professional-looking smooth paint finish on their brick walls.

Safety Precautions When Using an Airless Sprayer

Using an airless sprayer requires homeowners to wear protective goggles, gloves, and a respirator mask to ensure their safety. The powerful spray of the airless sprayer can create a fine mist of paint particles that can be harmful if inhaled or make contact with the eyes or skin.

To maintain the airless sprayer, regular cleaning is essential to prevent clogs and ensure proper functioning. Troubleshooting common issues like uneven spray pattern or loss of pressure can be resolved by checking for clogs, adjusting the nozzle, or cleaning the filters.

Regular maintenance and troubleshooting will help homeowners achieve a smooth and efficient painting process with their airless sprayer, allowing them to achieve professional-looking results.

Advertisement

The Transformation: Freshly Painted Brick Walls

After taking the necessary safety precautions when using an airless sprayer, the transformation of freshly painted brick walls can be truly remarkable. The impact of color choice cannot be underestimated, as it can completely change the look and feel of a space. Whether it’s a timeless neutral or a bold, vibrant color, a fresh coat of paint can breathe new life into a room. In addition to the aesthetic benefits, there are also practical benefits to consider. Professional painting services can ensure a high-quality finish, saving time and effort for homeowners. They have the expertise to properly prepare the surface, choose the right materials, and apply the paint evenly. The result is a beautifully transformed space that adds value to the home.

The Impact of Color Choice Benefits of Professional Painting Services
Completely changes the look High-quality finish
and feel of a space Saves time and effort
Timeless or vibrant options Expertise in surface preparation
Adds value to the home Proper material selection
Even application of paint

Frequently Asked Questions

How Long Does It Typically Take for Brick Walls to Dry Completely After Cleaning?

Brick walls typically take some time to dry completely after cleaning. The drying time can depend on factors such as weather conditions and the level of humidity. However, using the best cleaning methods for brick walls, such as using a power washer and allowing the walls to air dry, can help expedite the drying process.

It is important to ensure that the walls are thoroughly dry before proceeding with any painting or priming to achieve the best results.

Can I Use a Regular Primer on Brick Walls or Is There a Specific Primer for Masonry Surfaces?

When painting brick walls, it’s important to use the right primer for optimal results. While a regular primer may work on some surfaces, there are specific primers designed for masonry surfaces that are recommended for brick walls.

These masonry primers are specially formulated to enhance adhesion, durability, and resistance to moisture and alkali. By choosing the appropriate primer for brick walls, you can ensure better paint adherence and longevity of the paint job.

Advertisement

How Often Should Painted Brick Walls Be Cleaned and Maintained?

Painted brick walls should be cleaned and maintained regularly to keep them looking their best. The cleaning frequency will depend on the level of dirt and grime buildup, but generally, it is recommended to clean them at least once or twice a year.

To maintain the painted surface, homeowners should use warm water and dish soap to remove light dirt and gently scrub the walls with a soft-bristle brush. Stubborn stains can be treated with a solution of white vinegar and water.

Regular cleaning and maintenance will help preserve the appearance and longevity of the painted brick walls.

Is It Necessary to Apply Multiple Coats of Paint for a Smooth Finish?

Applying multiple coats of paint is necessary for achieving a smooth finish on brick walls. Using a roller or brush may not provide the same level of smoothness as an airless sprayer.

The multiple coats allow for better coverage and a more uniform appearance. The airless sprayer ensures even distribution of paint, resulting in a flawless finish.

Advertisement

Are There Any Potential Risks or Dangers Associated With Using an Airless Sprayer for Painting Brick Walls?

Using an airless sprayer for painting brick walls can pose potential risks and dangers. The high-pressure nature of the sprayer can create a fine mist of paint particles, which can be harmful if inhaled. Additionally, there is a risk of overspray, which can result in paint getting on unintended surfaces.

It is important to take safety precautions, such as wearing protective gear and properly ventilating the area. Proper training and experience with using an airless sprayer is also recommended to minimize these risks.

Conclusion

In conclusion, painting brick walls with an airless sprayer can provide a fresh and updated look to any space. It is important to properly prepare the surface by cleaning and removing loose paint and dirt.

Using the right paint colors and materials, along with a high-quality primer, will ensure long-lasting adhesion, durability, and resistance to moisture and alkali. Following the proper technique and safety precautions when using an airless sprayer is crucial.

An interesting statistic to consider is that painting brick walls can increase a home’s value by up to 5%.

Advertisement

Continue Reading

Paint Sprayer Maintenance and Troubleshooting

Setting Up and Cleaning the Graco 390 Airless Paint Sprayer

Published

on

By

An image capturing the step-by-step process of setting up and cleaning the Graco 390 Airless Paint Sprayer

It is essential to properly prepare and maintain the Graco 390 Airless Paint Sprayer to achieve a high-quality paint job. This paint sprayer is efficient and easy to use thanks to its simple setup and user-friendly features. Understanding how to adjust the spray settings using the pressure control knob, spray gun, and hose will help users meet their specific painting requirements.

Additionally, proper cleaning and maintenance ensure the longevity of the paint sprayer. In this article, we will guide you through the step-by-step process of setting up and cleaning the Graco 390 Airless Paint Sprayer, providing you with the knowledge and confidence to achieve outstanding paint results.

Key Takeaways

  • Inspect all equipment for good condition before assembly
  • Familiarize yourself with adjusting spray pressure for desired coverage
  • Regularly clean and maintain the paint sprayer, including the spray gun
  • Troubleshoot common issues such as paint viscosity, spray pattern, and clogs in the spray tip

Gathering and Unboxing the Necessary Equipment

The user gathers and unboxes the necessary equipment for setting up the Graco 390 Airless Paint Sprayer. Before starting the setup process, it is important to inspect all the equipment to ensure that everything is in good condition.

This includes checking the paint sprayer unit itself, as well as the spray gun, hose, and any additional accessories that may have been included. The unboxing process involves carefully opening the packaging and removing each component from its protective wrapping. It is important to handle the equipment with care to avoid any damage.

Advertisement

Once all the equipment has been unboxed, the user can proceed to the next step of assembling the components and getting ready for painting.

Assembling the Graco 390 Airless Paint Sprayer

To assemble the Graco 390 Airless Paint Sprayer, simply follow the instructions provided by the manufacturer.

Before starting the assembly process, inspect the components of the sprayer to ensure they are in good condition and nothing is missing. This includes checking the spray gun, hose, and pressure control knob.

Once the inspection is complete, understand how the pressure control works. The pressure control knob allows users to adjust the pressure of the paint being sprayed, which affects the coverage and finish of the paint job. Familiarize yourself with this feature to achieve optimal results with your paint sprayer.

Overall, assembling the Graco 390 Airless Paint Sprayer is a straightforward process that can be easily accomplished by following the manufacturer’s instructions.

Advertisement

Preparing the Surface and Adjusting Spray Settings

After gathering the necessary equipment and materials, the user inspects the surface and cleans it thoroughly before adjusting the spray settings for desired coverage. This is an important step in ensuring a smooth and even paint application.

Preparing the surface involves removing any dirt, dust, or debris that may interfere with the paint adhering properly. This can be done by using a broom, vacuum cleaner, or a damp cloth, depending on the type of surface.

Once the surface is clean, the user can then choose the paint color that best suits their preference and the overall aesthetic they want to achieve. It is important to consider factors such as lighting, room size, and personal taste when selecting paint colors.

Advertisement

Cleaning and Maintaining the Graco 390 Airless Paint Sprayer

In order to ensure optimal performance, it is essential for the user to regularly clean and maintain their Graco 390 Airless Paint Sprayer. Cleaning techniques and a recommended maintenance routine are necessary to keep the sprayer in good working condition.

After each use, it is important to disassemble and clean the spray gun thoroughly. This includes removing any remaining paint and debris from the gun’s components. Additionally, the paint sprayer system should be flushed with a cleaning solution to remove any paint residue.

Proper storage and maintenance of the sprayer is also crucial. This involves storing the sprayer in a clean and dry area, and inspecting it regularly for any signs of wear or damage.

Troubleshooting Common Issues With the Paint Sprayer

Advertisement

The user can check the spray tip for clogs and ensure that the paint viscosity and spray pattern are correct in order to troubleshoot common issues with the paint sprayer. Here are some steps to follow in order to identify and fix paint spray pattern issues:

  1. Check paint viscosity: Make sure the paint is properly mixed and thinned according to the manufacturer’s instructions. If the paint is too thick or too thin, it can affect the spray pattern.

  2. Inspect the spray pattern: Use a test board or piece of cardboard to spray a test pattern. Look for any irregularities, such as streaks, splotches, or uneven coverage. This can indicate issues with the spray tip or pressure settings.

  3. Adjust settings and clean the spray tip: If the spray pattern is not satisfactory, adjust the pressure control knob and clean the spray tip to remove any clogs or debris. A clean spray tip and proper pressure settings are essential for a consistent and even spray pattern.

Frequently Asked Questions

How Long Does It Take to Assemble the Graco 390 Airless Paint Sprayer?

Assembling time for the Graco 390 Airless Paint Sprayer depends on the user’s familiarity with the product. On average, it takes about 10-15 minutes to fully assemble the paint sprayer.

The required tools for assembly include a wrench and screwdriver. Users should carefully follow the instructions provided in the manual to ensure proper assembly and functionality of the sprayer.

What Is the Warranty Period for the Graco 390 Airless Paint Sprayer?

The warranty period for the Graco 390 Airless Paint Sprayer is an important aspect to consider. It provides peace of mind and reassurance to the user.

Additionally, knowing the assembly time required for the paint sprayer can help with planning and scheduling painting projects effectively.

Advertisement

These factors, along with the product’s features and performance, contribute to the overall satisfaction and convenience of using the Graco 390 Airless Paint Sprayer.

Can the Graco 390 Airless Paint Sprayer Be Used With Different Types of Paint?

The Graco 390 Airless Paint Sprayer is compatible with various types of paint, including latex, acrylic, and oil-based paints. This versatility allows users to tackle different painting projects with ease.

The advantages of using the Graco 390 Airless Paint Sprayer with different types of paint include efficient and even coverage, reducing the need for multiple coats. Its high-pressure system ensures excellent paint atomization, resulting in a professional finish.

Overall, the Graco 390 Airless Paint Sprayer is a reliable choice for any painting job.

What Is the Recommended Cleaning Solution for the Graco 390 Airless Paint Sprayer?

The recommended cleaning solution for the Graco 390 Airless Paint Sprayer is a mixture of warm water and a mild detergent. This solution effectively removes any residual paint or debris from the sprayer’s components.

Advertisement

It is important to thoroughly clean the spray gun, hose, and other parts after each use to maintain optimal performance. By following proper cleaning techniques and using the recommended cleaning solution, users can ensure the longevity and efficiency of their Graco 390 Airless Paint Sprayer.

How Often Should the Spray Gun of the Graco 390 Airless Paint Sprayer Be Cleaned?

The spray gun of the Graco 390 Airless Paint Sprayer should be cleaned regularly to ensure optimal performance. Cleaning the spray gun helps troubleshoot common issues such as clogs and improper spray patterns.

It is recommended to clean the spray gun after each use to prevent paint residue from building up and affecting the quality of the spray. By maintaining the spray gun properly, users can extend the lifespan of their Graco 390 Airless Paint Sprayer and achieve consistent, professional results.

Conclusion

In conclusion, setting up and cleaning the Graco 390 Airless Paint Sprayer is an essential task for achieving professional paint finishes. Following the step-by-step guide and familiarizing oneself with the equipment ensures smooth operation and efficient painting.

A clean and well-maintained paint sprayer saves time and money in the long run. It also provides exceptional painting results. Embrace the irony of the tedious cleaning process, knowing that it is the key to effortless and stunning paint jobs.

Advertisement

Continue Reading

Trending

Copyright © 2024 Paint Sprayer Zone Affiliate disclaimer As an affiliate, we may earn a commission from qualifying purchases. We get commissions for purchases made through links on this website from Amazon and other third parties.