
TL;DR

Get business pricing on tools and workshop supplies
- Business-only prices and quantity discounts
- Tax-exempt purchasing
- Multiple users, one account, clear invoices
A Hunker report describes using an oil-based penetrating stain, such as Minwax Wood Finish, to add color to prepared, unfinished wood cabinets while keeping their grain visible. The stain is not a complete protective finish: the report recommends letting it dry and applying at least two coats of polyurethane or a similar topcoat.
A Hunker report outlines an alternative to painting plain wood cabinets: applying an oil-based wood stain to prepared, unfinished wood, then sealing it with a separate protective topcoat. The method is intended to add color while leaving the wood grain visible; it does not eliminate the need for sanding, drying time or surface protection.
The report describes products such as Minwax Wood Finish as oil solutions containing suspended pigments. Applied to raw, prepared wood, the stain colors the surface and can accent its grain pattern. The article’s author, a professional woodworker, says oil stain can be applied evenly across larger projects, including a full set of cabinet doors, but the result depends on preparing the wood and applying the product consistently.
The process begins by removing cabinet doors and hardware, cleaning away dirt and grime, and sanding the wood. The author says they typically start with 60- or 80-grit sandpaper and work through progressively finer grits to at least 220 grit. Sanding dust should then be removed with a tack cloth. The report focuses on unfinished wood; applying pigmented stain over an existing finish is a separate technique known as glazing.
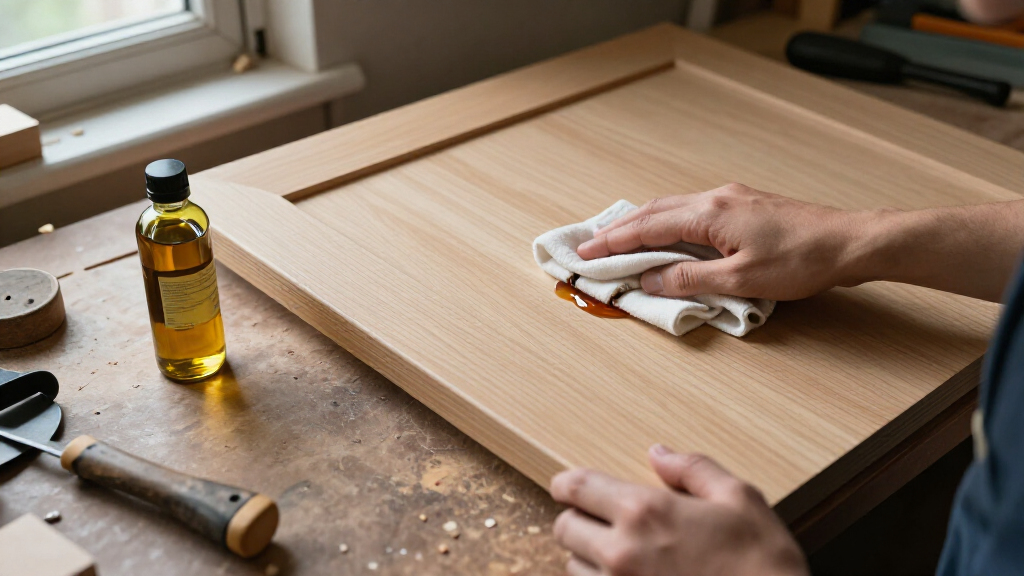
For application, the author’s preference is to brush stain over the prepared surface, including corners and decorative details, and then wipe away excess with a cotton cloth or shop towels. The stain should be applied evenly, and the report suggests comparing stained pieces as work proceeds to help maintain a consistent color. It says to allow the stain to dry completely before adding at least two coats of polyurethane or a similar protective product. Mineral spirits are identified for cleanup after oil stain.
A Grain-Visible Cabinet Update
For homeowners who want to change the color of wood cabinets without covering their natural pattern, the method offers a different finish choice from opaque paint or gel. Stain colors the wood rather than forming the same kind of fully covering appearance, so the grain can remain part of the finished look. That makes the wood’s existing condition and appearance central to whether this approach is suitable.
The distinction between stain and topcoat also affects project planning. Oil stain is a coloring step, not a complete protective finish, according to the report. Cabinet owners need to account for drying and separate topcoat applications, as well as surface preparation and cleanup. The article presents these as practical advantages and instructions from its author, not as a guarantee that every cabinet will produce the same color or finish.
Minwax Wood Finish oil stain for cabinets
As an affiliate, we earn on qualifying purchases.
As an affiliate, we earn on qualifying purchases.
Stain Is Not the Topcoat
The source article describes a common point of confusion in wood finishing: people may use “stain” to mean both the product that adds color and the clear protective coating applied afterward. Some finishing products combine color and protection, but the report’s example, Minwax Wood Finish, is treated as a stain that requires a separate protective layer.
The article is based on the author’s experience as a professional woodworker and expresses a preference for allowing wood grain to show. Its characterization of oil stain as superior to paint or gel is the author’s opinion. The practical guidance is narrower: prepare bare wood, apply the stain, let it dry, and protect the surface with a compatible topcoat according to product directions.
Results Depend on the Wood
The report does not specify how a particular cabinet species, prior treatment, or degree of wear will affect the final color. It also does not provide a test comparison between oil stain, gel stain and paint, or quantify how long the finished cabinets will last. Readers should check the specific stain and topcoat labels for compatibility, preparation requirements, drying times and application instructions. The source’s recommendation applies to raw, prepared wood; existing finishes may need a different approach.
Check Products Before Starting
Before beginning, identify whether the cabinet surfaces are unfinished wood or already coated, then consult the stain and topcoat manufacturers’ directions for suitable surfaces and application conditions. If proceeding on bare wood, the sequence in the report is to remove doors and hardware, clean and sand the surfaces, clear away dust, apply and wipe the stain evenly, allow it to dry fully, and apply at least two protective topcoat layers. Oil-stained rags should be laid flat to dry to reduce fire risk, as the source advises; follow local disposal rules and product safety instructions.
Key Questions
Can oil stain be used instead of paint on cabinets?
The report presents oil stain as an alternative for unfinished wood cabinets when the aim is to add color while keeping the grain visible. Paint provides a more opaque appearance, so the choice depends on the wood and the desired result.
Does oil stain protect cabinets by itself?
No. The Hunker report says the stain colors the wood but should be followed, after drying, by at least two coats of polyurethane or a similar product for surface protection.
How should cabinets be prepared for oil stain?
According to the report, remove doors and hardware, clean the wood, sand it progressively to at least 220 grit, and remove dust with a tack cloth before staining. Check the product instructions for requirements specific to the cabinet material.
Can oil stain go over an existing cabinet finish?
The article says pigmented oil stain can be applied over an existing finish using a technique called glazing, but its main instructions cover bare, prepared wood. The suitable method depends on the existing coating and the product directions.
How should stain-soaked rags be handled?
The source advises laying saturated cloths or rags flat to dry to reduce fire risk. Follow the product label and local rules for safe handling and disposal.
Source: rss
Halloween Picks
halloween
As an affiliate, we earn on qualifying purchases.