
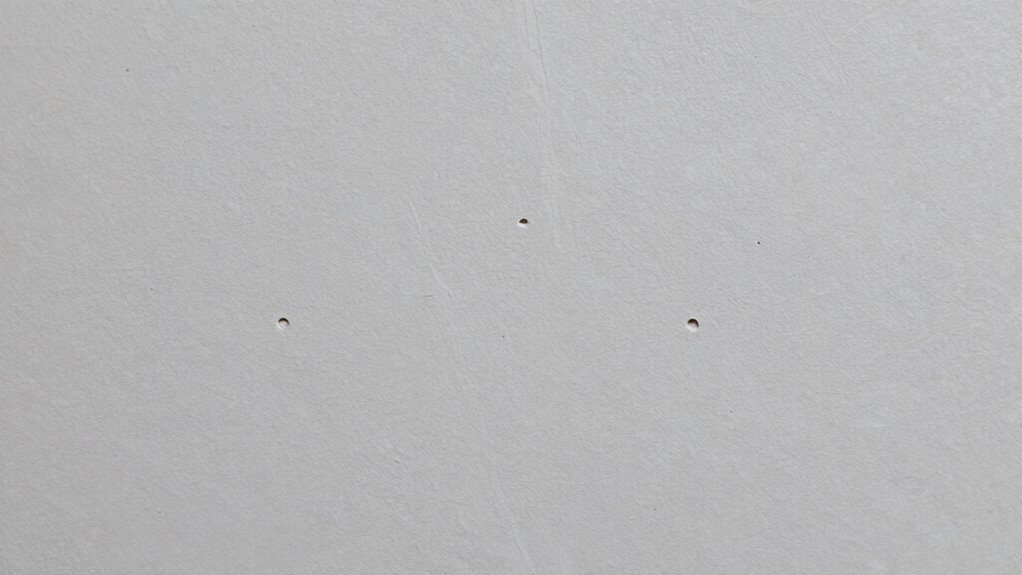
Pinholes appearing after coating dry typically result from either inadequate surface preparation or issues with film build. If the surface isn’t properly cleaned or roughened, contaminants or trapped air can cause pinholes. On the other hand, insufficient or uneven film thickness can trap solvents or air bubbles, leading to pinholes once dry. To prevent this, it’s important to optimize both surface prep and film application techniques—exploring these topics further can help you achieve a flawless finish.
Key Takeaways
- Poor surface cleaning or contamination can cause pinholes due to trapped air or debris during coating application.
- Inadequate surface roughness may lead to weak adhesion and pinholes, indicating a prep problem.
- Excessive volatile solvents in the formulation can create bubbles that burst, resulting in pinholes during film build.
- Rapid or uneven drying can trap solvents or air, leading to pinholes post-drying, pointing to film build issues.
- Insufficient or improper primer application can cause weak spots and pinholes, reflecting a prep or surface preparation problem.

CERAKOTE® Ceramic Trim Coat Kit – Quick Plastic Trim Restorer – Ceramic Coating Guaranteed Restoration to Last Over 200 Washes – A Ceramic Coating, Not a Dressing
- Restores and Protects Plastics: Cures to vehicle plastics, UV protection
- Long-Lasting Durability: Lasts over 200 washes
- Easy Application Process: Clean, dry, wipe on for quick results
As an affiliate, we earn on qualifying purchases.
As an affiliate, we earn on qualifying purchases.
What Causes Pinholes in Coatings?
Pinholes in coatings often occur when solvents or volatile components evaporate too quickly during the drying process. Surface contamination, such as dust, oil, or grease, can also contribute by creating uneven drying spots that trap air or gases, leading to pinholes. Your coating formulation plays an essential role; if it contains incompatible ingredients or excessive volatile solvents, it increases the risk of pinholes forming. A poorly balanced formulation may cause rapid evaporation, creating foam or bubbles that burst and leave tiny holes. To prevent this, choose formulations with proper solvent balance and ensure surfaces are free of contaminants before application. Managing evaporation rates and maintaining a clean surface are key steps to minimizing pinholes caused by formulation issues and surface contamination. Additionally, using vetted deals buy options for high-quality coatings can help ensure you select products designed to minimize such issues. Understanding coating chemistry can further help you select the right formulation to prevent pinholes. Incorporating techniques such as controlled drying and surface preparation can significantly reduce the likelihood of pinhole formation, especially when considering factors like evaporation control and environmental conditions.
How Surface Preparation Affects Coating Quality

Your surface cleanliness is vital; any dirt or grease can cause pinholes and poor adhesion. Ensuring proper surface roughness helps coatings bond better and reduces defects. Controlling moisture before application prevents issues that weaken the coating’s integrity and lead to pinholes. Additionally, creating a digital project space allows for tracking and documenting surface preparation processes to ensure consistency and quality. Proper surface preparation also involves understanding surface roughness and its impact on coating adhesion, which can be assessed using simple tools like a surface profile gauge. Maintaining a clean environment during application further reduces the risk of contaminants causing defects, emphasizing the importance of environmental control in coating procedures. Using the right oil for airless sprayers can also improve the uniformity of application, which is critical for achieving a smooth finish. Regularly inspecting the surface with visual checks helps identify potential issues early and ensures optimal coating performance.
Surface Cleanliness Importance
Surface cleanliness plays a critical role in ensuring high-quality coatings, as even tiny contaminants can compromise adhesion and lead to defects like pinholes after drying. Surface contamination, such as dirt, oil, or moisture, prevents proper bonding between the substrate and primer. If contaminants remain, they can create weak spots where the coating fails to adhere fully, increasing the risk of pinholes forming during drying. Proper cleaning removes these impurities, ensuring the primer adheres uniformly and bonds securely to the surface. When surface cleanliness is maintained, you reduce the chances of defects and improve the overall integrity of the coating. Maintaining surface cleanliness is essential for preventing issues like pinholes after drying. Additionally, surface preparation techniques can significantly influence the final coating quality, emphasizing the importance of meticulous cleaning procedures. Skipping thorough cleaning may seem minor but can markedly impact coating performance, ultimately leading to costly repairs and rework. Implementing effective cleaning methods can further enhance adhesion and minimize defect formation. Prioritize cleanliness to achieve a durable, defect-free finish, especially considering the importance of proper surface conditioning in coating success.
Proper Surface Roughness
Proper surface roughness is essential for achieving a strong, durable coating. When the surface is too smooth, coating adhesion suffers because the film can’t grip effectively. Conversely, if the surface is excessively rough, it can trap air and moisture, leading to pinholes and weak spots. You need to find the right balance in surface roughness—enough texture to promote adhesion without creating unnecessary imperfections. Proper preparation methods, like sanding or blasting, help achieve this suitable roughness. A well-roughened surface provides mechanical keying, ensuring the coating bonds securely and evenly. This improves overall film integrity and minimizes issues such as pinholes or delamination. Additionally, controlling surface roughness aligns with best practices in safe installation to prevent coating failures and ensure long-lasting protection. Remember, controlling surface roughness is a critical step in preventing coating failures and ensuring long-lasting protection. Consistent surface preparation helps maintain quality and predictability in coating performance, especially when considering environmental conditions that can affect adhesion and curing. Proper surface roughness also facilitates better moisture management, reducing the risk of trapped water that can compromise the coating. Furthermore, achieving the correct roughness can help mitigate contaminant entrapment, which is vital for a durable finish.
Moisture Control Strategies
Moisture trapped within or on the surface of a substrate can substantially compromise coating quality, leading to defects like pinholes and bubbling. To prevent this, you need effective moisture control strategies. Managing humidity levels during surface preparation minimizes moisture migration, reducing the risk of trapped moisture causing pinholes. Use dehumidifiers or climate-controlled environments to maintain consistent humidity, especially in high-humidity conditions. Proper drying time and techniques also help eliminate surface moisture before coating. Additionally, surface preparation techniques play a critical role in managing moisture and ensuring a high-quality finish. Proper moisture management practices are essential for controlling environmental factors that contribute to coating defects. For instance, implementing moisture control measures can significantly reduce the likelihood of moisture-related issues. By controlling humidity and moisture levels, you reduce the chance of moisture-related defects, resulting in a smoother, more durable finish. Incorporating innovative moisture detection methods can further enhance surface preparation and coating longevity. Understanding moisture migration dynamics can help in designing more effective preventative strategies for coating applications.
Common Application Mistakes That Lead to Pinholes

One common mistake is skipping proper surface preparation, which can trap air and cause pinholes. Applying too many coating layers or uneven drying conditions also increases the risk by trapping solvents or moisture. To prevent these issues, make certain your surface is well-prepared, apply coatings in thin, even layers, and maintain consistent drying conditions. Additionally, understanding easy document management can help reduce stress and prevent hurried application mistakes.
Improper Surface Preparation
If the surface isn’t prepared correctly before applying coating, pinholes are much more likely to form as the material dries. Surface contamination, such as dust, grease, or moisture, can prevent proper adhesion and create weak spots that lead to pinholes. Additionally, poor surface preparation can increase coating porosity, making it harder for the material to form a uniform, defect-free layer. Before applying your coating, ensure the surface is thoroughly cleaned, dry, and free of contaminants. Failing to do so allows trapped air, moisture, or debris to cause bubbles or voids that manifest as pinholes later. Proper surface preparation is essential to create a smooth, stable foundation that minimizes the risk of pinholes during the drying process.
Excessive Coating Layers
Applying too many coats or thick layers of coating can substantially increase the likelihood of pinholes forming as the material dries. Excessive coating creates a dense, uneven film that traps solvents and air bubbles beneath the surface. When you apply multiple layers without proper drying between coats, the underlying layers may not fully cure, leading to weak spots and pinholes. Thin, even coats are essential to prevent buildup that can cause film defects. Instead of layering excessively, focus on applying multiple thin coats, allowing each to dry thoroughly before applying the next. This approach minimizes trapped air and solvents, promoting a uniform, defect-free film. Proper application techniques and avoiding excessive coating are key to preventing pinholes caused by film build issues.
Inconsistent Drying Conditions
Inconsistent drying conditions are a common mistake that can lead to pinholes in coatings. When drying isn’t uniform, certain areas dry faster than others, causing uneven film formation. Poor temperature control can exacerbate this issue, leading to rapid evaporation in some spots while leaving others wet. This uneven drying prevents the coating from forming a smooth, defect-free surface. To avoid pinholes, assure consistent drying conditions throughout the process. Maintain proper temperature control and monitor humidity levels closely. Achieving drying uniformity helps the coating cure evenly, reducing the risk of pinholes caused by trapped air or solvent evaporation inconsistencies. By managing these factors, you promote a smooth, durable finish free of drying-related defects.
How to Recognize Signs of Poor Surface Prep and Insufficient Film Thickness

Poor surface preparation and insufficient film thickness often reveal themselves through visible defects after drying. You may notice areas where the coating appears uneven or thin, indicating inadequate coverage. Surface contamination, such as dirt, oil, or moisture, can cause poor coating adhesion, leading to pinholes, blistering, or delamination. If the coating doesn’t bond properly to the substrate, it may lift or peel, especially in spots with inadequate surface prep. Look for signs like rough texture, uneven gloss, or inconsistent film build. These issues suggest you didn’t prepare the surface thoroughly or applied too little coating. Recognizing these signs early helps you identify problems with surface prep or film thickness before they develop into more significant defects. Proper inspection ensures a durable, defect-free finish.
Best Practices for Surface Cleaning and Priming to Prevent Pinholes
Proper surface cleaning and priming are essential steps in preventing pinholes and ensuring a smooth, durable coating. To achieve this, remove surface contamination like dust, oil, and grease thoroughly. Use appropriate cleaning agents and techniques for your substrate. Apply a compatible primer to improve coating adhesion and seal any micro-porosities. Avoid using overly thick or incompatible primers that may trap air or moisture.
| Surface Condition | Recommended Action | Outcome |
|---|---|---|
| Dust, grease | Clean with solvent or detergent | Surface free from contamination |
| Rust, corrosion | Remove with abrasive or chemical treatment | Prevents adhesion issues |
| Moisture | Dry thoroughly before priming | Reduces pinhole risk |
| Old coatings | Sand and clean thoroughly | Ensures proper adhesion |
Tips for Applying a Smooth, Bubble-Free Coating
To achieve a smooth, bubble-free coating, you need to pay close attention to application techniques and environmental conditions. Start by maintaining proper surface tension; this helps the coating spread evenly without trapping air bubbles. Use consistent, even strokes and avoid over-brushing, which can disturb the film and create imperfections. Guarantee the surface is clean and primed correctly to promote good coating adhesion, preventing issues like pinholes or bubbles later. Apply thin coats rather than thick layers, giving each layer enough time to level out and eliminate air pockets before drying. Controlling temperature and humidity is vital—high humidity can increase surface tension issues, while temperature fluctuations can affect how the coating flows. Following these tips helps guarantee a smooth, defect-free finish.
Troubleshooting Pinholes: How to Diagnose and Fix Problems
Even when you follow the best application practices, pinholes can still appear in your coating. Diagnosing the cause requires careful inspection. First, check for issues with coating adhesion—poor adhesion often leads to pinholes. Next, consider environmental factors like humidity, temperature fluctuations, or dust that can cause surface imperfections. Inspect the surface for contaminants or surface defects before application. Also, evaluate how the coating was applied—such as thickness or drying conditions—that might have contributed. Finally, confirm your equipment is clean and functioning properly. To fix existing pinholes, lightly sand the area, clean thoroughly, and recoat, paying attention to environmental control. By understanding these factors, you can better troubleshoot and prevent future pinhole issues.
How to Prevent Future Pinholes Through Process Optimization

Implementing process optimization strategies is essential for preventing future pinholes in your coatings. Focus on improving coating adhesion by ensuring surfaces are properly cleaned and prepared, which reduces the risk of trapped air or contaminants causing pinholes. Control environmental factors such as humidity, temperature, and airflow during application and drying, as fluctuations can lead to film defects. Use appropriate application techniques, like consistent coating thickness and proper drying times, to minimize stress on the film. Regularly inspect equipment and materials to prevent contamination or irregularities that could compromise film integrity. By fine-tuning these process parameters, you create a stable environment that promotes uniform film formation and reduces pinhole formation, ensuring a high-quality, defect-free coating.
Frequently Asked Questions
Can Environmental Conditions During Drying Cause Pinholes?
Yes, environmental conditions during drying can cause pinholes. Moisture interference from high humidity or sudden temperature changes can create trapped air or moisture, leading to pinholes. Additionally, airflow effects, such as uneven or rapid drying, can disrupt the film’s smooth formation. To prevent this, control humidity levels and guarantee consistent airflow during drying, allowing the coating to dry evenly and reducing the risk of pinholes.
Do Different Coating Types Have Unique Pinhole Formation Issues?
Did you know that some coating types have a pinhole formation rate of up to 15%? Different coating formulations indeed face unique pinhole issues, often influenced by substrate preparation. You need to optimize surface cleaning and guarantee proper formulation to reduce pinholes. For example, thicker coatings may trap air bubbles, increasing pinholes, so adjust your formulation and prep steps accordingly to achieve a smooth finish.
How Does Curing Time Influence Pinhole Development?
You’ll find that longer drying durations and an effective curing process help reduce pinhole development. When you allow sufficient curing time, the solvent evaporates evenly, minimizing trapped air or moisture that can cause pinholes. Rushing the drying process often leads to incomplete curing, increasing pinholes. So, guarantee you follow recommended drying durations and proper curing steps to achieve a smooth, defect-free coating.
Are Pinholes More Common With Certain Application Techniques?
You might notice more pinholes with certain application techniques, especially if you rush or apply too thick a film build. When you don’t follow proper methods, the uneven coating can trap air bubbles or solvents, causing pinholes after drying. To prevent this, use consistent application techniques, thin coats, and proper curing. This ensures a smooth film build, reducing pinholes and delivering a flawless finish every time.
What Role Does Coating Viscosity Play in Pinhole Occurrence?
Your coating viscosity plays a vital role in pinhole formation, as it influences coating consistency. If the viscosity is too high, the coating becomes thick and uneven, increasing the chances of pinholes. Conversely, if it’s too low, the coating may run or sag, also causing defects. Proper viscosity control guarantees a smooth, uniform film, reducing pinholes and improving overall quality. Always maintain ideal viscosity for your specific application.
Conclusion
If you ignore the clues hiding in your surface and coating process, those tiny pinholes could become your project’s downfall. But with sharp eyes and the right techniques, you can catch problems early—before they turn into stubborn flaws. Imagine a flawlessly smooth finish, each layer perfectly sealed, standing strong against time and wear. Stay vigilant, follow best practices, and you’ll keep that pristine surface shining, free of surprises lurking beneath.