TL;DR

Get business pricing on tools and workshop supplies
- Business-only prices and quantity discounts
- Tax-exempt purchasing
- Multiple users, one account, clear invoices
Electric paint sprayers cut your painting time in half and deliver a sleek, even finish. Picking the right model depends on your project size, paint type, and comfort with safety procedures.
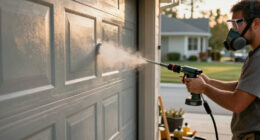
Picture this: a backyard fence, weathered and dull, suddenly transformed into a vibrant, smooth surface in just a few hours. That’s the power of an electric paint sprayer. If you’ve ever felt overwhelmed by the mess and time-consuming nature of traditional brushes and rollers, an electric sprayer might just change your game.
In this article, you’ll learn how these sprayers work, what types suit your needs, and how recent innovations make DIY projects easier and cleaner. Whether you’re painting furniture, fences, or walls, understanding your options will help you finish faster and look better.
Choose your sprayer type based on project size and detail needs—airless for big, HVLP for fine work.
Practice on scrap surfaces before starting your main project to master spray distance and speed.
Thinning paint is often necessary to prevent clogging, especially with thicker coatings.
Safety gear isn’t optional—mask, goggles, and good ventilation keep you safe.
Regular cleaning after each use can double your sprayer’s lifespan and performance.
What Makes Electric Paint Sprayers a DIY Dream
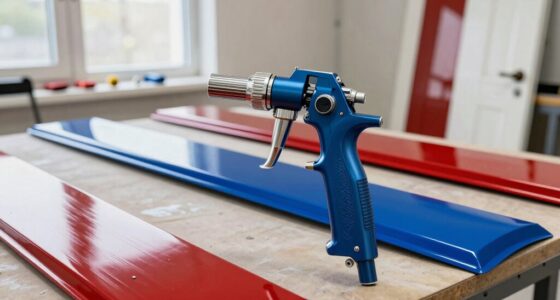
Electric paint sprayers are tools that atomize paint using electricity, turning it into a fine mist that coats surfaces evenly. They save you from the labor of brushing and rolling, producing a smooth finish in less time. Imagine covering a 10-foot wall in just 15 minutes, with minimal drips and uneven patches.
For DIYers, the appeal lies in speed, ease, and versatility. Many models are lightweight, with adjustable settings for spray pattern and flow rate. Plus, they work with a variety of paints—latex, acrylic, or oil-based—making them suitable for everything from furniture to fences.
The core benefit is efficiency: they allow you to complete large projects quickly, freeing up time for other tasks or leisure. However, this speed comes with tradeoffs—such as potential overspray and the need for proper technique to avoid paint wastage or uneven coats. Mastering the spray distance, speed, and pattern is crucial for professional-looking results. Ultimately, electric sprayers simplify DIY painting by reducing physical effort and providing a more consistent finish, but they require some practice and understanding of their settings to maximize their advantages.
electric paint sprayer for DIY projects
As an affiliate, we earn on qualifying purchases.
As an affiliate, we earn on qualifying purchases.
Which Type of Electric Paint Sprayer Fits Your Project
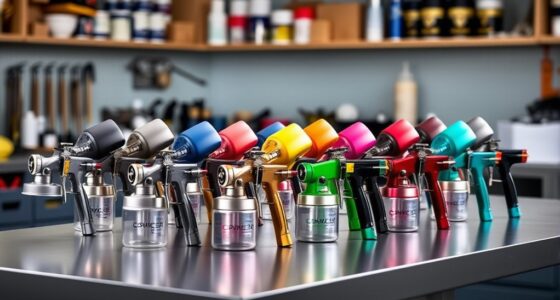
| Type | Best For | Pros | Cons |
|---|---|---|---|
| Airless | Large surfaces, thick paints like latex | Fast, covers big areas quickly, ideal for rough surfaces | Less control, overspray risk, may require masking and cleanup |
| HVLP | Furniture, cabinets, detailed work | Less overspray, fine finish, good control | Slower for large areas, may need multiple passes |
| Compressed Air | Professional-grade projects, small areas requiring precision | High precision, excellent for detailed work | Heavier, more complex operation, less portable |
5 Tips for Using Your Electric Paint Sprayer Like a Pro
- Practice on scrap wood or cardboard to understand your sprayer’s spray pattern, flow rate, and optimal distance. This helps prevent uneven coats and overspray, saving time and paint during your actual project.
- Keep your distance—about 12 inches from the surface—to ensure a uniform coat. Too close can cause runs and drips, while too far reduces coverage and increases overspray. Finding the right distance is key to efficiency and quality.
- Thin thick paints with water or appropriate solvents to prevent clogging. While it might seem counterintuitive, thinning enhances flow, reduces pressure issues, and results in a smoother finish—especially important for detailed or fine work.
- Move the sprayer steadily and evenly—no stopping mid-stroke—to avoid uneven patches. Consistent speed and movement ensure a uniform coat, reducing the need for touch-ups and rework.
- Wear protective gear—mask, goggles, gloves—and work in a well-ventilated area. Proper safety measures protect you from paint fumes, overspray, and accidental splashes, making the process safer and more comfortable.
The Latest Tech Making DIY Sprayers Better Than Ever
Recent innovations have made electric paint sprayers more user-friendly. Battery-powered models now last longer—up to 2 hours—so you can tackle bigger projects without dragging cords or needing multiple outlets. Nozzles with self-cleaning functions save significant time on cleanup, reducing frustration and downtime. Some advanced sprayers even connect to smartphone apps that offer tutorials, troubleshooting tips, and usage reminders, making them accessible even for beginners.
Lightweight designs, weighing as little as 5 pounds, mean you can paint ceilings or fences without fatigue, enabling more control and precision. These technological improvements collectively lower the barrier for DIYers, allowing more people to achieve professional-quality finishes at home. The tradeoff is often a slightly higher price point, but the time saved and ease of use justify the investment for most hobbyists.
What to Keep in Mind Before You Start Spraying
Safety is non-negotiable. Always wear a mask and goggles to protect against fumes and overspray, and work in a well-ventilated space to reduce inhalation risks. Proper surface preparation—clean, dry, and free of debris—is essential for adhesion and a smooth finish. Protect floors and nearby objects with drop cloths to avoid costly cleanup or damage. Thinning your paint may be necessary to prevent clogging and ensure a consistent spray pattern, especially with thicker coatings.
Test your sprayer on a small, inconspicuous area to fine-tune pressure, spray pattern, and distance. Adjust settings as needed to achieve a uniform mist, which reduces waste and rework. Remember, patience and practice are key—taking the time to set up correctly will save you time and frustration later, leading to a more professional-looking result.
How to Pick the Perfect Electric Sprayer for Your Home
- Define your project scope—are you painting a large fence or a small cabinet? Larger projects might benefit from more powerful, faster sprayers, while detailed work requires finer control.
- Decide between corded or cordless based on mobility needs. Cordless models offer greater flexibility but may have limited run time; corded units provide consistent power but restrict movement.
- Set your budget—entry-level models start around $50, suitable for occasional use, while high-end sprayers over $300 provide advanced features and durability for frequent projects. Balancing cost with features ensures you get the best value.
- Check compatibility with your paint type and thickness. Some sprayers handle thicker paints better, reducing the need for extensive thinning or multiple passes.
- Read reviews and watch demo videos to see how models perform in real-world scenarios. User feedback often reveals nuances about ease of use, maintenance, and results that specs alone can’t show.
Cleaning and Maintenance—Keep Your Sprayer in Top Shape
After each use, disassemble the nozzle and clean it thoroughly with water or solvent as recommended by the manufacturer. Proper cleaning prevents paint residue from drying and clogging the spray tip, which can compromise spray quality and lead to costly repairs. Regular maintenance—such as checking hoses, seals, and filters—ensures all parts function smoothly, reducing downtime and unexpected failures. Storing your sprayer in a dry, protected place prevents corrosion and damage, extending its lifespan. Investing a few minutes in proper cleaning and upkeep saves you time and money in the long run, keeps your equipment performing at its best, and guarantees consistent results for future projects.
Frequently Asked Questions
Are electric paint sprayers suitable for beginners?
Absolutely. Many models are designed with DIYers in mind, offering easy assembly, adjustable settings, and detailed instructions. Starting with a smaller, user-friendly sprayer helps build confidence before tackling bigger projects.
How do I choose the right electric paint sprayer?
Focus on your project size, type of paint, whether you want corded or cordless, and your budget. Reading reviews and watching demo videos can also help you pick a model that fits your skill level and needs.
What safety steps should I follow?
Always wear protective gear—mask, goggles, gloves—and work in a well-ventilated area. Properly prep your surface, thin paints if needed, and clean your sprayer thoroughly after use to prevent clogs and prolong its life.
Can I use an electric sprayer for small or detailed projects?
Yes. HVLP sprayers excel at detailed work like furniture or cabinets, offering fine control and less overspray. Just choose a model with adjustable settings suitable for precision tasks.
How do I keep my sprayer working smoothly?
Disassemble and clean the nozzle and filter after each use, store it in a dry place, and periodically check for worn parts. Proper maintenance guarantees consistent spray quality and extends lifespan.
Conclusion
Electric paint sprayers turn DIY painting from a chore into a quick, satisfying project. Picking the right model and mastering basic safety and technique will have you painting like a pro in no time. Imagine stepping back to admire a flawless, even coat—your home transformed beyond what brush strokes could achieve.
So, grab your sprayer, gear up, and let your creativity flow. With a little practice, your next home project will be faster, cleaner, and more impressive than ever.
Halloween Picks
halloween
As an affiliate, we earn on qualifying purchases.