Connect with us

Paint Sprayer Maintenance and Troubleshooting

Priming a Wagner Airless Paint Sprayer: Components, Preparation, and Troubleshooting

Published

on

An image depicting a well-lit workspace with a Wagner airless paint sprayer at the center

Getting a Wagner Airless Paint Sprayer ready for use is essential in order to achieve a flawless, professional finish. With its strong motor and user-friendly setup, this sprayer is a top pick for both DIYers and seasoned painters.

By properly priming the sprayer, users can ensure that the paint flows smoothly through the system, preventing clogs and ensuring an even coat. In this article, we will explore the components and preparation process, as well as troubleshooting tips to help you achieve perfect results every time.

Key Takeaways

  • Motor powers the piston pump
  • Choose the right paint for priming
  • Thoroughly clean and prepare the surface
  • Adjust the pressure settings for optimal coverage
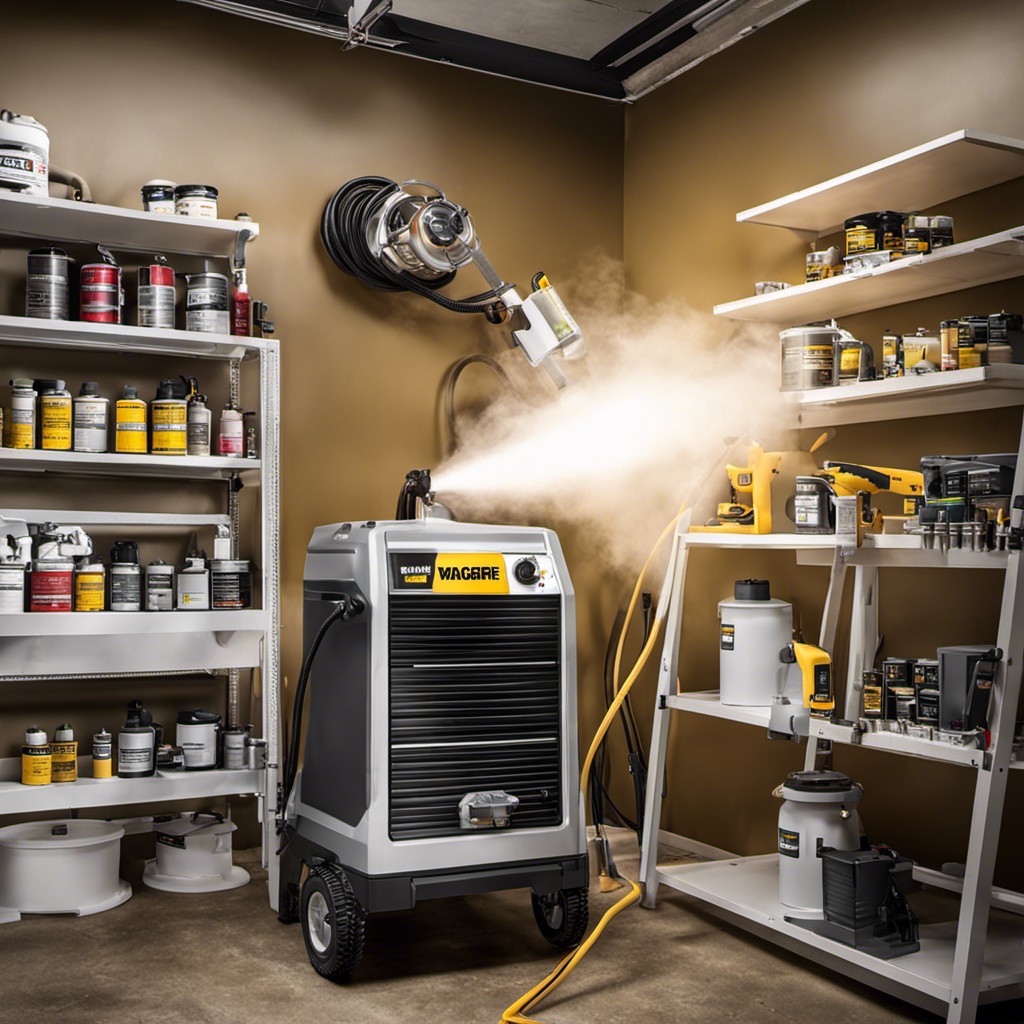
Understanding the Components and Preparation

The user should choose the right type and color of paint and measure and mix it according to instructions to properly prepare the Wagner airless paint sprayer for priming.

Choosing the right paint type is crucial for achieving the desired results. Different surfaces require different types of paint, such as latex or oil-based.

Advertisement

Understanding surface preparation is also important for successful priming. The surface should be clean, dry, and free from any loose or flaking paint. It may be necessary to sand or scrape the surface to create a smooth and even base.

Additionally, any holes or cracks should be filled and repaired before priming. Properly preparing the surface ensures that the paint adheres well and provides a long-lasting finish.

Choosing the Right Paint for Priming

When choosing the right paint for priming, it is important to consider the type of surface being painted. Different surfaces require different types of paint to ensure proper adhesion and a smooth finish. Here are some tips and tricks for achieving a smooth primed surface:

  1. Choose the right type of paint for the surface: Whether it’s wood, metal, or drywall, there are specific types of primers that are designed to adhere to each surface. Make sure to select the appropriate primer for the job.

  2. Consider the condition of the surface: If the surface has stains or is heavily damaged, it may require a stain-blocking or high-build primer. These primers are designed to cover imperfections and create a smooth base for the topcoat.

  3. Follow the manufacturer’s instructions: Different primers have different application methods and drying times. It’s important to read and follow the instructions on the paint can to ensure optimal results.

Considering the Type of Surface

Advertisement

To achieve a smooth and professional-looking finish, it’s important for the user to consider the type of surface being painted before selecting the appropriate primer.

Different surfaces require different types of primer to ensure proper adhesion and durability of the paint.

When applying primer on different surfaces, it’s crucial to troubleshoot common surface-related issues to avoid any potential problems.

For example, when priming a smooth and non-porous surface like metal or glass, it’s important to use a primer specifically designed for these surfaces to promote adhesion.

On the other hand, when priming a porous surface like wood or drywall, it’s important to use a primer that seals the surface and prevents the paint from being absorbed unevenly.

Advertisement

Preparing the Paint for Priming

Users should prepare the paint for priming by measuring and mixing it according to instructions, as well as straining it to remove impurities. Proper preparation of the paint is essential to achieve a smooth and professional finish.

Here are some important considerations for preparing the paint:

  1. Choosing the right paint type, color, and brand: Selecting the appropriate paint for the specific project and surface is crucial. Consider factors such as the type of surface, desired finish, and durability requirements. Additionally, choose a color that complements the overall design or theme.

  2. Proper paint storage and shelf life: Ensure that the paint is stored in a cool and dry place to prevent it from deteriorating. Check the expiration date on the paint can and discard any expired or spoiled paint. It’s also important to mix the paint well before use to ensure consistent color and texture.

  3. Straining the paint: Straining the paint before pouring it into the paint sprayer helps remove any impurities or debris that may affect the spray pattern or clog the nozzle. Use a fine mesh strainer or paint filter to strain the paint and ensure a smooth and even application.

Measuring and Mixing the Paint

Measuring and mixing the paint is a crucial step in the preparation process for achieving an optimal and consistent finish. To ensure proper paint consistency, it is important to follow the recommended paint mixing techniques.

Advertisement

Start by carefully measuring the paint according to the instructions provided by the manufacturer. Use a measuring cup or scale to accurately measure the desired amount of paint. Once the paint is measured, pour it into a clean mixing container.

Use a stir stick or a mechanical paint mixer to thoroughly mix the paint. This will help to evenly distribute any pigments and ensure a consistent color throughout. If the paint consistency is too thick or thin, troubleshoot by adding small amounts of water or paint thinner respectively.

Continuously stir and test the paint until the desired consistency is achieved. By following these paint mixing techniques and troubleshooting paint consistency issues, you can ensure a successful priming process and achieve the desired finish.

Straining the Paint to Remove Impurities

Straining the paint through a mesh strainer is an effective method for removing any impurities before priming. This step is crucial to ensure a smooth and even application of paint onto the surface.

Here’s why straining the paint is important:

Advertisement
  1. Removing impurities: Paint can contain small particles, such as dust, dirt, or dried paint flakes, which can clog the sprayer nozzle and lead to an uneven finish. Straining the paint helps to filter out these impurities, preventing them from obstructing the spray gun and ensuring a clean flow of paint.

  2. Preventing clogs: When paint is not strained, these impurities can cause clogs in the sprayer system, leading to interruptions in the paint flow or uneven spray patterns. By straining the paint, you eliminate the risk of clogs and maintain a consistent flow of paint throughout the priming process.

  3. Achieving a professional result: Straining the paint allows for a smoother application, resulting in a more professional-looking finish. It helps to eliminate any lumps or clumps in the paint, ensuring that the sprayed surface has a uniform appearance.

Cleaning and Preparing the Surface

After straining the paint to remove impurities, the next step in priming a Wagner airless paint sprayer is cleaning and preparing the surface. Proper surface preparation is crucial to ensure the paint adheres well and provides a smooth finish.

To start, the surface should be thoroughly cleaned using appropriate cleaning techniques such as scrubbing with a mild detergent or using a pressure washer. This helps remove dirt, grease, and other contaminants that can affect the paint’s adhesion.

After cleaning, any loose or peeling paint should be scraped off and the surface should be sanded to create a smooth and even base. Additionally, any cracks or holes should be filled with appropriate patching material.

Lastly, the surface should be properly dried before proceeding with priming to prevent any moisture-related issues.

Using Primer for a Smooth Base

To achieve a smooth base, it’s important to use primer before applying paint with a Wagner airless paint sprayer. Choosing the right primer for a smooth base is crucial to ensure optimal adhesion and coverage.

Advertisement

Here are common issues with priming and their solutions:

  1. Inadequate adhesion: If the primer doesn’t adhere properly to the surface, it can result in poor paint adhesion and peeling.
    Solution: Make sure to clean and prepare the surface thoroughly before priming. Use a primer specifically designed for the type of surface you’re working on.

  2. Uneven coverage: Uneven primer coverage can lead to an uneven paint finish.
    Solution: Apply the primer in thin, even coats, using overlapping strokes. Adjust the sprayer’s pressure and nozzle width to achieve consistent coverage.

  3. Drying issues: If the primer takes too long to dry or remains tacky, it can cause problems when applying the paint.
    Solution: Ensure proper ventilation and temperature conditions for drying. Consider using a faster-drying primer or applying thinner coats.

Setting Up and Adjusting the Sprayer

The user needs to ensure that the sprayer is clean and free from debris before setting it up and adjusting it.

Before starting the setup process, it is important to inspect the sprayer for any dirt, dust, or obstructions that could affect its performance. Cleaning the sprayer thoroughly will help prevent any paint flow issues that may occur during priming.

Once the sprayer is clean, the user can proceed with attaching the spray gun and hose securely. It is essential to follow the manufacturer’s guidelines for proper attachment.

After that, the paint container should be filled with primer, and the sprayer should be plugged in and turned on. At this point, the user can adjust the nozzle width for the project and troubleshoot any leaks or connections.

Advertisement

Finally, the pressure settings should be set according to the manufacturer’s recommendations to ensure consistent pressure during priming.

Ensuring the Sprayer Is Clean and Free From Debris

After setting up and adjusting the sprayer, the next step in priming a Wagner airless paint sprayer is to ensure that the sprayer is clean and free from debris. This is crucial for maintaining consistent pressure and troubleshooting sprayer performance. Here are the steps to follow:

  1. Inspect the sprayer for any dirt, dust, or paint residue. Clean the exterior of the sprayer using a soft cloth or brush.

  2. Check the spray gun and hose for any clogs or blockages. Clear any obstructions using a small tool or brush.

  3. Examine the pump and filter for any signs of clogs or blockages. Clean the filter thoroughly and ensure there are no obstructions.

Attaching the Spray Gun and Hose Securely

Attaching the spray gun and hose securely is a crucial step in using the Wagner airless paint sprayer. To ensure proper operation, it is important to troubleshoot any issues with the spray gun before priming.

If the spray gun is not functioning correctly, check for clogs or blockages in the nozzle. Clear any obstructions using a small tool or brush.

Additionally, adjusting the spray patterns for optimal coverage is essential. The spray patterns can be adjusted by changing the nozzle width or pressure settings on the sprayer. Experiment with different settings to find the best technique for your specific project.

Advertisement

Filling the Paint Container With Primer

To ensure proper operation, the user should securely attach the hose to the pump before filling the paint container with primer. This step is crucial to prevent any leaks or interruptions during the priming process.

Here are some techniques and tips for filling the paint container with primer:

  1. Measure and mix the primer according to the manufacturer’s instructions. It’s important to follow the recommended ratios to achieve the desired consistency and coverage.

  2. Strain the primer before pouring it into the paint container. This will help remove any impurities or clumps that could clog the spray gun or nozzle.

  3. Fill the paint container with primer, making sure not to overfill it. Leave some space at the top to allow for proper mixing and agitation.

Plugging in and Turning on the Sprayer

The user plugs in the sprayer and turns it on to begin the priming process.

Plugging in the Wagner airless paint sprayer is a crucial step in preparing for priming. Once plugged in, the user can turn on the sprayer to start the priming process.

It is important to ensure that the sprayer is clean and free from debris before plugging it in. This helps to maintain the spray pressure and prevent any issues during priming.

Advertisement

If there are any leaks or connections that need to be checked, the user should troubleshoot and address them before starting the priming process.

Adjusting the Nozzle Width for the Project

Adjusting the nozzle width for the project allows the user to control the spray pattern and coverage when using a Wagner airless paint sprayer. This is an important step in achieving the desired results.

Here are some key points to consider when adjusting the nozzle width:

  1. Choosing the appropriate nozzle size for different surfaces:

    • Different surfaces require different nozzle sizes to achieve optimal coverage.
    • Smaller nozzle sizes are suitable for detailed work and thin materials.
    • Larger nozzle sizes are better for covering larger areas and thicker materials.
  2. Troubleshooting common issues with nozzle clogging:

    • Nozzle clogging can occur due to paint or debris build-up.
    • To prevent clogging, strain the paint before using it in the sprayer.
    • If clogging occurs, clean the nozzle with a cleaning solution or replace it if necessary.

Troubleshooting Leaks and Checking Connections

After adjusting the nozzle width for the project, the next step in priming a Wagner airless paint sprayer is troubleshooting leaks and checking connections. This is an important step to ensure that the sprayer functions properly and delivers paint without any issues.

To troubleshoot leaks, it is essential to inspect all connections and fittings for any signs of leakage. This includes checking the connections between the spray gun, high-pressure hose, and the sprayer itself. If any leaks are found, they should be addressed immediately by tightening the connections or replacing any damaged parts.

In addition to checking for leaks, it is also important to ensure that all connections are secure and tight. Loose connections can cause paint to leak or spray unevenly, affecting the overall priming process. By carefully inspecting and tightening all connections, users can ensure a smooth and efficient priming experience.

Advertisement

To help visualize the troubleshooting process, here is a table showcasing common leaks and connection issues that may arise when using a Wagner airless paint sprayer:

Common Leaks Connection Issues
Paint dripping from spray gun Loose connection between spray gun and hose
Paint leaking from hose Loose connection between hose and sprayer
Inconsistent spray pattern Loose connection between pump and hose
Paint splattering during spraying Damaged or worn-out fittings

Frequently Asked Questions

Can I Use a Wagner Airless Paint Sprayer for Other Types of Paint Applications Besides Priming?

Using a Wagner airless paint sprayer for various paint applications besides priming offers several benefits. The sprayer allows for efficient and even coverage, saving time and effort.

It can be used with different types of paint, such as latex, acrylic, and enamel, providing versatility for different projects. The adjustable pressure settings and nozzle options allow for customization based on the desired finish.

Overall, a Wagner airless paint sprayer is a reliable tool for a range of paint applications.

What Should I Do if There Is a Blockage in the Hose or Spray Gun During Priming?

If there is a blockage in the hose or spray gun during priming, the user should follow these troubleshooting tips to unclog the Wagner airless paint sprayer.

Advertisement

First, turn off the sprayer and disconnect the hose from both the sprayer and the gun.

Then, inspect the hose for debris or obstructions and remove any using a brush or small tool.

Next, check the sprayer’s pump for blockages and clean the filter thoroughly.

If the issue persists, refer to the user manual or contact the manufacturer for further assistance.

How Often Should I Replace the Spray Tip on My Wagner Airless Paint Sprayer?

To ensure optimal performance, it’s recommended to regularly maintain and replace the spray tip on a Wagner airless paint sprayer. The spray tip is a crucial component that can wear out over time, leading to diminished spray quality and uneven coverage.

Advertisement

The recommended maintenance schedule for spray tip replacement varies depending on factors such as frequency of use and type of paint being sprayed. It’s advisable to consult the user manual or contact the manufacturer for specific guidelines on spray tip maintenance and replacement.

Is It Necessary to Wear Protective Gear While Priming With a Wagner Airless Paint Sprayer?

Wearing protective gear while priming with a Wagner airless paint sprayer is necessary to ensure safety and minimize potential risks.

It provides benefits such as protecting the user from inhaling paint fumes, preventing accidental contact with the skin or eyes, and reducing the risk of respiratory issues.

Alternatives to Wagner airless paint sprayers for priming purposes include traditional paintbrushes or rollers, but they may not provide the same level of efficiency and even coverage.

How Do I Properly Clean and Maintain My Wagner Airless Paint Sprayer After Priming?

To properly clean and maintain a Wagner airless paint sprayer after priming, it’s important to follow proper cleaning techniques and adhere to a recommended maintenance schedule.

Advertisement

After priming, the sprayer should be flushed with clean water to remove any paint residue.

A soft-bristle brush can be used to scrub stubborn spots, and a cleaning solution recommended by Wagner can be applied if necessary.

The sprayer should then be wiped with a clean cloth, lubricated, and stored properly to ensure its longevity and optimal performance.

Conclusion

In conclusion, priming a Wagner Airless Paint Sprayer requires a thorough understanding of its components and preparation process. By choosing the right paint and properly preparing the surface, users can achieve optimal results.

Troubleshooting and maintenance are crucial to ensure the sprayer’s efficiency and longevity.

Advertisement

However, have you ever wondered how priming with a Wagner Airless Paint Sprayer can transform your painting experience? With its advanced technology and user-friendly design, this sprayer allows for precise and efficient priming, saving you time and effort.

Continue Reading
Advertisement

Paint Sprayer Maintenance and Troubleshooting

Maintaining and Achieving Optimal Paint Consistency for Airless Sprayer Hose

Published

on

By

In a world where achieving a flawless paint finish is a true sign of professional skill, it is crucial to achieve the correct paint consistency for use in an airless sprayer hose.

The secret lies in a combination of proper maintenance, correct paint viscosity, and effective spraying techniques.

By regularly checking and replacing the sprayer hose, cleaning and storing the sprayer correctly, adjusting paint viscosity, using a filter or strainer, and mastering the correct spraying techniques, one can achieve a high-quality, streak-free finish.

Get ready to elevate your painting game and leave no room for imperfection.

Key Takeaways

  • Regularly check the hose for wear or damage and replace if necessary.
  • Clean the hose and inspect for leaks or cracks.
  • Achieving the right paint consistency ensures smooth flow and prevents clogs.
  • Properly store the sprayer in a clean, dry place away from direct sunlight and extreme temperatures.

Regularly Checking and Replacing the Sprayer Hose

Advertisement

The user should regularly check the sprayer hose for wear or damage and replace it if necessary. Preventing hose wear is crucial for maintaining the optimal performance of an airless sprayer.

Choosing the right hose material is equally important, as it affects the durability and flexibility of the hose. High-quality materials like polyurethane or nylon are recommended for their resistance to abrasion and chemicals. These materials can withstand the high pressure and constant movement involved in spraying paint.

It is essential to consider the type of paint being used and the specific requirements of the job when selecting the hose material.

Proper Cleaning and Storage Techniques

Properly cleaning and storing the sprayer ensures its longevity and prevents damage. To prevent paint buildup and maintain optimal performance, it’s important to choose the right cleaning solutions.

Here are some key steps to follow:

Advertisement
  • Select the right cleaning solutions:

  • Use a mild detergent or specialized sprayer cleaner recommended by the manufacturer.

  • Avoid harsh chemicals that can damage the sprayer components.

  • Follow proper cleaning techniques:

  • Disassemble the sprayer and remove any remaining paint.

  • Clean the spray tip, guard, and hose using warm soapy water.

  • Use a soft brush to remove dried paint or debris.

  • Rinse the parts with clean water and let them dry before reassembling the sprayer.

Achieving the Right Paint Consistency

To ensure a smooth flow and prevent clogs, it’s important to adjust the viscosity of the paint based on its type. Adjusting paint viscosity involves adding water or a specific thinner if the paint is too thick. Conversely, if the paint is too thin, a thickening agent can be added.

Achieving the right paint consistency is crucial as it ensures optimal spray performance and prevents paint clogs in the airless sprayer hose. By adjusting the viscosity, the paint flows smoothly through the sprayer without any blockages. This not only improves the overall quality of the paint job but also prolongs the lifespan of the sprayer by reducing the risk of blockages.

Properly adjusting the paint viscosity is an essential step in achieving a professional and efficient spraying experience.

Advertisement

Using a Filter or Strainer for Optimal Performance

Using a filter or strainer helps remove impurities from the paint, ensuring optimal spray performance and reducing the risk of blockages in the nozzle. When choosing the right filter or strainer for your airless sprayer hose, it is important to consider the type of paint you will be using and the level of filtration required.

The benefits of using a filter or strainer in your paint spraying process include:

  1. Improved Paint Quality:

    • Removes dirt, dust, and dried paint particles, resulting in a smoother finish.
    • Prevents clogs and ensures consistent paint flow.
  2. Extended Sprayer Lifespan:

    • Reduces the risk of blockages in the nozzle, which can lead to damage and costly repairs.
    • Prolongs the lifespan of the sprayer by preventing build-up of paint residue.

Mastering the Correct Spraying Techniques

The sprayer operator should take breaks and rest their arm to avoid fatigue while mastering the correct spraying techniques. This is crucial in preventing paint splattering and minimizing overspray.

To achieve a smooth and controlled spray pattern, the operator must maintain a consistent spraying distance and use the correct nozzle size for the paint and surface. Regularly flushing the sprayer system helps remove built-up paint residue, ensuring optimal performance.

Advertisement

It is important to note that nozzle size determines the spray pattern and flow rate, ultimately affecting the overall quality of the paint job. Different nozzle sizes are suitable for different paint and surface types, so it is essential to choose the appropriate one.

Maintaining and Extending the Lifespan of the Sprayer Hose

Regularly inspecting for wear or damage and promptly replacing if necessary helps maintain and extend the lifespan of the sprayer hose. To prevent hose damage and troubleshoot hose leaks, there are several key steps to follow:

  1. Ensure proper installation and secure connections to prevent leaks.
  2. Regularly clean the hose and inspect for any signs of wear, such as cracks or bulges.
  3. Avoid exposing the hose to extreme temperatures or harsh chemicals that can cause deterioration.
  4. Use caution when moving the sprayer to prevent bending or kinking the hose.
  5. Store the sprayer in a cool, dry place when not in use and relieve pressure in the hose.
  6. If a leak is detected, determine the source and repair or replace the affected section promptly.

Frequently Asked Questions

What Are Some Common Causes of Paint Clogs in the Sprayer Hose?

Common causes of paint clogs in the sprayer hose include using paint with improper viscosity, not properly cleaning the sprayer after each use, and failing to use a filter or strainer to remove debris from the paint.

To prevent paint clogs, it is important to adjust the viscosity of the paint, thoroughly clean the sprayer after each use, and use a filter or strainer to remove impurities.

These preventative measures ensure optimal paint consistency and prevent blockages in the sprayer hose.

Can I Use the Same Type of Paint Thinner for All Types of Paint?

Using the correct paint thinner is crucial for achieving optimal results. Different types of paint require specific thinners to maintain the desired consistency. Using the wrong thinner can lead to issues such as uneven drying, poor adhesion, or even damage to the paint surface.

Advertisement

It is important to consult the manufacturer’s recommendations or seek professional advice to determine the appropriate paint thinner for your specific type of paint. Properly using the correct paint thinner ensures a smooth and successful painting experience.

How Often Should I Clean the Spray Tip and Guard?

Cleaning frequency for the spray tip and guard depends on the frequency of use and the type of paint being used. It is recommended to clean the spray tip and guard thoroughly after each use to prevent paint build-up and clogs.

Proper cleaning techniques involve using warm soapy water and a soft brush to remove dried paint or debris. Rinse the parts with clean water and let them dry before reassembling the sprayer.

What Is the Recommended Spraying Distance for Optimal Paint Coverage?

For optimal paint coverage, it is recommended to maintain a consistent spraying distance. This ensures that the paint is evenly distributed and provides a smooth finish.

By keeping the proper distance, you can achieve optimal paint coverage without overspray or uneven application. Adjusting the spraying distance is essential when working on different surfaces or using different nozzle sizes.

Advertisement

It’s important to find the right balance to achieve the best results in your paint job.

Are There Any Specific Safety Precautions I Should Take When Using an Airless Sprayer Hose?

When using an airless sprayer hose, it’s important to take specific safety precautions to ensure a safe and effective painting experience.

Proper maintenance for the airless sprayer hose is crucial to prevent accidents and maintain optimal performance. This includes regularly checking for wear or damage, cleaning the hose and inspecting for leaks or cracks, and properly storing the sprayer in a cool, dry place.

Following these safety guidelines will help ensure a smooth and successful painting job.

Conclusion

In conclusion, maintaining and achieving optimal paint consistency for an airless sprayer hose is crucial for a flawless finish. By regularly checking and replacing the hose, cleaning and storing the sprayer properly, adjusting paint viscosity, using a filter or strainer, and mastering the correct spraying techniques, you can ensure a paint job that will leave jaws dropping and hearts racing.

Advertisement

Don’t let your creativity be hindered by clogs or inconsistent paint flow. Take control of your masterpiece and let your sprayer hose be the brush that paints dreams into reality.

Continue Reading

Paint Sprayer Maintenance and Troubleshooting

Why Using the Right Oil Matters for Your Airless Paint Sprayer

Published

on

By

An image that showcases an airless paint sprayer in action, with a close-up shot of oil being poured into the machine's designated oil reservoir, emphasizing the importance of using the right oil for optimal performance and longevity

When it comes to airless paint sprayers, choosing the correct oil is crucial for optimal performance and durability. Proper maintenance and storage of the oil are essential to prevent equipment malfunctions and avoid unnecessary wear and tear.

The viscosity of the oil greatly influences the spray patterns and coverage, making it vital to select the correct viscosity to avoid clogs and reduced efficiency. By adhering to manufacturers’ guidelines and ensuring regular lubrication, one can optimize their airless paint sprayer’s functioning.

Storing the oil appropriately is also crucial to prevent degradation.

Key Takeaways

  • Using the right oil is crucial for optimal functioning and performance of an airless paint sprayer.
  • Different types of oil are available that are specifically designed for high pressures and temperatures of airless paint sprayers.
  • Viscosity of the oil affects spray patterns and coverage, so understanding viscosity is important for achieving desired results.
  • Proper oil maintenance and storage, including regular checks, top-ups, and following manufacturers’ guidelines, ensures effective functioning and longevity of the sprayer.

The Importance of Using the Right Oil

Using the right oil in an airless paint sprayer is crucial for optimal performance and longevity. The role of oil in equipment malfunction cannot be understated. By using low-quality or contaminated oil, users risk clogs and decreased performance.

Regular lubrication with the appropriate oil prevents wear and tear, ensuring the sprayer functions smoothly and efficiently. Neglecting oil maintenance can lead to clogs and inconsistent spray patterns, resulting in subpar paint application.

To avoid these issues, it is important to choose the right oil for airless paint sprayers. Using the wrong oil can lead to clogs and decreased performance. Different types of oil are available that complement airless paint sprayers, providing the necessary lubrication and protection.

Advertisement

Proper Oil Maintenance and Storage

Proper maintenance and storage of the oil is crucial for ensuring optimal functioning of the airless paint sprayer. Preventing oil degradation and extending sprayer longevity are key objectives.

To achieve this, it is important to store oil in a cool and dry place to prevent degradation. Regularly checking and topping up oil levels is essential for optimal performance. Following the manufacturer’s guidelines for oil change intervals is also important.

It is recommended to use high-quality oil specifically designed for airless paint sprayers. This ensures proper lubrication and prevents clogs, resulting in effective functioning.

The Role of Oil in Equipment Malfunction

Improper oil maintenance can lead to equipment malfunction in airless paint sprayers. The role of oil in equipment malfunction is significant as it plays a crucial part in preventing clogs and ensuring optimal performance.

Using the wrong oil or neglecting oil maintenance can result in decreased performance and inconsistent spray patterns. Clogs can occur when the oil fails to lubricate the necessary components, leading to blockages in the sprayer system. This can cause the sprayer to malfunction and result in reduced efficiency.

Advertisement

To avoid these issues, it is important to use the correct oil designed for airless paint sprayers and follow the manufacturer’s recommendations for oil change intervals. Proper oil maintenance is essential for preventing clogs and ensuring consistent, reliable performance.

Regular Lubrication for Preventing Wear and Tear

Regularly lubricating the necessary components of an airless paint sprayer helps prevent wear and tear, ensuring its longevity and optimal performance. Proper oil maintenance is essential for regular maintenance, and choosing the right oil is crucial for the sprayer’s efficiency. When selecting oil for an airless paint sprayer, it is important to consider factors such as viscosity and compatibility. Different types of oil are available that complement airless paint sprayers, but it is crucial to use oil specifically designed for high pressures and temperatures. Using the wrong oil can lead to clogs and decreased performance. Regularly checking and topping up oil levels, following manufacturers’ guidelines for oil change intervals, and using high-quality oil designed for airless paint sprayers are all part of proper oil maintenance and storage. By ensuring proper lubrication and preventing clogs, the airless paint sprayer can function effectively and provide optimal results.

Point Details
Regular Maintenance Regularly lubricate necessary components
Oil Selection Choose oil designed for high pressures and temperatures
Proper Lubrication Ensure optimal performance and prevent clogs

The Impact of Neglecting Oil Maintenance

Neglecting proper oil maintenance and storage can have a detrimental impact on the efficiency and performance of an airless paint sprayer. The consequences of poor oil maintenance can lead to various issues that affect the overall functionality of the equipment.

Here are some key points to consider regarding the impact of oil neglect and the consequences of poor oil maintenance:

  • Increased risk of equipment malfunction and breakdown
  • Reduced spray quality and inconsistent patterns
  • Clogging of the spray gun and nozzle
  • Decreased lifespan of the airless paint sprayer
  • Inefficient use of paint and increased material waste

To avoid these issues, it is crucial to prioritize oil maintenance. Regularly check and top up oil levels, follow manufacturers’ guidelines for oil change intervals, and use high-quality oil designed specifically for airless paint sprayers.

Proper oil maintenance and storage ensure optimal performance and longevity of your equipment.

Advertisement

Types of Oil Compatible With Airless Paint Sprayers

Different oil types specifically designed for high pressures and temperatures are compatible with airless paint sprayers. These oils are essential for ensuring optimal performance and longevity of the equipment. When it comes to airless paint sprayers, using the wrong oil can lead to clogs and decreased performance. Therefore, it is crucial to choose the right oil that complements the sprayer’s requirements.

Viscosity plays a significant role in sprayer performance, affecting how easily the paint flows and influencing spray patterns and coverage. Different paint formulations have varying viscosities, and temperature also affects viscosity. By understanding viscosity and using the correct oil, users can achieve optimal spray patterns and coverage.

It is important to follow the manufacturer’s recommendations and choose the appropriate oil to prevent clogging and maintain efficiency.

Avoiding Clogs and Decreased Performance

To prevent clogs and maintain optimal performance, users should ensure proper lubrication and follow the manufacturer’s guidelines for oil change intervals.

Neglecting oil maintenance can lead to clogs and decreased performance, resulting in inconsistent spray patterns and reduced efficiency.

Advertisement

By using the correct oil viscosity, users can avoid clogs and improve spray quality. Choosing the right viscosity is crucial, as using the wrong viscosity can lead to clogging and reduced efficiency.

Additionally, high-quality oil with the right additives enhances sprayer longevity and ensures optimal performance.

Proper oil maintenance and storage are essential for preventing clogs and maintaining effective functioning. Regularly checking and topping up oil levels, storing oil in a cool, dry place, and using high-quality oil designed for airless paint sprayers are all important steps in avoiding clogs and improving spray quality.

Choosing the Right Oil for Optimal Performance

Proper maintenance and storage of oil is crucial in order to achieve optimal performance with an airless paint sprayer. Choosing the right oil viscosity and preventing oil degradation are key factors in ensuring the longevity and efficiency of the equipment.

Using the wrong viscosity can lead to clogs and reduced efficiency, resulting in inconsistent spray patterns and decreased coverage. It is important to select oil that matches the manufacturer’s recommendations, as airless paint sprayers require specific oil designed for high pressures and temperatures.

Advertisement

Regular lubrication with the appropriate oil prevents wear and tear, enhancing the sprayer’s performance and longevity. To prevent oil degradation, store the oil in a cool, dry place and follow the manufacturer’s guidelines for oil change intervals.

Understanding Viscosity and Its Impact

In order to fully understand why using the right oil matters for your airless paint sprayer, it is important to delve into the concept of viscosity and its impact on sprayer performance. Viscosity refers to how easily a liquid flows, and it plays a crucial role in determining how well the paint is sprayed.

Different paint formulations have varying viscosities, and understanding this factor is essential for achieving optimal spray patterns and coverage.

Additionally, the consistency of the paint is also affected by viscosity. The right oil can help maintain the desired paint consistency, ensuring smooth and even application. This is where the role of additives in oil performance comes into play.

Additives are specifically designed to enhance the performance of the oil and provide additional benefits such as improved lubrication and protection against wear and tear.

Advertisement

Viscosity and Spray Patterns

Understanding viscosity and its impact on spray patterns is crucial for achieving optimal performance with an airless paint sprayer. Viscosity refers to the thickness or resistance to flow of a liquid. When it comes to paint, viscosity determines how easily it flows through the sprayer and onto the surface being painted.

Proper oil selection plays a critical role in maintaining the desired viscosity for efficient paint flow. Using the right oil ensures that the sprayer operates smoothly and consistently, preventing clogs and disruptions in the spray pattern. In addition, choosing the correct oil enhances the durability of the sprayer by providing adequate lubrication to the internal components.

Temperature and Viscosity Relationship

The temperature of the environment directly affects the viscosity of the paint, which ultimately impacts the spray patterns and coverage achieved by the airless paint sprayer.

When the temperature increases, the viscosity of the paint decreases, resulting in a thinner consistency. This allows the paint to flow more easily through the sprayer, leading to wider spray patterns and better coverage.

On the other hand, when the temperature decreases, the viscosity of the paint increases, causing it to become thicker. This can result in more concentrated spray patterns and potentially uneven coverage.

Advertisement

Therefore, it is important to consider the temperature when using an airless paint sprayer to ensure the paint flows properly and the desired spray coverage is achieved.

Benefits of Using the Correct Oil

Choosing the appropriate oil viscosity ensures optimal performance and longevity of the sprayer. Using high-quality oil provides several benefits for airless paint sprayers.

Firstly, it ensures longevity by reducing wear and tear on the equipment. High-quality oil with the right additives enhances the sprayer’s lifespan and prevents premature breakdown.

Additionally, using the correct oil viscosity improves overall performance. It minimizes the risk of clogs and reduces the chances of reduced efficiency. The sprayer operates smoothly and consistently, resulting in better spray patterns and coverage.

Clogging and Efficiency Issues

Clogs and reduced efficiency can occur when the wrong viscosity is used in an airless paint sprayer. To prevent these issues and maximize efficiency, it is crucial to choose the correct viscosity oil for the sprayer. Here are five important points to consider:

Advertisement

  • Using the wrong viscosity oil can lead to clogs, which can disrupt the paint flow and cause uneven spray patterns.
  • The right viscosity oil ensures smooth operation and consistent paint application, maximizing the sprayer’s efficiency.

Regular maintenance, including checking and topping up oil levels, helps prevent clogs and ensures optimal performance.

Following the manufacturer’s recommendations for oil change intervals and using high-quality oil designed for airless paint sprayers is essential for preventing clogs.

Proper lubrication with the correct viscosity oil is necessary to prevent wear and tear, prolong the sprayer’s lifespan, and maintain optimal efficiency.

Proper Oil Maintenance and Storage Tips

Proper oil maintenance and storage techniques are essential for preventing oil degradation and ensuring optimal performance of your airless paint sprayer. By following these practices, you can prolong the life of your equipment and avoid costly repairs. Here are some tips for proper oil maintenance and storage:

Proper Oil Maintenance and Storage Tips
Store oil in a cool and dry place to prevent degradation caused by heat and moisture.
Regularly check and top up oil levels to ensure optimal performance.
Follow the manufacturer’s guidelines for oil change intervals to maintain the sprayer’s efficiency.
Use high-quality oil specifically designed for airless paint sprayers to enhance longevity and performance.

Frequently Asked Questions

Can I Use Any Type of Oil in My Airless Paint Sprayer?

Using the wrong oil in an airless paint sprayer can damage the machine and affect its performance, so it’s important to use the right type of oil.

Different types of oil are available that complement airless paint sprayers, designed specifically for high pressures and temperatures.

Advertisement

Using the correct oil viscosity is crucial for optimal performance, as using the wrong viscosity can lead to clogging and reduced efficiency.

It’s essential to choose oil that matches the manufacturer’s recommendations to ensure optimal spray patterns and coverage.

How Does Viscosity Affect the Performance of an Airless Paint Sprayer?

Oil viscosity has a significant impact on the performance of an airless paint sprayer. Using the correct viscosity is crucial for optimal functioning.

If the viscosity is too high, the paint may not flow smoothly, resulting in clogs and reduced efficiency.

On the other hand, if the viscosity is too low, the spray pattern may become inconsistent and the coverage may be uneven.

Advertisement

It is essential to choose the right oil viscosity to ensure reliable and effective operation of the airless paint sprayer.

What Happens if I Use the Wrong Viscosity Oil in My Sprayer?

Using the wrong viscosity oil in an airless paint sprayer can have detrimental effects. The potential oil damage includes clogs, reduced efficiency, and increased wear and tear on the equipment.

It is crucial to understand the importance of oil viscosity in maintaining optimal performance. Proper lubrication with the correct viscosity oil ensures smooth flow, consistent spray patterns, and maximum coverage.

Neglecting this aspect can lead to costly repairs and compromised results.

How Often Should I Check and Top up the Oil Levels in My Sprayer?

To properly clean and maintain your airless paint sprayer, it’s important to regularly check and top up the oil levels. This ensures optimal performance and prevents clogs.

Advertisement

Using a high-quality oil designed for airless paint sprayers is crucial for the longevity of your equipment. The benefits of using the right oil include enhanced efficiency, reduced clogging, and increased sprayer lifespan.

Following the manufacturer’s guidelines for oil change intervals and proper lubrication will ensure effective functioning of your sprayer.

Can I Store My Oil in Any Location, or Are There Specific Storage Requirements?

Proper storage conditions for oil are essential to maintain the integrity and performance of your airless paint sprayer. Storing oil in a cool, dry place prevents degradation and ensures its effectiveness when used.

Using the wrong oil can damage your sprayer, causing clogs and reduced efficiency. It’s crucial to follow the manufacturer’s recommendations and use high-quality oil specifically designed for airless paint sprayers.

Conclusion

In conclusion, the choice of oil for an airless paint sprayer is not to be taken lightly. Symbolically, it represents the lifeblood of the equipment, ensuring its optimal performance and longevity.

Advertisement

Neglecting proper oil maintenance and storage would be akin to denying nourishment to the sprayer, leading to equipment malfunction and wear and tear.

By understanding viscosity and the relationship between temperature and oil flow, one can achieve superior spray patterns and coverage.

Ultimately, using the correct oil, combined with regular lubrication and diligent storage, is essential for the effective functioning and maintenance of an airless paint sprayer.

Continue Reading

Paint Sprayer Maintenance and Troubleshooting

Why Is It Called an Airless Paint Sprayer

Published

on

By

An image of a sleek, futuristic paint sprayer with a transparent chamber, showcasing its advanced technology

An airless paint sprayer, when used by an individual, has the power to turn a plain surface into a work of art, similar to how a magician’s wand works its magic.

Have you ever wondered why it’s called an airless paint sprayer? In this article, I will unravel the mystery behind this powerful tool.

We will explore its history, how it works, key components, advantages, common applications, maintenance, troubleshooting, safety precautions, and even compare it to other painting techniques.

So, sit back and prepare to be amazed by the wonders of the airless paint sprayer.

Key Takeaways

  • Airless paint sprayers were designed to overcome the limitations of traditional paintbrushes and rollers.
  • They revolutionized the painting industry by increasing productivity and improving overall quality.
  • Airless sprayers rely on high pressure to force paint through a small orifice, eliminating the need for compressed air.
  • Airless sprayers offer faster application, smoother finish, reduced overspray, and versatility in various projects.

History of Airless Paint Sprayers

The history of airless paint sprayers dates back to the early 20th century. These innovative tools have evolved significantly over time, revolutionizing the painting industry.

Airless paint sprayers were initially designed to overcome the limitations of traditional paintbrushes and rollers, offering a more efficient and time-saving method of applying paint. The introduction of airless paint sprayers had a profound impact on the painting industry, allowing for faster completion of projects with a more consistent and even finish.

Advertisement

The technology behind these sprayers involves pressurizing paint, which is then forced through a small nozzle, creating a fine mist of paint particles. This transitioned the industry from manually applying paint to using a mechanized system that increased productivity and improved overall quality.

Understanding how airless paint sprayers work is key to maximizing their benefits.

How Airless Paint Sprayers Work

To understand how airless paint sprayers work, it’s important to know the basic components involved.

Airless paint sprayers are highly efficient tools that offer numerous benefits and advantages. Unlike traditional paint sprayers that use compressed air to atomize the paint, airless sprayers rely on high pressure to force the paint through a small orifice, creating a fine mist of paint particles.

This method allows for a faster and more even application, resulting in a smooth and professional finish. One of the main advantages of using airless sprayers is their ability to cover large areas quickly, making them ideal for both commercial and residential projects.

Advertisement

Additionally, airless sprayers are versatile and can be used with a wide range of coatings, including latex, enamels, stains, and lacquers.

Now, let’s explore the key components of an airless paint sprayer.

Key Components of an Airless Paint Sprayer

When using an airless paint sprayer, you’ll find that the key components are the motor, the pump, the hose, and the spray gun. These components work together to provide the functionality of the sprayer.

The motor powers the pump, which pressurizes the paint.
The pump draws the paint from the container and pushes it through the hose.
The hose carries the pressurized paint to the spray gun.
The spray gun controls the flow and pattern of the paint, allowing for precise application.
The nozzle at the end of the spray gun atomizes the paint into fine droplets for a smooth finish.

Understanding these components is crucial for using an airless paint sprayer effectively.

Advertisement

Now, let’s explore the advantages of using an airless paint sprayer.

Advantages of Using an Airless Paint Sprayer

If you want a faster and more efficient way to apply paint, you should consider using an airless paint sprayer.

The advantages and benefits of using an airless paint sprayer are numerous. Firstly, it allows for a much faster application of paint compared to traditional methods. The high pressure produced by the sprayer ensures that the paint is evenly distributed and covers a larger area in less time.

Additionally, airless paint sprayers can handle a wide range of coatings, including thick and textured paints, which can be difficult to apply with brushes or rollers. Moreover, using an airless paint sprayer results in a smoother finish with no brush marks or roller lines. It also reduces overspray, minimizing wastage and saving on paint costs.

In the subsequent section, we will explore the common applications of airless paint sprayers.

Advertisement

Common Applications of Airless Paint Sprayers

The most common applications for airless paint sprayers are in large-scale commercial projects. These powerful machines are capable of spraying paint at high pressure, making them ideal for covering large areas quickly and efficiently.

Some of the common applications of airless paint sprayers include:

  • Painting furniture: Airless paint sprayers are perfect for painting furniture as they can evenly coat surfaces, even those with intricate designs or hard-to-reach areas.

  • Exterior house painting: When it comes to painting the exterior of a house, airless paint sprayers are the go-to choice. They can easily cover large surfaces like walls and roofs in a short amount of time.

  • Industrial painting: Airless paint sprayers are commonly used in industrial settings for painting large machinery, equipment, or structures.

  • Commercial painting: Whether it’s painting a shopping center, office building, or warehouse, airless paint sprayers are highly efficient for commercial painting projects.

  • Automotive painting: Airless paint sprayers can provide a smooth and professional finish when painting vehicles, making them a popular choice in the automotive industry.

When it comes to choosing the right airless paint sprayer for your project, there are several factors to consider.

Choosing the Right Airless Paint Sprayer for Your Project

When it comes to choosing the right airless paint sprayer for your project, it’s important to understand the different types available. Each type has its own features and capabilities, making them suitable for specific applications. To help you make an informed decision, here is a table outlining the different types of airless paint sprayers and their recommended uses:

Type Recommended Use
Airless Piston Pump Ideal for large projects
Airless Diaphragm Great for spraying thick coatings
Airless High Volume Perfect for high-speed coverage
Airless Low Volume Suitable for detailed work
Airless HVLP Provides a fine finish

Tips for Properly Using an Airless Paint Sprayer

When it comes to using an airless paint sprayer, there are several painting technique tips that can help you achieve a smooth and even finish.

Advertisement

It’s important to avoid common mistakes such as spraying too close or too far from the surface, as this can result in uneven coverage or overspray.

Additionally, proper cleaning and maintenance of the sprayer is essential to ensure its longevity and optimal performance.

Painting Technique Tips

To achieve a smooth finish, try adjusting the nozzle of your airless paint sprayer for a more controlled spray pattern. This technique can significantly improve the overall quality of your painting job.

Here are some additional painting technique tips to help you achieve professional results:

  • Maintain a consistent distance between the sprayer and the surface being painted.
  • Apply the paint using overlapping strokes to ensure even coverage.
  • Keep the sprayer moving at a steady pace to avoid pooling or uneven application.
  • Start and stop the sprayer off the surface to prevent drips or excessive buildup.
  • Practice on a scrap surface to get a feel for the sprayer and adjust your technique accordingly.

By following these painting technique tips, you can enhance your painting preparation and increase your chances of achieving a smooth finish.

Now, let’s move on to common mistakes to avoid when using an airless paint sprayer.

Advertisement

Common Mistakes to Avoid

If you don’t maintain a consistent distance, you may end up with uneven coverage when using an airless paint sprayer. One of the most common mistakes people make is holding the sprayer too close to the surface being painted. This can result in excessive paint buildup and an uneven finish. On the other hand, holding the sprayer too far away can lead to overspray and wasted paint.

To achieve the best results, it is important to follow some best practices. First, ensure that you are holding the sprayer at the recommended distance from the surface, which is usually around 12 inches. Second, move the sprayer in a smooth and controlled motion, overlapping each pass by about 50% to ensure even coverage.

Now that you know how to avoid common mistakes, let’s move on to cleaning and maintenance tips for your airless paint sprayer.

Cleaning and Maintenance Tips

Properly maintaining your airless paint sprayer is essential for its longevity and optimal performance. Here are some cleaning techniques and the best cleaning products to keep your sprayer in top shape:

  • Use a solvent or cleaning solution recommended by the manufacturer to clean the pump, hoses, and gun.
  • Flush the system with clean water or solvent after each use to prevent paint residue buildup.
  • Clean the filters regularly to ensure proper paint flow and prevent clogs.
  • Inspect the spray tip for any blockages or wear and replace if necessary.
  • Store your sprayer in a clean and dry environment to prevent damage and corrosion.

By following these cleaning techniques and using the best cleaning products, you can ensure that your airless paint sprayer stays in excellent condition.

In the next section, we will explore the maintenance and cleaning of airless paint sprayers in more detail.

Advertisement

Maintenance and Cleaning of Airless Paint Sprayers

When it comes to maintaining and cleaning an airless paint sprayer, there are a few key points to keep in mind.

Proper nozzle maintenance is essential for ensuring a smooth and consistent spray pattern.

It’s also important to use the right cleaning solution for your specific sprayer, as using the wrong product can damage the equipment.

Lastly, taking preventative measures to avoid clogs and blockages will help keep your sprayer running efficiently and extend its lifespan.

Proper Nozzle Maintenance

To maintain your paint sprayer’s nozzle, you need to regularly clean it and replace any worn-out parts. Proper nozzle care is crucial for achieving optimal spray patterns and preventing clogs or uneven spraying. Here are some troubleshooting tips to ensure your nozzle stays in top shape:

Advertisement

  • Check for debris: Before and after each use, inspect the nozzle for any paint or debris buildup. Clean it thoroughly with a soft brush or a nozzle cleaning tool.

  • Clear clogs: If the nozzle is clogged, remove it and soak it in a cleaning solution or use a nozzle cleaning needle to unclog it gently.

  • Replace worn-out parts: Over time, the nozzle tip and seal may wear out. Replace them as needed to maintain consistent spray performance.

  • Use the correct nozzle size: Different projects require different nozzle sizes. Make sure to use the appropriate size for the type of paint and desired finish.

  • Store properly: After cleaning, store the nozzle in a clean, dry place to prevent damage.

Now, let’s move on to cleaning solution recommendations for your paint sprayer.

Cleaning Solution Recommendations

You can use a mixture of vinegar and water as a cleaning solution for your nozzle. This cleaning solution is not only effective but also eco-friendly. Vinegar is a natural disinfectant and can help remove any paint residue or buildup from the nozzle.

Simply mix equal parts vinegar and water in a container and soak the nozzle for about 30 minutes. After that, gently scrub the nozzle with a brush to remove any remaining paint particles. Rinse it thoroughly with clean water and let it dry before reattaching it to your airless paint sprayer.

Preventing Clogs and Blockages

To prevent clogs and blockages when using an airless paint sprayer, there are a few important steps to follow.

First, make sure to choose the right paint for your sprayer. Using a paint that is too thick or contains particles can lead to clogs. Additionally, it is crucial to properly thin the paint according to the manufacturer’s instructions. This will help the paint flow smoothly through the sprayer without causing blockages.

Advertisement

Another tip is to regularly clean the filters and nozzles of your sprayer to remove any debris or dried paint that could cause clogs. Finally, using a tip with the correct size for your project can help prevent overspray and ensure a more even application.

Now, let’s move on to troubleshooting common issues with airless paint sprayers…

Troubleshooting Common Issues With Airless Paint Sprayers

If your airless paint sprayer is experiencing common issues, troubleshooting can help identify and resolve the problem. Here are some troubleshooting tips for airless paint sprayers.

First, check the power source and make sure it is properly connected. If the sprayer is not turning on, check the fuse or circuit breaker.

Next, inspect the spray tip for any clogs or blockages. Clean the tip if necessary. Also, check the paint filter and ensure it is clean and free from debris.

Advertisement

If the sprayer is not priming, check the suction tube for any obstructions.

Lastly, make sure the paint is properly mixed and thinned according to the manufacturer’s instructions.

By following these troubleshooting steps, you can quickly identify and resolve common issues with your airless paint sprayer.

Now, let’s move on to discussing safety precautions when using an airless paint sprayer.

Safety Precautions When Using an Airless Paint Sprayer

When using an airless paint sprayer, it’s important to follow safety precautions to protect yourself and others. Here are some precautions to keep in mind:

Advertisement

  • Wear protective gear: Always wear safety glasses, gloves, and a respirator to prevent any paint or fumes from coming into contact with your eyes, skin, or lungs.

  • Ventilate the area: Make sure the painting area is well-ventilated to minimize the inhalation of paint fumes.

  • Secure the work area: Clear the area of any potential hazards, such as tripping hazards or flammable materials, to ensure a safe working environment.

  • Proper equipment handling: Familiarize yourself with the operating instructions of the airless paint sprayer and handle the equipment with care to prevent accidents.

  • Clean up properly: After completing your painting project, clean the sprayer thoroughly and dispose of any paint or solvents in accordance with local regulations.

By following these precautions and handling the equipment responsibly, you can ensure a safe and successful painting experience.

Now, let’s explore how airless paint sprayers compare to other painting techniques.

Comparing Airless Paint Sprayers to Other Painting Techniques

Comparing airless paint sprayers to other painting techniques, there are several factors to consider.

Airless sprayers offer numerous benefits that make them a popular choice among painters. Firstly, they provide a faster and more efficient way of painting large surfaces. The high-pressure system of airless sprayers enables them to cover a larger area in less time compared to traditional methods like brushes or rollers.

Additionally, airless sprayers offer a more even and consistent finish, avoiding brush marks or roller lines. They also allow for greater control over the application of paint, with adjustable pressure settings that can be tailored to different surfaces and materials.

Advertisement

Moreover, airless sprayers can handle thicker coatings, such as latex or enamel, making them versatile for various painting projects.

Overall, the benefits of airless sprayers make them a valuable tool for professional painters.

Frequently Asked Questions

What Are Some Alternative Painting Techniques to Using an Airless Paint Sprayer?

Some alternative painting techniques to using an airless paint sprayer include sponge painting and stenciling. These methods can create unique textures and patterns on surfaces, allowing for creativity and personalization in your painting projects.

Are There Any Safety Precautions Specific to Using an Airless Paint Sprayer?

When using an airless paint sprayer, it’s crucial to follow safety precautions. Properly ventilate the area, wear protective gear, and keep a safe distance from the spray. These measures ensure a smooth and accident-free painting experience.

How Do You Choose the Right Airless Paint Sprayer for a Specific Project?

When choosing the right airless paint sprayer for a specific project, there are several factors to consider. It’s important to think about the size and type of the project, the type of paint being used, and the desired finish.

Advertisement

What Are Some Common Issues That Can Occur When Using an Airless Paint Sprayer?

When using an airless paint sprayer, common issues can arise. However, with proper troubleshooting techniques, these problems can be easily resolved. Let me share some of the most common issues and how to fix them.

How Do You Properly Clean and Maintain an Airless Paint Sprayer?

To properly clean and maintain an airless paint sprayer, start by flushing out any leftover paint and cleaning the filters. Regularly check for clogs and wear, and replace any worn parts. Following these tips will help prolong the lifespan of your sprayer.

Conclusion

In conclusion, airless paint sprayers are a practical and efficient solution for painting projects. With their high-pressure technology, they provide a smooth and even finish, saving both time and paint.

An interesting statistic to note is that airless paint sprayers can cover up to 10 times more surface area compared to traditional paintbrushes or rollers. So, if you’re looking to tackle a large painting job, investing in an airless paint sprayer can greatly increase your productivity.

Advertisement

Continue Reading

Trending

Copyright © 2024 Paint Sprayer Zone Affiliate disclaimer As an affiliate, we may earn a commission from qualifying purchases. We get commissions for purchases made through links on this website from Amazon and other third parties.