Connect with us

How-To & Tips

The Importance of Filters in the Magnum Airless Paint Sprayer

Published

on

An image showcasing the intricate internal structure of the Magnum Airless Paint Sprayer's filters

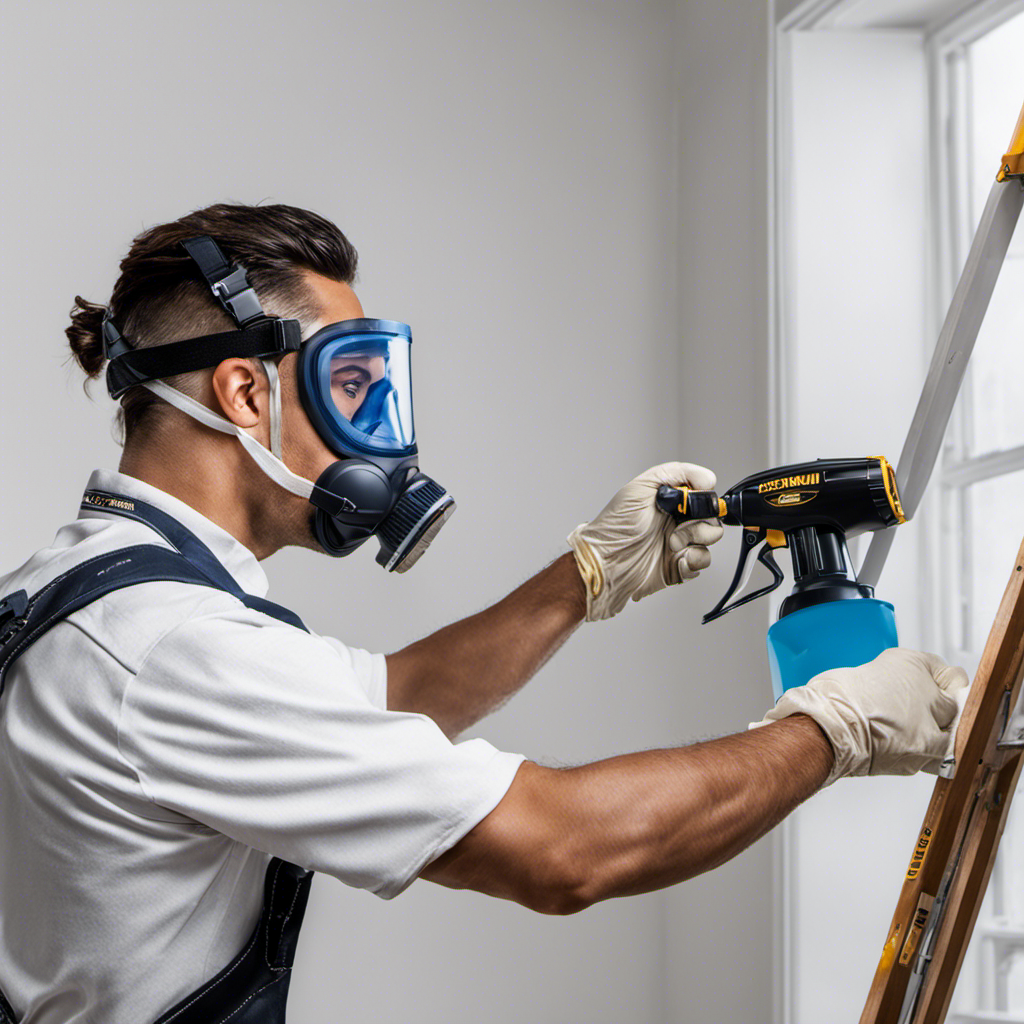
The performance of any painting project is heavily reliant on the effectiveness of the Magnum Airless Paint Sprayer, with the filter being the unsung hero at its core. This element plays a crucial role in maintaining a clean, debris-free paint flow, essential for achieving impeccable results. The filter is essential in preventing blockages and guaranteeing a seamless finish, highlighting its significance as a key component of the device.

In this article, we will delve into the importance of filters in the Magnum Airless Paint Sprayer and explore the techniques for proper maintenance and upgrading for optimal performance.

Key Takeaways

  • Investing in high-quality filters is crucial for the longevity and durability of the Magnum Airless Paint Sprayer.
  • Proper filtration ensures clean and debris-free paint flow, resulting in a smooth and even spray.
  • Regularly cleaning and maintaining filters is essential for optimal performance and longevity.
  • Choosing the right filters enhances the efficiency and effectiveness of your Magnum sprayer.

The Significance of Proper Filtration

Proper filtration ensures clean and debris-free paint flow, resulting in a smooth and even spray. The benefits of proper filtration in the Magnum Airless Paint Sprayer are numerous.

By using long-lasting filters, impurities and contaminants are effectively removed from the paint, preventing clogs and ensuring professional finishes. Clean and debris-free paint not only saves time during painting projects but also reduces frustration.

Advertisement

Filters are crucial in achieving optimal performance and efficiency with the Magnum airless paint sprayer. Using filters improves spray performance, reduces nozzle clogging, and extends the equipment’s life.

Ensuring Clean and Debris-Free Paint Flow

To achieve a smooth and even spray, users should regularly clean and maintain their filters in the Magnum Airless Paint Sprayer to ensure clean and debris-free paint flow. Regular filter maintenance offers several benefits, including improved performance, longer filter lifespan, and enhanced paint coverage.

Clean filters prevent clogs and blockages, ensuring optimal paint flow and spray performance. This leads to professional finishes and improved paint coverage. Regular maintenance extends the life of filters, reducing the need for frequent replacement.

Choosing the right filter size is also crucial for effective filtration and paint application. The mesh size determines the level of filtration, and selecting the appropriate filter material ensures compatibility and performance.

Preventing Clogs and Achieving Professional Finishes

Advertisement

Regular maintenance and cleaning of the filters in the Magnum Airless Paint Sprayer help prevent clogs and ensure professional finishes.

Proper filtration is crucial for achieving optimal performance and efficiency. By removing impurities and contaminants, filters prevent clogs and ensure a smooth and even spray. Clean paint flow not only saves time and frustration during painting projects but also improves spray performance and extends the life of the equipment.

It is important to choose the right filters, considering size and material, to ensure proper filtration and paint application. Regular inspection, cleaning, and replacement of filters, if necessary, are essential for optimal performance.

Troubleshooting filter issues and maintaining filters through proper care and cleaning help prevent painting problems and save time and money in the long run.

Advertisement

Time-Saving Benefits of Clean and Debris-Free Paint

Achieving a clean and debris-free paint flow saves time and frustration during painting projects, resulting in more efficient and satisfying results.

  • Benefits of clean and debris-free paint:
  • Time-saving: With a clean and debris-free paint flow, painters can maintain a steady and uninterrupted workflow, saving valuable time.
  • Improved efficiency: Clean paint ensures smooth and even coverage, reducing the need for touch-ups and rework.
  • Enhanced results: By eliminating debris, the final finish is professional-looking and visually appealing, leading to greater customer satisfaction.

By investing in high-quality filters for the Magnum Airless Paint Sprayer, painters can experience these time-saving benefits. Proper filtration removes impurities and contaminants, preventing clogs and ensuring a consistent paint flow.

Regularly cleaning and maintaining the filters is essential for optimal performance and longevity. With clean and debris-free paint, painters can complete projects more efficiently and achieve superior results.

Improving Performance and Efficiency With Filters

By properly maintaining and upgrading their filters, painters can significantly enhance the performance and efficiency of their Magnum airless paint sprayer. Filters play a crucial role in increasing durability and maximizing paint coverage. These filters ensure a clean and debris-free paint flow, resulting in a smooth and even spray.

Advertisement

By removing impurities and contaminants, filters prevent clogs and ensure professional finishes. Clean and debris-free paint not only saves time during painting projects but also improves the overall quality of the final result. Regular inspection, cleaning, and replacement of filters when necessary are essential for optimal performance and longevity.

Choosing the right filter size and material, as well as upgrading to high-quality filters, can further enhance the efficiency and effectiveness of the Magnum airless paint sprayer. Proper care and maintenance of filters are crucial for impeccable painting results and improved efficiency.

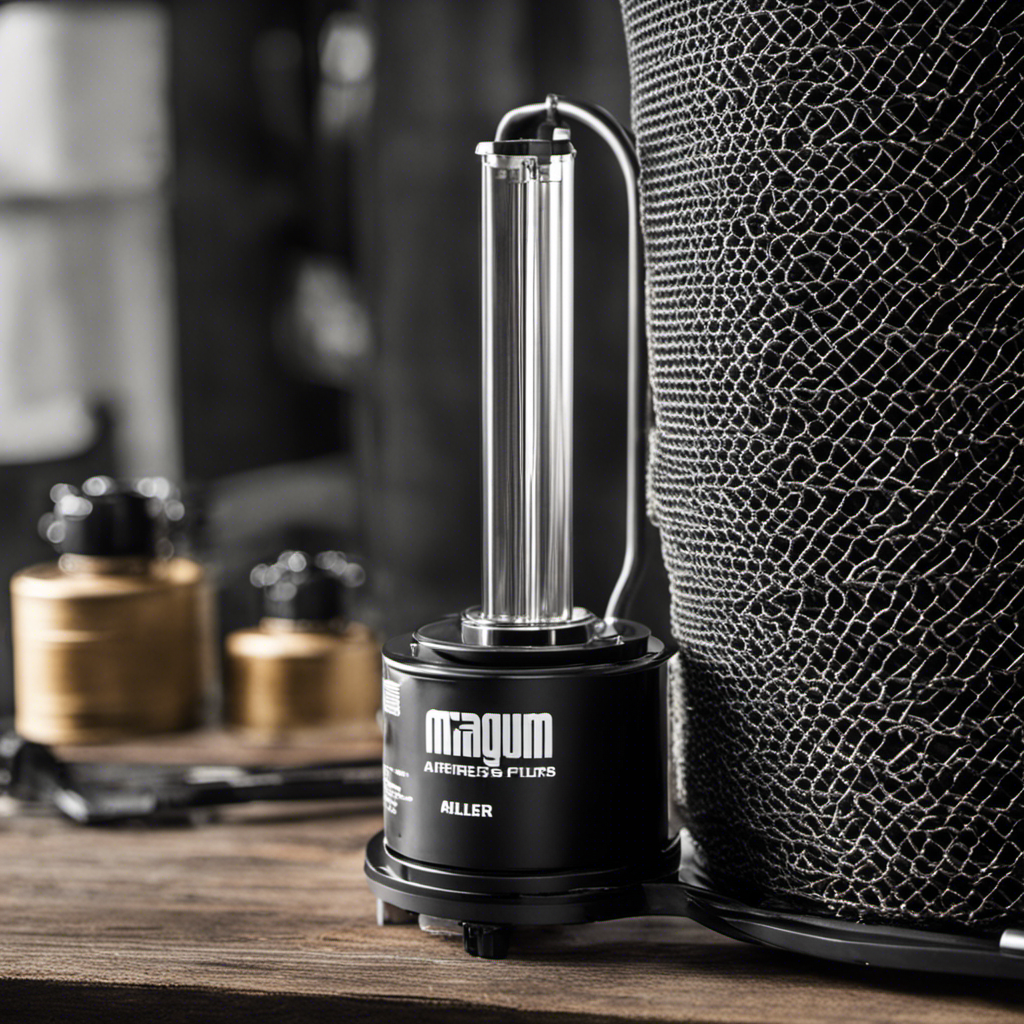
Locating and Cleaning Filters in the Magnum Airless Paint Sprayer

When maintaining the Magnum airless paint sprayer, painters can easily locate and clean the filters in two main areas: the suction tube and the spray gun.

Regular filter maintenance is of utmost importance for the optimal performance and longevity of the equipment. By using high-quality filters, painters can enjoy several benefits, including a smooth and even spray, prevention of clogs and blockages, and time-saving during painting projects.

Cleaning the filters removes dirt, dust, and particles, ensuring uninterrupted paint flow. It is essential to regularly inspect and clean the filters, as well as replace them if necessary, to maintain optimal performance. Proper filter maintenance not only extends the life of the Magnum airless paint sprayer but also improves spray performance and reduces nozzle clogging.

Advertisement

The Suction Tube and Spray Gun Filter Locations

Painters can easily locate the filters in the suction tube and spray gun of the Magnum airless paint sprayer. Regular filter maintenance is of utmost importance for optimal performance and longevity.

Using high-quality filters offers several benefits, such as ensuring clean and debris-free paint flow, resulting in a smooth and even spray. Filters remove impurities and contaminants, preventing clogs and ensuring professional finishes.

The suction tube filter is situated at the bottom of the paint container, while the spray gun filter is located near the trigger. Regularly inspecting and cleaning these filters, as well as replacing them if necessary, is crucial for maintaining optimal performance.

Effective Techniques for Cleaning Filters

Regularly cleaning and maintaining the filters in the suction tube and spray gun of the Magnum airless paint sprayer is essential for optimal performance and longevity. Here are some effective cleaning techniques and maintenance tips to ensure the filters are in top condition:

  • Clean the suction tube filter by removing the container and unscrewing the filter housing. Soak the spray gun filter in a cleaning solution.

  • Regularly inspect and clean the filters to remove dirt, dust, and particles that can cause clogs and blockages.

  • Troubleshoot filter issues by thoroughly cleaning them or replacing damaged or worn-out filters.

  • Choose the right filter size and material based on the manufacturer’s recommendations for proper compatibility and performance.

  • Upgrade filters to enhance paint flow and improve coverage, ensuring efficient and effective painting.

  • Maintain filters after each use, looking out for tears or holes, to prevent clogs and affect the spray pattern.

Don’t neglect filters for impeccable painting results. Follow these cleaning techniques and maintenance tips to ensure optimal performance and longevity.

Advertisement

Regular Inspection and Maintenance for Optimal Performance

Regular inspection and maintenance are essential for ensuring optimal performance and extending the life of the Magnum Airless Paint Sprayer. By regularly inspecting the filters, users can identify any signs of wear or damage, such as tears or holes, and promptly address them. This proactive approach prevents clogs and blockages that can affect the spray pattern and overall performance of the sprayer.

Furthermore, regular maintenance, including thorough cleaning after each use, removes dirt, dust, and particles that may accumulate in the filters over time. By keeping the filters clean and in good condition, users can maximize the efficiency and longevity of their Magnum Airless Paint Sprayer.

Neglecting regular maintenance can lead to reduced performance, increased downtime, and the need for premature replacement of equipment, highlighting the importance of regular maintenance for extending the life of the sprayer.

Troubleshooting and Maintenance of Filters

When troubleshooting and maintaining the filters in the Magnum Airless Paint Sprayer, users should ensure they are cleaning the filters thoroughly after each use and promptly addressing any signs of wear or damage. This is important to ensure optimal performance and prevent painting problems.

To evoke emotion in the audience, consider the following:

Advertisement
  • Frustration: Clogged filters can cause frustration and delays during painting projects.
  • Efficiency: Regular maintenance and troubleshooting techniques improve filter efficiency, saving time and money in the long run.
  • Longevity: Proper care and cleaning of filters extend their lifespan, ensuring consistent performance and professional finishes.

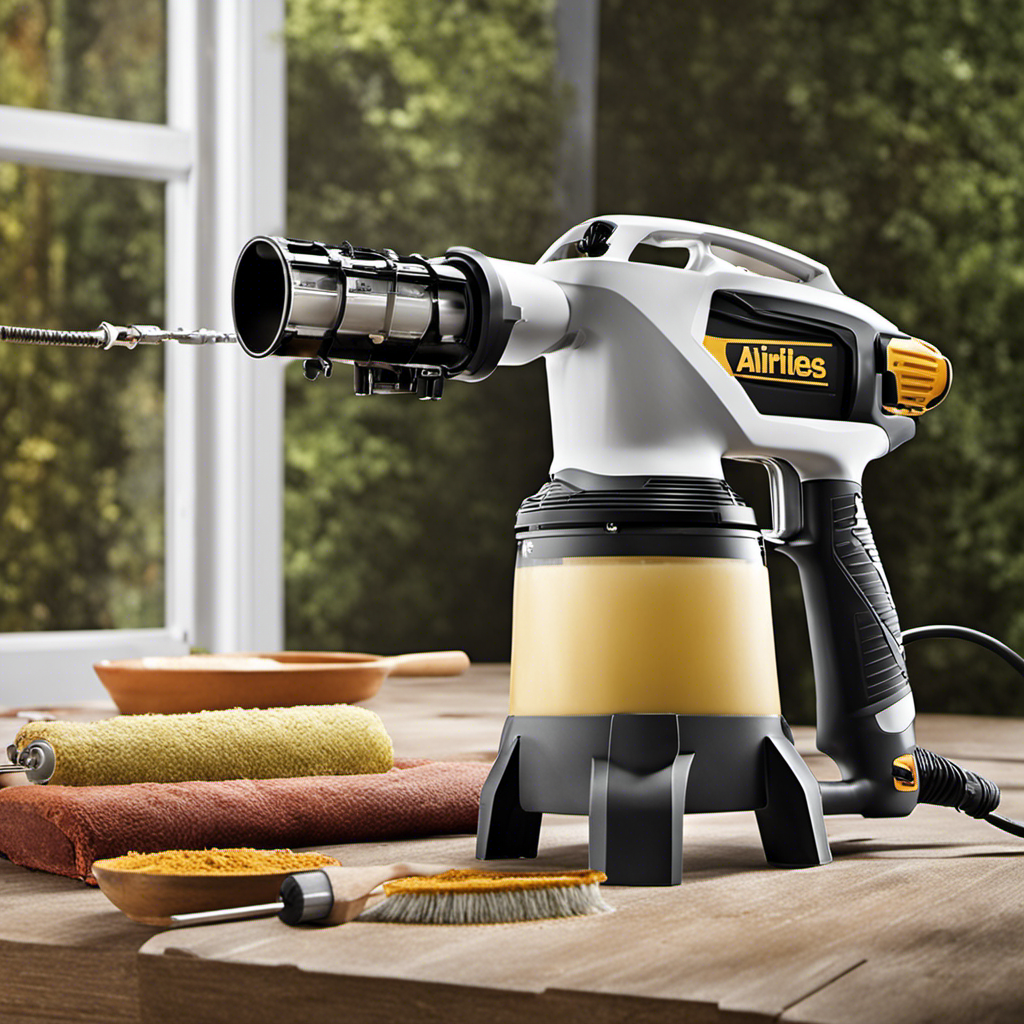
Tips for Choosing and Upgrading Filters for the Magnum Airless Paint Sprayer

After understanding the importance of troubleshooting and maintaining filters in the Magnum Airless Paint Sprayer, it is crucial to focus on selecting and upgrading filters to optimize its performance. When choosing filter material, it is essential to consider the level of filtration required and the compatibility with the sprayer. To assist in this process, manufacturers often provide recommendations regarding the appropriate filter size and material. Upgrading filters offers numerous benefits, including enhanced paint flow, improved paint coverage, and increased painting efficiency. High-quality filters also tend to have a longer lifespan, resulting in cost savings in the long run. By choosing and upgrading filters, users can ensure that their Magnum Airless Paint Sprayer operates at its best, delivering impeccable painting results.

Choosing Filter Material Benefits of Upgraded Filters
Consider level of filtration Enhanced paint flow
Check compatibility with sprayer Improved paint coverage
Consult manufacturer’s recommendations Increased painting efficiency
Longer lifespan

Frequently Asked Questions

What Is the Recommended Frequency for Cleaning the Filters in the Magnum Airless Paint Sprayer?

The recommended cleaning frequency for filters in the Magnum Airless Paint Sprayer is after every use.

Proper cleaning solutions should be used to ensure thorough removal of dirt, dust, and particles.

Cleaning the filters regularly prevents clogs and blockages, maintaining optimal performance.

Neglecting filter maintenance can affect the spray pattern and overall painting results.

Can I Use Any Cleaning Solution for Soaking the Spray Gun Filter, or Are There Specific Recommendations?

When it comes to soaking the spray gun filter in the Magnum Airless Paint Sprayer, it’s important to choose compatible cleaning solutions.

Advertisement

While there may be alternative cleaning methods, it’s recommended to follow the manufacturer’s guidelines for the appropriate cleaning solution.

Using the wrong cleaning solution could potentially damage the filter or affect its performance.

Therefore, it’s crucial to choose a cleaning solution that is specifically recommended for soaking the spray gun filter to ensure optimal cleaning and maintenance.

Are There Any Specific Signs or Symptoms That Indicate a Clogged Filter in the Magnum Airless Paint Sprayer?

Signs of a clogged filter in the Magnum Airless Paint Sprayer include reduced paint flow, uneven spray patterns, and increased pressure fluctuations.

Cleaning techniques, such as removing and soaking the filters in a cleaning solution, are crucial for preventing clogged filters.

Advertisement

Regular inspection, maintenance, and replacement of filters when necessary are essential to ensure optimal performance and prevent painting problems.

Are There Any Alternative Methods for Cleaning the Filters if I Don’t Have Access to a Cleaning Solution?

If access to a cleaning solution is limited, there are alternative methods for cleaning the filters of the Magnum Airless Paint Sprayer.

One method is to use warm soapy water to soak and gently scrub the filters.

Another option is to use a mild household detergent or vinegar solution to dissolve any paint residue.

It is important to rinse the filters thoroughly after cleaning to ensure all debris is removed.

Advertisement

Regular filter cleaning is of utmost importance to maintain optimal performance and prevent clogs in the paint sprayer.

Besides the Manufacturer’s Recommendations, Are There Any Other Factors to Consider When Choosing Upgraded Filters for the Magnum Airless Paint Sprayer?

When choosing upgraded filters for the Magnum Airless Paint Sprayer, there are several factors to consider.

Firstly, one should consider the mesh size of the filter, as it determines the level of filtration.

Additionally, the material of the filter is crucial for proper compatibility and performance.

Upgraded filters offer benefits such as enhanced paint flow and improved paint coverage.

Advertisement

They also have a longer lifespan and improve painting efficiency.

Considering these factors ensures optimal performance and longevity of the paint sprayer.

Conclusion

In conclusion, the importance of filters in the Magnum Airless Paint Sprayer cannot be overstated. These filters act as the gatekeepers, ensuring a smooth and even spray by removing impurities and contaminants from the paint flow. They prevent clogs, enhance performance, and achieve professional finishes.

Just like a vigilant guard, regular inspection and maintenance of filters are crucial for optimal performance. Choosing the right filter size and material is like selecting the perfect tool for the job.

So, remember to treat your filters with care and watch as they effortlessly transform your painting experience into a masterpiece.

Advertisement

Continue Reading
Advertisement

How-To & Tips

The Importance of Lubrication for Airless Paint Sprayers

Published

on

By

An image showcasing the significance of lubrication for airless paint sprayers

Properly lubricating airless paint sprayers is essential for optimizing their performance and extending their lifespan. Regular lubrication helps prevent expensive repairs and prolongs the equipment’s service life by promoting smooth operation, preventing clogs, and reducing wear. By minimizing friction and wear on the working components, lubrication ultimately enhances overall functionality.

Different types of lubricants, such as silicone, mineral oil, and synthetic lubricants, can be used. Following manufacturer instructions for regular maintenance, including cleaning the sprayer before lubrication and applying the appropriate amount, is essential for optimal performance.

Troubleshooting tips and maintenance advice are also provided in this article.

Key Takeaways

  • Using the right lubricant is crucial for maintaining an airless paint sprayer.
  • Regular lubrication helps prevent costly repairs and extends the lifespan of the equipment.
  • Proper lubrication is important for smooth and efficient operation, preventing clogs or damage.
  • Lubricating reduces friction and wear on moving parts, extending the lifespan and enhancing efficiency.

The Benefits of Regular Lubrication

Regular lubrication helps prevent costly repairs and extends the lifespan of the equipment. It also ensures smooth and efficient operation of airless paint sprayers. The importance of regular lubrication cannot be overstated. Lubrication plays a crucial role in enhancing the efficiency and lifespan of the equipment. By reducing friction and wear on moving parts, lubrication helps to maintain consistent performance and prevent clogs or damage. It also minimizes the risk of breakdowns and costly repairs.

Advertisement

Proper lubrication ensures that the airless paint sprayer operates smoothly and efficiently, resulting in a high-quality paint finish. Regular maintenance and lubrication are essential for optimal working condition and to maximize the longevity and efficiency of the equipment.

Types of Lubricants for Airless Paint Sprayers

Silicone lubricants provide excellent lubrication, high heat resistance, and water repellency for airless paint sprayers. When it comes to choosing the best lubricant for your airless paint sprayer, silicone lubricants are the top choice. They offer superior lubrication properties that ensure smooth and efficient operation of the equipment.

Additionally, silicone lubricants have high heat resistance, preventing the lubricant from breaking down under the high temperatures generated by the sprayer. They also provide water repellency, protecting the equipment from moisture damage.

As for the lubrication frequency, it is recommended to lubricate your airless paint sprayer according to the manufacturer’s instructions. Regular lubrication is essential for maintaining the longevity and optimal performance of your equipment.

Steps to Properly Lubricate Your Equipment

Advertisement

To properly lubricate the equipment, the user should first clean the sprayer to remove any debris or paint residue. This ensures that the lubricant can effectively coat the necessary parts and provide optimal performance. After cleaning, the following steps should be followed for proper lubrication techniques:

  1. Refer to the manufacturer’s instructions: Different airless paint sprayers may have specific lubrication requirements, so it’s important to follow the guidelines provided.

  2. Use the recommended lubricant: Using the wrong type of lubricant can lead to inadequate lubrication or even damage to the equipment. It’s essential to use the lubricant recommended by the manufacturer for optimal results.

  3. Apply the lubricant to the appropriate parts: Focus on lubricating the moving components of the sprayer, such as the piston rod, packings, and seals. Apply the lubricant evenly and ensure proper coverage.

  4. Avoid over-lubrication: Applying too much lubricant can cause excess buildup, leading to clogs and decreased performance. Use the correct amount of lubricant as specified by the manufacturer.

Troubleshooting Common Lubrication Issues

Properly maintaining the equipment includes troubleshooting common lubrication issues to ensure optimal performance.

Airless paint sprayers may encounter a few common lubrication problems that can affect their efficiency and lifespan.

One common issue is the presence of debris or paint residue in the lubrication system, leading to clogs and reduced lubrication. This can be resolved by thoroughly cleaning the sprayer before applying lubricant.

Advertisement

Another problem is the use of incorrect lubricant or using too much of it, which can cause build-up and interfere with the sprayer’s operation. It is important to use the recommended lubricant and apply the correct amount.

Additionally, improper storage or lack of regular maintenance can also result in lubrication issues.

Maintenance Tips for Extending the Lifespan of Your Sprayer

Regular maintenance and proper storage are key factors in extending the lifespan of an airless paint sprayer. To ensure the longevity of your equipment, follow these storage techniques and cleaning methods:

Advertisement
  1. Store in a clean and dry area: Keep your paint sprayer in a clean and dry environment to prevent dust and moisture buildup, which can lead to clogs and damage.

  2. Clean after each use: Thoroughly clean the sprayer after each use to remove any paint residue or debris that may affect its performance. Use appropriate cleaning solutions and follow the manufacturer’s instructions.

  3. Protect sensitive parts: Cover the spray tip and other sensitive parts with protective caps when not in use to prevent damage and maintain their effectiveness.

  4. Use quality storage containers: Store your paint sprayer in a sturdy and well-sealed container to protect it from accidental damage and ensure its safety during transportation or storage.

Commonly Asked Questions About Lubrication for Airless Paint Sprayers

Using the correct type of lubricant is crucial for maintaining the optimal performance and longevity of an airless paint sprayer. The frequency of lubrication and the choice of lubricant are important factors to consider. To help you make an informed decision, here are some commonly asked questions about lubrication for airless paint sprayers:

Question Answer
Can I use any type of lubricant on my airless paint sprayer? It is recommended to use lubricants specifically designed for airless paint sprayers.
How often should I lubricate my airless paint sprayer? The lubrication frequency depends on the manufacturer’s guidelines, but typically, it is recommended to lubricate the sprayer after every 50 hours of use.
Can I over-lubricate my airless paint sprayer? Yes, over-lubrication can lead to clogs and other issues. Follow the manufacturer’s instructions for the correct amount of lubricant to use.
What are the signs that my airless paint sprayer needs lubrication? If you notice increased friction, unusual noises, or decreased performance, it may be time to lubricate your sprayer.
Are there any specific maintenance tips I should follow to keep my airless paint sprayer in good condition? In addition to regular lubrication, proper storage, cleaning, and inspection of parts are essential for maintaining your airless paint sprayer’s longevity.

Expert Tips for Maintaining Optimal Performance

To ensure optimal performance, experts recommend following the manufacturer’s guidelines for lubrication frequency and choice of lubricant for maintenance of an airless paint sprayer. Proper maintenance is essential for maintaining the longevity and efficiency of the equipment.

Here are some expert tips to help you maintain optimal performance:

  1. Determine the maintenance frequency: Consult the manufacturer’s guidelines to determine how often your airless paint sprayer needs to be lubricated. Regular lubrication is essential for smooth and efficient operation.

  2. Choose the right lubricant: Selecting the appropriate lubricant is crucial for preventing wear and tear on moving parts. Consider factors such as heat resistance, water repellency, and rust prevention when choosing the lubricant.

  3. Clean before lubrication: Before applying the lubricant, ensure that the sprayer is clean and free from any debris or paint residue. This will help prevent clogs and ensure proper lubrication.

  4. Follow the instructions: Apply the lubricant to the recommended parts as per the manufacturer’s instructions. Use the correct amount of lubricant to ensure proper coverage and performance.

Frequently Asked Questions

Can I Use WD-40 or Other General-Purpose Lubricants on My Airless Paint Sprayer?

Using WD-40 or other general-purpose lubricants on an airless paint sprayer is not recommended. Using alternative lubricants can have adverse effects on the equipment. It may not provide the necessary lubrication needed for smooth operation and can potentially cause damage to the sprayer.

It is important to use the lubricants recommended by the manufacturer to ensure optimal performance and to maintain the longevity of the equipment.

Advertisement

Is It Necessary to Use a Specific Brand of Lubricant Recommended by the Manufacturer?

Using alternative lubricants for airless paint sprayers is not recommended. The potential consequences of using the wrong lubricant on an airless paint sprayer can be detrimental to its performance and lifespan. Manufacturers usually provide specific lubricant recommendations for their equipment, and it is necessary to follow these guidelines.

Using a lubricant that is not recommended may result in decreased efficiency, increased wear and tear, and potential damage to the paint sprayer. It is best to stick to the lubricants recommended by the manufacturer to ensure optimal operation and longevity.

How Do I Know if I Have Applied Enough Lubricant to My Airless Paint Sprayer?

To ensure the lifespan of an airless paint sprayer, it’s important to know if enough lubricant has been applied. Common signs of insufficient lubrication include increased friction, sticking parts, and decreased performance.

To maintain the sprayer’s lifespan, it’s crucial to evenly apply the recommended amount of lubricant to the appropriate parts. This will prevent wear and tear, ensure smooth operation, and extend the equipment’s longevity.

Proper lubrication is essential for optimal performance and to avoid costly repairs.

Advertisement

Can I Use a Lubricant That Is Not Recommended for High Heat Resistance on My Sprayer?

Using non-recommended lubricants on airless paint sprayers can pose potential risks and consequences. It is important to use heat-resistant lubricants specifically designed for airless paint sprayers. These lubricants provide the necessary protection against high temperatures and ensure smooth operation without compromising the equipment’s performance.

Using a lubricant that is not recommended for high heat resistance may lead to overheating, damage to the equipment, and decreased efficiency. It is crucial to follow the manufacturer’s guidelines and use the appropriate lubricant for optimal results.

Are There Any Alternative Methods of Lubrication for Airless Paint Sprayers?

Alternative lubrication methods for airless paint sprayers provide additional options for maintaining optimal performance. While using the recommended lubricants is crucial, some users may prefer to explore alternatives.

However, it is important to note that alternative methods may not offer the same level of effectiveness and benefits as the recommended lubricants.

Regular lubrication, using the appropriate lubricant, helps prevent costly repairs, extends equipment lifespan, and ensures smooth operation.

Advertisement

Conclusion

In conclusion, regular lubrication is crucial for the efficient and long-lasting performance of airless paint sprayers. By reducing friction and wear on moving parts, proper lubrication enhances the sprayer’s efficiency and prevents costly repairs.

Choosing the right lubricant, following manufacturer’s instructions, and performing regular maintenance are key steps in ensuring optimal working condition. Remember, ‘a well-oiled machine’ is not just an idiom but a literal expression of the importance of lubrication in maintaining the sprayer’s functionality.

So, keep your sprayer well-lubricated to keep it running smoothly and extend its lifespan.

Continue Reading

How-To & Tips

The Importance of Pressure Adjustment: Achieving an Even Paint Application

Published

on

By

An image showcasing a professional painter adjusting pressure on a spray gun while applying paint to a smooth surface

To achieve a perfect paint job, it is crucial to properly adjust the pressure. Imagine a painter carefully working on a surface, only to end up with streaks and uneven patches. This highlights the importance of adjusting the pressure correctly.

By fine-tuning the pressure on a paint sprayer, one can ensure consistent and even paint coverage, resulting in a smooth and professional finish.

In this article, we will explore the importance of pressure adjustment and provide valuable tips for achieving an even paint application.

Key Takeaways

  • Adjusting pressure ensures even and consistent paint application
  • Using proper tools, such as a pressure gauge and wrench/screwdriver, is important for accurate pressure readings
  • Conducting a test spray on a scrap piece of cardboard helps determine if pressure needs adjustment
  • Fine-tuning pressure settings and experimenting with techniques can improve the spray pattern and coverage

The Basics of Pressure Adjustment

Adjusting the pressure ensures that the paint is applied evenly and consistently, allowing for the desired coverage and avoiding streaks or uneven spots. Proper pressure adjustment is of utmost importance when using a paint sprayer.

One common mistake in pressure adjustment is using the wrong tools. It is crucial to gather the necessary tools such as a pressure gauge and a wrench or screwdriver to accurately measure and adjust the pressure.

Another mistake is not consulting the sprayer’s manual. The manual provides instructions for pressure adjustment settings and troubleshooting solutions to common issues.

Advertisement

Neglecting to test the spray before starting the actual painting is another error. Conducting a test spray on a scrap piece of material helps determine if pressure needs adjustment and allows for the identification of clogs or issues with paint viscosity.

Selecting the Right Tools for Pressure Adjustment

Using the correct tools for pressure adjustment is crucial to ensuring accurate readings and maintaining the quality of the paint job.

When it comes to choosing the correct pressure gauge, there are a few factors to consider. First, make sure the gauge is compatible with your sprayer model. Different sprayers may require different types of gauges, so it’s important to check the manufacturer’s recommendations.

Additionally, understanding pressure adjustments is essential for achieving the desired paint application. The pressure gauge allows you to monitor and adjust the pressure levels to ensure even and consistent coverage.

Conducting a Test Spray for Pressure Adjustment

Advertisement

To determine if the pressure needs adjustment, the user can start by conducting a test spray on a scrap piece of cardboard. This step is crucial to achieving an even paint application.

By using a pressure gauge for the test spray, the user can accurately measure and monitor the pressure. This ensures that the desired coverage and consistency are achieved.

Adjusting the pressure is especially important when working with different paint viscosities. Thick or thin paints require different pressure settings to achieve optimal results.

Using a pressure gauge allows the user to make precise adjustments and avoid streaks or uneven spots.

Advertisement

Fine-Tuning and Experimenting With Pressure Settings

The user can experiment with different pressure settings to achieve a variety of spray patterns and enhance their painting skills. By fine-tuning the pressure, they can control the overspray and minimize wastage.

Adjusting the spray distance from the surface also allows for different spray patterns to be created. It is important to practice and experiment with different techniques to improve painting skills.

The user can adjust the pressure and distance to achieve a smooth and even finish on their painting project. It is crucial to avoid over-adjusting the pressure, as this can lead to potential risks.

Cleaning and Maintenance for Optimal Pressure Adjustment

Advertisement

Regularly cleaning and maintaining the sprayer ensures optimal performance and longevity, allowing for accurate pressure adjustment and a smooth painting process. To prevent paint clogs, it is important to use a recommended cleaning solution.

After each use, thoroughly clean the sprayer by flushing the system to remove paint residue from the gun, nozzle, and filters. Regularly inspect and clean filters to prevent blockages. Lubricate moving parts to ensure smooth operation. If the nozzle gets clogged, clean it with a cleaning solution and remove stubborn clogs.

Troubleshooting Common Issues With Pressure Adjustment

Cleaning and maintaining the sprayer regularly ensures that common issues with pressure adjustment can be effectively troubleshooted. Adjusting pressure for different surfaces and preventing overspray and wastage are crucial for achieving an even paint application. Troubleshooting common issues with pressure adjustment requires attention to detail and proper knowledge.

Here are five steps to help troubleshoot common issues:

  • Check for clogs in the nozzle or hose and ensure suitable paint viscosity.
  • Inspect hoses and connections for air leaks and tighten loose connections.
  • Clean clogged nozzle with a cleaning solution and remove stubborn clogs.
  • Adjust pressure or thin paint to achieve a consistent spray pattern.
  • Regularly inspect and clean filters to prevent blockages.

Best Practices for Achieving an Even Paint Application

To achieve a smooth and flawless finish, painters should start by conducting a test spray on a scrap piece of material. This allows them to observe the spray pattern and coverage and determine if any pressure adjustment techniques are needed. Fine-tuning the pressure settings is crucial for achieving smooth finishes.

Experimentation and practice with different techniques can also enhance skills. Adjusting the pressure and distance from the surface can create different spray patterns. It is important to clean and maintain the sprayer regularly to ensure optimal performance. Troubleshooting common issues, such as clogs or air leaks, is essential for a smooth painting process.

Advertisement

Frequently Asked Questions

Can Pressure Adjustment Be Done on Any Type of Paint Sprayer?

Pressure adjustment can be done on most types of paint sprayers. However, it is important to note that different types of sprayers may have different methods of adjusting pressure. Some sprayers have built-in pressure adjustment settings, while others may require the use of additional tools such as a pressure gauge and wrench.

It is essential to consult the sprayer’s manual for specific instructions on how to adjust pressure for optimal paint application. Understanding the pros and cons of different types of sprayers can help determine which one is best suited for a particular project.

What Are the Potential Risks of Not Adjusting the Pressure Properly?

Improper pressure adjustment while using a paint sprayer can lead to various risks and negatively impact the quality of the paint application. It may result in uneven coverage, streaks, or spots, which can be visually unappealing.

Additionally, if the pressure is too high, it can cause overspray and wastage of paint. On the other hand, if the pressure is too low, it may result in a thin and insufficient coating.

Therefore, it is crucial to properly adjust the pressure to achieve an even and satisfactory paint application.

Advertisement

How Often Should Pressure Adjustments Be Made During a Paint Job?

Frequency of pressure adjustments during a paint job depends on various factors. These include the type of paint being used, the surface being painted, and the desired coverage and finish.

It is recommended to make pressure adjustments as needed to achieve an optimal spray pattern and coverage. Regularly monitoring the pressure and fine-tuning as necessary will ensure an even paint application.

Additionally, referring to the sprayer’s manual for recommended pressure ranges can help achieve the desired results.

Are There Any Safety Precautions to Take When Adjusting the Pressure?

When it comes to pressure adjustment and safety precautions, it’s important to take the necessary steps to ensure a smooth painting process. Proper pressure adjustment techniques can help achieve an even paint application and avoid any potential risks.

Safety precautions include wearing protective gear such as gloves and goggles, ensuring proper ventilation in the painting area, and following the manufacturer’s guidelines for the specific sprayer being used.

Advertisement

Can Pressure Adjustment Affect the Drying Time of the Paint?

Pressure adjustment can have an effect on the drying time of paint. By adjusting the pressure, the paint can be applied more evenly and consistently, which can impact the quality of the paint job. Proper pressure adjustment can also improve paint adhesion to the surface.

However, it is important to note that excessive pressure can lead to overspray and longer drying times. It is recommended to follow the manufacturer’s guidelines and conduct test sprays to ensure optimal pressure adjustment for the desired drying time.

Conclusion

In conclusion, achieving an even paint application is of utmost importance, and pressure adjustment plays a vital role in accomplishing this goal.

By using the correct tools and conducting a test spray, one can fine-tune the pressure settings for optimal results.

Regular cleaning and maintenance are necessary to ensure the sprayer’s performance remains at its best.

Advertisement

Troubleshooting common issues is also essential to overcome any obstacles.

By following these best practices, painters can enjoy the satisfaction of a smooth and flawless paint finish.

Continue Reading

How-To & Tips

Thinning Oil-Based Paint for Airless Sprayers: Benefits and Techniques

Published

on

By

An image showcasing a professional painter effortlessly thinning oil-based paint for airless sprayers

Thinning oil-based paint is an essential step for effectively applying it with airless sprayers. When the paint is too thick, it can lead to clogs and uneven coverage, making thinning crucial. Using thinned paint helps achieve better coverage and a smoother finish. This article delves into the advantages and methods of thinning oil-based paint for airless sprayer application.

From selecting the correct thinner to achieving the perfect ratio, readers will learn how to ensure a consistent and flawless coat. Safety precautions are also emphasized to promote a successful painting experience.

Key Takeaways

  • Thinning oil-based paint is crucial for effective use in airless sprayers.
  • Benefits of using oil-based paint in airless sprayers include better coverage and a smoother finish.
  • Thinning the paint helps prevent clogs and ensures smooth and even application.
  • Proper preparation, mixing, and testing are essential for achieving optimal spraying results.

Importance of Thinning Oil-Based Paint for Airless Sprayers

Thinning oil-based paint is crucial for effective use in airless sprayers. It helps prevent clogs and ensures smooth and even application. Achieving optimal thinning is essential to reap the benefits of thinning techniques.

When using oil-based paint in airless sprayers, thinning the paint offers better coverage and a smoother finish. Thick paint can easily clog the sprayer nozzle, leading to uneven application. By thinning the paint, you can prevent clogs and ensure a consistent flow through the sprayer, resulting in a professional-looking finish.

Advertisement

To achieve optimal thinning, it is important to select the correct thinner for your oil-based paint and airless sprayer. Recommended thinners include mineral spirits, turpentine, naphtha, and acetone. By following the correct thinning techniques, you can maximize the benefits of using oil-based paint in airless sprayers.

Achieving Better Coverage With Thinned Oil-Based Paint

Achieving a smoother finish and better coverage is possible when using thinned oil-based paint in airless sprayers. Thinning the paint is an essential technique that helps prevent clogs and ensures even application.

To achieve better coverage, it is important to choose the correct thinner for your oil-based paint and airless sprayer. Recommended thinners include mineral spirits, turpentine, naphtha, and acetone.

Gathering all the necessary tools and materials, such as paint thinner, a mixing container, and a stirring stick, is crucial before starting the thinning process. By following the paint manufacturer’s guidelines and using precise measurements, the paint can be properly mixed with the appropriate amount of thinner.

Testing the thinned paint through a test spray helps identify any issues and allows for adjustments to be made to achieve optimal spraying results.

Advertisement

Smooth Finish: The Result of Thinning Oil-Based Paint

Using the appropriate thinner and following the recommended mixing ratio results in a smooth finish when using oil-based paint in an airless sprayer. Achieving a smooth finish is crucial for a professional and polished look. Thinning the paint helps to ensure that it flows smoothly through the sprayer without clogging the nozzle or causing uneven application. By thinning the paint, the viscosity is reduced, allowing for better coverage and a more even coat.

Techniques for thinning paint involve selecting the correct thinner for your oil-based paint and airless sprayer. Some commonly recommended thinners include mineral spirits, turpentine, naphtha, and acetone. It is important to gather all the necessary tools and materials before starting the thinning process, such as paint thinner, a mixing container, a measuring cup or scale, a stirring stick or paddle, and a clean cloth or rag.

The process of thinning the paint involves assessing the viscosity of the paint and consulting the manufacturer’s guidelines for the recommended thinning ratio. Precise measurements are crucial to achieve the correct ratio of thinner to paint. Thoroughly mixing the thinner and paint ensures a homogeneous mixture.

Advertisement

Once the paint is thinned, it is important to check and adjust the consistency. Using a viscosity cup, the thinness of the paint can be measured to ensure proper consistency. Test spraying the thinned paint helps to check for smooth and even application. If the paint is too thick, adding more thinner in small increments and mixing well can help achieve the desired consistency. On the other hand, if the paint is too thin, adding a small amount of paint can help thicken it.

Testing and troubleshooting the thinned paint is crucial to ensure optimal spraying results. Spraying a small amount of thinned paint helps to test its performance in the airless sprayer and check for any clogs, uneven application, or other issues. Adjustments to the thinness of the paint can be made if needed. It is important to clean the airless sprayer thoroughly before and after each use. Following proper safety precautions when working with oil-based paint and thinners is essential for a smooth and successful painting experience.

Avoiding Clogs: Why Thinning Is Essential for Airless Sprayers

To prevent clogs in airless sprayers, it is essential to properly thin the oil-based paint. Thinning oil-based paint offers several benefits when using airless sprayers.

Firstly, it allows for better coverage, ensuring that the paint reaches all desired surfaces with ease. Secondly, thinning the paint results in a smoother finish, eliminating any visible brush or roller marks.

Troubleshooting thinning techniques is crucial to achieve optimal results. It is important to select the correct thinner for the specific type of oil-based paint and airless sprayer being used. Following the manufacturer’s guidelines for the recommended thinning ratio is also essential.

Advertisement

Testing the thinned paint through a test spray helps identify any clogs, uneven application, or other issues that may arise. By following these techniques, clogs can be avoided, ensuring a smooth and efficient application of oil-based paint in airless sprayers.

Selecting the Right Thinner for Oil-Based Paint and Airless Sprayers

When selecting the right thinner for oil-based paint and airless sprayers, it is important to consider the specific type of paint and sprayer being used. Different thinner options are available for oil-based paint, each with its own properties.

Mineral spirits is a common choice, as it effectively thins oil-based paint and is readily available. Turpentine is another popular option, known for its strong solvent properties. Naphtha is a faster-drying thinner that is ideal for quick-drying oil-based paints. Acetone is a powerful thinner that is best suited for industrial applications.

Advertisement

To thin oil-based paint effectively for airless sprayers, proper techniques should be followed. These include carefully measuring and mixing the paint and thinner, checking and adjusting the consistency, and testing and troubleshooting the thinned paint for optimal spraying results.

Gathering Tools and Materials for Thinning Oil-Based Paint

After selecting the right thinner for oil-based paint and airless sprayers, the next step is to gather the necessary tools and materials for the thinning process.

It is important to have everything prepared before starting to ensure a smooth and efficient workflow. Some essential tools and materials include paint thinner, a mixing container, a measuring cup or scale, a stirring stick or paddle, and a clean cloth or rag.

Additionally, it is crucial to prepare the workspace by covering surrounding areas with drop cloths or plastic sheets to avoid any accidental spills or stains.

It is also important to consider the proper storage and disposal of paint thinners to minimize any potential environmental harm. Properly sealing and storing paint thinners in a well-ventilated area away from heat sources and disposing of them according to local regulations are essential steps to ensure safety and environmental responsibility.

Advertisement

Preparing and Mixing Oil-Based Paint for Airless Sprayers

The first step in preparing and mixing oil-based paint for airless sprayers is assessing the viscosity of the paint to determine the appropriate thinning ratio. This can be done using various measuring techniques, such as using a viscosity cup to measure the thinness of the paint.

Once the viscosity is determined, thinning additives can be added to achieve the desired consistency. These additives help ensure optimal flow through the airless sprayer and prevent clogs. It’s important to use precise measurements when adding the thinning additives to achieve the correct ratio.

Thoroughly mixing the paint and additives is crucial to ensure a uniform mixture. By following these steps, the paint will be ready for testing and troubleshooting before being used in the airless sprayer.

Assessing Viscosity: A Key Step in Thinning Oil-Based Paint

Assessing the viscosity of the paint is a crucial step in achieving the desired consistency for optimal flow through the airless sprayer. Accurately measuring the thinness of the paint is essential to ensure a smooth and even application.

There are several techniques available for assessing viscosity. One common method is to use a viscosity cup, which measures the time it takes for the paint to flow through a small hole in the cup. The longer the flow time, the thicker the paint.

Advertisement

Another technique is to use a viscometer, a device that measures the resistance of the paint to flow. By using these techniques, painters can determine if the paint needs to be thinned further or if it is already at the desired consistency.

Precise assessment of viscosity is crucial for achieving optimal spraying results.

Achieving the Perfect Thinning Ratio for Oil-Based Paint

In order to achieve optimal thinning consistency for oil-based paint, it is important to use the right techniques. Thinning the paint too much can result in poor coverage and a watery finish, while not thinning it enough can lead to clogs and uneven application. To help guide the thinning process, here are some techniques for thinning oil-based paint:

Techniques for Thinning Oil-Based Paint
Gradual Additions
Thinners and Ratios
Stirring and Mixing

Checking Consistency: Ensuring Proper Thinning of Oil-Based Paint

To ensure proper thinning of oil-based paint, it is important to check the consistency before using it in an airless sprayer. This step is crucial to adjusting the consistency of the paint for optimal performance. Here are some key points to consider:

  • Adjusting Consistency:

  • Thinning the paint helps prevent clogs and ensures smooth application.

  • Proper consistency ensures even coverage and a professional finish.

  • Testing Performance:

  • Test spray a small amount of thinned paint to check for smooth and even application.

  • Check for any clogs, unevenness, or other issues during the test spray.

  • Make adjustments to the thinness of the paint if needed to achieve optimal spraying results.

Troubleshooting Thinned Oil-Based Paint for Airless Sprayers

The user can troubleshoot any issues with the thinned paint by testing its performance in the airless sprayer. Troubleshooting paint application is essential to ensure a smooth and even finish.

Advertisement

Common thinning mistakes can lead to clogs, uneven application, and other problems. To troubleshoot, the user should carefully observe the paint’s performance during a test spray. If there are any clogs or unevenness, adjustments should be made to the thinness of the paint.

Adding more thinner in small increments and mixing well can help if the paint is too thick. Conversely, if the paint is too thin, a small amount of paint can be added to thicken it.

It is important to follow proper safety precautions when working with oil-based paint and thinners.

Safety Precautions When Working With Thinned Oil-Based Paint

When working with thinned oil-based paint, it is important for users to follow proper safety precautions. This ensures a safe and efficient painting experience. Here are some key safety measures to keep in mind:

  • Personal Protective Equipment (PPE):

  • Wear gloves, goggles, and a respirator to protect against paint fumes and splatters.

  • Clothing should cover exposed skin to prevent contact with the paint.

  • Ventilation:

  • Work in a well-ventilated area or use a ventilation system to remove paint fumes from the workspace.

  • Open windows or use fans to improve air circulation.

Proper disposal of oil-based paint waste is essential to protect the environment. Here are a few disposal guidelines:

Advertisement
  • Empty paint cans should be allowed to dry completely before disposal.
  • Dispose of dried paint cans in accordance with local regulations.
  • Liquid paint waste should be taken to a hazardous waste facility or a designated paint disposal location.

By following these safety precautions and disposal guidelines, users can ensure a safe and environmentally-friendly painting process.

Additionally, regular cleaning of airless sprayers is necessary to maintain their performance and longevity.

Frequently Asked Questions

Can I Thin Water-Based Paint Using the Same Techniques as Oil-Based Paint?

Yes, water-based paint can be thinned using similar techniques as oil-based paint. However, it’s important to note that there are some differences in the thinning techniques for oil-based and water-based paint.

Water-based paint typically requires the use of water or a specific water-based paint thinner for thinning. The thinning ratio and consistency may also vary between the two types of paint.

It’s recommended to consult the manufacturer’s guidelines for the proper thinning techniques for water-based paint.

What Are Some Common Mistakes to Avoid When Thinning Oil-Based Paint for Airless Sprayers?

Some common mistakes to avoid when thinning oil-based paint for airless sprayers include:

Advertisement
  • Using the wrong type of thinner
  • Not following the manufacturer’s guidelines for the recommended thinning ratio
  • Not properly mixing the paint and thinner

Another mistake to avoid is not testing the thinned paint before spraying it. This can lead to clogs and uneven application.

To ensure the best results, it is important to:

  • Choose the correct thinner
  • Follow the recommended ratio
  • Thoroughly mix the paint and thinner
  • Test spray before starting the project.

Can I Use Any Type of Thinner for Oil-Based Paint, or Are There Specific Ones I Should Use?

Yes, there are specific thinners that should be used for oil-based paint. While there are alternatives, it is important to choose the correct thinner for optimal results.

Recommended thinners for oil-based paint include mineral spirits, turpentine, naphtha, and acetone. These thinners help to achieve the right consistency for smooth and even application through airless sprayers.

It is crucial to follow the paint manufacturer’s guidelines and use precise measurements when mixing the paint and thinner to ensure the correct ratio.

How Often Should I Clean My Airless Sprayer When Using Thinned Oil-Based Paint?

Airless sprayer maintenance is crucial for optimal performance when using thinned oil-based paint. Proper cleaning techniques should be followed to ensure the longevity of the sprayer.

While the frequency of cleaning will depend on the frequency of use, it is generally recommended to clean the airless sprayer thoroughly before and after each use. This helps prevent the build-up of dried paint and ensures that the sprayer functions efficiently.

Advertisement

Following the manufacturer’s guidelines for cleaning and maintenance is essential for the proper care of the equipment.

Are There Any Potential Health Hazards or Safety Precautions I Should Be Aware of When Working With Thinned Oil-Based Paint?

When working with thinned oil-based paint, there are potential health hazards and safety precautions to be aware of.

The fumes from oil-based paint can be harmful if inhaled, so it’s important to work in a well-ventilated area or use a respirator.

Additionally, skin contact with the paint and its thinners should be avoided, as they can cause irritation or allergic reactions.

It’s recommended to wear protective clothing, gloves, and goggles when handling these materials.

Advertisement

Conclusion

In conclusion, thinning oil-based paint for airless sprayers is a crucial step to achieve optimal spraying results. By selecting the right thinner and achieving the perfect ratio, painters can enjoy better coverage and a smoother finish.

Thinning also helps prevent clogs in the sprayer nozzle, ensuring even application. However, it is important to check the consistency of the thinned paint and troubleshoot any issues that may arise.

Remember to always follow safety precautions when working with oil-based paint and thinners. As the saying goes, "Thinning oil-based paint is like adding wings to your sprayer, allowing it to soar with precision and ease."

Continue Reading

Trending

Copyright © 2024 Paint Sprayer Zone Affiliate disclaimer As an affiliate, we may earn a commission from qualifying purchases. We get commissions for purchases made through links on this website from Amazon and other third parties.