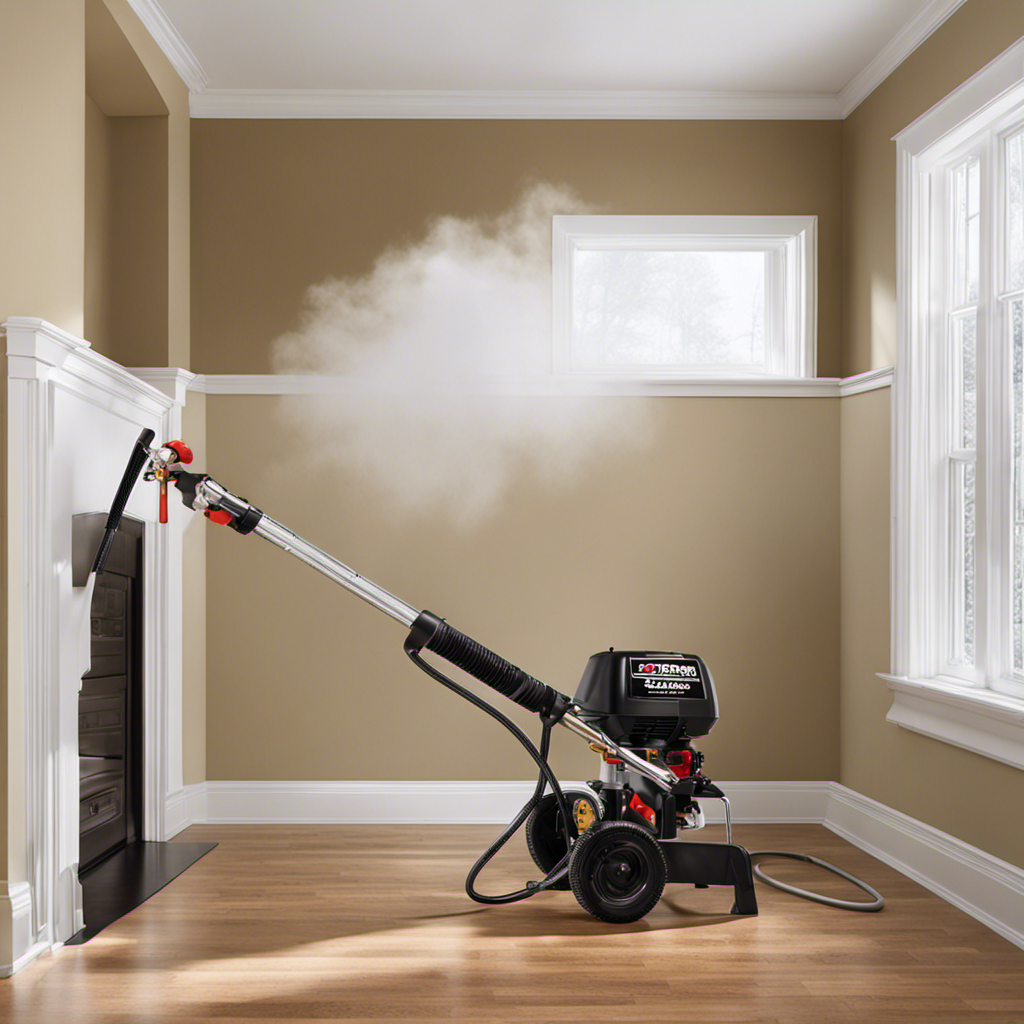
Connect with us

Paint Sprayer Maintenance and Troubleshooting

Ultimate Guide to Maintaining and Using Krause & Becker Airless Paint Sprayer

Published

on

An image showcasing a well-lit workshop with a skilled painter wearing protective gear effortlessly operating a Krause & Becker Airless Paint Sprayer, surrounded by perfectly painted walls, showcasing the tool's precision and ease of use

Maintaining and utilizing the Krause & Becker airless paint sprayer is akin to possessing a dependable partner for achieving flawless painting work. By regularly cleaning and maintaining this powerful tool, you can expect exceptional performance and durability.

This comprehensive guide provides step-by-step instructions on flushing the system, disassembling and cleaning each component, lubricating moving parts, and ensuring proper paint application.

From preparation to troubleshooting, this article equips readers with the knowledge and techniques needed to master the art of airless paint spraying.

Key Takeaways

  • Regular cleaning and maintenance of the Krause and Becker airless paint sprayer is crucial for longevity and optimal performance.
  • Proper preparation and organization of your workspace, along with gathering necessary supplies, will ensure a seamless painting experience.
  • Choosing the right paint and adjusting spray settings, such as pressure and spray pattern, are essential for achieving the desired outcome.
  • Mastering technique and application, including maintaining a consistent distance from the surface and overlapping each pass, will result in a professional-looking paint job.

Importance of Cleaning and Maintenance

Regular cleaning and maintenance of the Krause and Becker airless paint sprayer is essential for ensuring optimal performance and extending its lifespan. Neglecting these tasks can lead to common maintenance issues that may affect the sprayer’s functionality.

Advertisement

To prevent such issues, it is important to follow proper cleaning techniques. This includes flushing the system with water or cleaning solution to remove debris or dried paint, as well as disassembling and cleaning each component separately using a brush and cleaning solution.

Lubricating moving parts and regularly inspecting and cleaning filters are also crucial steps in maintaining the sprayer. By regularly cleaning and addressing common maintenance issues, users can ensure that their Krause and Becker airless paint sprayer operates smoothly and efficiently for years to come.

Troubleshooting Common Issues

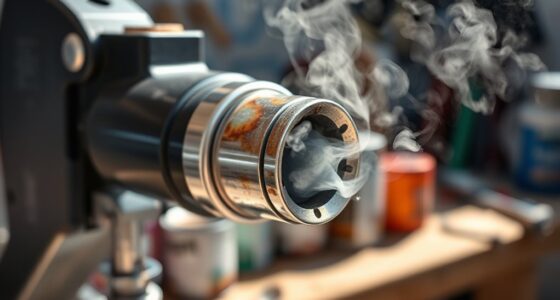
To troubleshoot common issues with the Krause and Becker airless paint sprayer, the user can easily unclog the nozzle or adjust the pressure control knob.

Common troubleshooting issues with the sprayer include clogged nozzles, which can lead to uneven spray patterns or no spray at all. To unclog the nozzle, the user can remove it from the sprayer and soak it in a cleaning solution or use a small wire brush to remove any debris.

Another common issue is improper pressure settings, which can result in an inconsistent spray or overspray. By adjusting the pressure control knob, the user can ensure the right amount of pressure for their specific project.

Advertisement

Regularly maintaining and troubleshooting the Krause and Becker airless paint sprayer can help ensure optimal performance and extend its lifespan.

Cleaning and Maintaining for Longevity

The user can extend the lifespan of their airless paint sprayer by regularly cleaning and maintaining it. Cleaning techniques are essential for keeping the sprayer in optimal condition.

To clean the sprayer, the user should flush the system with water or a cleaning solution to remove debris or dried paint. Each component should be disassembled and cleaned separately using a brush and cleaning solution.

Advertisement

It is also important to lubricate moving parts to prevent wear and tear. Regularly inspecting and cleaning the filters is crucial to prevent clogs.

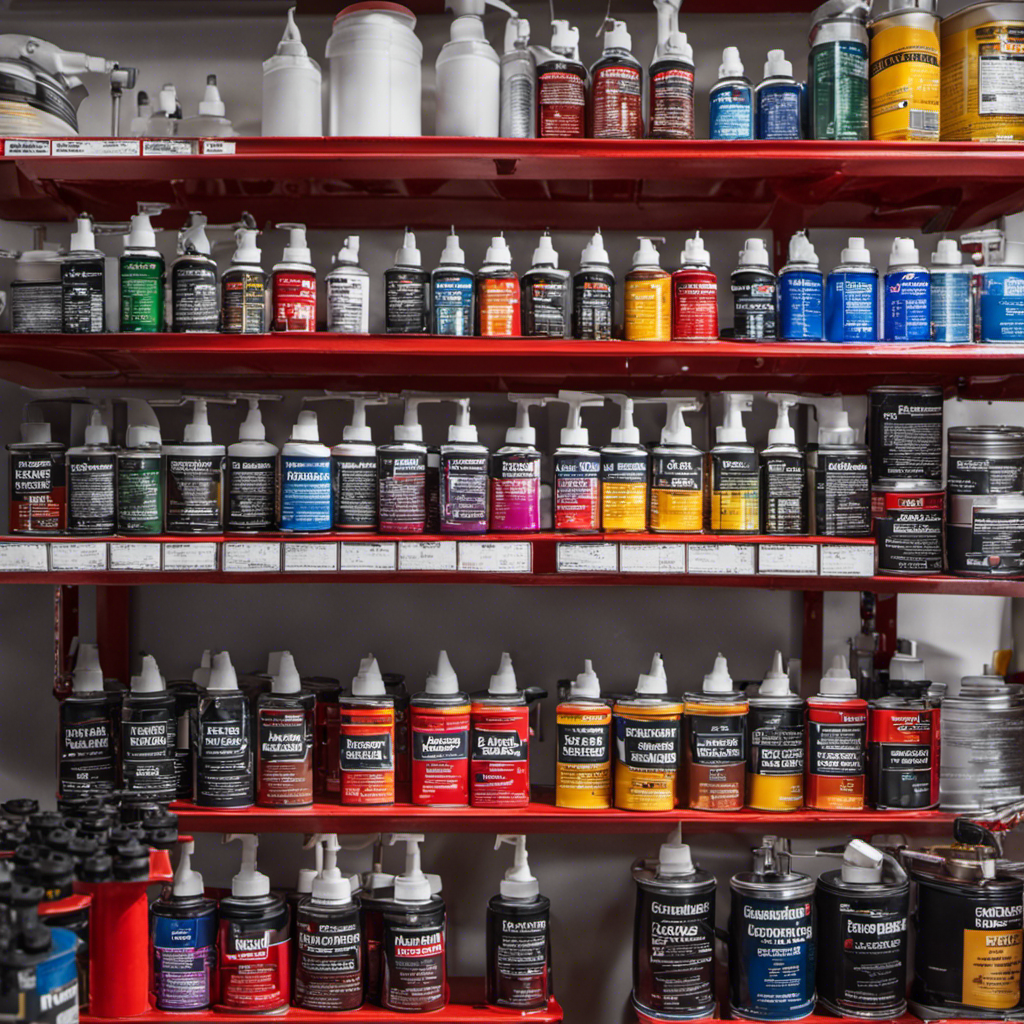
When it comes to cleaning products, it is recommended to use mild detergents or specialized cleaning solutions designed for paint sprayers. These products are gentle enough to clean the sprayer effectively without causing damage.

Preparation and Supplies

Clearing the workspace of furniture and objects that may obstruct movement is an important step in preparing for a paint job. This ensures that you have enough space to move around and access all areas that need to be painted.

Once the workspace is clear, it’s time to gather your supplies and prepare the surfaces. When choosing paint colors, consider the existing color scheme and your personal preferences.

Additionally, it’s essential to properly thin the paint if necessary to achieve the desired consistency for the paint sprayer. This can be done by following the manufacturer’s instructions or adding the appropriate amount of thinning agent. Proper thinning techniques ensure that the paint flows smoothly through the sprayer, resulting in an even and professional finish.

Advertisement

Workspace Organization

Organizing the workspace and having all necessary supplies within reach creates a seamless painting experience. Here are three key aspects of workspace organization and paint sprayer maintenance that can help ensure a smooth and efficient painting process:

  1. Clearing the workspace: Removing furniture and objects that could obstruct movement allows for easy access to all areas that need to be painted. A clutter-free workspace also reduces the risk of accidents or damage to furniture.

  2. Creating a designated area: Designate a specific area for your painting supplies, such as a table or shelf, to keep everything organized and within reach. This prevents time wasted searching for supplies and ensures that you have everything you need readily available.

  3. Proper storage of the paint sprayer: When not in use, it is important to store the paint sprayer properly to maintain its longevity. This includes cleaning the sprayer thoroughly, removing any excess paint, and storing it in a clean and dry space.

Choosing the Right Paint

To achieve the desired outcome, the user should carefully choose the appropriate paint color and adjust the spray settings accordingly.

When selecting the paint color for their project, it is important to consider the existing color scheme and personal preferences. Additionally, understanding different paint finish options, such as matte or satin, can help achieve the desired aesthetic.

Advertisement

Once the paint color has been chosen, it may be necessary to thin the paint to achieve the desired consistency for the sprayer.

Adjusting the spray pattern and pressure settings is crucial for achieving optimal results. Different spray patterns require different pressure settings, so it is important to experiment and find the settings that work best for the specific project.

Adjusting Spray Settings

Adjusting the spray pattern and pressure on the paint sprayer is crucial for achieving the desired outcome and optimal results for the project. To evoke emotion in the audience, here are three key factors to consider when adjusting spray settings:

  1. Spray pattern adjustment: The ability to adjust the spray pattern allows for versatility in application. Whether you need a narrow pattern for precise detailing or a wide pattern for larger areas, being able to customize the spray pattern ensures that you can achieve the desired coverage and finish.

  2. Pressure control adjustment: Controlling the pressure of the paint sprayer is essential for achieving a consistent and even application. By adjusting the pressure, you can avoid issues such as overspray or uneven distribution of paint. This ensures that your project looks professional and achieves the desired results.

  3. Experimentation and practice: Adjusting spray settings may require some experimentation and practice. It’s important to familiarize yourself with the paint sprayer and understand how different adjustments affect the outcome. By practicing on a scrap piece of material, you can fine-tune your technique and achieve the best results on your actual project.

Familiarizing Yourself With the Sprayer

The user can become familiar with the sprayer by reading the instruction manual and practicing on a scrap piece of material before starting the actual project. This will help them understand the different features and functions of the Krause and Becker airless paint sprayer. Additionally, it is important to learn about sprayer maintenance techniques and troubleshooting tips to ensure optimal performance and longevity of the sprayer.

To provide a visual representation of these ideas, a table can be used:

Advertisement
Sprayer Maintenance Techniques Sprayer Troubleshooting Tips
Flush the system with water or cleaning solution to remove debris or dried paint Unclog the nozzle if necessary
Disassemble and clean each component separately using a brush and cleaning solution Adjust the pressure control knob if the spray is uneven
Lubricate moving parts to prevent wear and tear Check for leaks or loose connections
Regularly inspect and clean the filters to prevent clogs Ensure proper paint consistency and thinning
Store the sprayer in a clean and dry place when not in use Clean the sprayer thoroughly after each use

Technique for Consistent Distance

After familiarizing yourself with the Krause and Becker airless paint sprayer, it’s time to focus on improving your technique for maintaining a consistent distance from the surface. This is crucial for achieving an even and professional finish. Here are some tips to help you improve your technique and ensure proper surface preparation:

  1. Measure and mark: Use a measuring tape and pencil to mark the desired distance from the surface. This will serve as a reference point and help you maintain consistency throughout the painting process.

  2. Practice with a scrap piece: Before starting your actual project, practice spraying on a scrap piece of material. This will allow you to get a feel for the sprayer and fine-tune your technique before tackling the main surface.

  3. Use a guide or spacer: If you struggle with maintaining a consistent distance, consider using a guide or spacer. This can be a simple piece of cardboard or a specialized tool that helps you maintain the desired distance from the surface.

Achieving a Smooth Finish

To achieve a smooth finish, the user should focus on maintaining a consistent speed and angle while operating the sprayer. This ensures that the paint is evenly distributed and avoids streaks or drips. Additionally, adjusting the spray pattern and pressure settings is crucial for achieving the desired outcome. Different spray patterns require different pressure settings, so it’s important to experiment and find the right combination for your project. Thinning the paint consistency may also be necessary, especially if it is too thick to properly atomize and spray. This can be done by adding a small amount of water or paint thinner until the desired consistency is achieved. By following these tips and techniques, you can achieve a professional-looking finish with your Krause and Becker airless paint sprayer.

Spray Pattern Pressure Setting Thinning Consistency
Vertical High Thin
Horizontal Medium Medium
Round Low Thick

Overlapping for Even Coverage

Achieving even coverage requires the user to overlap each pass when operating the Krause and Becker airless paint sprayer, ensuring that every area is adequately coated. This technique is essential for achieving smooth and professional-looking results.

Here are three key points to keep in mind when using overlapping techniques to achieve even coats:

  1. Consistent distance: Maintaining a consistent distance from the surface while overlapping each pass is crucial. This helps to avoid uneven coverage and drips.

  2. Spray nozzle angle: Adjusting the spray nozzle angle to match the surface and maintaining a consistent speed will result in a smooth finish. Moving too quickly can lead to thin coverage, while going too slowly can cause drips and uneven layers.

  3. Proper overlap: Giving each pass a nice overlap ensures that every area is adequately coated. This technique helps to eliminate any missed spots and creates an even and seamless finish.

Tips for a Professional-Looking Paint Job

When aiming for a professional-looking paint job, it is important to properly prepare the workspace and choose high-quality paint. Here are some tips for achieving that polished finish.

Advertisement

First, make sure to thin the paint if necessary to achieve the desired consistency for the sprayer. This will help prevent clogs and ensure smooth application.

Additionally, be aware of common paint application mistakes such as applying too much paint at once or not waiting for each coat to dry before applying the next. Applying multiple thin coats will result in a more even and professional finish.

Lastly, take the time to practice your technique on a scrap piece of material before starting your actual project. This will help you refine your skills and avoid any costly mistakes.

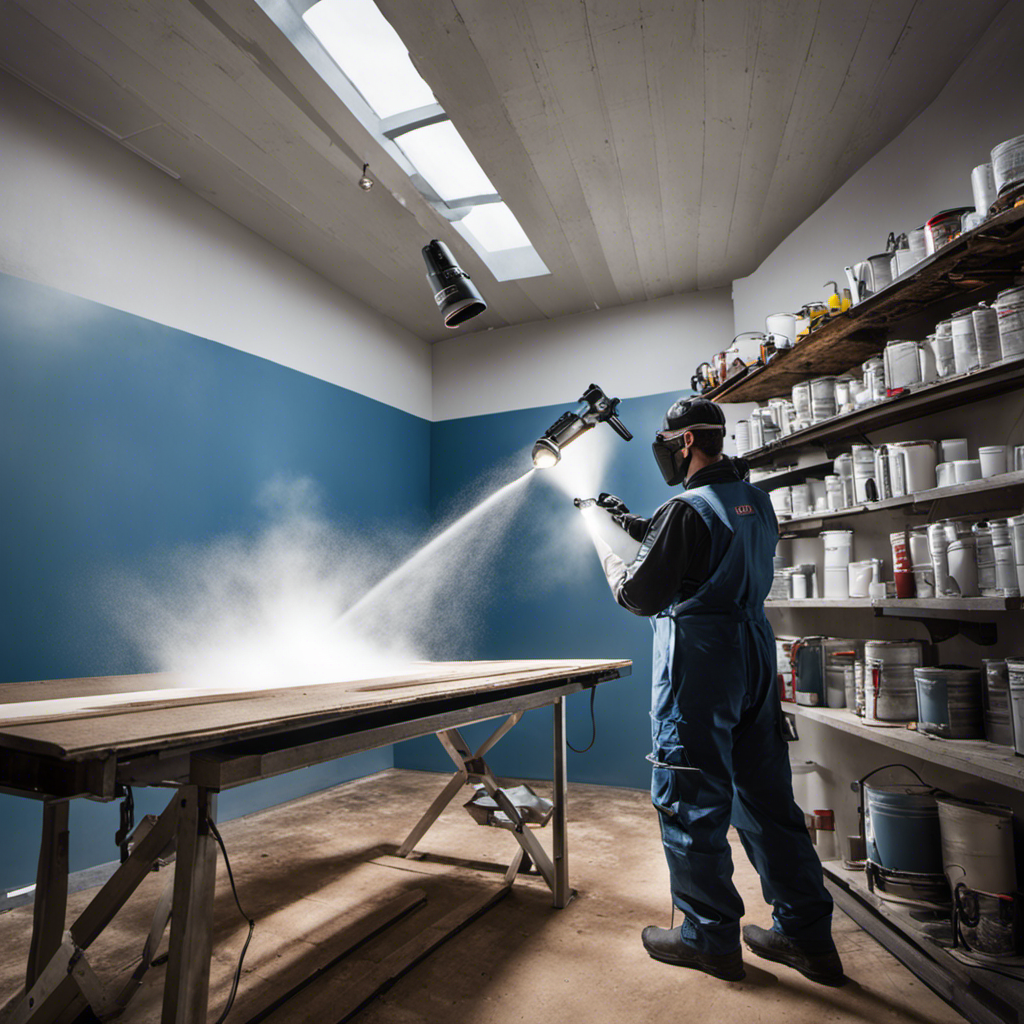
Safety Precautions and Proper Cleaning

Wearing proper safety gear, such as protective clothing, eyewear, and a respirator, is essential when operating the sprayer and cleaning it after each use. Here are three important safety precautions to keep in mind:

  1. Protect yourself: Safety should always be the top priority when using any paint sprayer. Wearing the appropriate safety gear, including gloves, goggles, and a respirator, will safeguard against harmful fumes and potential accidents.

  2. Proper storage: After each use, it is crucial to store the sprayer correctly. This includes draining any remaining paint, cleaning the components thoroughly, and storing them in a dry and secure location. Proper storage will help prolong the lifespan of the sprayer and prevent any damage.

  3. Safety gear requirements: Always follow the manufacturer’s recommendations for safety gear requirements. Different projects may have specific safety gear requirements, such as wearing a full face shield when working with toxic or hazardous materials.

Frequently Asked Questions

How Do I Troubleshoot Issues With the Airless Paint Sprayer if It’s Not Spraying Properly?

If the airless paint sprayer is not spraying properly, there are a few troubleshooting tips you can try.

Advertisement

Common problems may include clogged nozzle, incorrect pressure settings, or paint consistency issues.

Start by checking for any clogs in the nozzle and clearing them if necessary.

Adjust the pressure settings to ensure they are suitable for your project.

Also, make sure the paint is properly thinned for the sprayer.

These simple steps can often resolve the issue and get your sprayer back to working properly.

Advertisement

Can I Use the Airless Paint Sprayer for Different Types of Paint, Such as Oil-Based or Latex?

Yes, the airless paint sprayer can be used for different types of paint, including oil-based and latex. However, it’s important to follow the cleaning process between paint changes to ensure proper functioning and avoid mixing different paint types.

Cleaning the sprayer thoroughly will prevent any potential clogs or issues caused by residue from previous paint. By maintaining a clean sprayer, you can achieve optimal performance and achieve professional results with different types of paint.

What Safety Precautions Should I Take When Using the Airless Paint Sprayer?

When using an airless paint sprayer, it’s important to take proper safety precautions. These include wearing protective clothing, such as gloves and goggles, to prevent any paint from coming into contact with your skin or eyes.

Additionally, it’s recommended to use a respirator to protect yourself from any fumes or particles in the air.

Proper maintenance of the airless paint sprayer, such as regular cleaning and lubrication, is also crucial for safe and effective operation.

Advertisement

How Often Should I Clean the Filters of the Airless Paint Sprayer?

Cleaning the filters of the airless paint sprayer is an essential maintenance task. The frequency of cleaning depends on factors such as the type of paint used and the amount of usage. However, it is generally recommended to clean the filters after every use or at least once a week for regular use.

Proper filter maintenance ensures that the sprayer operates efficiently by preventing clogs and maintaining optimal performance. Regular cleaning of the filters will help prolong the lifespan of the airless paint sprayer.

Is the Airless Paint Sprayer Suitable for Small Touch-Up Projects or Is It Primarily for Larger Painting Jobs?

The airless paint sprayer is suitable for both small touch-up projects and larger painting jobs. Its versatility allows for precise and efficient application, making it ideal for any scale of work.

The advantages of using an airless paint sprayer include its ability to cover large areas quickly and provide a smooth and professional finish. Whether you need to touch up a small area or tackle a larger project, the airless paint sprayer is a valuable tool.

Conclusion

In conclusion, maintaining and using the Krause & Becker airless paint sprayer is like giving your painting projects a breath of fresh air. By regularly cleaning and maintaining the sprayer, you ensure its optimal performance and longevity.

Advertisement

Just like a well-oiled machine, this sprayer needs a little TLC to keep it running smoothly. With the proper preparation, technique, and safety precautions, you can achieve a professional-looking paint job that will leave your friends and neighbors green with envy.

So go ahead, grab that sprayer, and let your creativity flow!

Continue Reading
Advertisement

Paint Sprayer Maintenance and Troubleshooting

Maximize Your Airless Paint Sprayer’s Lifespan With These Essential Tips

Published

on

By

An image showcasing a well-maintained airless paint sprayer: a clean nozzle, properly lubricated parts, and a debris-free filter

Are you fed up with your paint sprayer malfunctioning when you need it the most? No need to fret, we’ve got your back!

In this article, we’ll provide you with essential tips to maximize the lifespan of your airless paint sprayer. Imagine a paint sprayer that lasts longer, performs reliably, and saves you time and money.

By following these simple yet effective techniques, you’ll ensure proper storage, regular cleaning, and maintenance, and the use of high-quality replacement parts.

So, let’s dive in and make your airless paint sprayer last for years to come!

Key Takeaways

  • Proper storage and protection: Clean and dry the sprayer before storage, find a cool and dry place, invest in a protective case, and keep it away from extreme temperatures and moisture.
  • Regular cleaning: Clean the spray gun after each use, check and clean the filters regularly, flush out the system, and keep the storage area clean to prevent clogs and blockages.
  • Lubrication: Follow manufacturer’s recommendations for oil type and usage, regularly check oil levels, and apply oil to moving parts for smooth operation.
  • High-quality replacement parts: Invest in durable and reputable replacement parts, replace worn-out or damaged parts promptly, and use genuine parts to maintain performance and reliability.

Proper Storage and Protection

Advertisement

To maximize your airless paint sprayer’s lifespan, follow these steps:

  1. Clean the sprayer thoroughly before storage. Ensure all components are dry.
  2. Find a cool and dry place to store the sprayer.
  3. Proper sprayer maintenance and effective storage techniques are crucial for keeping your equipment in optimal condition.

After each use:

  1. Clean the spray gun and check and clean the filters regularly.
  2. Flush out the entire system with water or a cleaning solution to prevent clogs and blockages.
  3. Lubricate the sprayer with the manufacturer-recommended oil to reduce friction, wear, and corrosion.

Remember to:

  1. Invest in high-quality replacement parts to ensure durability and functionality.
  2. Cheap parts wear out quickly and require frequent replacements.

Thorough Cleaning

Regularly clean the spray gun after each use to prevent clogs and maintain optimal performance. Thorough cleaning techniques are essential to ensure the longevity of your airless paint sprayer.

Start by disassembling the spray gun and removing any paint residue or debris. Use a cleaning solution recommended by the manufacturer and thoroughly clean all the components, including the nozzle and filter.

Pay close attention to the hoses, as they can also become clogged with dried paint. Flush out the entire system with water or the appropriate cleaning solution to ensure all paint particles are removed.

After cleaning, dry all the components thoroughly before reassembling the spray gun. By following these thorough cleaning techniques and using the best cleaning solutions, you can keep your airless paint sprayer in optimal condition and avoid any performance issues.

Regular Filter Maintenance

Advertisement

Ensure you clean and inspect the filters of your airless paint sprayer on a consistent basis to maintain optimal performance. Cleaning the filters regularly is essential to prevent clogs and ensure smooth operation.

The frequency of cleaning will depend on the type and amount of paint being sprayed. As a general rule, it’s recommended to clean the filters after every use or at least once a week for heavy use.

Start by removing the filters from the sprayer and rinse them thoroughly with water or a cleaning solution. Use a soft brush or toothbrush to remove any stubborn debris. Allow the filters to dry completely before reinserting them into the sprayer.

Regularly checking and cleaning the filters will prolong the lifespan of your airless paint sprayer and ensure consistent, high-quality results.

Advertisement

Flushing the System

Flushing the system is an important step in maintaining the performance of your airless paint sprayer. Regular system maintenance ensures optimal performance and prevents clogs or blockages.

To flush the system, start by removing any remaining paint from the sprayer. Then, fill the paint container with a cleaning solution recommended by the manufacturer.

Attach the sprayer to a water source and turn it on. Allow the cleaning solution to flow through the system, flushing out any paint residue or debris. Run the cleaning solution through all components, including the hoses, filters, and nozzle.

Once the cleaning solution runs clear, disconnect the sprayer from the water source and thoroughly rinse the system with clean water.

This flushing technique will help maintain the efficiency and longevity of your airless paint sprayer.

Advertisement

Clean Storage Area

To maintain the cleanliness of your storage area, keep it free from dust or dirt that could potentially enter critical components. Here are some cleaning techniques and tips to prevent dust accumulation:

  • Regularly dust and sweep the storage area to remove any loose dirt or debris.
  • Use a vacuum cleaner with a brush attachment to clean hard-to-reach areas.
  • Wipe down surfaces with a damp cloth to remove any stubborn dust or grime.
  • Consider using air purifiers or dehumidifiers to maintain a clean and dry environment.

Store your airless paint sprayer in a protective case or bag to prevent dust from settling on it. Avoid storing the sprayer in areas prone to moisture or dust, such as basements or garages. Cover the sprayer with a cloth or plastic sheet when not in use to further protect it from dust.

Nozzle and Filter Cleaning

Now that you understand the importance of keeping your storage area clean, let’s move on to the next crucial aspect of maintaining your airless paint sprayer: nozzle and filter cleaning.

Regularly cleaning the nozzle and filters is essential for optimal performance and preventing common nozzle issues.

Advertisement

To start, always follow the manufacturer’s instructions for cleaning the nozzle. Typically, this involves removing the nozzle from the spray gun and soaking it in a cleaning solution or using a specialized cleaning brush to remove any paint residue or debris. Be sure to clean the nozzle thoroughly, as any build-up can lead to clogs or uneven spray patterns.

Additionally, it’s crucial to regularly check and clean the filters. These filters help prevent debris from entering the sprayer and can become clogged over time. Simply remove the filters and rinse them with water or a cleaning solution, ensuring all dirt and debris are removed.

Hose Inspection and Cleaning

Make sure you regularly inspect and clean the hoses of your airless paint sprayer to ensure optimal performance. Here are some troubleshooting tips for hose maintenance:

  • Check for any cracks or leaks in the hoses
  • Inspect the hose fittings for any signs of wear or damage
  • Clean the hoses thoroughly after each use to remove any paint residue or debris
  • Use a soft brush or cloth to clean the exterior of the hoses
  • Flush out the hoses with water or a cleaning solution to remove any clogs or blockages
  • Pay attention to any kinks or twists in the hoses and straighten them out if necessary
  • Replace any damaged or worn-out hoses promptly to prevent further issues
  • Store the hoses in a clean and dry area to prevent them from being exposed to moisture or dust

Lubrication Guidelines

Ensure you consult the manufacturer’s recommendations for the correct oil type to use in your airless paint sprayer. Using the right oil is crucial for optimal performance and longevity. Lightweight mineral-based oil designed for high-pressure applications is typically recommended.

Regularly check the oil level in your sprayer and top up or change the oil as recommended by the manufacturer. Following the proper oiling frequency is important to reduce friction, wear, and corrosion. Apply oil to moving parts to ensure smooth operation, but be cautious not to over-lubricate as it can attract dust and debris.

Regularly check oil levels and refill as needed to maintain the sprayer’s efficiency. By using the appropriate oil and following the recommended lubrication frequency, you can maximize the lifespan of your airless paint sprayer.

Advertisement

Correct Oil Type

Using the recommended lightweight mineral-based oil for high-pressure applications is crucial to ensure optimal performance and longevity of your airless paint sprayer. Choosing the right oil and proper lubrication techniques are essential for maintaining your sprayer.

Here are some key points to consider:

  • Use a lightweight mineral-based oil designed for high-pressure applications.
  • Regularly check the oil level in the sprayer and top up or change it as recommended.
  • Proper oil usage reduces friction, wear, and corrosion in the internal components.
  • Apply oil to the moving parts to ensure smooth operation.
  • Avoid over-lubricating, as it can attract dust and debris.
  • Follow the manufacturer’s guidelines for oiling frequency.
  • Regularly check oil levels and refill as needed.

Regular Oil Level Check

Check the oil level in your sprayer regularly to ensure optimal performance and prevent unnecessary wear and tear.

Regular oil level monitoring is crucial for maintaining the efficiency of your airless paint sprayer. Oil acts as a lubricant, reducing friction and preventing corrosion within the internal components.

By regularly checking the oil level and topping up or changing it as recommended by the manufacturer, you can ensure smooth operation and extend the lifespan of your sprayer.

Regular oil changes are important because over time, the oil can become contaminated with debris and lose its lubricating properties. By staying on top of oil changes, you can prevent damage to the sprayer and avoid costly repairs.

Advertisement

Make it a habit to monitor the oil level in your sprayer and perform regular oil changes to keep it running smoothly.

High-Quality Replacement Parts

When it comes to maintaining your airless paint sprayer, using high-quality replacement parts is essential. Genuine parts offer several benefits that can significantly impact the lifespan and performance of your sprayer.

Here are some reasons why using genuine parts is important:

  1. Superior Durability and Functionality:

    • Genuine parts are designed specifically for your sprayer model, ensuring a perfect fit and optimal performance.
    • They are made from high-quality materials, making them more durable and resistant to wear and tear.
    • Using genuine parts eliminates the risk of leaks or malfunctions, providing a reliable and efficient spraying experience.
  2. Reduced Repairs and Downtime:

    • High-quality replacement parts minimize the need for frequent repairs, saving you time and money.
    • Genuine parts are less likely to fail or break, preventing unexpected project delays.
    • By investing in genuine parts, you can avoid costly downtime and keep your sprayer working at its best.
  3. Maintenance and Reliability:

    • Genuine parts are manufactured to meet the highest standards, ensuring consistent performance and reliability.
    • Regular maintenance, including the use of genuine replacement parts, is crucial for maximizing the lifespan of your sprayer.
    • By following recommended maintenance practices and using genuine parts, you can enjoy a reliable and long-lasting airless paint sprayer.

Importance of Premium Parts

Investing in high-quality replacement parts for your airless paint sprayer is essential for durability and optimal performance. Premium parts offer several benefits. Firstly, they are designed to fit and function perfectly, eliminating leaks or malfunctions that can occur with cheaper alternatives. Additionally, premium parts have a longer lifespan, reducing the need for frequent replacements. When choosing replacement parts, consider reputable manufacturers who offer warranties for their products. Ensure that the replacement parts are compatible with your specific sprayer model. Using genuine parts is crucial to maintain performance and reliability. By investing in high-quality replacement parts, you can minimize repairs, extend the lifespan of your sprayer, and ultimately save time and money in the long run.

Reputable Manufacturers for Replacement Parts

Look for warranties provided by reputable manufacturers to ensure the quality and reliability of replacement parts for your airless paint sprayer.

When it comes to finding reliable suppliers for replacement parts, here are a few things to consider:

Advertisement
  • Warranty coverage: Reputable manufacturers often offer warranties on their replacement parts, giving you peace of mind and assurance that the parts are of high quality and built to last.

  • Reputation: Look for manufacturers with a strong reputation in the industry. Reliable suppliers are known for producing top-notch replacement parts that meet or exceed industry standards.

  • Compatibility: Ensure that the replacement parts you choose are compatible with your specific airless paint sprayer model. Reputable manufacturers provide detailed information about compatibility to help you make the right choice.

Timely Replacement of Worn-Out Parts

To ensure optimal performance, regularly replacing worn-out parts is crucial for keeping your airless paint sprayer running smoothly. Timely replacement of worn-out parts is essential for the proper functioning of your sprayer and to avoid any potential breakdowns during your painting projects.

By replacing worn-out parts in a timely manner, you can prevent further damage to your sprayer and ensure its longevity. Not only does timely replacement of parts help maintain the performance of your sprayer, but it also has numerous maintenance benefits. It reduces the risk of malfunctions, leaks, and inefficient paint application. Additionally, it minimizes the need for costly repairs and downtime, saving you both time and money.

Cost and Time Savings With Proper Maintenance

To ensure maximum longevity and performance from your airless paint sprayer, regular maintenance is crucial. By investing a little time and effort into proper care, you can save yourself both money and time in the long run.

Here are the key reasons why regular maintenance is important and the benefits of investing in a protective case:

  1. Importance of Regular Maintenance:

    • Prevents clogs and blockages, ensuring smooth operation and consistent spray patterns.
    • Reduces friction, wear, and corrosion, extending the lifespan of your sprayer.
    • Protects the sprayer from cold-related issues, such as freezing or damage to seals and valves.
  2. Benefits of Investing in a Protective Case:

    • Shields the sprayer from accidental drops, bumps, and impacts.
    • Guards against dust, moisture, and other environmental factors that can damage critical components.
    • Provides convenient storage and organization for accessories and spare parts.

Frequently Asked Questions

How Often Should I Clean the Spray Gun After Each Use?

To ensure optimal performance, clean the spray gun after each use. This is a crucial step in airless paint sprayer maintenance. Use a cleaning solution recommended by the manufacturer and thoroughly clean all components, including the nozzle and filter.

Regular cleaning prevents clogs and blockages, ensuring smooth operation. By following best practices for cleaning your airless paint sprayer, you can maximize its lifespan and avoid costly repairs.

Advertisement

Can I Use Any Type of Oil for Lubricating the Airless Paint Sprayer?

Yes, you can use any type of oil for lubricating your airless paint sprayer. However, it is important to use the correct oil recommended by the manufacturer for optimal performance and lifespan.

Using the wrong type of oil can lead to friction, wear, and corrosion, causing damage to the internal components. Avoid common mistakes in lubricating airless paint sprayers by consulting the manufacturer’s guidelines and using lightweight mineral-based oil designed for high-pressure applications.

Regularly check the oil level and refill as needed to ensure smooth operation.

How Frequently Should I Check and Clean the Filters?

To extend the lifespan of your airless paint sprayer, it’s important to regularly check and clean the filters. This ensures optimal performance and prevents clogs and blockages. The frequency of checking and cleaning the filters depends on the usage and the type of paint being sprayed.

However, as a general guideline, it is recommended to check and clean the filters after every use or at least once a week for heavy usage. Proper maintenance of the filters will help maximize the lifespan of your airless paint sprayer.

Advertisement

What Are the Benefits of Using High-Quality Replacement Parts?

Using high-quality replacement parts for your airless paint sprayer offers a multitude of benefits. These durable parts ensure proper functionality, eliminating leaks and malfunctions. By investing in premium parts, you can reduce the need for frequent repairs and project downtime.

This not only saves you time but also money in the long run. High-quality replacement parts extend the lifespan of your sprayer, providing reliable performance and enhancing efficiency. So, opt for reputable manufacturers and genuine parts to maximize the durability and longevity of your airless paint sprayer.

How Can Proper Maintenance of the Airless Paint Sprayer Save Me Money and Time in the Long Run?

Proper maintenance of your airless paint sprayer can save you both time and money in the long run. By ensuring proper storage, you protect the sprayer from damage caused by extreme temperatures, moisture, and dust.

Regular maintenance, such as cleaning the spray gun and filters, prevents clogs and blockages that can lead to costly repairs. Using high-quality replacement parts enhances efficiency and reduces project downtime.

Taking these steps will maximize the lifespan of your airless paint sprayer and provide reliable performance.

Advertisement

Conclusion

So there you have it, with these essential tips, you can maximize the lifespan of your airless paint sprayer and enjoy its reliable performance for years to come.

By properly storing and protecting your sprayer, cleaning it thoroughly after each use, and regularly maintaining the filters and system, you can ensure its longevity.

Investing in high-quality replacement parts from reputable manufacturers and timely replacements of worn-out parts will also contribute to cost and time savings.

So take care of your airless paint sprayer and witness the benefits of proper maintenance firsthand.

Advertisement

Continue Reading

Paint Sprayer Maintenance and Troubleshooting

Painting Brick Walls With an Airless Sprayer: a Complete Guide

Published

on

By

An image showcasing an airless sprayer in action, with a skilled painter effortlessly coating a brick wall with smooth, even strokes

Painting brick walls with an airless sprayer can bring them back to life. This comprehensive guide walks you through every step of the process, from preparing the surface to ensuring an even coat.

With the right tools and materials, including a high-quality primer, you can enhance the durability and resistance of your brick walls. Expert tips and safety precautions ensure a smooth finish and a transformation that will leave your walls looking brand-new.

Get ready to bring new vibrancy and timeless beauty to your space.

Key Takeaways

  • Preparation and surface cleaning is essential before painting brick walls with an airless sprayer.
  • Selecting the right paint color and gathering the necessary materials and equipment are crucial for a successful painting project.
  • Cleaning and maintaining the painted brick walls regularly will help them stay in good condition.
  • Priming the walls with a high-quality primer designed for masonry surfaces enhances adhesion, durability, and resistance to moisture and alkali.

Surface Preparation: Tools and Cleaning

The homeowner gathers the necessary tools, including a wire brush, scraper, and power washer, to remove loose paint and dirt from the brick walls. Acquiring these tools is essential for proper cleaning techniques.

Advertisement

Using the wire brush and scraper, the homeowner meticulously removes any loose paint and dirt from the surface of the brick walls. After that, a power washer is used to thoroughly clean the walls, ensuring a clean and smooth surface for painting.

It is important to allow the walls to dry completely before proceeding to the next step. By acquiring the necessary tools and following proper cleaning techniques, the homeowner ensures a clean and well-prepared surface for painting the brick walls.

Selecting the Right Paint Colors and Materials

When selecting paint colors and materials, it is important to consider the desired aesthetic and gather the necessary tools. Choosing paint colors that complement the overall look and feel of the space is crucial for achieving the desired result.

Additionally, having the right materials is essential for a successful painting project. Following a step-by-step guide for surface preparation is also crucial. This includes gathering tools such as a wire brush, scraper, and power washer. It is important to remove loose paint and dirt from the surface using the wire brush and scraper, and then thoroughly clean the area with a power washer.

Once the surface is clean and dry, you can proceed with choosing the appropriate paint color and gathering the necessary materials and equipment like paint, primer, drop cloth, painters tape, and sandpaper.

Advertisement

Essential Equipment for Painting Brick Walls

To achieve a flawless result, one must ensure they have the essential equipment necessary for painting brick walls. This includes proper airless sprayer maintenance and choosing the right paintbrush.

Here are three key items to consider:

  • Well-maintained airless sprayer: Regularly clean and inspect the sprayer to ensure it functions properly. This will ensure consistent paint application and prevent clogging or uneven spraying.

  • High-quality paintbrush: Choose a brush that is suitable for masonry surfaces and the type of paint being used. A good brush will provide smooth and even coverage, allowing for precise detailing and edges.

  • Safety equipment: Protect yourself while painting by wearing safety goggles, gloves, and a mask to prevent inhalation of fumes or particles.

Achieving Even Coverage With an Airless Sprayer

Using an airless sprayer ensures even coverage when painting brick walls. This method is great for achieving consistent results.

Advertisement

However, there are some common issues that may arise when using an airless sprayer. One common issue is overspray, which occurs when the paint is applied too heavily or the sprayer is held too close to the surface. To troubleshoot this issue, adjust the spray nozzle to a narrower setting and maintain a consistent distance from the wall.

Another common issue is clogging of the sprayer tip due to debris or dried paint. To avoid this, strain the paint before pouring it into the sprayer and clean the tip regularly during the painting process.

Proper Technique: Starting From the Top

Starting from the top ensures that the paint is applied evenly and avoids drips or streaks on the brick walls. This technique allows for better control and coverage, ensuring a professional-looking finish.

Advertisement

When starting at the bottom, gravity can cause the paint to run down the wall, leading to uneven application and potential drips. By beginning at the top, the paint can be evenly distributed downwards, avoiding any potential issues.

However, it is important to troubleshoot common issues that may arise when painting brick walls with an airless sprayer. These issues can include clogging of the sprayer nozzle, uneven spray pattern, or overspray.

Cleaning and Maintenance Tips for Painted Brick Walls

Regular cleaning and maintenance is essential for preserving the appearance and longevity of painted brick walls. To keep them looking their best, it’s important to use proper cleaning techniques and know how to remove stubborn stains.

Light dirt can be easily removed with warm water and dish soap. Gently scrub the walls with a soft-bristle brush to avoid damaging the paint.

For stubborn stains, create a solution of white vinegar and water and treat the affected areas. Rinse the walls with clean water to remove any residue.

Advertisement

The Importance of Priming Masonry Surfaces

Priming masonry surfaces is crucial for enhancing adhesion, durability, and resistance to moisture and alkali. A high-quality primer designed for masonry surfaces is essential for paint longevity and a successful painting project.

Without proper priming, paint may not adhere well to the surface, leading to peeling and chipping over time. Primer acts as a barrier, preventing moisture and alkali from seeping into the paint, which can cause it to deteriorate.

However, common issues with primer can occur, such as poor coverage, uneven application, or improper drying. To troubleshoot these problems, ensure the walls are clean and dry before applying primer, use the recommended primer for masonry surfaces, and allow sufficient drying time.

Drying Time for Primer Application

After applying primer to the masonry surfaces, it is important to allow sufficient drying time of approximately 24 hours. This drying time is crucial to ensure that the primer properly adheres to the surface and creates a strong foundation for the paint.

It also allows the primer to fully cure, enhancing its durability and resistance to moisture and alkali. While waiting for the primer to dry, it is essential to protect the surface from any potential damage or contamination.

Advertisement

Additionally, it is worth considering alternative priming methods, such as using a tinted primer or a primer/sealer combination, which can provide additional benefits like improved color coverage or added protection against stains.

Advantages of Primer: Adhesion, Durability, and Resistance

Applying a high-quality primer to masonry surfaces ensures strong adhesion, increased durability, and enhanced resistance to moisture and alkali. The advantages of using primer go beyond these benefits and extend to cost savings, as it helps paint adhere better, reducing the need for multiple coats.

Additionally, primer improves the overall appearance and finish of the painted surface, giving it a smooth and professional look. When it comes to application techniques, primer can be easily applied using a brush, roller, or sprayer, making it suitable for different preferences and skill levels.

Its quick drying time allows for efficient completion of painting projects. Overall, using primer before painting brick walls with an airless sprayer is a wise choice, offering numerous advantages in terms of cost and application techniques.

Expert Tips for a Smooth Paint Finish

To achieve a smooth paint finish on the brick walls, homeowners should consider using a high-quality paint roller for even coverage. This is one of the most important tips for paint application on brick surfaces.

Advertisement

Another common mistake to avoid is using a low-quality roller, which can leave streaks and uneven texture on the walls. It is also essential to choose the right roller nap thickness for the type of brick surface. A thicker nap is typically recommended for rough or textured brick, while a thinner nap works well for smooth brick walls.

Additionally, homeowners should apply the paint in thin, even coats to prevent drips and runs. Taking these tips into consideration can help homeowners achieve a professional-looking smooth paint finish on their brick walls.

Safety Precautions When Using an Airless Sprayer

Using an airless sprayer requires homeowners to wear protective goggles, gloves, and a respirator mask to ensure their safety. The powerful spray of the airless sprayer can create a fine mist of paint particles that can be harmful if inhaled or make contact with the eyes or skin.

To maintain the airless sprayer, regular cleaning is essential to prevent clogs and ensure proper functioning. Troubleshooting common issues like uneven spray pattern or loss of pressure can be resolved by checking for clogs, adjusting the nozzle, or cleaning the filters.

Regular maintenance and troubleshooting will help homeowners achieve a smooth and efficient painting process with their airless sprayer, allowing them to achieve professional-looking results.

Advertisement

The Transformation: Freshly Painted Brick Walls

After taking the necessary safety precautions when using an airless sprayer, the transformation of freshly painted brick walls can be truly remarkable. The impact of color choice cannot be underestimated, as it can completely change the look and feel of a space. Whether it’s a timeless neutral or a bold, vibrant color, a fresh coat of paint can breathe new life into a room. In addition to the aesthetic benefits, there are also practical benefits to consider. Professional painting services can ensure a high-quality finish, saving time and effort for homeowners. They have the expertise to properly prepare the surface, choose the right materials, and apply the paint evenly. The result is a beautifully transformed space that adds value to the home.

The Impact of Color Choice Benefits of Professional Painting Services
Completely changes the look High-quality finish
and feel of a space Saves time and effort
Timeless or vibrant options Expertise in surface preparation
Adds value to the home Proper material selection
Even application of paint

Frequently Asked Questions

How Long Does It Typically Take for Brick Walls to Dry Completely After Cleaning?

Brick walls typically take some time to dry completely after cleaning. The drying time can depend on factors such as weather conditions and the level of humidity. However, using the best cleaning methods for brick walls, such as using a power washer and allowing the walls to air dry, can help expedite the drying process.

It is important to ensure that the walls are thoroughly dry before proceeding with any painting or priming to achieve the best results.

Can I Use a Regular Primer on Brick Walls or Is There a Specific Primer for Masonry Surfaces?

When painting brick walls, it’s important to use the right primer for optimal results. While a regular primer may work on some surfaces, there are specific primers designed for masonry surfaces that are recommended for brick walls.

These masonry primers are specially formulated to enhance adhesion, durability, and resistance to moisture and alkali. By choosing the appropriate primer for brick walls, you can ensure better paint adherence and longevity of the paint job.

Advertisement

How Often Should Painted Brick Walls Be Cleaned and Maintained?

Painted brick walls should be cleaned and maintained regularly to keep them looking their best. The cleaning frequency will depend on the level of dirt and grime buildup, but generally, it is recommended to clean them at least once or twice a year.

To maintain the painted surface, homeowners should use warm water and dish soap to remove light dirt and gently scrub the walls with a soft-bristle brush. Stubborn stains can be treated with a solution of white vinegar and water.

Regular cleaning and maintenance will help preserve the appearance and longevity of the painted brick walls.

Is It Necessary to Apply Multiple Coats of Paint for a Smooth Finish?

Applying multiple coats of paint is necessary for achieving a smooth finish on brick walls. Using a roller or brush may not provide the same level of smoothness as an airless sprayer.

The multiple coats allow for better coverage and a more uniform appearance. The airless sprayer ensures even distribution of paint, resulting in a flawless finish.

Advertisement

Are There Any Potential Risks or Dangers Associated With Using an Airless Sprayer for Painting Brick Walls?

Using an airless sprayer for painting brick walls can pose potential risks and dangers. The high-pressure nature of the sprayer can create a fine mist of paint particles, which can be harmful if inhaled. Additionally, there is a risk of overspray, which can result in paint getting on unintended surfaces.

It is important to take safety precautions, such as wearing protective gear and properly ventilating the area. Proper training and experience with using an airless sprayer is also recommended to minimize these risks.

Conclusion

In conclusion, painting brick walls with an airless sprayer can provide a fresh and updated look to any space. It is important to properly prepare the surface by cleaning and removing loose paint and dirt.

Using the right paint colors and materials, along with a high-quality primer, will ensure long-lasting adhesion, durability, and resistance to moisture and alkali. Following the proper technique and safety precautions when using an airless sprayer is crucial.

An interesting statistic to consider is that painting brick walls can increase a home’s value by up to 5%.

Advertisement

Continue Reading

Paint Sprayer Maintenance and Troubleshooting

Setting Up and Cleaning the Graco 390 Airless Paint Sprayer

Published

on

By

An image capturing the step-by-step process of setting up and cleaning the Graco 390 Airless Paint Sprayer

It is essential to properly prepare and maintain the Graco 390 Airless Paint Sprayer to achieve a high-quality paint job. This paint sprayer is efficient and easy to use thanks to its simple setup and user-friendly features. Understanding how to adjust the spray settings using the pressure control knob, spray gun, and hose will help users meet their specific painting requirements.

Additionally, proper cleaning and maintenance ensure the longevity of the paint sprayer. In this article, we will guide you through the step-by-step process of setting up and cleaning the Graco 390 Airless Paint Sprayer, providing you with the knowledge and confidence to achieve outstanding paint results.

Key Takeaways

  • Inspect all equipment for good condition before assembly
  • Familiarize yourself with adjusting spray pressure for desired coverage
  • Regularly clean and maintain the paint sprayer, including the spray gun
  • Troubleshoot common issues such as paint viscosity, spray pattern, and clogs in the spray tip

Gathering and Unboxing the Necessary Equipment

The user gathers and unboxes the necessary equipment for setting up the Graco 390 Airless Paint Sprayer. Before starting the setup process, it is important to inspect all the equipment to ensure that everything is in good condition.

This includes checking the paint sprayer unit itself, as well as the spray gun, hose, and any additional accessories that may have been included. The unboxing process involves carefully opening the packaging and removing each component from its protective wrapping. It is important to handle the equipment with care to avoid any damage.

Advertisement

Once all the equipment has been unboxed, the user can proceed to the next step of assembling the components and getting ready for painting.

Assembling the Graco 390 Airless Paint Sprayer

To assemble the Graco 390 Airless Paint Sprayer, simply follow the instructions provided by the manufacturer.

Before starting the assembly process, inspect the components of the sprayer to ensure they are in good condition and nothing is missing. This includes checking the spray gun, hose, and pressure control knob.

Once the inspection is complete, understand how the pressure control works. The pressure control knob allows users to adjust the pressure of the paint being sprayed, which affects the coverage and finish of the paint job. Familiarize yourself with this feature to achieve optimal results with your paint sprayer.

Overall, assembling the Graco 390 Airless Paint Sprayer is a straightforward process that can be easily accomplished by following the manufacturer’s instructions.

Advertisement

Preparing the Surface and Adjusting Spray Settings

After gathering the necessary equipment and materials, the user inspects the surface and cleans it thoroughly before adjusting the spray settings for desired coverage. This is an important step in ensuring a smooth and even paint application.

Preparing the surface involves removing any dirt, dust, or debris that may interfere with the paint adhering properly. This can be done by using a broom, vacuum cleaner, or a damp cloth, depending on the type of surface.

Once the surface is clean, the user can then choose the paint color that best suits their preference and the overall aesthetic they want to achieve. It is important to consider factors such as lighting, room size, and personal taste when selecting paint colors.

Advertisement

Cleaning and Maintaining the Graco 390 Airless Paint Sprayer

In order to ensure optimal performance, it is essential for the user to regularly clean and maintain their Graco 390 Airless Paint Sprayer. Cleaning techniques and a recommended maintenance routine are necessary to keep the sprayer in good working condition.

After each use, it is important to disassemble and clean the spray gun thoroughly. This includes removing any remaining paint and debris from the gun’s components. Additionally, the paint sprayer system should be flushed with a cleaning solution to remove any paint residue.

Proper storage and maintenance of the sprayer is also crucial. This involves storing the sprayer in a clean and dry area, and inspecting it regularly for any signs of wear or damage.

Troubleshooting Common Issues With the Paint Sprayer

Advertisement

The user can check the spray tip for clogs and ensure that the paint viscosity and spray pattern are correct in order to troubleshoot common issues with the paint sprayer. Here are some steps to follow in order to identify and fix paint spray pattern issues:

  1. Check paint viscosity: Make sure the paint is properly mixed and thinned according to the manufacturer’s instructions. If the paint is too thick or too thin, it can affect the spray pattern.

  2. Inspect the spray pattern: Use a test board or piece of cardboard to spray a test pattern. Look for any irregularities, such as streaks, splotches, or uneven coverage. This can indicate issues with the spray tip or pressure settings.

  3. Adjust settings and clean the spray tip: If the spray pattern is not satisfactory, adjust the pressure control knob and clean the spray tip to remove any clogs or debris. A clean spray tip and proper pressure settings are essential for a consistent and even spray pattern.

Frequently Asked Questions

How Long Does It Take to Assemble the Graco 390 Airless Paint Sprayer?

Assembling time for the Graco 390 Airless Paint Sprayer depends on the user’s familiarity with the product. On average, it takes about 10-15 minutes to fully assemble the paint sprayer.

The required tools for assembly include a wrench and screwdriver. Users should carefully follow the instructions provided in the manual to ensure proper assembly and functionality of the sprayer.

What Is the Warranty Period for the Graco 390 Airless Paint Sprayer?

The warranty period for the Graco 390 Airless Paint Sprayer is an important aspect to consider. It provides peace of mind and reassurance to the user.

Additionally, knowing the assembly time required for the paint sprayer can help with planning and scheduling painting projects effectively.

Advertisement

These factors, along with the product’s features and performance, contribute to the overall satisfaction and convenience of using the Graco 390 Airless Paint Sprayer.

Can the Graco 390 Airless Paint Sprayer Be Used With Different Types of Paint?

The Graco 390 Airless Paint Sprayer is compatible with various types of paint, including latex, acrylic, and oil-based paints. This versatility allows users to tackle different painting projects with ease.

The advantages of using the Graco 390 Airless Paint Sprayer with different types of paint include efficient and even coverage, reducing the need for multiple coats. Its high-pressure system ensures excellent paint atomization, resulting in a professional finish.

Overall, the Graco 390 Airless Paint Sprayer is a reliable choice for any painting job.

What Is the Recommended Cleaning Solution for the Graco 390 Airless Paint Sprayer?

The recommended cleaning solution for the Graco 390 Airless Paint Sprayer is a mixture of warm water and a mild detergent. This solution effectively removes any residual paint or debris from the sprayer’s components.

Advertisement

It is important to thoroughly clean the spray gun, hose, and other parts after each use to maintain optimal performance. By following proper cleaning techniques and using the recommended cleaning solution, users can ensure the longevity and efficiency of their Graco 390 Airless Paint Sprayer.

How Often Should the Spray Gun of the Graco 390 Airless Paint Sprayer Be Cleaned?

The spray gun of the Graco 390 Airless Paint Sprayer should be cleaned regularly to ensure optimal performance. Cleaning the spray gun helps troubleshoot common issues such as clogs and improper spray patterns.

It is recommended to clean the spray gun after each use to prevent paint residue from building up and affecting the quality of the spray. By maintaining the spray gun properly, users can extend the lifespan of their Graco 390 Airless Paint Sprayer and achieve consistent, professional results.

Conclusion

In conclusion, setting up and cleaning the Graco 390 Airless Paint Sprayer is an essential task for achieving professional paint finishes. Following the step-by-step guide and familiarizing oneself with the equipment ensures smooth operation and efficient painting.

A clean and well-maintained paint sprayer saves time and money in the long run. It also provides exceptional painting results. Embrace the irony of the tedious cleaning process, knowing that it is the key to effortless and stunning paint jobs.

Advertisement

Continue Reading

Trending

Copyright © 2024 Paint Sprayer Zone Affiliate disclaimer As an affiliate, we may earn a commission from qualifying purchases. We get commissions for purchases made through links on this website from Amazon and other third parties.