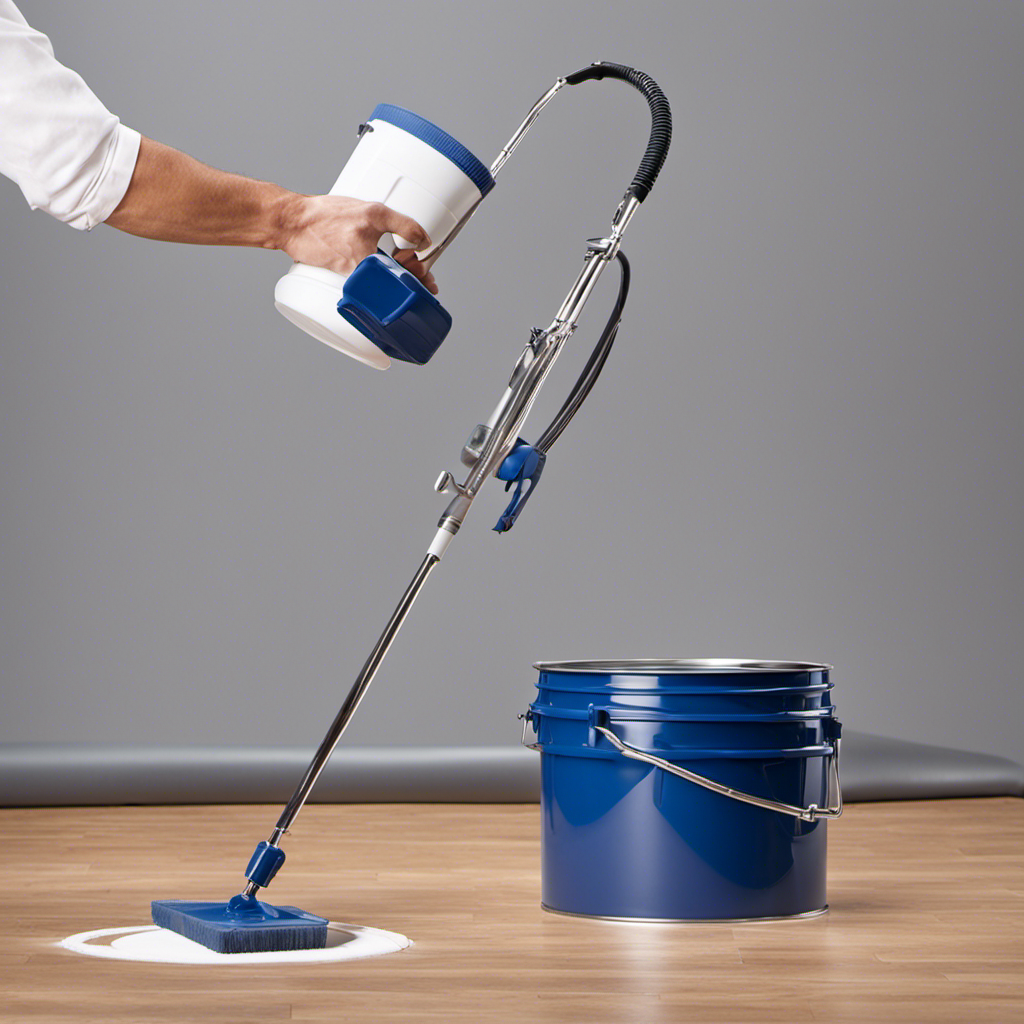

To thin paint for HVLP or airless sprayers, start by checking the paint type—water-based or oil-based—and use the appropriate thinner, like water or mineral spirits. For HVLP, add thinner gradually, testing the consistency with a viscosity cup to guarantee smooth flow. With airless sprayers, strain and filter the paint first, then thin carefully to avoid clogs. Properly adjusting the viscosity improves spray quality; keep exploring for detailed tips and techniques.
Key Takeaways
- Use water or water-based reducers for thinning water-based paints, and mineral spirits or paint thinner for oil-based paints.
- Thin paint gradually, testing consistency with a viscosity cup or stir stick before spraying.
- Strain and filter paint to remove debris and prevent nozzle clogs during application.
- Adjust thinning ratios based on spray type: HVLP requires slightly thicker paint, while airless can handle thinner mixes.
- Always follow manufacturer guidelines for thinning agents and recommended paint viscosity to ensure optimal spray performance.
Understanding the Difference Between HVLP and Airless Sprayers

When choosing a sprayer, understanding the key differences between HVLP and airless models is essential. HVLP sprayers use lower pressure, which provides better control over paint application, resulting in improved paint adhesion and a smoother finish. They’re ideal for detail work and surfaces requiring precision. Airless sprayers deliver higher pressure, covering large areas quickly, but they can be less forgiving on delicate surfaces and may cause overspray. Consider brush compatibility when selecting a sprayer; HVLP is better suited for detailed projects where brush-like control matters, while airless sprayers are more suited for big jobs. Knowing these distinctions helps you choose the right tool for your project, ensuring suitable paint adhesion and ease of use. Additionally, understanding the security features of different sprayer models can help protect your equipment during storage and transport. Being aware of sprayer maintenance can prolong the lifespan of your equipment and ensure consistent performance. For optimal results, it’s also important to understand the paint thinning process and how it varies between sprayer types, which can significantly affect the quality of your finish. Proper technique is crucial for achieving professional-looking results with either sprayer type, especially when adjusting pressure and spray patterns. Moreover, being informed about technology advancements in sprayer design can assist in selecting models with enhanced features for better efficiency and durability.
Why Correct Paint Viscosity Matters for Spraying

Using the right paint viscosity helps you achieve a smooth, even finish without streaks or uneven layers. It also prevents spray clogs that can waste time and ruin your project. When the paint is properly thinned, your application will be cleaner and more professional-looking. Proper viscosity enhances creative problem-solving, ensuring your projects are successful from start to finish. Additionally, maintaining the correct paint consistency can extend the lifespan of your sprayer by reducing strain on its components. Knowing how top beach towns vary in scenery and activity can help you select the ideal destination for your vacation needs. Properly adjusting viscosity is especially important for special occasions, where a flawless finish can make a lasting impression. Incorporating AI in Business can further streamline your workflow, making the painting process more efficient and less stressful.
Achieving Smooth Application
Achieving a smooth application with your sprayer depends heavily on the paint’s viscosity, as improper thickness can cause uneven spray patterns and drips. When your paint is the right consistency, it flows evenly, reducing frustration and wasted material. To guarantee this, focus on proper brush techniques to test flow and always store paint correctly to prevent thickening or drying out. Ensuring the correct projector setup is also essential for optimal results. Here are four key tips:
- Maintain consistent viscosity for uniform coverage.
- Use brush techniques to identify spray issues early.
- Store paint in sealed containers to preserve ideal thickness.
- Regularly check and adjust paint viscosity before spraying. Additionally, understanding the exfoliation process can help you better prepare your paint for spraying, ensuring smoother application and better finish quality.
These practices help you achieve a professional, smooth finish every time.
Preventing Spray Clogs
Proper paint viscosity is essential for preventing spray clogs, as thick or inconsistent paint can easily block your sprayer’s nozzle. To maintain the right consistency, consider using paint additives designed to improve flow and reduce buildup. These additives help ensure your paint flows smoothly, minimizing the risk of clogs during spraying. Additionally, correct viscosity plays a critical role in achieving accurate color matching, as overly thick paint can distort colors and create uneven coats. Before spraying, always test the paint’s viscosity and adjust with thinners or additives if necessary. Using the correct spraying techniques also helps maintain consistent paint flow and avoid blockages. Understanding air purifier maintenance and following proper cleaning routines can further assist in creating a calm, focused environment that promotes careful application and reduces mistakes. By controlling paint thickness and using proper additives, you’ll prevent clogs, ensure a smooth application, and achieve professional-looking results every time.
Ensuring Finish Quality
When paint has the right viscosity, your spray job will look smooth and professional. Properly thinned paint ensures maximum paint durability and color consistency, making your project stand out. If the paint is too thick, you risk uneven coverage and a rough finish. Too thin, and you might sacrifice color vibrancy and durability. Ensuring the correct tip size helps achieve the desired spray pattern and finish quality. To ensure quality, focus on these key points: 1. Achieve a consistent flow for a smooth, even coat. 2. Prevent drips and splatters that compromise finish quality. 3. Maintain true color tones for a professional look. 4. Guarantee long-lasting results with durable paint application. Proper paint viscosity is essential for both efficiency and a flawless appearance, minimizing waste and rework. Using the right headphone connection can also improve your experience by providing a more reliable and high-quality audio connection, especially during detailed work like spraying. Achieving the correct viscosity also involves understanding how industry transformations can influence your tools and techniques, ultimately leading to better outcomes. Getting the viscosity right isn’t just about ease; it’s about delivering a flawless, durable finish every time.
Choosing the Right Thinning Agents for Different Paint Types

Choosing the right thinning agents depends on the type of paint you’re using. Water-based paints usually need water or specific thinners, while oil-based paints require solvents like mineral spirits. You might also consider specialty thinners for unique finishes or challenging applications. Additionally, selecting the appropriate paint formulation can help ensure optimal results and ease of application. Understanding the types of air purifiers suitable for removing paint fumes and odors can also contribute to a safer workspace and better air quality during your projects.
Water-Based Paints Compatibility
Water-based paints require specific thinning agents to guarantee smooth spraying and proper adhesion. Using the right paint additives ensures your finish is flawless and color matching remains accurate. When thinning water-based paints, consider these key factors:
- Use water or specialized reducers to maintain consistency without compromising quality.
- Additives that improve flow help prevent clogs and ensure even coverage.
- Test for color matching after thinning, as excessive water can alter hues.
- Follow manufacturer guidelines to avoid thinning too much, which weakens paint integrity.
Choosing compatible thinning agents preserves the paint’s vibrancy and durability, giving you confidence in your project’s final look. Proper thinning also minimizes sputtering and uneven spray, making your work smoother and more satisfying.
Oil-Based Paints Needs
Oil-based paints require different thinning agents than water-based formulas to achieve ideal spray performance. When thinning oil-based paints, use mineral spirits or paint thinner, which help maintain the paint’s consistency without compromising adhesion. Proper brush techniques, like avoiding over-brushing, can prevent uneven thinning, while ensuring you mix thoroughly helps achieve a smooth, workable consistency. Good paint storage is essential; keep your oil-based paints sealed tightly to prevent thickening or skin formation, which can interfere with spraying. Always add thinning agents gradually, testing the spray pattern regularly. This prevents over-thinning, which can lead to runs or poor coverage. With the right thinning agents, brush techniques, and proper storage, your oil-based paints will spray evenly and deliver a professional finish.
Specialty Thinners and Solvents
Selecting the appropriate specialty thinners and solvents is essential for achieving ideal spray results across different paint types. Using the wrong solvent can lead to uneven finishes or clogs. To guarantee perfect compatibility, consider these factors:
- Match specialty thinners with your paint’s base to assure solvent compatibility.
- Choose specific solvents for fast evaporation when working with quick-drying coatings.
- Use specialty thinners to improve flow and leveling for complex or textured paints.
- Avoid generic solvents that may damage delicate finishes or cause poor adhesion.
- Understanding paint composition helps select the most effective thinning agents for your project.
- Being aware of dog names and their characteristics can help tailor your approach to selecting the right thinning agents for different kinds of paints.
- Considering paint formulation can ensure you select thinners that won’t compromise the integrity of your finish.
Step-by-Step Guide to Thinning Paint for HVLP Sprayers

Thinning paint for HVLP sprayers requires careful attention to achieve the right consistency for a smooth, even application. First, check your paint’s color matching to ensure it remains true after thinning. Pour the paint into a clean container, then add small amounts of thinning agent, such as water or a compatible reducer. Mix thoroughly to avoid lumps. Always stir gently to prevent introducing bubbles. Proper paint storage is essential—keep unused thinned paint sealed tightly to prevent drying out or contamination. Test the consistency by dipping a stir stick; it should flow smoothly without dripping heavily. Adjust by adding more thinning agent if necessary. This process ensures your paint sprays evenly and maintains its color integrity. Additionally, understanding the different types of sprayers can help you choose the best method for your project.
How to Prepare Paint for Airless Sprayers

Before you load paint into your airless sprayer, you need to strain and filter it to remove any lumps or debris. This guarantees a smooth application and prevents clogs. Once filtered, check and adjust the paint’s consistency to achieve the right flow for your sprayer.
Strain and Filter Paint
To guarantee smooth and clog-free spraying, you should start by straining and filtering your paint thoroughly. Proper paint strain and filter application remove debris, lumps, and impurities that can cause blockages. This step ensures your sprayer operates efficiently and delivers a flawless finish.
Here’s what you should do:
- Use a fine mesh paint strain to catch larger particles before pouring.
- Apply a high-quality filter to your paint container to trap smaller debris.
- Check the filter regularly during spraying and replace if clogged.
- Always filter your paint after thinning to ensure consistency.
Taking these steps guarantees your paint flows smoothly through the sprayer, reducing downtime and frustration. Proper strain and filter application are key to professional results.
Adjust Paint Consistency
After filtering your paint to remove debris, it’s time to adjust its consistency to guarantee smooth flow through your airless sprayer. Proper consistency prevents clogs and uneven coverage. To achieve this, consider color mixing techniques to ensure uniform color and texture. Test your paint by running a sample through the sprayer; if it drips or splatters, thin it further. Use a stir stick to blend in small amounts of water or thinner gradually. Keep in mind that brush techniques, like gentle stirring instead of vigorous shaking, help maintain the paint’s smoothness. Here’s a quick guide:
| Condition | Action | Result |
|---|---|---|
| Thick, clumpy | Thin with water or reducer | Better flow and spray |
| Too thin | Add more paint | Improved coverage |
| Color mixing issues | Stir thoroughly | Uniform color and texture |
| Uneven flow | Adjust consistency | Smooth application |
| Splatters or drips | Thin slightly | Cleaner spray pattern |
Tips for Achieving the Perfect Consistency

Achieving the perfect consistency when thinning paint for sprayers is essential for smooth application and professional results. To do this, focus on these tips:
- Use proper brush techniques to test the paint’s flow—if it drips or splatters, it’s too thick.
- Mix colors thoroughly to ensure uniformity before thinning, preventing uneven sprays.
- Add thinning agents gradually, stirring constantly until you reach the ideal viscosity.
- Check the paint’s consistency by running it through a flow test; it should glide smoothly without clogging or running.
Mastering these steps helps you control the paint’s flow, ensuring an even, flawless finish every time. Remember, patience with color mixing and brush techniques makes all the difference.
Common Mistakes When Thinning Paint for Sprayers

Many DIYers make the mistake of over-thinning paint, which can cause poor paint adhesion, longer drying times, and uneven coverage. When paint is too thin, it may drip or sag, ruining your finish. Conversely, under-thinning leads to clogging and inconsistent spray patterns. A common error is guessing the right consistency without testing, risking wasted material and frustration. To avoid these pitfalls, always measure and test your paint before spraying.
| Mistake | Consequence | Solution |
|---|---|---|
| Over-thinning | Runs, drips, poor adhesion | Thin gradually and test |
| Under-thinning | Clogs, uneven coverage | Add small amounts of thinning agent |
| Not testing consistency | Poor results, increased drying time | Spray a sample first |
| Rushing the process | Missed adjustments, mistakes | Take your time and evaluate |
Testing and Adjusting Paint Thickness Before Spraying

Before you start spraying, it’s crucial to test and adjust your paint’s thickness to guarantee a smooth and even finish. Proper testing ensures your color matching stays consistent and prevents uneven application. Start by pulling a small sample of paint from your container, then use a viscosity cup or thinning test to check the flow. If the paint is too thick, it may clog your sprayer; if too thin, it may run or drip. Remember, paint storage conditions impact consistency—stale or improperly stored paint can affect thickness. Always measure and record your adjustments to maintain uniformity.
- Test the paint’s flow with a viscosity cup or thinning test.
- Adjust with small amounts of thinning agent if needed.
- Re-test until the desired consistency is achieved.
- Keep your paint covered and stored properly for reliable results.
Tools and Equipment Needed for Proper Thinning

To properly thin paint for sprayers, you’ll need a few essential tools and equipment. First, a clean paint mixing container is vital for combining paint and thinner thoroughly. A stir stick or paddle ensures even consistency without introducing air bubbles. A high-quality paint strainer helps remove lumps or debris that could clog your sprayer. Safety gear like gloves, goggles, and a mask protects you from fumes and splashes during the thinning process. A measuring cup or graduated container guarantees accurate mixing ratios. Additionally, having a moisture and viscosity gauge can help you determine the right paint thickness. These tools streamline the process, promote safety, and guarantee your paint is properly thinned for optimal spray performance.
Troubleshooting Spray Issues Related to Paint Viscosity

When your spray pattern becomes uneven or clogging occurs, the root cause often traces back to the paint’s viscosity. Too thick paint can cause frustrating blockages, uneven coverage, and extended drying times. To troubleshoot, consider these steps:
- Adjust your brush techniques to ensure even application before spraying.
- Thin the paint further if it’s still too viscous, following proper guidelines.
- Check the spray tip for clogs caused by dried, thick paint.
- Allow adequate paint drying time between coats to prevent buildup that worsens viscosity issues.
Frequently Asked Questions
How Does Temperature Affect Paint Thinning for Sprayers?
Temperature impacts your paint thinning process by affecting paint temperature, which in turn influences spray consistency. When it’s too cold, paint thickens, making it harder to spray smoothly, so you need to thin it more. Conversely, warmer temperatures help maintain proper paint temperature, resulting in better spray consistency. Adjust your thinning ratio based on the environment, ensuring your paint flows evenly and coats surfaces properly without clogs or uneven coverage.
Can I Reuse Leftover Thinned Paint for Future Projects?
You can reuse leftover paint, but it depends on how well you store it and its condition. Proper paint recycling involves sealing the container tightly and keeping it in a cool, dry place. Check for contamination, separation, or foul odor before using leftover paint for future projects. Reusing paint saves money and reduces waste, but always test it first to ensure quality and consistency.
What Safety Precautions Should I Take When Thinning Paint?
When thinning paint, you should prioritize safety by wearing personal protective equipment like gloves, goggles, and a mask to avoid skin and respiratory irritation. Make certain proper ventilation in your workspace to disperse fumes and prevent inhalation of harmful vapors. Always work in a well-ventilated area, and follow manufacturer instructions for thinning ratios. Taking these precautions keeps you safe while preparing your paint for spraying.
How Often Should I Check Paint Viscosity During Spraying?
You should check your paint viscosity regularly during spraying to guarantee a smooth application. Typically, do this every few minutes or after every significant change in batch or temperature. Use a viscosity cup or a test strip, and consider paint additives that can help maintain consistent thickness. Thinning techniques may need adjustment if the paint becomes too thick or thin, so frequent checks keep your spray job even and professional-looking.
Are There Eco-Friendly Thinning Agents Available?
You’ll find eco-friendly solvents and biodegradable thinners are great options for thinning paint. These environmentally conscious agents reduce harmful emissions and are safer for you and the planet. Look for products labeled as biodegradable thinners or eco-friendly solvents, which work effectively without compromising your spray quality. Using these alternatives helps you maintain a greener workspace while achieving smooth, even paint application with your sprayer.
Conclusion
Getting your paint just right isn’t luck — it’s knowing the right steps. Whether you’re using an HVLP or airless sprayer, the perfect viscosity makes all the difference. When you thin your paint correctly, spraying becomes smoother, and your finish looks flawless. Imagine finishing your project with ease, the spray evenly covering every corner, and feeling confident you nailed it — all because you took the time to prepare your paint properly.

Franz came aboard the Paint Sprayer Zone team with a background in both journalism and home renovation. His articulate writing style, combined with a passion for DIY projects, makes him an invaluable asset. Franz has a knack for breaking down technical jargon into easy-to-understand content, ensuring that even the most novice of readers can grasp the complexities of paint sprayers.