
To prevent dry edges on small trim pieces, stop trimming or sanding when the paint is slightly wet but not dripping, usually before it fully dries. This timing guarantees you avoid creating thin, exposed edges that dry out fast. Watch for a smooth, consistent surface, and don’t go beyond this point. If you keep an eye on the process, you’ll master the perfect finish — and there’s more to learn about timing and technique.
Key Takeaways
- Trim small pieces when the paint is still slightly wet but not overly so to prevent dry edges.
- Monitor the drying process and work quickly to complete trimming before the paint dries completely.
- Use a steady, controlled motion with your trimming tool to avoid causing uneven edges.
- Stop trimming once the surface feels smooth and consistent, indicating optimal timing.
- Practice timing by testing on scrap pieces to identify the ideal moment when paint is tacky but not dry.
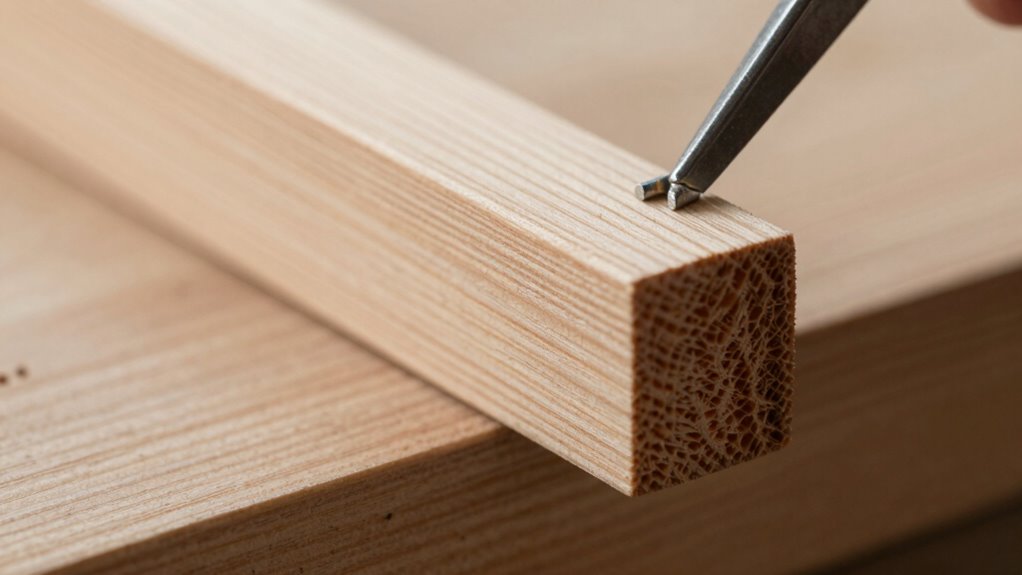
Why Do Dry Edges Happen on Small Trim Pieces?

Dry edges often occur on small trim pieces because they have less surface area to hold onto moisture or adhesive. When you apply paint or sealant, these tiny edges dry faster than larger surfaces, making it tricky to achieve a smooth, uniform finish. Without proper edge sealing, paint can lift or peel, reducing adhesion and causing chipping over time. Small trim pieces are more susceptible to rapid drying because their limited surface area doesn’t retain enough moisture or adhesive for a proper bond. To prevent this, you should focus on sealing the edges early and consistently. Doing so helps maintain better paint adhesion and prevents those unsightly dry edges from forming, ensuring a more professional-looking finish on your trim work. Additionally, understanding precious metal IRA markets can help investors diversify their portfolios and secure their financial future.
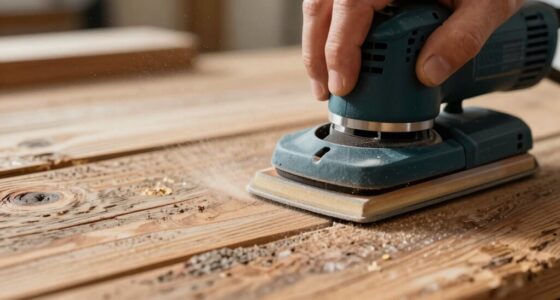
When Should You Stop Trimming or Sanding for a Smooth Edge?

Knowing when to stop trimming or sanding is key to achieving a clean, smooth edge. You should stop when the edge shows consistent texture and no visible rough spots, ensuring uniformity across the piece. Over-trimming or sanding can create uneven surfaces or cause the dry edge problem you’re trying to avoid. Pay close attention to edge consistency; if the surface feels smooth and looks even, it’s a good sign to pause. Additionally, stopping at the right moment enhances trim aesthetics, making the final piece look polished. Trust your touch—if the edge feels smooth and matches the surrounding surface, you’ve reached the perfect stopping point. Proper edge finishing ensures a professional, flawless look. Being mindful of wood movement can also help prevent issues with edges shifting after finishing. Recognizing the appropriate timing for stopping is essential for achieving a high-quality result. Incorporating attention to detail during this process can further improve the final appearance and durability of your work.
How to Recognize When Your Edge Looks Perfect

Your edge looks perfect when it appears uniform in texture and smooth to the touch, with no visible rough spots or uneven areas. During edge inspection, check for consistency along the entire trim, ensuring there are no burrs or gaps. A high finish quality shows a seamless progression between the trim and the surface, indicating you’ve achieved a clean, professional look. Run your fingers gently along the edge to feel for any roughness or irregularities. If the surface feels smooth and the edge looks even, you’ve reached the ideal finish. Proper inspection techniques help confirm that your work meets the desired standard. Using precision tools can further enhance your trimming accuracy and finish quality. Additionally, maintaining a steady hand and proper measurement helps prevent errors and ensures a consistent edge. Paying attention to material properties can also guide your trimming approach, leading to better results.
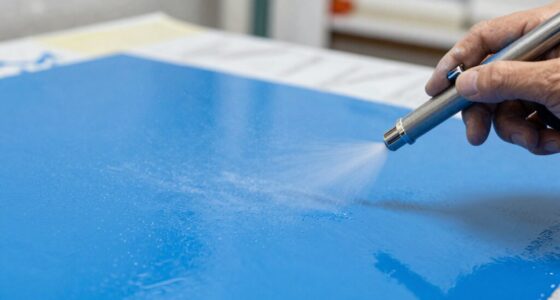
Step-by-Step: Timing Your Trims for a Clean Finish

Timing your trims is crucial for achieving a clean, professional finish. Start by preparing your tools and making sure your paint application is smooth and even. As you approach the trim, pause briefly to evaluate whether the edge looks wet but not overly so. For ideal edge finishing, trim when the paint is still slightly wet—this prevents dry edges and creates seamless lines. Move steadily along the trim, maintaining consistent speed and pressure to avoid uneven paint buildup. If you notice the paint starting to set, pause and adjust your pace. Proper timing ensures the paint bonds well and reduces touch-ups later. Being aware of the paint’s drying process helps you determine the perfect moment to trim for a flawless finish. Additionally, understanding innovative European cloud servers can inspire new approaches to your work, emphasizing efficiency and precision. Monitoring drying conditions can help you better time your trims and achieve optimal results. With practice, you’ll develop a rhythm that guarantees crisp, sharp edges and a flawless overall look. Paying attention to drying times and environmental conditions can further refine your technique for professional results. Recognizing how environmental factors influence the paint’s curing process will help you better time your trims for optimal results.
Tips for Maintaining Consistent Pressure and Speed

Maintaining consistent pressure and speed while trimming is essential for achieving clean, professional edges. Focus on pressure control to avoid applying too much force, which can cause uneven cuts or damage to the material. Light, steady pressure helps produce smoother edges and reduces the risk of dry or frayed areas. Simultaneously, keep your tool speed uniform; moving too quickly can lead to jagged cuts, while moving too slowly might cause burn marks or rough edges. Practice maintaining a steady rhythm that matches the material’s response. Use smooth, controlled motions, and be mindful of your hand’s pressure. Developing fine motor skills can further enhance your control and outcome. Additionally, paying attention to tool ergonomics can help maintain steadiness and reduce fatigue during trimming. Consistent pressure combined with steady tool speed ensures a clean, precise trim every time, helping you avoid dry edges and achieve professional results. Incorporating proper technique can further enhance your control and outcome. Moreover, staying aware of your trimming environment can help you maintain focus and steadiness throughout the process.
Common Mistakes That Cause Dry Edges: and How to Avoid Them

One common mistake is overworking the edges, which can cause paint to dry too quickly and create dry spots. Applying too much paint or rushing through the process also leads to uneven coverage and dry edges. To avoid these issues, focus on smooth, controlled strokes and pace yourself for a more consistent finish. Additionally, understanding field recording techniques can help in assessing the drying process and adjusting your approach accordingly. Being aware of paint drying times can help you plan your work and prevent premature drying that results in dry edges. Monitoring environmental conditions such as temperature and humidity can also influence drying times and help you achieve a flawless result. Using proper painting tools can further ensure even application and minimize the risk of dry edges.
Overworking the Edges
When you spend too much time working the edges of your trim, you risk causing dry, brittle areas that can crack or peel over time. Overworking the edges encourages grain separation, weakening the wood’s structure and leading to flaky, uneven surfaces. It also increases the chance of edge curling, which distorts the trim’s profile and makes a smooth finish impossible. Repeated sanding or scraping can remove the protective surface layer, exposing raw wood that dries out faster. To avoid this, limit your contact with the edges and focus on gentle, even strokes. Let the paint or finish do its work without excessive manipulation. Proper timing and patience are key to maintaining the integrity of small trim pieces and preventing dry, damaged edges. Additionally, understanding the importance of proper surface preparation can help ensure a more durable and flawless finish.
Applying Excessive Paint
Applying too much paint at once is a common mistake that leads to dry, uneven edges on your trim. When you load your brush or roller with excessive paint, it creates a thick layer that takes longer to dry. This increased paint thickness causes uneven drying times, making edges more prone to drying out before you can blend them smoothly. As a result, you may notice visible lines or ridges, especially on small pieces. To avoid this, apply thin, even coats and work in manageable sections. Allow each layer to dry properly before applying the next. Proper control over paint thickness ensures faster drying times, reducing the risk of dry edges and giving your trim a clean, professional finish.
Rushing the Process
Rushing the painting process often leads to dry edges, as you may be tempted to move quickly and skip essential steps. When you hurry, you compromise trim precision and risk uneven edge consistency. Taking your time allows the paint to settle properly, reducing the chance of dry edges that can ruin a clean finish. If you rush, you might also overload your brush or roller, causing excess paint to dry too fast and create unsightly lines. To avoid this, work methodically, applying thin coats and letting each layer dry fully before proceeding. Slow, deliberate strokes help maintain edge consistency, ensuring your trim looks smooth and professional. Remember, patience is key to achieving flawless results and preventing dry edges from ruining your project.
How to Fix Dry Edges After Cutting

Dry edges after trimming can be frustrating, but you can easily fix them with a few simple steps. First, apply a thin layer of edge sealing product to the dry edge to restore moisture and prevent further cracking. Let it sit for a minute, then gently smooth the edge with a fine-grit sandpaper or a finishing tool to achieve a seamless look. Finish smoothing helps blend the repaired edge into the rest of your piece, giving it a polished appearance. If necessary, repeat the process for stubborn dry edges. Always work carefully to avoid over-sanding, which can create new imperfections. With these steps, you’ll restore your trim’s smooth, professional finish and prevent future dry edges from forming.
Frequently Asked Questions
What Tools Are Best for Preventing Dry Edges on Small Trims?
You should use a fine-tipped brush or a foam applicator for edge sealing small trims, ensuring precise application to prevent dry edges. These tools help you finish smoothing the edges seamlessly, reducing the risk of dryness or chipping. Apply thin, even coats and wait for each to dry before adding more. This technique guarantees a clean, professional finish while keeping the edges moist and manageable during the process.
Can Environmental Factors Influence Dry Edge Formation?
Environmental factors definitely influence dry edge formation on trims. If the moisture content in the air drops or environmental temperature rises, your material dries out faster, increasing the risk of dry edges. You should monitor these conditions closely, especially in dry or hot environments, to adjust your trimming timing accordingly. Keeping the workspace humidified or working during cooler periods can help maintain ideal moisture content and prevent dry edges.
Is It Necessary to Use Protective Coatings on Trimmed Edges?
You should definitely use protective coatings on trimmed edges to ensure proper edge sealing and enhance paint adhesion. Applying a suitable sealant or primer creates a barrier that prevents moisture and environmental factors from causing dry edges or peeling paint. This step is especially vital for small pieces, where edges are more vulnerable. Proper edge sealing not only improves the finish but also prolongs the durability of your paint job.
How Does Blade Type Affect Dry Edge Development?
Imagine your blade slicing through wood like a hot knife through butter, shaping perfect edges. Your choice of blade type directly influences dry edge development; a sharper, finer blade enhances edge quality, reducing roughness. Opt for blades designed for precision to keep edges clean and smooth. By selecting the right blade, you guarantee each cut maintains the integrity of your work, preventing dry edges and delivering professional-looking results every time.
Are There Specific Techniques for Trimming Different Types of Materials?
Yes, you should modify your trimming techniques based on material expansion and adhesive compatibility. For flexible materials, use slow, steady cuts to prevent cracking or curling, while rigid materials need quicker, precise cuts. Always consider how the material responds to trimming, especially with heat or moisture involved. Matching your approach to each material’s properties helps prevent dry edges and ensures cleaner, more professional results.
Conclusion
To avoid dry edges on small trim pieces, timing is everything. Trust the theory that stopping just before your edge dries guarantees a smooth, professional finish. By maintaining consistent pressure and knowing when to stop, you prevent those unwanted dry spots. Remember, practice makes perfect. So, keep experimenting with your timing, and you’ll find the sweet spot that assures flawless edges every time. Your trims will look sharp and polished, just like the pros.