To see defects before paint dries, install proper lighting in your spray booth using LED strips placed along edges at natural angles for even coverage. Diffuse the light with frosted panels or diffusers to avoid glare and shadows, helping you spot imperfections early. Choose neutral white LEDs around 4000K for true color perception. When you optimize your lighting setup, you’ll catch flaws early and improve your finish—stay tuned to learn more about perfecting your lighting!
Key Takeaways
- Install LED strips along the booth edges at natural light angles for even, shadow-free illumination.
- Use diffusers like frosted acrylic or diffusing film to soften direct LED light and prevent harsh glare.
- Choose neutral white LEDs around 4000K to ensure accurate color and surface defect visibility.
- Position lighting close enough to illuminate surfaces clearly without creating shadows or glare.
- Test and adjust lighting placement to maximize surface detail visibility before paint dries.
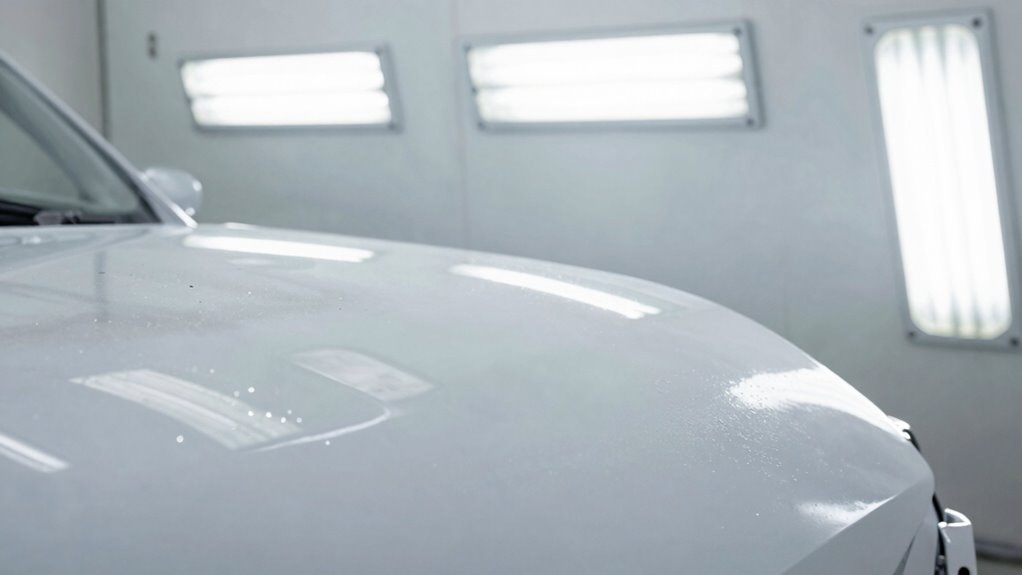
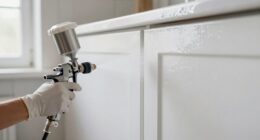
Setting up proper lighting in your spray booth is essential for achieving a smooth, professional finish on your projects. When you’re painting, the ability to see every detail clearly before the paint dries can make the difference between a flawless finish and a costly mistake. Proper lighting allows you to spot imperfections, runs, or uneven coats early, giving you the chance to fix issues immediately. One of the most effective ways to achieve this is through strategic LED strip placement combined with light diffusion techniques.
Start by positioning LED strips along the edges of your spray booth, ideally at a height that mimics natural light angles. This placement ensures an even distribution of light across the surface you’re working on. LED strips are versatile, energy-efficient, and produce minimal heat, making them ideal for close-up work. When installing, keep the strips close enough to eliminate shadows but far enough to prevent harsh glare. The goal is to cast uniform light that reveals surface imperfections without creating distracting bright spots.
Next, incorporate light diffusion techniques to soften the LED light. Without diffusion, LED strips can produce sharp, direct light that creates glare and conceals surface flaws or casts shadows. To counter this, cover the strips with diffusers—these can be as simple as frosted acrylic panels, diffusing film, or even white plastic tubing. These materials scatter the light, spreading it evenly across the working area. The result is a consistent, shadow-free illumination that makes it easier to spot defects early in the process. When light diffusion is correctly applied, you get a more accurate view of the surface, which helps you achieve a professional-quality finish.
You should also consider the color temperature of your LED strips. A neutral white (around 4000K) offers a natural daylight effect, providing clarity without distortion. This makes it easier to see true colors and detect imperfections on different surfaces. Additionally, understanding how lighting impacts perception can help you fine-tune your setup for the best results. Adjusting the placement and diffusion of your LED strips might take some trial and error, but once you find the right combination, you’ll notice a significant improvement in your ability to see every detail before the paint dries.
Frequently Asked Questions
What Is the Ideal Color Temperature for Spray Booth Lighting?
The ideal color temperature for spray booth lighting is around 5000K to 6000K, providing a daylight or neutral light color. This range guarantees you see true paint colors and defects clearly before they dry. Using the right color temperature helps you identify imperfections early, allowing for better touch-ups and a flawless finish. Make sure your light source mimics natural daylight to get the most accurate view of your work.
How Do LED Lights Compare to Fluorescent for Visibility?
LED lights generally offer better visibility than fluorescent bulbs for spray booths. They provide brighter, more consistent illumination, which helps you spot defects clearly before the paint dries. In a fluorescent comparison, LEDs tend to reduce glare and flickering, ensuring you see all imperfections accurately. Plus, LEDs are more energy-efficient and have a longer lifespan. Overall, choosing LED lighting enhances your ability to inspect your work thoroughly and achieve a flawless finish.
Can I Install DIY Lighting Without Professional Electrical Help?
Sure, you can attempt DIY lighting installation, but don’t forget DIY safety and electrical expertise matter. Ignoring these risks might seem tempting, but faulty wiring can cause shocks or fires. If you’re not confident in your electrical skills, it’s best to call a professional. It’s better to be safe than sorry, especially when it comes to working with electricity in your spray booth.
What Safety Precautions Are Necessary When Setting up Spray Booth Lighting?
When setting up spray booth lighting, you must prioritize electrical safety by ensuring all wiring is properly insulated and grounded. Use fixtures rated for damp or wet environments and avoid overloading circuits. To prevent fire hazards, keep combustible materials away from the lighting and install smoke detectors nearby. Always turn off power before working on electrical connections, and if you’re unsure, consult a professional to guarantee safe installation.
How Often Should Spray Booth Lights Be Replaced or Maintained?
Did you know that spray booth light bulbs typically last around 1,000 hours? You should replace or maintain your lights based on a regular maintenance schedule, ideally every 6 to 12 months. This guarantees consistent visibility and prevents defects from going unnoticed. Keep track of your light bulb lifespan and perform routine checks to avoid unexpected failures, maintaining a safe and efficient spray booth environment.
Conclusion
So, now you’re all set with your DIY spray booth lighting—because who needs professional tools or a proper setup when you can just blast some bulbs and hope for the best? Remember, spotting those tiny defects before they dry is overrated. After all, why bother with quality when you can enjoy the thrill of discovering imperfections too late? Happy spraying, and may your paint jobs be as flawless as your questionable lighting choices!