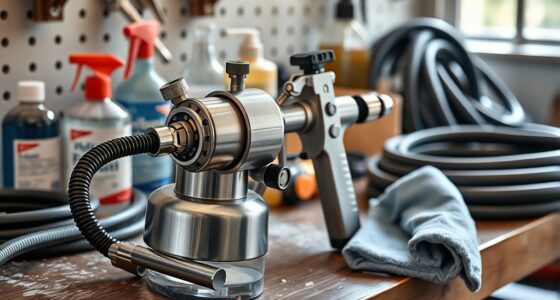
If your spray pattern becomes uneven, inconsistent coverage, or you notice cracks, clogs, or erosion on the tip, it’s time to replace your spray tip. First, turn off your sprayer and relieve pressure before removing the worn tip with a wrench or pliers. Inspect it closely—if cleaning doesn’t restore proper function, install a new one matching your sprayer specifications. Keep an eye on your tips; knowing when and how to replace them helps improve spray quality and reduces waste.
Key Takeaways
- Look for uneven spray patterns, reduced coverage, cracks, clogs, or erosion on the spray tip as signs of wear.
- Turn off the sprayer, relieve pressure, and carefully remove the worn spray tip using appropriate tools.
- Inspect the tip closely for cracks, blockages, or erosion to determine if cleaning or replacement is needed.
- Match and install a new spray tip suitable for your sprayer, ensuring it’s tightened securely without over-tightening.
- Test the sprayer post-installation to confirm a consistent spray pattern and proper coverage.

Over time, spray tips can wear out, leading to uneven spray patterns and reduced efficiency. This deterioration can cause frustration, especially when you’re trying to get a smooth, consistent application. Recognizing the signs early is key to maintaining your equipment’s performance. One of the most effective ways to keep your sprayer functioning at its best is by following proper maintenance tips. Regular inspection of spray tips should be part of your routine, and it’s vital to troubleshoot issues as they arise. If you notice inconsistent spray, drips, or uneven coverage, it’s likely time to replace the worn tip.
Regularly inspect and replace worn spray tips to ensure even coverage and optimal spray performance.
Begin by turning off your sprayer and relieving any pressure in the system. Carefully remove the spray tip from the nozzle using the appropriate tools—usually a wrench or pliers—being gentle to avoid damaging surrounding parts. Once removed, inspect the tip closely. Look for signs of wear such as cracks, clogs, or erosion on the nozzle or orifice. Sometimes, debris or hardened paint can block the spray pattern, which might seem like a worn tip but could be solved by cleaning. However, if cleaning doesn’t restore proper spray, replacement becomes necessary.
When choosing a new spray tip, make sure it matches the specifications of your sprayer and the type of work you’re doing. Using the correct size and pattern guarantees maximum coverage and efficiency. Once you have the right replacement, install it carefully, tightening it securely but not overly tight to avoid damaging the threads. After installation, run a test spray to check for a consistent pattern. If the spray remains uneven or drips, double-check the installation and make sure the tip is seated correctly.
Troubleshooting issues related to spray tips often involves understanding the cause of wear and addressing it promptly. Regular maintenance tips include cleaning the tips after each use, avoiding harsh chemicals that can erode the nozzle, and storing the equipment properly. Keeping an eye on the spray pattern during use helps catch problems early before they become major issues. Remember, a worn spray tip doesn’t just affect coverage; it also wastes material and can cause overspray or uneven application, impacting your project’s quality. Additionally, understanding projector technology can help you better maintain your equipment and optimize your work.
Frequently Asked Questions
Can I Replace a Spray Tip Myself or Need a Professional?
You can definitely do a DIY replacement of a spray tip if you’re comfortable with basic maintenance, but professional repair guarantees the job’s done right. If you’re experienced, follow the manufacturer’s instructions carefully to avoid damage. Otherwise, consider hiring a professional to prevent mistakes and ensure proper installation. Ultimately, your choice depends on your skill level and confidence with tools, but both options can get the job done effectively.
How Long Does a Spray Tip Typically Last?
Think of your spray tip as a tire on a long journey—its lifespan varies with use. Typically, a spray tip lasts around 200-300 hours of spraying or about a season. Wear indicators like uneven spray patterns, visible erosion, or reduced coverage signal it’s time for a replacement. Regularly inspecting your tip keeps your work smooth, ensuring consistent results without surprises along the way.
Are There Different Types of Spray Tips for Specific Applications?
Yes, there are different types of spray tips designed for specific applications. You can choose application-specific tips that suit your project, like fine finishing or heavy-duty coatings. These tips offer various spray pattern options, including narrow, wide, or custom shapes, allowing you to regulate the coverage and finish quality. Selecting the right tip guarantees efficient spraying, better results, and less waste, making your work more precise and professional.
What Safety Precautions Should I Take During Replacement?
Sure, because nothing says fun like risking a paint explosion! You should always wear personal protective gear, like gloves, goggles, and a mask, to dodge harmful splatters. Make sure your workspace is well-ventilated—nothing kills the mood like inhaling fumes. Turn off equipment, depressurize the system, and handle parts carefully. Play it safe, so your spray tip replacement doesn’t turn into a paint-covered disaster!
How Can I Prevent Spray Tips From Wearing Out Prematurely?
To prevent spray tips from wearing out prematurely, follow regular maintenance tips like cleaning the tips after each use and inspecting for damage. Proper storage solutions are vital; store spray tips in a dry, protected area to avoid corrosion and debris buildup. Using the correct pressure settings and avoiding overuse also extend tip life. These practices keep your spray tips in good condition, ensuring consistent performance and longer lifespan.
Conclusion
Replacing a worn spray tip keeps your equipment working efficiently and prevents costly repairs. Did you know that neglecting to replace worn tips can reduce spray accuracy by up to 30%? Staying proactive ensures your projects stay on track and save you money in the long run. So, check your spray tips regularly, follow the steps, and keep your equipment performing at its best. Your future self will thank you for the effort!