Connect with us

How-To & Tips

Mastering Airless Sprayer Painting

Published

on

An image showcasing a skilled painter effortlessly maneuvering an airless sprayer, as vibrant droplets of paint disperse through the air, perfectly coating a smooth surface with precision and efficiency

In the piece entitled ‘Mastering Airless Sprayer Painting,’ the writers provide a comprehensive guide for achieving professional-level results with an airless paint sprayer.

They emphasize the importance of proper preparation, including clearing clutter and protecting surrounding areas.

With a focus on wearing protective clothing and working in a well-ventilated space, they advise on choosing the right paint and adjusting the sprayer for optimal results.

By highlighting proper spraying techniques and maintenance tips, readers are equipped to troubleshoot common issues and achieve flawless finishes.

Key Takeaways

  • Proper spray tip selection is crucial for achieving desired results and troubleshooting issues
  • Using the correct pressure for different paints and surfaces ensures optimal paint application and coverage
  • Following proper spraying technique, including maintaining consistent spraying distance and angle, results in a professional-quality finish
  • Maintaining a smooth and even arm movement, overlapping each pass of the sprayer, and adjusting the speed of arm movement based on desired paint coverage are important for achieving thorough and consistent paint coverage.

Preparing for Painting

Advertisement

The painter clears clutter and protects surrounding areas before starting to paint. This is an essential step in preparing the workspace for painting. By removing any items that could get in the way or be damaged during the painting process, the painter ensures a clean and organized area to work in.

Additionally, protecting surrounding areas such as floors, furniture, and fixtures with drop cloths or plastic sheets prevents accidental spills or splatters from damaging these surfaces.

Another important aspect of preparing for painting is choosing the right paint color. The painter should consider factors such as the desired aesthetic, lighting conditions, and the existing color scheme of the space. By carefully selecting the paint color, the painter can create a cohesive and visually pleasing result.

Clearing Clutter and Protecting Surrounding Areas

To clear clutter and protect surrounding areas, one should wear protective clothing and ensure proper ventilation. This is essential to prevent any potential damage to the surfaces and to keep oneself safe from harmful fumes and particles. In addition, it is important to take the necessary precautions to protect the floor, furniture, and other items in the vicinity of the painting area. Using drop cloths or plastic sheets can help in preventing any accidental spills or splatters. Moreover, covering furniture and removing any fragile or valuable items from the area will further safeguard them from any potential damage. By taking these simple steps, one can ensure a clean and protected environment for painting, allowing for a smooth and hassle-free process.

Clearing Clutter Protecting Surfaces
Wear protective clothing Use drop cloths or plastic sheets
Ensure proper ventilation Cover furniture and remove fragile items
Remove unnecessary items Protect flooring with protective covers
Organize tools and equipment Safeguard valuable items from potential damage

Wearing Protective Clothing and Ensuring Proper Ventilation

Advertisement

Wearing protective clothing and ensuring proper ventilation is crucial for the safety of the painter and the quality of the paint job.
When painting, it is important to choose the right protective clothing to safeguard against potential hazards. This includes wearing coveralls or a paint suit, gloves, safety glasses or goggles, and a respirator or mask. These items provide protection against paint splatters, chemicals, and fumes.

Proper ventilation is also essential to maintain a healthy working environment. Opening windows and doors, using fans, or employing exhaust systems can help to remove airborne particles and fumes. Adequate ventilation helps to prevent the buildup of harmful toxins and improves air quality for both the painter and anyone else in the vicinity.

Gathering Necessary Materials and Setting Up Workspace

When gathering necessary materials and setting up the workspace, painters should ensure they have all the tools and equipment they need for a successful paint job. This includes paint brushes, rollers, drop cloths, painter’s tape, and a paint tray.

It is also important to have proper ventilation in the workspace to ensure the safety of the painter. This can be achieved by opening windows or using fans to circulate fresh air.

Advertisement

Additionally, painters should remove any obstacles or clutter from the area to create a clean and organized workspace.

Choosing the Right Paint and Thinning It if Necessary

A painter must carefully select the appropriate paint for the job and may need to thin it if necessary to achieve the desired consistency.

Choosing the right paint for different surfaces is crucial for a successful painting project. Different surfaces require different types of paint, such as latex or oil-based, depending on their characteristics. It is important to consider factors such as durability, adhesion, and resistance to moisture or chemicals when selecting paint.

Advertisement

Additionally, thinning the paint can help achieve optimal spraying results. Thinning paint allows for a smoother application and better coverage. It is important to follow the manufacturer’s instructions for the specific type of paint being used and to use the appropriate thinner to achieve the desired consistency.

Preparing the Surface for Painting

To prepare the surface for painting, the painter must thoroughly clean it to remove any dirt, dust, or grease. This step is crucial to ensure proper adhesion of the paint and a smooth finish. Here are five key steps for surface preparation:

  • Clear any clutter and protect surrounding areas to prevent any accidental damage during the painting process.
  • Wear protective clothing and ensure proper ventilation to protect yourself from any harmful fumes or particles.
  • Gather all the necessary materials and set up your workspace to make the painting process more efficient.
  • Choose the right paint for your project and thin it if necessary, following the manufacturer’s instructions.
  • Finally, clean the surface thoroughly, removing any dirt, dust, or grease using appropriate cleaning agents or solutions.

Properly preparing the surface will ensure a professional-quality finish and help the paint adhere better, resulting in a longer-lasting and more attractive paint job.

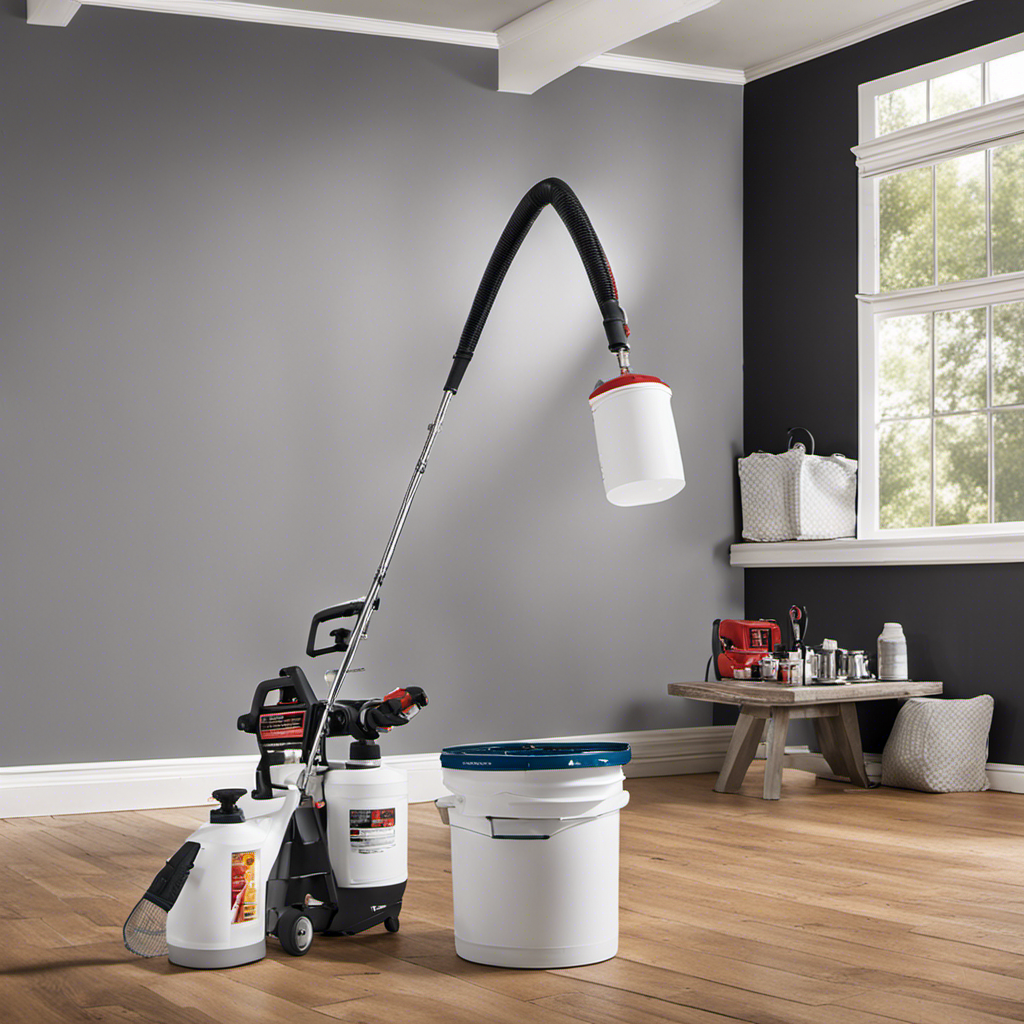
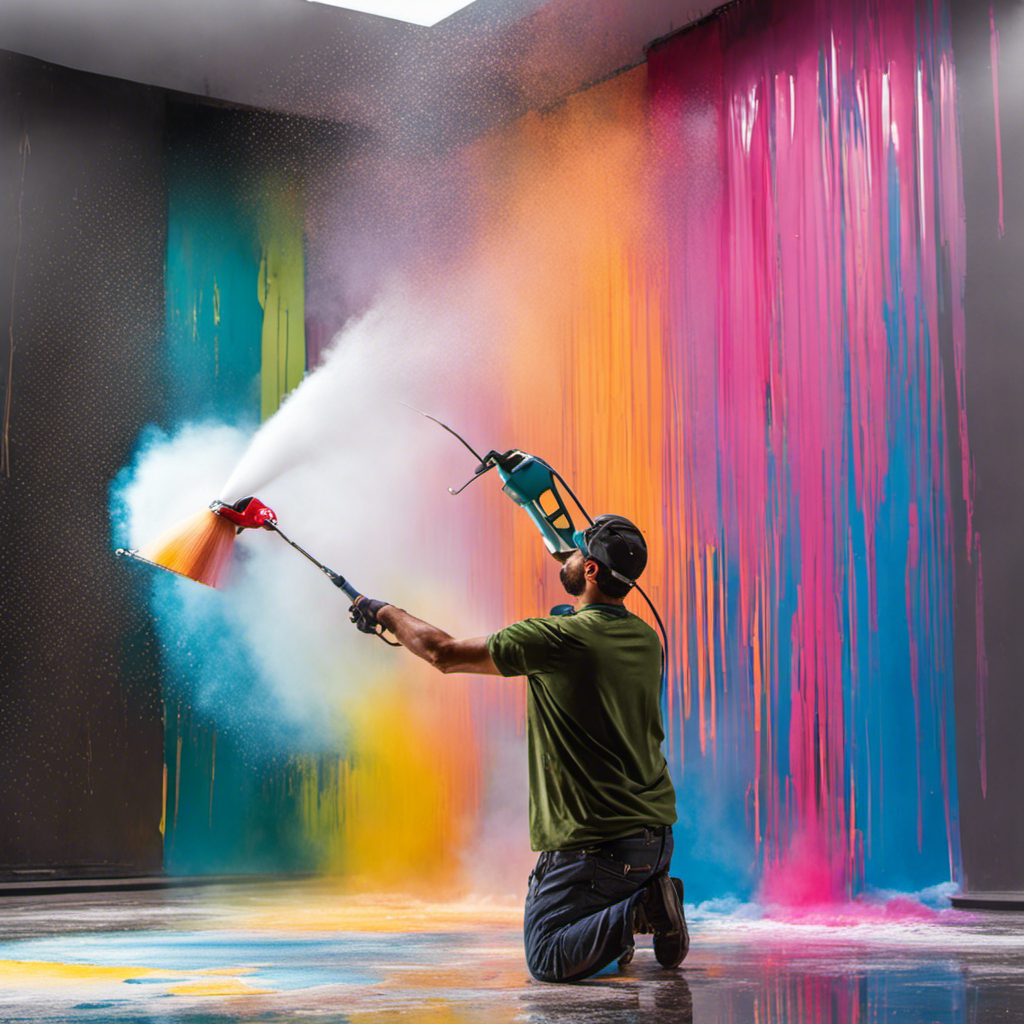
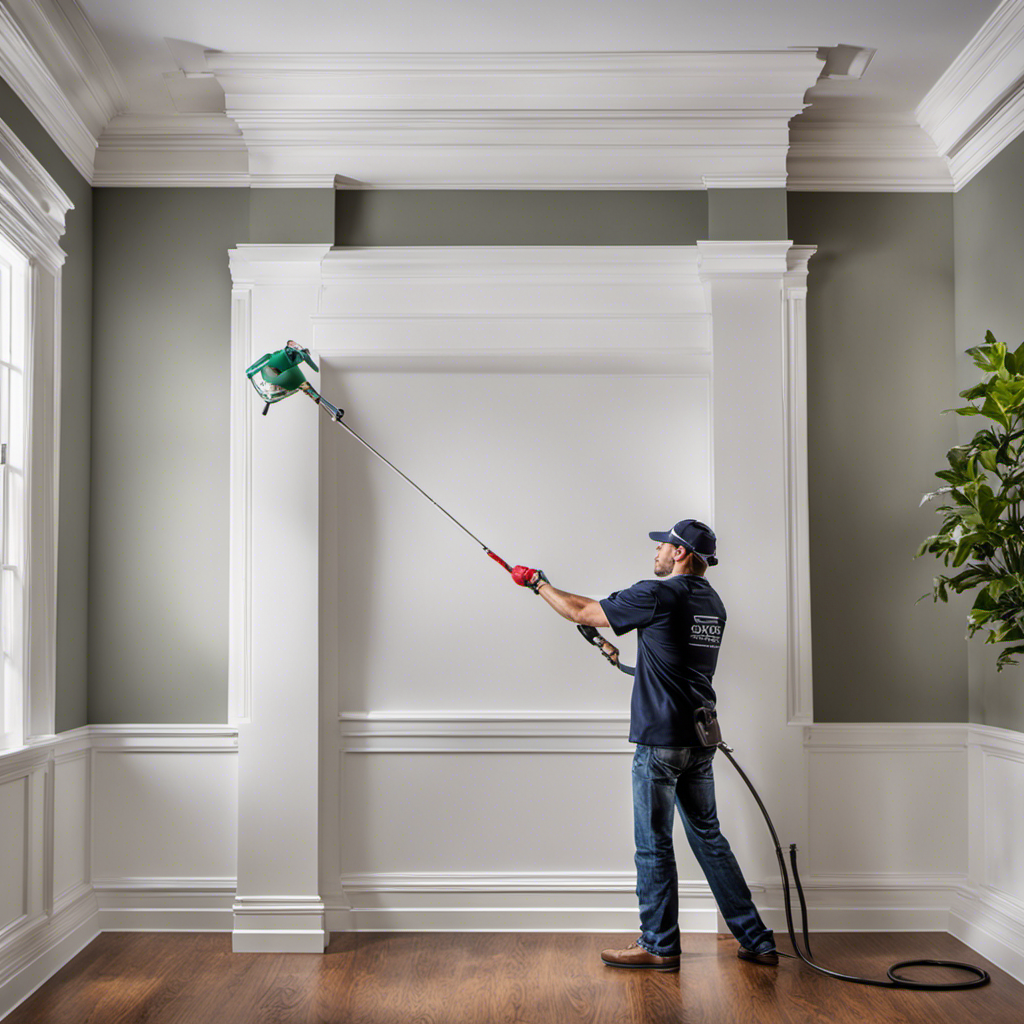
Setting Up and Adjusting the Airless Sprayer

The painter adjusts the airless sprayer by setting the spray pattern, pressure, nozzle width, and direction. To achieve the desired results, it is crucial to adjust the pressure according to the type of paint being used. Thicker paints and larger surfaces require higher pressure, while thinner paints and smaller areas need lower pressure.

By doing so, the painter ensures an even and consistent application of paint. Additionally, troubleshooting common issues with the airless sprayer is essential. Clogged spray tips and inconsistent spray patterns are common problems that can be addressed by mixing and straining the paint, choosing the right spray tip, and applying multiple thin coats.

Following these steps will help the painter achieve a professional-quality finish.

Advertisement

Adjusting Spray Pattern, Pressure, Nozzle Width, and Direction

Adjusting the spray pattern, pressure, nozzle width, and direction is crucial for achieving an even and consistent application of paint. The spray pattern determines how the paint is distributed, while the pressure affects the force at which the paint is sprayed.

Nozzle width and direction determine the coverage area and how the paint is applied to the surface. To achieve the desired results, proper spray tip selection is essential. Different spray tips have different characteristics and are suitable for different types of paint and surfaces.

It is also important to troubleshoot any issues that may arise during the painting process. By following troubleshooting techniques, such as clearing clogged spray tips or addressing inconsistent spray patterns, one can ensure a professional-quality finish.

Using the Correct Pressure for Different Paints and Surfaces

Using the correct pressure for different paints and surfaces ensures optimal paint application and coverage. It is important to choose the appropriate nozzle size for different paints and surfaces to achieve the desired results. Understanding the impact of pressure on paint application quality is crucial in achieving a professional finish.

When using an airless sprayer, adjusting the pressure is essential. Higher pressure is typically used for thicker paints and larger surfaces, while lower pressure is suitable for thinner paints and smaller areas. By adjusting the pressure accordingly, you can avoid issues such as overspray or uneven coverage.

Advertisement

To assist you further, here is a table showing the recommended pressure range for different paint types and surfaces:

Paint Type Surface Pressure Range
Latex Walls, ceilings 2000-2500 PSI
Oil-based Wood, metal 2500-3000 PSI
Stains, sealers Decks, fences 1500-2000 PSI

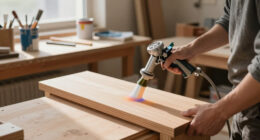
Proper Spraying Technique

To achieve a professional finish, painters should maintain a consistent spraying distance and angle to ensure even paint coverage. This proper spraying technique is crucial in achieving a smooth finish and avoiding common mistakes.

Here are some key tips to keep in mind:

  • Maintain a consistent spraying distance and perpendicular angle to the surface.
  • Move the arm smoothly and evenly in a sweeping motion, overlapping each pass.
  • Avoid spraying too close or too far, applying too much pressure, and moving too quickly.

By following these guidelines, painters can achieve a smooth and even paint coverage, enhancing the color depth and improving durability. It is important to remember that proper spraying technique is essential in achieving a professional-quality finish.

Maintaining Consistent Spraying Distance and Perpendicular Angle

The painter maintains a consistent spraying distance and perpendicular angle to the surface, ensuring even coverage and a professional finish. By doing so, they prevent overspray and achieve optimal paint distribution. This technique is essential for achieving a flawless result and improving the overall spraying technique.

In addition, maintaining a consistent spraying distance and perpendicular angle helps troubleshoot common issues with spray patterns. It allows the painter to identify and correct any inconsistencies or irregularities in the paint application. By paying attention to these details, the painter can easily adjust their technique and achieve better control over the spray pattern.

Advertisement

This improvement leads to a smoother and more uniform finish, enhancing the overall quality of the paint job.

Moving Arm Smoothly and Evenly in a Sweeping Motion

With practiced precision, the painter smoothly and evenly moves their arm in a sweeping motion, ensuring thorough and consistent paint coverage. This sweeping motion technique is crucial for achieving a professional-quality finish when using an airless sprayer.

Here are some arm movement tips to master this technique:

  • Maintain a steady and fluid motion throughout the entire painting process.
  • Keep the arm at a comfortable angle, neither too high nor too low.
  • Overlap each pass of the sprayer to avoid missed spots.
  • Adjust the speed of the arm movement based on the desired paint coverage.
  • Practice control and coordination to avoid excessive paint buildup or streaks.

Frequently Asked Questions

How Do I Troubleshoot and Fix Clogged Spray Tips?

To troubleshoot and fix clogged spray tips, the first step is to remove the tip from the sprayer.

Next, use a small brush or toothpick to carefully remove any paint or debris that may be blocking the tip.

If the clog persists, soak the tip in a cleaning solution or warm water for a few minutes, then use the brush or toothpick again to clean it.

Advertisement

Rinse the tip thoroughly before reattaching it to the sprayer.

What Are Some Tips for Achieving a Professional-Quality Finish?

To achieve a professional-quality finish, it’s important to focus on achieving a smooth and even coat of paint.

One tip is to choose the right nozzle for the job. This will ensure that the paint is applied evenly and without any streaks or inconsistencies.

Additionally, using a sweeping motion and overlapping each pass will help achieve a flawless result.

How Do I Properly Mix and Strain Paint Before Using It in the Airless Sprayer?

Proper paint mixing and straining techniques are essential before using an airless sprayer. To achieve a professional-quality finish, start by thoroughly stirring the paint to ensure it’s well-mixed.

Advertisement

Then, strain the paint through a mesh strainer to remove any lumps, debris, or impurities. This step helps prevent clogging in the sprayer and ensures a smooth application.

What Are Some Common Issues That Can Occur When Using an Airless Sprayer and How Do I Address Them?

Common issues that can occur when using an airless sprayer include clogged spray tips and inconsistent spray patterns. To address these issues, it is important to regularly clean the sprayer and flush it with water or cleaning solution.

Paying attention to the nozzle, filters, and hoses, and removing stubborn paint particles can help prevent clogs. Additionally, troubleshooting techniques such as adjusting the spray pattern, pressure, and direction can help achieve a consistent and professional-quality finish.

Can I Use an Airless Sprayer for Painting Small Areas or Do I Need a Different Tool?

An airless sprayer can be used for painting small areas, eliminating the need for a traditional brush. Using an airless sprayer offers several benefits for small painting projects. It allows for faster and more efficient coverage, ensuring a smooth and even finish.

The sprayer also minimizes overspray, resulting in less wasted paint. Additionally, it can reach tight corners and crevices that may be difficult to access with a brush.

Advertisement

Overall, an airless sprayer is a convenient and effective tool for painting small areas.

Conclusion

In conclusion, mastering airless sprayer painting requires careful preparation, proper setup, and adjustment of the sprayer, and the use of correct spraying techniques.

It is essential to clear clutter and protect surrounding areas, wear protective clothing, and work in a well-ventilated space.

Choosing the right paint and adjusting the pressure according to the paint type and surface size is crucial.

By maintaining a consistent spraying distance and angle, moving the arm smoothly, and avoiding common mistakes, a professional-quality finish can be achieved.

Advertisement

One interesting statistic is that using an airless sprayer can save up to 50% of painting time compared to traditional methods.

Continue Reading
Advertisement

How-To & Tips

Mastering Airless Sprayer Techniques for Perfect Ceiling Painting

Published

on

By

An image showcasing a skilled painter effortlessly operating an airless sprayer, flawlessly coating a ceiling with even layers of paint, capturing the precision and finesse required to achieve a flawless finish

Mastering the use of airless sprayers is essential for achieving a professional finish when painting ceilings. Proper preparation and technique are key factors that make up 90% of the success of a ceiling painting project.

In this comprehensive guide, beginners and DIY enthusiasts will learn the importance of selecting the right equipment, protecting the surrounding area, and maintaining a consistent distance from the ceiling.

With tips on cleaning, overlapping passes for complete coverage, and evaluating the finished result, this article will help you achieve flawless ceilings every time.

Key Takeaways

  • Proper preparation and equipment selection are crucial for achieving a professional finish when painting a ceiling with an airless sprayer.
  • Maintaining a consistent distance from the ceiling and overlapping each pass slightly ensures complete coverage.
  • Allow sufficient drying time before applying a second coat and touch up any areas with thin coverage or uneven paint.
  • Proper cleanup and storage of the sprayer and painting equipment are essential for easy maintenance and future touch-ups.

Importance of Proper Preparation

The painter must use drop cloths or plastic sheets to protect the floor and furniture when preparing for ceiling painting. Proper preparation is crucial for achieving a flawless finish.

Advertisement

Preparation techniques include inspecting and repairing any cracks or holes in the ceiling, as well as cleaning the ceiling to remove dirt and dust. Common mistakes to avoid include skipping the preparation steps and not protecting the surrounding surfaces.

To ensure a flawless finish, here are some preparation tips: thoroughly clean the ceiling before painting, patch any imperfections, and consider the overall aesthetic of the room when choosing a paint color.

Selecting the Right Equipment

When selecting the right equipment, it is important to consider factors such as the size and texture of the ceiling.

Choosing the right nozzle is crucial for achieving a smooth and even spray pattern. Different nozzles offer different spray widths and fan patterns, so it’s important to select one that suits the size of the ceiling.

Troubleshooting common issues with the equipment is also essential for a successful painting job. If the sprayer is clogging or producing uneven coverage, it may be due to improper setup or maintenance. Regularly cleaning the sprayer and inspecting the filters and tips can help prevent these issues.

Advertisement

Protecting the Surrounding Area

To protect the surrounding area, it’s important to use drop cloths or plastic sheets and inspect for any cracks or holes in the ceiling. This will prevent paint from splattering onto furniture and other objects.

Additionally, taking the following steps can help prevent overspray and ensure a smooth painting process:

  • Covering furniture with drop cloths or plastic sheets
  • Securing the drop cloths or plastic sheets with tape or clamps
  • Masking off any areas that should not be painted, such as light fixtures or vents

Inspecting and Repairing Ceiling Imperfections

Inspecting and repairing any cracks or holes in the ceiling is an essential step in achieving a professional finish when using an airless sprayer.

Before starting the painting process, it is important to thoroughly inspect the ceiling for any imperfections. Cracks and holes can disrupt the smoothness of the final paint job and may require additional touch-ups later on.

Advertisement

To repair cracks, use a joint compound or spackling paste to fill them in, making sure to smooth out the surface. For smaller holes, a lightweight spackle can be used.

Once the repairs are complete, allow sufficient drying time before proceeding with painting.

Cleaning the Ceiling Surface

Using a damp cloth or sponge, you can easily clean the ceiling surface to remove any dirt or dust particles.

Advertisement

To ensure a thorough cleaning, here are some effective cleaning techniques and the best cleaning solutions to use:

  • Dusting: Start by gently dusting the ceiling with a microfiber cloth or a feather duster to remove loose particles.

  • Vacuuming: If the ceiling is heavily soiled, use a vacuum cleaner with a soft brush attachment to help remove stubborn dirt and cobwebs.

  • Mild soap solution: Mix a small amount of mild dish soap with warm water. Dip the cloth or sponge into the solution and wring out excess moisture. Wipe the ceiling in gentle, circular motions to remove any stains or grime.

Remember to always test a small, inconspicuous area before cleaning the entire ceiling.

Additionally, avoid using abrasive cleaners or excessive moisture, as they can damage the ceiling surface.

Choosing the Perfect Paint Color

When selecting the ideal paint color, homeowners should consider the overall aesthetic of the room. Choosing the right paint finish and creating a color scheme are crucial for achieving the desired look.

To create a color scheme, homeowners can start by identifying the main color they want to use and then selecting complementary or contrasting colors for accents or trim. It’s important to consider factors such as natural light, room size, and existing furniture or decor when choosing paint colors.

Advertisement

Additionally, homeowners should consider the desired mood or atmosphere they want to create in the room. By carefully selecting paint colors and finishes, homeowners can create a cohesive and visually pleasing space.

Setting the Correct Sprayer Pressure

To achieve a smooth finish, homeowners need to ensure they set the correct sprayer pressure for their painting project. Adjusting sprayer settings is crucial in preventing overspray and achieving professional results. Here are some key points to consider:

  • Consult the sprayer’s manual or manufacturer’s instructions for recommended pressure settings.
  • Start with a low pressure setting and gradually increase until the desired coverage is achieved.
  • Test the sprayer on a small surface to check for any inconsistencies or overspray.
  • Adjust the nozzle settings to control the spray pattern and reduce overspray.
  • Maintain a consistent distance from the ceiling while spraying to ensure even coverage.
  • Use a sweeping motion and overlap each pass slightly for complete and uniform application.

Preparing the Airless Sprayer

When it comes to preparing the airless sprayer for painting, there are several steps to follow to ensure a smooth and efficient process.

One of the pros of using an airless sprayer is that it allows for quick and even application of paint on large surfaces like ceilings.

However, there are also some cons to consider, such as the potential for overspray and the need for proper ventilation.

Before starting, it is important to troubleshoot common issues with airless sprayers, such as clogs or uneven spray patterns.

Advertisement

This can be done by checking the sprayer’s filters and tips, and adjusting the pressure and nozzle settings accordingly.

Additionally, it is crucial to clean the sprayer immediately after use to prevent clogs and to properly store all painting equipment for future use.

Testing the Sprayer’s Performance

The painter checks the sprayer’s performance by testing it on a small surface to ensure it’s working correctly. This step is crucial in identifying any issues with the sprayer settings and troubleshooting them before starting the actual painting process.

Here are some important things to consider when testing the sprayer’s performance:

  • Start by setting the sprayer pressure to the recommended level for the type of paint being used.
  • Adjust the sprayer’s nozzle settings to achieve the desired spray pattern.
  • Test the sprayer on a small surface, such as a piece of cardboard or scrap wood, to observe the spray pattern, coverage, and consistency.
  • Look for any issues like uneven spray, clogs, or drips and make the necessary adjustments or repairs.
  • Ensure that the sprayer is delivering the paint smoothly and evenly to achieve a professional finish.

Adjusting Spray Pattern for Even Coverage

Adjusting the sprayer’s nozzle settings allows the painter to achieve an even spray pattern for consistent coverage.

To adjust the spray pattern, the painter can start by adjusting the nozzle size. A smaller nozzle size will result in a narrower spray pattern, while a larger nozzle size will create a wider pattern. This allows for flexibility in covering different areas of the ceiling.

Advertisement

Additionally, troubleshooting common sprayer issues can help ensure an even spray pattern. For example, if the sprayer is producing an uneven pattern, it may be due to a clogged nozzle. Cleaning or replacing the nozzle can help resolve this issue.

Maintaining Consistent Distance From the Ceiling

Maintaining a consistent distance from the ceiling ensures an even and smooth application of paint when using an airless sprayer. This technique helps prevent overspray and ensures that the paint is evenly distributed across the surface.

To achieve this, follow these steps:

  • Stand at a distance of about 12-16 inches from the ceiling.
  • Hold the sprayer at a slight angle to the surface, pointing it towards the ceiling.
  • Move the sprayer in a steady and controlled motion, keeping the distance consistent.
  • Overlap each pass slightly to ensure complete coverage.
  • Take breaks when needed to prevent fatigue and maintain accuracy.

Overlapping Each Pass for Complete Coverage

To achieve complete coverage when using an airless sprayer, it is important to overlap each pass slightly. This technique ensures that no areas are missed and helps avoid paint drips. By overlapping the spray pattern, the paint is applied evenly across the entire surface, resulting in a professional finish. Additionally, overlapping the passes helps to blend the paint and eliminate any visible lines or streaks.

When troubleshooting common sprayer issues, such as clogging or uneven spray patterns, overlapping each pass can be a helpful solution. It allows for better distribution of the paint and helps to prevent any blockages in the sprayer nozzle. By following this technique, painters can achieve consistent coverage and avoid potential problems during the painting process.

Remember to maintain a steady and consistent distance from the ceiling while overlapping each pass to ensure optimal results.

Advertisement

Allowing Sufficient Drying Time

Allowing enough time for the paint to dry is crucial in achieving a smooth and professional finish. To ensure a successful drying process, there are a few key steps to follow:

  • Avoiding paint drips:

  • Apply thin and even coats of paint to prevent drips from forming.

  • Use a high-quality brush or roller to minimize the risk of drips.

  • Check for any drips or excess paint and immediately smooth them out before they dry.

  • Using proper lighting:

  • Ensure that the room is well-lit to accurately evaluate the drying progress.

  • Use natural or artificial light sources to identify any missed spots or imperfections.

  • Adjust the lighting angle to reveal any areas that may need touch-ups.

Evaluating and Touching Up the Painted Ceiling

The painter evaluates the painted ceiling for any areas that may need touch-ups or additional coverage. This step is crucial to ensure a professional finish. They carefully inspect the ceiling, using proper lighting to identify any missed spots or imperfections. They consider the paint’s sheen and adjust the lighting accordingly for accurate evaluation.

If they find areas with thin coverage or uneven paint, they use touch-up techniques to correct them. This may involve using a brush or roller to apply additional paint to those areas. They make sure to blend the touch-up paint seamlessly with the rest of the ceiling to achieve a smooth and consistent appearance.

Frequently Asked Questions

Can an Airless Sprayer Be Used on Textured Ceilings?

Yes, an airless sprayer can be used on textured ceilings. However, there are some pros and cons to consider.

The main advantage is that the high pressure of the sprayer can easily cover the uneven surface of the texture. This saves time and ensures a more even finish.

Advertisement

On the other hand, the texture can make it harder to control overspray, which may require additional masking and protection. Regular airless sprayer maintenance is also important to prevent clogs and ensure optimal performance.

How Do You Prevent Overspray When Using an Airless Sprayer?

To prevent overspray when using an airless sprayer, it’s crucial to maintain proper maintenance and follow some key techniques.

First, ensure the sprayer is set at the correct pressure and nozzle settings for an even spray pattern.

Second, maintain a consistent distance from the ceiling while spraying and overlap each pass slightly for complete coverage.

Lastly, regularly clean the sprayer to prevent clogs and ensure optimal performance.

Advertisement

What Is the Best Method for Cleaning the Sprayer After Use?

The best method for cleaning the sprayer after use involves several maintenance tips.

First, it’s important to clean the sprayer immediately to prevent clogs.

Next, remove and clean any paint filters or tips.

Dispose of unused paint properly according to local regulations.

Store leftover paint in airtight containers for future touch-ups.

Advertisement

Finally, properly clean and store all other painting equipment.

Following these steps will ensure that the sprayer remains in good condition for future use.

How Long Should Paint Dry Before Applying a Second Coat?

The paint should be allowed to dry for a sufficient amount of time before applying a second coat. This ensures that the first coat has properly adhered to the ceiling and avoids any smudging or blending of the layers.

The exact drying time can vary depending on factors such as temperature and humidity, so it is important to refer to the paint manufacturer’s instructions for specific guidance.

Can an Airless Sprayer Be Used on Popcorn Texture Ceilings?

Using an airless sprayer on popcorn texture ceilings can be challenging due to the uneven surface. However, with proper maintenance and technique, it is possible to achieve satisfactory results.

Advertisement

Regular maintenance of the sprayer, such as cleaning and adjusting the pressure and nozzle settings, is crucial for optimal performance.

The benefits of using an airless sprayer, such as faster application and better coverage, still apply to popcorn texture ceilings.

It’s important to practice and test on a small area before tackling the entire ceiling.

Conclusion

In conclusion, mastering airless sprayer techniques is crucial for achieving a flawless finish when painting ceilings. By following the proper preparation steps, selecting the right equipment, and protecting the surrounding area, DIY enthusiasts can achieve professional-looking results.

For example, John, a DIY enthusiast, used the airless sprayer techniques outlined in this guide to paint his textured ceiling. He followed the recommended distance, overlapping each pass, and allowed sufficient drying time between coats. The end result was a perfectly painted ceiling that enhanced the overall look of his room.

Advertisement

By following these techniques, anyone can achieve a flawless finish when painting ceilings.

Continue Reading

How-To & Tips

Mastering Airless Sprayer Techniques for Flawless Paint Finish

Published

on

By

An image showcasing a skilled painter effortlessly using an airless sprayer, evenly coating a surface with flawless precision

Are you in search of the perfect paint finish? You’ve come to the right place. Mastering the use of an airless sprayer is essential for achieving professional-quality results.

In this article, we will delve into the world of airless sprayers and explore the proper techniques that will leave your surfaces streak-free and flawless.

From understanding the sprayer system to choosing the right paint and adjusting the spray pressure, we will cover all the essential steps to help you achieve a smooth and impeccable finish every time.

So, let’s dive in and master those airless sprayer techniques!

Key Takeaways

  • Choosing the right tip size ensures proper atomization and even application of paint.
  • Maintaining a consistent distance from the surface and moving in a steady, overlapping motion helps prevent streaks.
  • Proper maintenance and correct usage of the sprayer system are crucial to avoid paint streaks.
  • Thinning paint allows for better atomization and smoother application.

Understanding the Airless Sprayer System and Proper Technique

Advertisement

The airless sprayer system uses high pressure to force paint through a small opening, creating a fine mist that ensures a smooth and even application of paint. Proper sprayer maintenance and troubleshooting techniques are essential for achieving optimal results.

Regularly cleaning the sprayer and inspecting and replacing worn parts can prevent issues that may result in paint streaks. Lubricating the sprayer properly ensures smooth operation. Troubleshooting techniques, such as checking for clogs or blockages in the sprayer and adjusting the spray pattern and pressure, help address any problems that arise during the painting process.

Proper Surface Preparation for a Flawless Finish

Inspecting the surface for imperfections and rough spots before painting is an essential step in achieving a professional-looking result. To ensure a flawless finish, one must use proper sanding techniques to smooth out any bumps or uneven areas.

Choosing sandpaper with the appropriate grit is crucial for achieving the desired level of smoothness. After sanding, it is important to thoroughly clean the surface to remove dust and debris.

Once the surface is clean, applying a primer is the next step in the priming process. The primer seals the surface and provides a smooth base for paint adhesion.

Advertisement

Proper surface preparation, including sanding and priming, minimizes the chances of paint streaks and ensures a professional-looking finish. Taking the time to properly prepare the surface will result in a flawless paint application.

Choosing the Right Paint and Thinning Ratio

To achieve a smooth and even application of paint, one must consider the appropriate paint type and thinning ratio. The importance of proper paint storage and handling cannot be overstated.

Storing paint in a cool, dry place and sealing the containers tightly help maintain its quality. Before starting a project, it is crucial to mix the paint thoroughly to ensure consistent color and texture.

Advertisement

Achieving optimal paint coverage also relies on the right spraying technique. Maintaining a consistent distance from the surface and moving in a steady, overlapping motion ensures an even coat. Adjusting the spray pressure and using the correct tip size further contribute to a flawless finish.

Adjusting the Spray Pressure for Consistent Results

Achieving consistent results with an airless sprayer relies on adjusting the spray pressure to find the optimal setting for the desired spray pattern. Here are some spray pressure adjustment tips and troubleshooting techniques to ensure a flawless paint finish:

  1. Start with a low pressure setting and gradually increase it until the desired spray pattern is achieved.
  2. Use a pressure gauge to accurately measure and adjust the spray pressure.
  3. Check the manufacturer’s recommendations for the optimal pressure range for the specific paint.

By testing the spray pattern on a scrap surface before starting the project and making proper spray pressure adjustments, you can eliminate paint streaks and achieve professional-looking results.

Troubleshooting common spray pressure issues involves checking for clogs or blockages in the sprayer and adjusting the pressure as needed. Regularly cleaning and maintaining the sprayer, as well as using filters and strainers, will help prevent issues and ensure a smooth spraying experience.

Preventing Clogs and Blockages for Smooth Spraying Experience

Advertisement

Regularly cleaning and maintaining the sprayer, as well as using filters and strainers, helps prevent clogs and blockages, ensuring a smooth spraying experience. Cleaning techniques and troubleshooting tips are essential for maintaining an airless sprayer system. By incorporating these practices into your routine, you can minimize the risk of clogs and blockages that can disrupt the paint flow and lead to uneven application. Additionally, using filters and strainers helps catch debris or particles in the paint, preventing them from entering the sprayer and causing potential issues. To provide a visual representation of the importance of cleaning and maintaining the sprayer, here is a table outlining some effective cleaning techniques and troubleshooting tips:

Cleaning Techniques Troubleshooting Tips
Regularly clean the sprayer after each use Check for clogs or blockages in the sprayer
Thoroughly clean all parts of the sprayer, including the nozzle and hose Adjust the spray pattern and pressure as needed
Inspect and replace worn or damaged parts Properly lubricate the sprayer for smooth operation
Use filters and strainers to catch debris or particles in the paint Address any problems that arise during the painting process

Frequently Asked Questions

What Are Some Common Mistakes to Avoid When Using an Airless Sprayer?

When using an airless sprayer, there are some common mistakes to avoid in order to achieve even coverage.

One mistake is not properly maintaining the sprayer, which can lead to clogs and streaks.

Another mistake is not choosing the right tip size, resulting in uneven application of paint.

Additionally, not adjusting the spray pressure correctly can cause paint streaks.

Advertisement

How Can I Achieve a Smooth Finish on Textured Surfaces With an Airless Sprayer?

Achieving even coverage on textured surfaces with an airless sprayer requires careful consideration of nozzle selection. Choosing the right nozzle size ensures proper atomization and distribution of paint.

A larger nozzle size may be necessary for textured surfaces to allow the paint to flow smoothly and cover the surface evenly.

Additionally, adjusting the spray pressure and maintaining a consistent distance from the surface while moving in a steady, overlapping motion will help achieve a flawless finish on textured surfaces.

What Are Some Tips for Avoiding Overspray When Using an Airless Sprayer?

To avoid overspray when using an airless sprayer, proper cleaning techniques and avoiding clogging issues are essential.

First, regularly clean the sprayer after each use to remove any residual paint or debris that could cause clogs.

Advertisement

Additionally, use filters and strainers to catch any particles in the paint that could lead to clogging.

Can I Use an Airless Sprayer to Apply Different Types of Paint, Such as Latex and Oil-Based?

Using an airless sprayer for intricate paint designs has its pros and cons when it comes to different paint types.

While airless sprayers are versatile and can handle both latex and oil-based paints, it’s important to consider a few factors.

Latex paints are generally easier to spray and clean up, but they may require more thinning for optimal atomization.

Oil-based paints can be more challenging due to their higher viscosity, but they provide a smoother finish.

Advertisement

Proper thinning and adjusting the spray pressure are crucial for achieving flawless results with different paint types.

How Do I Troubleshoot and Fix Uneven Spray Patterns With an Airless Sprayer?

To troubleshoot and fix uneven spray patterns with an airless sprayer, there are a few techniques to keep in mind.

First, check the spray tip for any clogs or blockages and clean it thoroughly.

Next, adjust the spray pressure to ensure a consistent flow of paint.

Additionally, make sure the sprayer is held at a consistent distance from the surface and moved in a steady, overlapping motion.

Advertisement

These troubleshooting techniques will help you achieve a flawless paint finish.

Conclusion

In conclusion, mastering airless sprayer techniques is essential for achieving a flawless paint finish. By using the proper sprayer system and technique, one can avoid those dreaded paint streaks.

It’s ironic how such a seemingly simple task can require attention to detail and precise execution. But fear not, with the right tips, consistent distance, and steady motion, anyone can become a pro at this art.

Just remember to properly maintain your sprayer, prepare your surface, choose the right paint, adjust the spray pressure, and prevent clogs.

Happy painting!

Advertisement

Continue Reading

How-To & Tips

The Importance of Lubrication for Airless Paint Sprayers

Published

on

By

An image showcasing the significance of lubrication for airless paint sprayers

It is crucial to keep airless paint sprayers properly lubricated to maintain their efficiency and enhance their longevity. Regular lubrication can prevent costly repairs and increase the service life of the equipment. It allows for smooth and effective operation by preventing clogs and reducing wear. By reducing friction and wear on moving parts, lubrication improves overall performance.

Different types of lubricants, such as silicone, mineral oil, and synthetic lubricants, can be used. Following manufacturer instructions for regular maintenance, including cleaning the sprayer before lubrication and applying the appropriate amount, is essential for optimal performance.

Troubleshooting tips and maintenance advice are also provided in this article.

Key Takeaways

  • Using the right lubricant is crucial for maintaining an airless paint sprayer.
  • Regular lubrication helps prevent costly repairs and extends the lifespan of the equipment.
  • Proper lubrication is important for smooth and efficient operation, preventing clogs or damage.
  • Lubricating reduces friction and wear on moving parts, extending the lifespan and enhancing efficiency.

The Benefits of Regular Lubrication

Regular lubrication helps prevent costly repairs and extends the lifespan of the equipment. It also ensures smooth and efficient operation of airless paint sprayers. The importance of regular lubrication cannot be overstated. Lubrication plays a crucial role in enhancing the efficiency and lifespan of the equipment. By reducing friction and wear on moving parts, lubrication helps to maintain consistent performance and prevent clogs or damage. It also minimizes the risk of breakdowns and costly repairs.

Advertisement

Proper lubrication ensures that the airless paint sprayer operates smoothly and efficiently, resulting in a high-quality paint finish. Regular maintenance and lubrication are essential for optimal working condition and to maximize the longevity and efficiency of the equipment.

Types of Lubricants for Airless Paint Sprayers

Silicone lubricants provide excellent lubrication, high heat resistance, and water repellency for airless paint sprayers. When it comes to choosing the best lubricant for your airless paint sprayer, silicone lubricants are the top choice. They offer superior lubrication properties that ensure smooth and efficient operation of the equipment.

Additionally, silicone lubricants have high heat resistance, preventing the lubricant from breaking down under the high temperatures generated by the sprayer. They also provide water repellency, protecting the equipment from moisture damage.

As for the lubrication frequency, it is recommended to lubricate your airless paint sprayer according to the manufacturer’s instructions. Regular lubrication is essential for maintaining the longevity and optimal performance of your equipment.

Steps to Properly Lubricate Your Equipment

Advertisement

To properly lubricate the equipment, the user should first clean the sprayer to remove any debris or paint residue. This ensures that the lubricant can effectively coat the necessary parts and provide optimal performance. After cleaning, the following steps should be followed for proper lubrication techniques:

  1. Refer to the manufacturer’s instructions: Different airless paint sprayers may have specific lubrication requirements, so it’s important to follow the guidelines provided.

  2. Use the recommended lubricant: Using the wrong type of lubricant can lead to inadequate lubrication or even damage to the equipment. It’s essential to use the lubricant recommended by the manufacturer for optimal results.

  3. Apply the lubricant to the appropriate parts: Focus on lubricating the moving components of the sprayer, such as the piston rod, packings, and seals. Apply the lubricant evenly and ensure proper coverage.

  4. Avoid over-lubrication: Applying too much lubricant can cause excess buildup, leading to clogs and decreased performance. Use the correct amount of lubricant as specified by the manufacturer.

Troubleshooting Common Lubrication Issues

Properly maintaining the equipment includes troubleshooting common lubrication issues to ensure optimal performance.

Airless paint sprayers may encounter a few common lubrication problems that can affect their efficiency and lifespan.

One common issue is the presence of debris or paint residue in the lubrication system, leading to clogs and reduced lubrication. This can be resolved by thoroughly cleaning the sprayer before applying lubricant.

Advertisement

Another problem is the use of incorrect lubricant or using too much of it, which can cause build-up and interfere with the sprayer’s operation. It is important to use the recommended lubricant and apply the correct amount.

Additionally, improper storage or lack of regular maintenance can also result in lubrication issues.

Maintenance Tips for Extending the Lifespan of Your Sprayer

Regular maintenance and proper storage are key factors in extending the lifespan of an airless paint sprayer. To ensure the longevity of your equipment, follow these storage techniques and cleaning methods:

Advertisement
  1. Store in a clean and dry area: Keep your paint sprayer in a clean and dry environment to prevent dust and moisture buildup, which can lead to clogs and damage.

  2. Clean after each use: Thoroughly clean the sprayer after each use to remove any paint residue or debris that may affect its performance. Use appropriate cleaning solutions and follow the manufacturer’s instructions.

  3. Protect sensitive parts: Cover the spray tip and other sensitive parts with protective caps when not in use to prevent damage and maintain their effectiveness.

  4. Use quality storage containers: Store your paint sprayer in a sturdy and well-sealed container to protect it from accidental damage and ensure its safety during transportation or storage.

Commonly Asked Questions About Lubrication for Airless Paint Sprayers

Using the correct type of lubricant is crucial for maintaining the optimal performance and longevity of an airless paint sprayer. The frequency of lubrication and the choice of lubricant are important factors to consider. To help you make an informed decision, here are some commonly asked questions about lubrication for airless paint sprayers:

Question Answer
Can I use any type of lubricant on my airless paint sprayer? It is recommended to use lubricants specifically designed for airless paint sprayers.
How often should I lubricate my airless paint sprayer? The lubrication frequency depends on the manufacturer’s guidelines, but typically, it is recommended to lubricate the sprayer after every 50 hours of use.
Can I over-lubricate my airless paint sprayer? Yes, over-lubrication can lead to clogs and other issues. Follow the manufacturer’s instructions for the correct amount of lubricant to use.
What are the signs that my airless paint sprayer needs lubrication? If you notice increased friction, unusual noises, or decreased performance, it may be time to lubricate your sprayer.
Are there any specific maintenance tips I should follow to keep my airless paint sprayer in good condition? In addition to regular lubrication, proper storage, cleaning, and inspection of parts are essential for maintaining your airless paint sprayer’s longevity.

Expert Tips for Maintaining Optimal Performance

To ensure optimal performance, experts recommend following the manufacturer’s guidelines for lubrication frequency and choice of lubricant for maintenance of an airless paint sprayer. Proper maintenance is essential for maintaining the longevity and efficiency of the equipment.

Here are some expert tips to help you maintain optimal performance:

  1. Determine the maintenance frequency: Consult the manufacturer’s guidelines to determine how often your airless paint sprayer needs to be lubricated. Regular lubrication is essential for smooth and efficient operation.

  2. Choose the right lubricant: Selecting the appropriate lubricant is crucial for preventing wear and tear on moving parts. Consider factors such as heat resistance, water repellency, and rust prevention when choosing the lubricant.

  3. Clean before lubrication: Before applying the lubricant, ensure that the sprayer is clean and free from any debris or paint residue. This will help prevent clogs and ensure proper lubrication.

  4. Follow the instructions: Apply the lubricant to the recommended parts as per the manufacturer’s instructions. Use the correct amount of lubricant to ensure proper coverage and performance.

Frequently Asked Questions

Can I Use WD-40 or Other General-Purpose Lubricants on My Airless Paint Sprayer?

Using WD-40 or other general-purpose lubricants on an airless paint sprayer is not recommended. Using alternative lubricants can have adverse effects on the equipment. It may not provide the necessary lubrication needed for smooth operation and can potentially cause damage to the sprayer.

It is important to use the lubricants recommended by the manufacturer to ensure optimal performance and to maintain the longevity of the equipment.

Advertisement

Is It Necessary to Use a Specific Brand of Lubricant Recommended by the Manufacturer?

Using alternative lubricants for airless paint sprayers is not recommended. The potential consequences of using the wrong lubricant on an airless paint sprayer can be detrimental to its performance and lifespan. Manufacturers usually provide specific lubricant recommendations for their equipment, and it is necessary to follow these guidelines.

Using a lubricant that is not recommended may result in decreased efficiency, increased wear and tear, and potential damage to the paint sprayer. It is best to stick to the lubricants recommended by the manufacturer to ensure optimal operation and longevity.

How Do I Know if I Have Applied Enough Lubricant to My Airless Paint Sprayer?

To ensure the lifespan of an airless paint sprayer, it’s important to know if enough lubricant has been applied. Common signs of insufficient lubrication include increased friction, sticking parts, and decreased performance.

To maintain the sprayer’s lifespan, it’s crucial to evenly apply the recommended amount of lubricant to the appropriate parts. This will prevent wear and tear, ensure smooth operation, and extend the equipment’s longevity.

Proper lubrication is essential for optimal performance and to avoid costly repairs.

Advertisement

Can I Use a Lubricant That Is Not Recommended for High Heat Resistance on My Sprayer?

Using non-recommended lubricants on airless paint sprayers can pose potential risks and consequences. It is important to use heat-resistant lubricants specifically designed for airless paint sprayers. These lubricants provide the necessary protection against high temperatures and ensure smooth operation without compromising the equipment’s performance.

Using a lubricant that is not recommended for high heat resistance may lead to overheating, damage to the equipment, and decreased efficiency. It is crucial to follow the manufacturer’s guidelines and use the appropriate lubricant for optimal results.

Are There Any Alternative Methods of Lubrication for Airless Paint Sprayers?

Alternative lubrication methods for airless paint sprayers provide additional options for maintaining optimal performance. While using the recommended lubricants is crucial, some users may prefer to explore alternatives.

However, it is important to note that alternative methods may not offer the same level of effectiveness and benefits as the recommended lubricants.

Regular lubrication, using the appropriate lubricant, helps prevent costly repairs, extends equipment lifespan, and ensures smooth operation.

Advertisement

Conclusion

In conclusion, regular lubrication is crucial for the efficient and long-lasting performance of airless paint sprayers. By reducing friction and wear on moving parts, proper lubrication enhances the sprayer’s efficiency and prevents costly repairs.

Choosing the right lubricant, following manufacturer’s instructions, and performing regular maintenance are key steps in ensuring optimal working condition. Remember, ‘a well-oiled machine’ is not just an idiom but a literal expression of the importance of lubrication in maintaining the sprayer’s functionality.

So, keep your sprayer well-lubricated to keep it running smoothly and extend its lifespan.

Continue Reading

Trending

Copyright © 2024 Paint Sprayer Zone Affiliate disclaimer As an affiliate, we may earn a commission from qualifying purchases. We get commissions for purchases made through links on this website from Amazon and other third parties.