
This guide walks you through the complete process of painting a surface with an airless paint sprayer: setting up the machine, preparing your workspace and material, spraying with correct technique, and cleaning the equipment so it lasts. It is written for DIY homeowners and hobbyists who are using an airless sprayer for the first time or the first time in a while. You do not need prior spraying experience, but you should be comfortable with basic prep work like masking and using drop cloths.

Get business pricing on tools and workshop supplies
- Business-only prices and quantity discounts
- Tax-exempt purchasing
- Multiple users, one account, clear invoices

Graco Magnum 257025 Project Painter Plus Paint Sprayer
- ✔ Material: Metal
- ✔ Country of Origin: USA
- ✔ Max Project Size: Up to 5 gallons

InoKraft NEO Airless Paint Sprayer Kit, 3000 PSI 0.26 GPM
- ✔ Model: IK01099 (NEO)
- ✔ Pressure: 3000 PSI
- ✔ Max Paint Output: 0.26 GPM

WORKPRO 700W Airless Paint Sprayer, 2900 PSI High Efficiency
- ✔ Motor: 700W
- ✔ Max Pressure: 2900 PSI
- ✔ Flow Rate: 0.317 GPM
By the end, you will have an evenly coated surface — walls, ceilings, fences, doors, cabinets, or furniture — with no runs, streaks, or heavy overspray, and a sprayer that is cleaned and ready for the next job. Expect the full process, including cleanup, to take 2-4 hours for a typical room or fence section. Cleanup alone takes 30-45 minutes and should not be rushed; dried paint inside a sprayer can ruin it.
Difficulty: Intermediate | Time: 2-4 hours (including setup and cleanup)
What You’ll Need
Tools & Materials:
- Airless paint sprayer (handheld or stand-mounted, rated for your material)
- Spray tip matched to your material (e.g., 311 or 411 for interior walls, 515 or 617 for fences/decks)
- Paint strainer bags (fine mesh)
- Drop cloths or plastic sheeting (canvas for floors, plastic for furniture and fixtures)
- Painter’s tape (at least 1.5 inches wide)
- Stir sticks and a drill-mounted paint mixer
- Bucket of clean water (latex) or mineral spirits (oil-based) for flushing
- Safety glasses, respirator with organic vapor cartridges, and gloves
- Extension wand (optional, for ceilings or high walls)
- Cardboard or spare drywall scrap for test spraying
Knowledge:
- Basic understanding of paint types (latex vs. oil-based) and thinning requirements
- How to mask and protect surfaces with tape and plastic
- Familiarity with the sprayer’s manual — where the prime valve, pressure control, and gun trigger safety are located
Read your sprayer’s manual before starting. Controls differ between models, and the manual will show the exact valve positions for priming and spraying. If you are renting the sprayer, ask the rental counter to demonstrate the priming and cleaning cycle and confirm which fluids they want it returned flushed with. Check that your tip size matches your material: thin materials like stains use small tips (311 or smaller), while thick latex paints need larger ones (515+). A mismatched tip causes spitting, poor pattern shape, or a struggling motor.
Graco Magnum 257025 Project Painter Plus Paint Sprayer
When we line up all three sprayers, the Graco Project Painter Plus earns the top spot because it is the most grown-up machine of the group. Its metal construction contrasts sharply with the plastic-heavy builds of the InoKraft NEO and WORKPRO, and that translates directly into a pump that survives being stored between seasons rather than failing after a few weekends. Graco’s reputation in airless spraying also means parts, tips, and hoses are easy to source later, something neither budget brand can match.The standout feature for DIY homeowners is 50 ft of hose support, double what the other two sprayers include. If you are painting a two-story exterior or spraying a ceiling from a single paint station downstairs, that extra reach removes constant repositioning. The flexible suction tube that draws straight from a 1 or 5-gallon bucket works the same way the InoKraft’s does, but the fully adjustable pressure control feels more precise when switching between thick latex walls and thin stain on a deck rail.The honest tradeoff is readiness and cleanup. Unlike the InoKraft NEO, nothing extra comes in the box, so you will buy masking supplies separately. And unlike true pro units, this model is still capped at DIY-scale projects. Compared with the WORKPRO’s higher flow rate, the Graco is slightly slower on huge flat walls, but it delivers a more consistent finish and better long-term durability, which matters more to most homeowners.
Pros:
- Durable metal construction outlasts the plastic-bodied budget competition
- Supports up to 50 ft of hose for two-story and large exterior reach
- Fully adjustable pressure handles everything from thick latex to thin stain
- Sprays unthinned paint directly from 1 or 5-gallon buckets
Cons:
- No accessories included, so masking tape and supplies cost extra
- Designed for DIY duty, not daily professional use
- Cleanup takes longer than the InoKraft’s Flush-Ease system
Best for: Homeowners tackling multi-room interiors, exteriors, or two-story projects who want a durable sprayer they can reuse for years
Not ideal for: Buyers who want a complete all-in-one starter kit with accessories included, or occasional users spraying less than a gallon at a time
Bottom line: The most durable and farthest-reaching option here, and the one we would buy if the sprayer needs to last beyond a single project season.
“The most durable and farthest-reaching option here, and the one we would buy if the sprayer needs to last beyond a single project season.”
InoKraft NEO Airless Paint Sprayer Kit, 3000 PSI 0.26 GPM
The InoKraft NEO wins on a simple but rare strength: it is the only sprayer in this lineup that arrives truly project-ready. Where the Graco sends you to the store for masking film and the WORKPRO includes just basics, the NEO boxes up masking film, painter’s tape, a touch-up brush, cleaning tools, and a 25 ft hose together. For a first-time sprayer buyer, that bundle removes the most common day-one stumbling block.At 10 lbs with built-in component storage, it is also the most portable of the three, noticeably easier to carry up stairs than the Graco. Its 3000 PSI pressure matches the professional standard, and it draws straight from 1 or 5-gallon containers without thinning when the coating permits, exactly like the Graco. The Flush-Ease valve is the feature we would highlight to anyone who has heard horror stories about airless cleanup: minimal disassembly means you are done washing up in minutes rather than an hour.Where it trails the Graco is longevity and reach. The 25 ft hose is half the Graco’s maximum, so multi-story exteriors mean moving the unit constantly. And while the included 515 tip and 12-inch 360° swivel extension handle broad surfaces well, detail work is not its strength. Compared with the WORKPRO, it gives up a little raw flow for far better accessory coverage and easier cleanup, a trade most DIY beginners should take happily.
Pros:
- Complete starter kit includes masking film, tape, touch-up brush, and cleaning tools
- Lightweight 10 lb design with built-in storage keeps parts organized
- Flush-Ease valve makes cleanup fast with minimal disassembly
- Sprays directly from 1 or 5-gallon containers without thinning when permitted
Cons:
- 25 ft hose limits reach compared with the Graco’s 50 ft capacity
- Best suited to projects up to about 5 gallons, not larger jobs
- Thinning-free spraying depends on coating compatibility
Best for: First-time sprayer owners who want everything included in one box and quick cleanup after each session
Not ideal for: Owners of large multi-story homes who need 50 ft of hose reach, or anyone wanting a sprayer that doubles for daily pro work
Bottom line: The smartest entry point for DIY painters, because it bundles everything a beginner needs and makes cleanup painless.
“The smartest entry point for DIY painters, because it bundles everything a beginner needs and makes cleanup painless.”
WORKPRO 700W Airless Paint Sprayer, 2900 PSI High Efficiency
If your project is a large, flat surface, such as an exterior wall, a long fence, or a bare ceiling, the WORKPRO 700W makes a strong case as the value play. Its 0.317 GPM flow rate is actually the highest of the three sprayers here, edging out the InoKraft’s 0.26 GPM, and combined with 2900 PSI it covers big areas noticeably faster than rollers. When speed on broad surfaces is the priority, this model holds its own against more established names.The true airless atomization means no thinning, and WORKPRO emphasizes reduced overspray and an even finish with good adhesion, which addresses the two complaints most people have about cheap sprayers. The adjustable pressure knob lets you dial back for trim or detailed surfaces rather than running flat-out constantly, and the 25 ft abrasion-resistant hose plus a 12-inch extension rod mirror the InoKraft’s reach setup for working high walls and soffits without a ladder move every few minutes.The tradeoffs are real, though. Compared with the Graco, the build feels like what it is: a budget tool for occasional use, with no long-hose upgrade path. Compared with the InoKraft, the accessory bundle is thinner, covering safety goggles, a wrench set, and a cleaning kit, but no masking supplies, so you will still shop before day one. If your painting is infrequent and walls are big, those compromises are easy to accept; if you expect to spray every season, the Graco’s durability is worth the step up.
Pros:
- Highest flow rate of the trio at 0.317 GPM for fast large-area coverage
- True airless technology sprays unthinned paint with reduced overspray
- Adjustable pressure knob adapts output to different surfaces and coatings
- 25 ft hose plus 12-inch extension rod extends reach for walls and ceilings
Cons:
- Accessory bundle lacks masking supplies, unlike the InoKraft kit
- Build quality is lighter-duty than the Graco’s metal construction
- No option to extend hose length for multi-story work
Best for: Budget-minded DIYers prioritizing fast coverage on large walls, fences, decks, and ceilings
Not ideal for: Buyers who want a complete starter bundle, long hose reach, or a sprayer built to last through many project seasons
Bottom line: The fastest cheap route to covering big flat surfaces, as long as you accept lighter build quality and a slimmer kit.
“The fastest cheap route to covering big flat surfaces, as long as you accept lighter build quality and a slimmer kit.”
As an Amazon Associate we earn from qualifying purchases.
Before You Start
Spray everything you can before it matters. Overspray from an airless sprayer travels much farther than most first-time users expect — 6 to 10 feet or more in still air, further with wind outdoors. Close windows, turn off HVAC systems, and cover anything within that radius. Indoors, seal doorways with plastic sheeting and tape. Outdoors, check wind speed: anything above 8-10 mph will carry paint onto cars, windows, and neighbors’ property, so reschedule or wait for calmer conditions.
Prepare the surface first: fill holes, sand glossy surfaces dull, and remove dust with a tack cloth or damp rag. Spraying does not hide defects — it highlights them, because the thin, even coat reveals every bump and scratch. Also open your paint and stir it thoroughly, then strain it through a mesh bag into a clean bucket. Straining removes skin, clumps, and debris that will clog the tip within the first few minutes of spraying.
Wear a respirator, not a dust mask. Airless sprayers atomize paint into a fine mist that stays airborne and is easy to inhale. Work in a ventilated area whenever possible.
Step-by-Step Instructions
Step 1: Set up and prime the sprayer
Place the sprayer on a level surface near your material. Attach the spray gun to the hose, then connect the hose to the pump outlet, hand-tightening the fittings until snug. Put the intake tube into your bucket of water (for latex work) and set the prime valve to the prime or drain position. Turn on the machine and let it draw water through until it runs steadily out of the return tube into the bucket — this takes 30 seconds to 2 minutes.
Switch the prime valve to spray, point the gun into a waste bucket, and trigger it until water flows in a steady stream. Then move the intake tube into your strained paint and repeat: prime until paint flows from the return tube, then trigger the gun (still pointed into the waste bucket) until pure paint, not watery paint, comes out.
Tip: Never point the gun at your hand to check flow — airless sprayers operate at pressures above 2,000 PSI and can inject paint through skin. Always trigger into a bucket with the gun firmly held, and engage the trigger lock whenever you set the gun down.
Check: The machine runs smoothly with a steady rhythm, and solid, unbroken paint comes from the gun tip. No sputtering or air spitting.
Step 2: Set the pressure and install the tip
Install the spray tip in the gun guard, making sure the arrow on the tip points forward in the direction of spraying. Set the pressure control to the lowest setting recommended in your manual, then turn it up gradually while test-spraying onto cardboard. Watch the fan pattern: at correct pressure, the pattern is even from edge to edge with no heavy lines at the sides, no spitting from the tip, and no tails of unatomized paint.
Tip: If you see fingers or heavy edges in the pattern, pressure is too low — turn it up in small increments. If the pattern is fine but paint is bouncing back as heavy mist, pressure may be too high. Finding the lowest pressure that produces a full, even fan gives the best control and the least overspray.
Check: A test spray on cardboard shows a uniform rectangle of paint with no gaps, fingers, or spitting.
Step 3: Spray the surface with correct technique
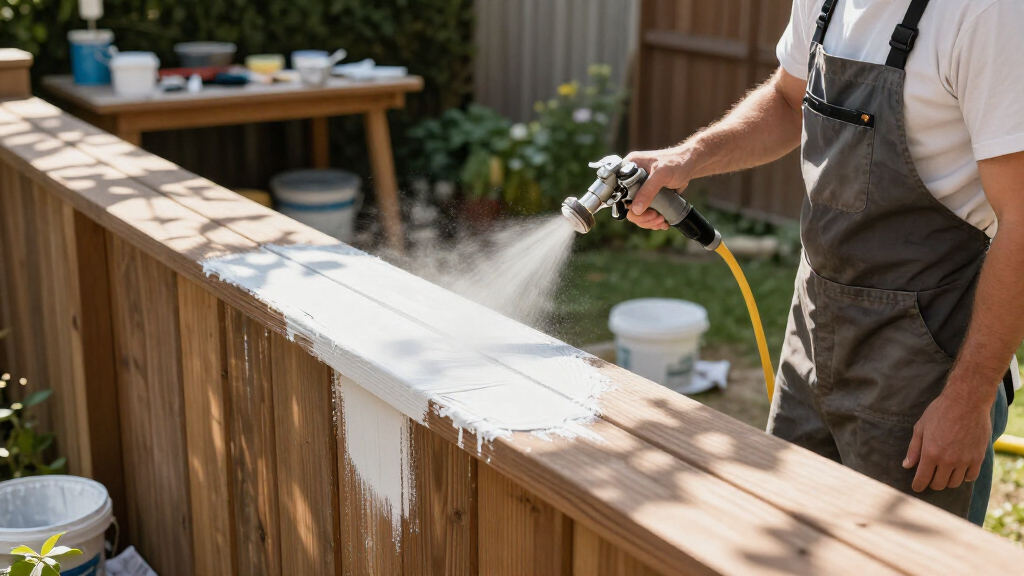
Hold the gun 10-12 inches from the surface, perpendicular to it at all times. Start moving the gun before you pull the trigger, and release the trigger before you stop moving — starting and stopping while spraying causes heavy buildup at the ends of each pass. Overlap each pass by about 50% over the previous one to avoid streaks.
Work in sections of roughly 3-4 feet wide. Spray the edges and corners of each section first, then fill in the middle with full overlapping passes. Keep your wrist locked and move from the shoulder or elbow so the gun stays the same distance from the surface across the whole pass. On long walls, plan your passes so you finish at a natural break like a corner rather than stopping mid-wall.
Tip: Do not swing the gun in an arc like a pendulum. An arc changes the distance to the surface, laying paint on heavy in the middle and light at the ends. If you cannot reach the full height in one pass, spray the top half working from a ladder or with an extension wand rather than reaching and tilting the gun.
Check: The wet surface shows a uniform sheen with no dark stripes (heavy coat) or dry, thin streaks. Paint should look wet and even, not dripping.
Step 4: Deal with runs, drips, and clogs as you go
Inspect your work under raking light every few passes. If you see a run or drip forming, do not spray over it — lay the gun down, engage the trigger lock, and smooth the run with a light stroke of a dry brush or a quick wipe with the edge of a clean cloth, then feather the edge back in with one light pass.
If the spray pattern suddenly spits or cuts out mid-pass, lock the trigger, rotate the tip 180 degrees, and trigger into the waste bucket to blow the clog clear. Rotate the tip back and continue. This reverses the tip’s clean-out position without disassembling anything.
Tip: Clogs happen most often in the first 20 minutes when debris left in the hose or unstrained paint reaches the tip. If clogs keep recurring, strain your paint again and flush the system once more before continuing.
Check: Pattern returns to normal after reversing the tip, and no runs remain visible on the finished section.
Step 5: Apply a second coat if needed
Check the paint manufacturer’s recoat time on the label — typically 2-4 hours for latex. Let the first coat dry to the touch and lose its wet sheen before spraying again. Apply the second coat the same way as the first, positioning your overlaps slightly offset from the first coat’s passes so no ridges build up in the same lines.
Tip: Two thin coats always beat one heavy coat. Resist the urge to lay it on thick to finish in one pass — thick coats sag, drip, and dry with an uneven texture.
Check: After the final coat, the surface shows full, uniform color with no bleed-through of the previous color or substrate.
Step 6: Flush and clean the sprayer
Do this immediately after your final pass — dried paint in the pump and hose is the most common way DIY users ruin a sprayer. Set the prime valve to prime, move the intake tube to clean water (or mineral spirits for oil-based paint), and circulate fluid until the return tube runs completely clear. Then switch to spray and trigger the gun into the waste bucket until clear fluid comes from the tip. Repeat with fresh water a second time.
Remove the tip and tip guard, rinse them separately under running water, and use a soft brush on the tip openings — never a wire, which damages the orifice. Wipe the filter screen clean. Run pump saver fluid through the pump if the sprayer will sit unused for more than a few weeks, following the manual’s instructions.
Tip: Dispose of rinse water responsibly. Latex rinse water can be left in an open bucket to evaporate or taken to a hazardous waste collection point; never pour it down a storm drain.
Check: Water circulating through the system stays clear, the tip sprays clean water in a full fan, and all parts are dry before storage.
Common Mistakes to Avoid
- Skipping the paint strainer and spraying straight from the can. — Always strain paint through a mesh bag into a clean bucket. Even new paint contains skin and clumps that will clog the tip within minutes and force you to stop and clean mid-project.
- Moving the gun in an arc or rocking the wrist during passes. — Lock your wrist and move from the shoulder, keeping the gun 10-12 inches from the surface at every point in the pass. Practice the motion on cardboard before committing to the wall.
- Spraying too heavy in one pass, causing runs and sags. — Aim for a coat that looks uniformly wet but not glossy-heavy. Two thin coats are faster to fix and look better than one thick coat that drips.
- Underestimating overspray and inadequate masking. — Cover everything within 10 feet, seal doorways with plastic, shut off HVAC, and check wind before outdoor work. Overspray cleanup takes far longer than proper masking.
Troubleshooting
Problem: Gun spits or sprays an uneven pattern with fingers at the edges.
Solution: Pressure is too low for the tip size, or the tip is partially clogged. Turn up pressure in small increments while test-spraying. If the pattern does not improve, reverse the tip to clear it, then remove and rinse the tip and check the manifold filter.
Problem: Paint won’t draw — the pump runs but nothing comes through.
Solution: Check that the intake tube is fully submerged, the prime valve is in the correct position, and the pickup filter is not clogged with dried paint or debris. If the pump has run dry for a while, prime it with water first, then switch to paint. Check the manual for a stuck inlet valve; tapping or cycling the valve often frees it.
Problem: Runs and drips appearing on the finished surface.
Solution: Let the run dry until it skins over, then sand it lightly smooth with fine sandpaper and feather the area back with one thin coat. Do not wipe wet runs aggressively — that removes surrounding paint and leaves a visible patch.
Problem: Motor labors or cycles constantly while spraying.
Solution: The tip is too large for the pump’s capacity, or the paint is too thick. Switch to a smaller tip size, or thin latex paint up to 10% with water per the paint label. Persistent laboring on a rented machine may mean a worn pump — return it for a swap.
What Success Looks Like
Your project is complete when the final coat has dried and you can verify all of the following: the surface shows uniform color and sheen with no visible streaks, stripes, or thin spots when viewed from an angle in daylight or raking light; there are no runs, sags, or drips; cut-in edges and masked lines are crisp, with no paint bleed under tape; adjacent surfaces (floors, trim, windows, plants) show no overspray; and the sprayer flushes completely clear water and all parts are dry and stored. If you can run your hand lightly over the dried surface and feel a smooth, even texture with no bumps or ridges, the job is done right.
Next Steps
Once the surface has fully cured — typically 1-2 weeks for latex — clean up your masking materials carefully by scoring tape edges with a blade before pulling to avoid lifting fresh paint. Store your sprayer with the pump protected per the manual, and label your leftover strained paint can with the project date and room so touch-ups match later. Save the used tip if it is still clean; tips wear out after roughly 20-40 gallons, so a worn tip shows a degraded fan pattern and should be replaced before your next project. For future jobs, build a simple spray booth from plastic sheeting for furniture and cabinet doors, which contains overspray and makes small-project cleanup much faster. If the spray finish turns out orange-peeled or rough, your next upgrade is adjusting pressure and practicing trigger control on scrap before touching the real surface again.
Frequently Asked Questions
Do I need to thin paint for an airless sprayer?
Usually not for a quality airless sprayer with the correct tip — most are designed to spray unthinned latex. However, if the motor labors or the pattern is poor, thinning latex up to 10% with water can help. Always follow the paint manufacturer’s limits; over-thinning causes runs and reduces coverage. Small handheld sprayers typically need more thinning than stand-mounted units.
Is an airless sprayer worth it for a small project like a fence or one room?
For surfaces with lots of texture or detail — fences, decks, paneled doors, popcorn ceilings — an airless sprayer is dramatically faster than rolling or brushing. For one flat, empty room, a roller may be simpler because masking time for a sprayer can exceed the time saved. Renting is a good option: rental sprayers are typically higher quality than entry-level purchases and cost a fraction of buying.
How do I keep the sprayer from clogging during breaks between coats?
For breaks under an hour, trigger-lock the gun, submerge the tip in a cup of water or wrap it in a damp cloth, and relieve pressure by switching the prime valve. For longer breaks, flush the system with water. Never leave paint sitting in the pump or hose overnight.
Why does my finish look orange-peeled?
Orange peel texture comes from paint that is too thick to atomize fully, pressure that is too low, or holding the gun too far from the surface. Thin the paint slightly, raise the pressure, and check your distance — 10-12 inches is the standard. Light sanding between coats removes existing texture.
Can I spray indoors without making a mess?
Yes, with thorough preparation. Seal the room with plastic sheeting over doorways, cover floors and any remaining fixtures, turn off HVAC and close windows to stop airflow, and spray at the lowest effective pressure. A slower, controlled approach indoors produces much less airborne overspray than high pressure and fast spraying.
Fall yard work Picks
leaf blowers
As an affiliate, we earn on qualifying purchases.