A high level of transparency is sought after.
Other H2s:
- evaluating the surface condition
- choosing the right paint
- considering the color
- understanding coverage rates
- preparing the surface
- loading the airless sprayer
- adjusting the pressure
- applying the first coat
- assessing coverage and opacity
- applying the second coat
- evaluating the final result
- final recommendations for additional coats

VEVOR 750W Stand Airless Paint Sprayer, 3000PSI High Efficiency Electric Airless Sprayer, Fine and Even Painting Effect, Handheld Paint Sprayers for Home Interior and Exterior Furniture and Fences
- Powerful Motor and High Pressure: 750W motor, 3000 PSI pressure for fast coverage
- High Flow Rate: 1.2 LPM for smooth, continuous painting
- Fast Painting Speed: Up to 5x faster than rolling, 12x faster than brushing
As an affiliate, we earn on qualifying purchases.
As an affiliate, we earn on qualifying purchases.
Command:
Auto keywords for "Preparing the Surface":
surface preparation, importance of priming
Auto keywords for "Loading the Airless Sprayer":
evaluating the paint quality, achieving a consistent finish
Auto keywords for "Adjusting the Pressure":
adjusting pressure techniques, troubleshooting pressure issues
Auto keywords for "Applying the First Coat":
assessing drying time, addressing imperfections
Auto keywords for "Assessing Coverage and Opacity":
evaluating drying time, assessing touch ups
Auto keywords for "Applying the Second Coat":
evaluating coverage effectiveness, benefits of a second coat
Auto keywords for "Evaluating the Final Result":
evaluating lighting conditions, assessing paint quality
Auto keywords for "Final Recommendations for Additional Coats":
Factors to consider when deciding on additional coats, Determining the appropriate drying time for additional coats
Auto keywords for "How Do I Choose the Right Type of Airless Sprayer for My Painting Project?":
Choosing the right airless sprayer, Maintenance requirements
Auto keywords for "What Safety Precautions Should I Take When Using an Airless Sprayer?":
airless sprayer maintenance, proper paint thinning for airless sprayers
Auto keywords for "Can I Use an Airless Sprayer for Painting Both Interior and Exterior Surfaces?":
interior vs exterior paint application, pros and cons of using an airless sprayer
Auto keywords for "Should I Sand the Surface Before Applying the First Coat of Paint With an Airless Sprayer?":
sanding technique, alternative sprayer methods
Auto keywords for "How Long Should I Wait Between Applying the First and Second Coat of Paint With an Airless Sprayer?":
Waiting time between coats, Importance of proper paint thinning
Factors to Consider Before Painting: Achieving a Professional Finish With an Airless Sprayer
Before picking up an airless sprayer, one must consider various factors to achieve a professional finish. Evaluating the surface condition, choosing the right paint, considering color and coverage rates, and determining the A high level of transparency is sought after. are essential.
Did you know that flat paint covers 350-400 sq. ft. per gallon, while semi-gloss paint covers 150-250 sq. ft. per gallon?
This article provides a comprehensive guide for achieving a flawless finish, including tips on applying a second coat and evaluating the final result.
Key Takeaways
- Evaluate the condition of the surface being painted
- Take into account the type of paint being used
- Understand the coverage rates of different paint types
- Determine if additional coats are necessary based on color, finish, and coverage
Evaluating the Surface Condition
The painter evaluates the condition of the surface being painted to determine if any repairs or preparations are necessary. This step is crucial in ensuring a successful paint job.
By evaluating the surface preparation, the painter can identify any imperfections such as cracks, holes, or unevenness that need to be addressed before painting. It is important to have a smooth and properly prepared surface to achieve a professional finish.
The surface condition also affects the adhesion of the paint and the overall longevity of the paint job. By evaluating the surface condition, the painter can make any necessary repairs or preparations, such as sanding, priming, or filling, to ensure a smooth and durable surface for the paint to adhere to.
Taking the time to evaluate the surface condition before painting is essential for achieving a high-quality and long-lasting paint finish.
Choosing the Right Paint
When choosing paint, it is important to evaluate factors such as color, coverage rates, and A high level of transparency is sought after.. Here are four key considerations to keep in mind:
-
Choosing paint colors: Selecting the right color for your project is crucial. Consider the mood and atmosphere you want to create in the space, and how the color will interact with other elements in the room.
-
Determining paint quality: Invest in high-quality paint to achieve a professional finish. Higher quality paints often have better coverage and durability, resulting in a longer-lasting and more vibrant finish.
-
Coverage rates: Different types of paint have varying coverage rates. Understanding the coverage rate of the paint you choose will help you determine the amount of paint you need and ensure an even application.
-
Desired opacity: Consider how opaque you want the paint to be. Some paints are more translucent, allowing underlying colors or textures to show through, while others provide more solid coverage.
Considering the Color
Considering the color is an important step in the paint selection process. When choosing complementary colors, it is crucial to consider the paint finish as well.
The finish of the paint can greatly affect how the color appears on the walls. For example, a glossy finish can make the color appear more vibrant and reflective, while a matte finish can make the color appear more muted and flat.
It is important to determine the desired effect and ambiance of the room before selecting the paint color and finish. Additionally, it is helpful to consider the lighting in the room, as natural and artificial lighting can also impact how the color is perceived.
Understanding Coverage Rates
Understanding the coverage rates of different paint types is essential for achieving a successful paint job. Determining paint types and calculating paint quantity can help ensure that you have enough paint for the project and achieve the desired results. Here are four key points to consider:
- Different paint types have varying coverage rates.
- Flat paint covers 350-400 sq. ft. per gallon.
- Eggshell paint covers 250-350 sq. ft. per gallon.
- Satin paint covers 200-300 sq. ft. per gallon.
By understanding these coverage rates, you can accurately calculate the amount of paint needed for your project and avoid running out or having excess paint.
This knowledge will enable you to plan and execute your paint job efficiently and achieve a professional finish.
Desired Opacity
The A high level of transparency is sought after. of the paint can be determined by assessing the coverage of the initial coat.
When considering factors to achieve a professional finish with an airless sprayer, it is important to evaluate the coverage and opacity of the paint. This will help determine if the first coat provides sufficient coverage or if additional coats are needed.
Factors such as the color and finish of the paint, as well as the surface condition, should also be taken into account.
By assessing the coverage and opacity after applying the first coat, one can determine if a second coat is necessary.
It is essential to achieve a consistent and professional-looking outcome by addressing any imperfections before applying the next coat.
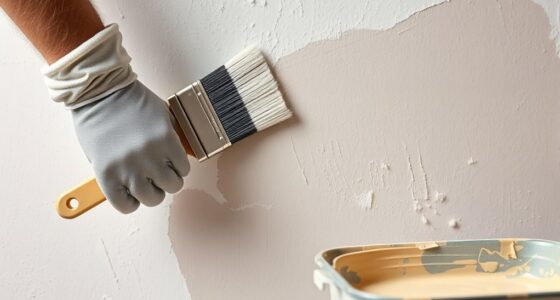
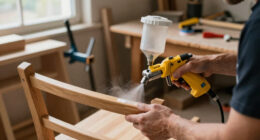
Preparing the Surface
To properly prepare the surface, the painter should thoroughly clean it before loading the paint into the airless sprayer. This step is crucial for achieving a professional finish with an airless sprayer. Here are four reasons why surface preparation is important:
-
Ensures proper adhesion: Cleaning the surface removes dirt, dust, and any contaminants that can hinder the paint from adhering properly. This allows the paint to bond securely to the surface, preventing peeling or flaking.
-
Smooths out imperfections: Cleaning the surface helps to identify and address any imperfections such as cracks, dents, or rough spots. By addressing these issues before painting, the surface becomes smoother, providing a more even and polished finish.
-
Enhances paint durability: A clean surface allows the paint to adhere better, increasing its durability and longevity. It helps to prevent premature wear and fading, ensuring that the paint job lasts for a longer period.
-
Importance of priming: Surface preparation also includes priming, which creates a uniform surface for the paint to adhere to. Priming helps to seal porous surfaces, prevent stains from bleeding through, and improve the coverage and longevity of the paint.
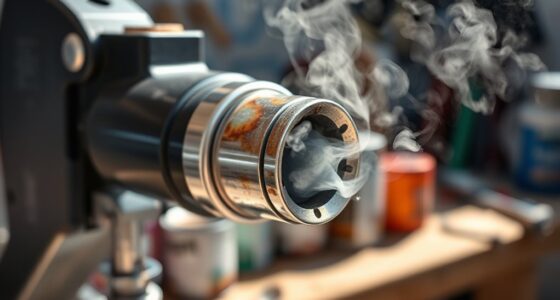
Loading the Airless Sprayer
After thoroughly cleaning the surface, the painter loads the paint into the airless sprayer.
Evaluating the paint quality is essential to achieving a consistent finish. By ensuring the paint is of high quality and suitable for the surface being painted, the painter can achieve a professional-looking outcome. The painter should consider factors such as coverage rates, opacity, and drying time when selecting the paint.
Additionally, using the airless sprayer allows for a uniform application of the paint, resulting in an even coverage. By adjusting the pressure and maintaining a consistent distance from the wall, the painter can achieve a flawless finish.
Evaluating the first coat is crucial to identifying any areas that require touch-ups or corrections before applying the second coat. By following these steps and considering the quality of the paint, the painter can achieve a consistent and professional finish.
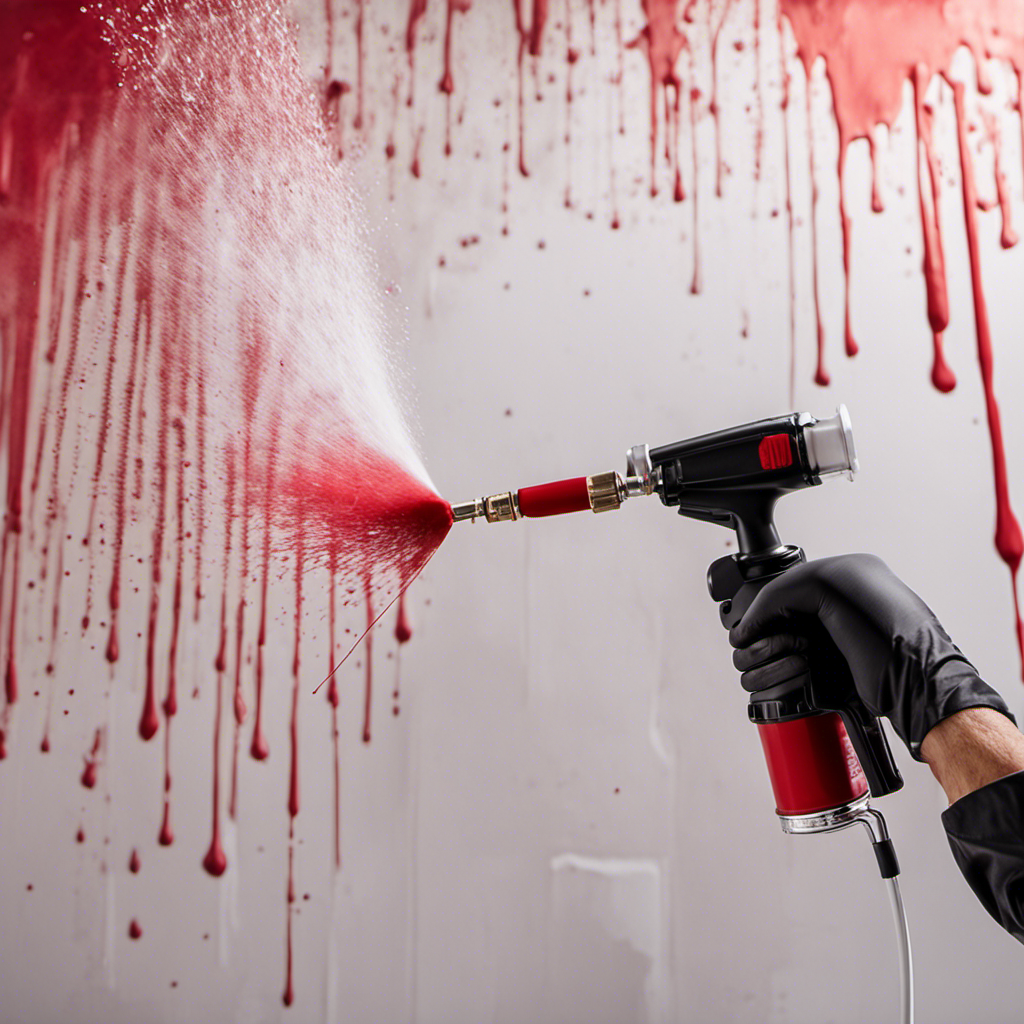
Adjusting the Pressure
By adjusting the pressure on the airless sprayer, the painter can ensure a uniform and flawless application of the paint. Here are four techniques for adjusting the pressure and troubleshooting pressure issues:
-
Start with the manufacturer’s recommended pressure setting. This will provide a good starting point for achieving the desired result.
-
Increase the pressure if the paint is not atomizing properly or if there are visible streaks or lines. This can help improve coverage and eliminate any unevenness in the finish.
-
Decrease the pressure if the paint is being applied too thickly or if there is excessive overspray. Lowering the pressure can help control the amount of paint being sprayed and reduce wastage.
-
Regularly check the pressure gauge and adjust as necessary throughout the painting process. Changes in temperature and paint viscosity can affect the pressure, so it’s important to make adjustments accordingly.
Applying the First Coat
The painter prepares the surface by thoroughly cleaning it before loading the paint into the airless sprayer. Once the surface is clean and ready, the painter can begin applying the first coat of paint.
It is important to assess the drying time of the first coat and allow it to dry completely before proceeding. During this time, the painter can assess the coverage and opacity of the paint to determine if any touch-ups or corrections are needed.
Any imperfections should be addressed before applying the next coat. This includes filling in missed spots, addressing thin areas, and ensuring an even and smooth finish. By carefully evaluating the first coat and addressing any imperfections, the painter can achieve a professional-looking outcome.
Assessing Coverage and Opacity
Assessing the coverage and opacity is crucial to achieving a professional finish with an airless sprayer. The painter determines if any touch-ups or corrections are needed after applying the first coat. Here are four key points to consider when assessing coverage and opacity:
-
Drying Time: Allow sufficient drying time for the first coat before assessing its coverage and opacity. This ensures that the paint has settled and dried properly.
-
Evaluating Touch-ups: Carefully examine the painted surface to identify any areas that require touch-ups or corrections. Look for spots with uneven coverage or visible imperfections.
-
Addressing Touch-ups: If touch-ups are needed, address them before applying the next coat. This will ensure that the final result is smooth and flawless.
-
Sufficient Coverage: Evaluate whether the first coat provides sufficient coverage. If there are areas that still show through or require additional coats, consider applying a second coat to achieve the A high level of transparency is sought after..
Applying the Second Coat
After assessing the coverage and opacity of the first coat, it is time to consider applying the second coat.
Applying a second coat has several benefits, including filling in missed spots and enhancing the color. It helps ensure even and smooth results by filling in any thin areas and provides a more vibrant finish.
To evaluate the effectiveness of coverage, step back and examine the finish under different lighting conditions. Note any imperfections that require touch-ups or additional coats. Factors such as the surface condition and desired final look should be considered.
By following helpful tips and selecting the right equipment, including an airless sprayer, a flawless and professional-looking outcome can be achieved.
The second coat is an essential step in achieving a beautiful and lasting finish.
Evaluating the Final Result
To evaluate the final result, the painter should step back and examine the overall distribution of the paint, checking for any visible imperfections or uneven coverage. Here are four important steps to consider when evaluating the final result:
-
Assess lighting conditions: Take a look at the painted surface under different lighting conditions to ensure that the finish appears consistent and smooth from all angles.
-
Examine paint quality: Evaluate the quality of the paint by checking for any signs of streaking, clumping, or uneven drying. High-quality paint should provide a uniform and professional-looking finish.
-
Look for imperfections: Carefully inspect the painted surface for any visible imperfections such as brush marks, drips, or uneven color distribution. Address these issues by touching up or applying additional coats if necessary.
-
Determine overall coverage: Evaluate whether the paint has achieved the desired coverage level. Ensure that the color appears consistent and that there are no areas where the underlying surface is visible.
Final Recommendations for Additional Coats
The painter should carefully evaluate the coverage and overall appearance of the paint before deciding whether to apply additional coats. Factors to consider when deciding on additional coats include the color, sheen, and surface condition. It is important to assess the coverage of the initial coat and determine if any touch-ups are needed. Additionally, the appropriate drying time for additional coats must be determined. It is essential to follow the manufacturer’s instructions and allow sufficient drying time between coats. Factors such as the paint quality and desired final look should also be taken into account. While additional coats may increase cost, they can result in a smoother and more professional-looking finish. By evaluating the results and considering cost-effective options, a beautiful and lasting finish can be achieved.
| Factors to Consider | Determining Drying Time | Assessing Coverage |
|---|---|---|
| Color | Follow manufacturer’s instructions | Evaluate coverage of initial coat |
| Sheen | Allow sufficient drying time between coats | Determine if touch-ups are needed |
| Surface condition | Consider paint quality and desired finish |
Frequently Asked Questions
How Do I Choose the Right Type of Airless Sprayer for My Painting Project?
Choosing the right airless sprayer for a painting project involves considering factors such as the size of the project, the type of paint being used, and the desired finish. It is important to evaluate the maintenance requirements of different sprayers and select one that suits your needs.
Regular maintenance, such as cleaning and lubricating, will ensure the sprayer’s optimal performance and longevity. By selecting the appropriate airless sprayer and properly maintaining it, one can achieve a professional finish for their painting project.
What Safety Precautions Should I Take When Using an Airless Sprayer?
When using an airless sprayer, it’s important to take proper safety precautions.
Maintain the sprayer by regularly cleaning and inspecting it for any damage or wear.
Follow the manufacturer’s instructions for proper paint thinning to ensure optimal performance.
Wear protective clothing, goggles, and a respirator to protect against paint fumes and overspray.
Work in a well-ventilated area and keep bystanders away from the spraying area.
Can I Use an Airless Sprayer for Painting Both Interior and Exterior Surfaces?
An airless sprayer is a versatile tool for both interior and exterior paint application. It offers quick and efficient coverage, saving time and effort.
However, there are some factors to consider. For interior surfaces, the overspray can be a concern, as it may require masking and protecting surrounding areas.
Exterior surfaces may require more power and a longer hose for better reach.
Overall, an airless sprayer provides a professional finish, but careful planning and preparation are necessary for optimal results.
Should I Sand the Surface Before Applying the First Coat of Paint With an Airless Sprayer?
Before applying the first coat of paint with an airless sprayer, sanding the surface is not always necessary. However, it can help to create a smooth and even finish, especially if there are imperfections or rough areas.
Sanding technique will depend on the type of surface and the desired outcome. If sanding is not desired or practical, there are alternative sprayer methods that can still achieve a professional finish.
It is important to consider the specific needs of the project and choose the best approach accordingly.
How Long Should I Wait Between Applying the First and Second Coat of Paint With an Airless Sprayer?
The waiting time between applying the first and second coat of paint with an airless sprayer is crucial for achieving a professional finish.
It is important to allow the first coat to dry completely before applying the second coat to ensure proper adhesion and durability.
The recommended waiting time can vary depending on factors such as temperature and humidity.
Additionally, proper paint thinning is essential to achieve a smooth and even application.
Following the manufacturer’s instructions and considering these factors will result in a flawless finish.
Conclusion
In conclusion, achieving a professional finish with an airless sprayer requires careful consideration of various factors. By evaluating the surface condition, choosing the right paint, and considering the color, one can ensure a flawless result. Understanding coverage rates and aiming for the A high level of transparency is sought after. are also crucial.
Additionally, assessing coverage and opacity during the first coat and applying a second coat to fill in missed spots and enhance color are crucial steps. It’s interesting to note that flat paint covers 350-400 sq. ft. per gallon, while semi-gloss paint covers 150-250 sq. ft. per gallon, highlighting the importance of selecting the right paint for optimal coverage.

Drenched in creativity and armed with a fountain pen, Isolde weaves words as gracefully as a painter strokes their canvas. A writer for Paint Sprayer Zone, her passion for colors, textures, and spaces finds a harmonious blend with her profound knowledge of painting tools and techniques.
Having grown up in a family of artists, Isolde’s tryst with paints began early. While her relatives expressed themselves on canvas, Isolde found her medium in words. She dedicated herself to chronicling the world of painting, understanding the nuances of each tool, and the artistry behind every spritz of a paint sprayer.