Connect with us

Paint Sprayer Maintenance and Troubleshooting

Enhance and Protect Your Pipe Fence: Painting With an Airless Sprayer

Published

on

An image of a person wearing protective gear, skillfully operating an airless sprayer to paint a pipe fence

Looking to enhance and protect your pipe fence? Consider using an airless sprayer to apply paint.

This method offers a range of benefits, including protection against rust, corrosion, and moisture seepage, as well as a boost in aesthetic appeal and property value.

By choosing the right paint color, sanding the surface, and applying a coat of primer, you can ensure a long-lasting and visually appealing result.

With the right technique and equipment, painting your pipe fence has never been easier.

Key Takeaways

  • Painting your pipe fence with an airless sprayer provides protection against rust, corrosion, moisture seepage, and rot.
  • It enhances the aesthetic appeal and property value of your pipe fence.
  • Using an airless sprayer ensures efficient and even application of paint, resulting in a strong bond that resists peeling and flaking.
  • Painting with an airless sprayer is a faster process compared to other methods.
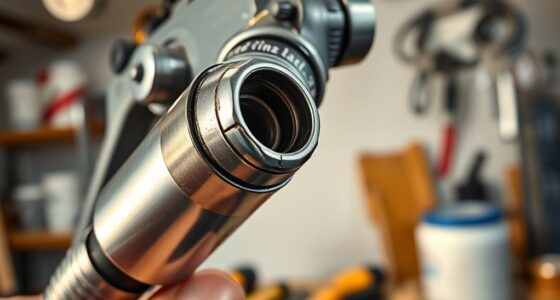
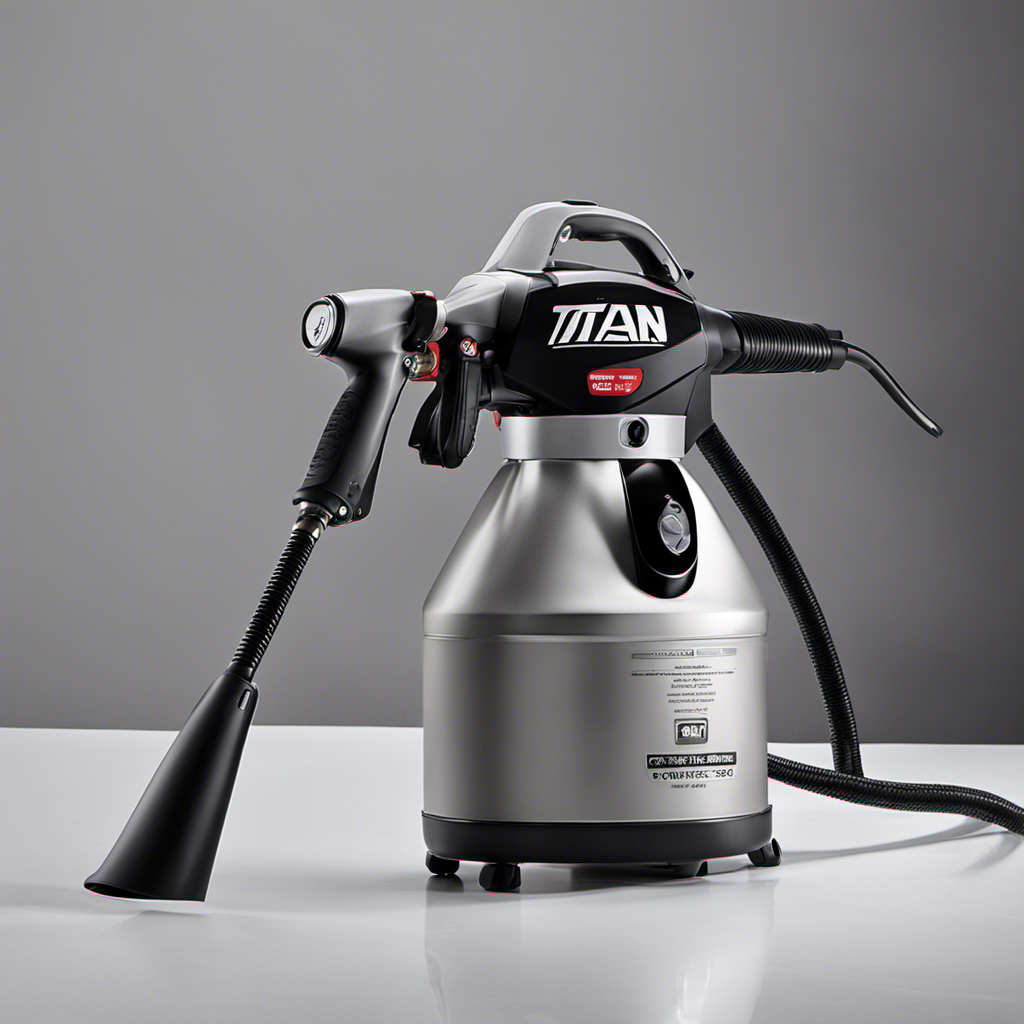
Benefits of Painting Your Pipe Fence With an Airless Sprayer

Advertisement

Using an airless sprayer to paint your pipe fence offers benefits such as protection against rust, corrosion, moisture seepage, and rot, as well as enhancing its aesthetic appeal and property value.

The use of a paint sprayer for fence painting provides a more efficient and even application of paint, ensuring thorough coverage and a smooth finish. The high-pressure spray from the airless sprayer allows the paint to penetrate into the surface of the pipe, creating a strong bond that resists peeling and flaking.

Additionally, the airless sprayer allows for faster painting, reducing the overall time and effort required for the project. To achieve a smooth and even finish with an airless sprayer, it is important to choose the right paint color designed for metal, properly prepare the surface by sanding and applying a primer, and practice proper technique and safety precautions during the painting process.

Choosing the Right Paint Color for Your Pipe Fence

To ensure a visually pleasing outcome, it is important for individuals to select a paint color specifically designed for metal when considering painting their pipe fence. Choosing the right paint color for your pipe fence is crucial in achieving the desired aesthetic appeal and long-lasting protection.

When it comes to selecting the best paint brands for painting a pipe fence, there are several options available in the market. Some popular choices include Rust-Oleum, Sherwin-Williams, and Behr. These brands offer a wide range of colors specifically formulated for metal surfaces, ensuring excellent adhesion and durability.

Advertisement

It is recommended to consult with professionals or refer to the manufacturer’s recommendations to determine the best paint color for your pipe fence based on your specific needs and preferences.

Sanding the Surface for Proper Paint Adhesion

Before painting, it is necessary to sand the surface of the pipe fence to ensure proper adhesion of the paint. Surface preparation is crucial in achieving a long-lasting and professional finish. Here are three important paint adhesion techniques to consider:

  • Clean the surface: Remove any dirt, dust, or debris from the pipe fence using a stiff brush or pressure washer. This step ensures that the paint adheres properly and prevents any contaminants from affecting the finish.

  • Remove rust and loose paint: Use sandpaper or a wire brush to remove any rust or loose paint. This step helps create a smooth and even surface for the paint to adhere to.

  • Smooth out rough areas: Pay attention to any rough or uneven areas on the pipe fence. Sand them down using sandpaper or a sanding block to create a uniform surface for the paint.

Applying a Coat of Primer to Protect Against Rust and Corrosion

After cleaning and sanding the surface of the pipe fence, it is important to apply a coat of primer to provide an additional layer of protection against rust and corrosion.

Advertisement

Choosing the right type of primer for your pipe fence is crucial. Look for a primer specifically designed for metal surfaces, as it will adhere better and offer superior protection. Rust-inhibiting primers are highly recommended, as they create a barrier that prevents moisture and oxygen from reaching the metal, reducing the risk of rust formation.

When applying the primer, follow these tips for proper application: ensure the surface is clean and dry, use a brush or roller to apply an even coat, and allow sufficient drying time before applying the topcoat.

Applying a coat of primer is a vital step in the painting process to ensure the longevity and durability of your pipe fence.

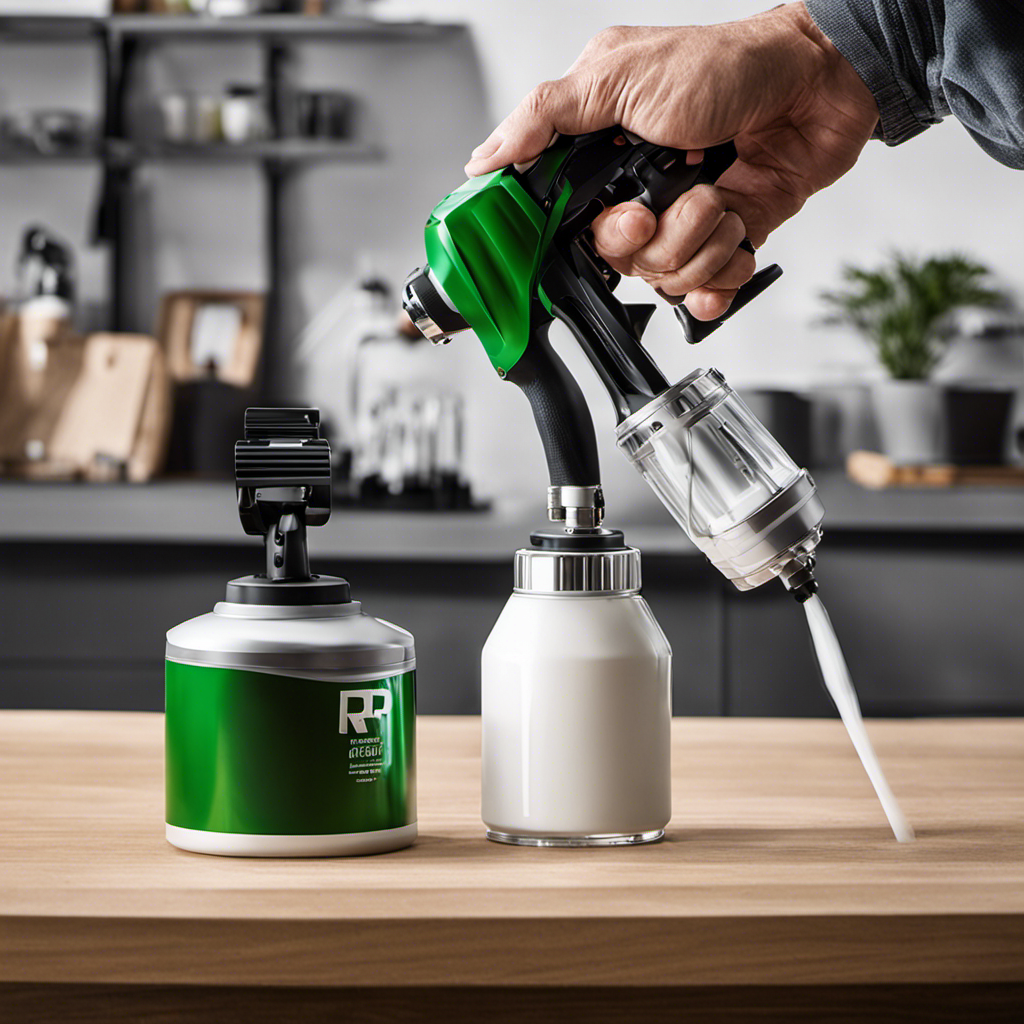
Gathering Necessary Materials and Equipment for Painting

Advertisement

Gathering all the required materials and equipment is essential for successfully completing the painting process of the pipe fence.

To ensure a smooth and efficient painting experience, it is important to choose the right type of paint for your pipe fence. Consider using a paint color specifically designed for metal surfaces, as this will provide optimal protection and durability.

Additionally, proper maintenance and care for painted pipe fences are crucial for their longevity. Regular inspections and touch-ups as needed will help prevent rust, corrosion, and other forms of damage.

It is also important to clean up and properly store your painting equipment after each use.

Setting up a Proper Work Area for Painting Your Pipe Fence

Setting up a suitable workspace is crucial for a smooth and efficient painting process when working on a pipe fence. To ensure proper ventilation during the painting process, it is important to choose an area with adequate airflow. This can be achieved by opening windows or using fans to circulate the air.

Advertisement

Additionally, it is necessary to clear the work area of any debris or obstructions that could hinder the painting process. A clean and organized workspace will allow for better maneuverability and accessibility to all areas of the fence.

It is also essential to protect the surrounding surfaces by covering them with drop cloths or plastic sheets. By setting up a proper work area for painting your pipe fence, you can ensure a safe and effective painting process.

Organizing Tools and Laying Down a Drop Cloth for a Clean Work Environment

To create a safe and clean work environment while painting your pipe fence with an airless sprayer, it is important to organize your tools efficiently and lay down a drop cloth. Here are some tips to help you achieve this:

  • Organize tools efficiently: Keep your paint cans, brushes, and other tools within easy reach. Use a tool belt or toolbox to keep everything organized and minimize the time spent searching for items.

  • Lay down a drop cloth: Before starting the painting process, lay down a drop cloth to protect the ground from paint drips and spills. This will help keep your work area clean and prevent accidents.

  • Create a safe work environment: Make sure your work area is well-lit and free from any tripping hazards. Remove any clutter or obstacles that may impede your movement. Additionally, wear appropriate protective gear such as goggles, gloves, and a mask to protect yourself from paint fumes and splatters.

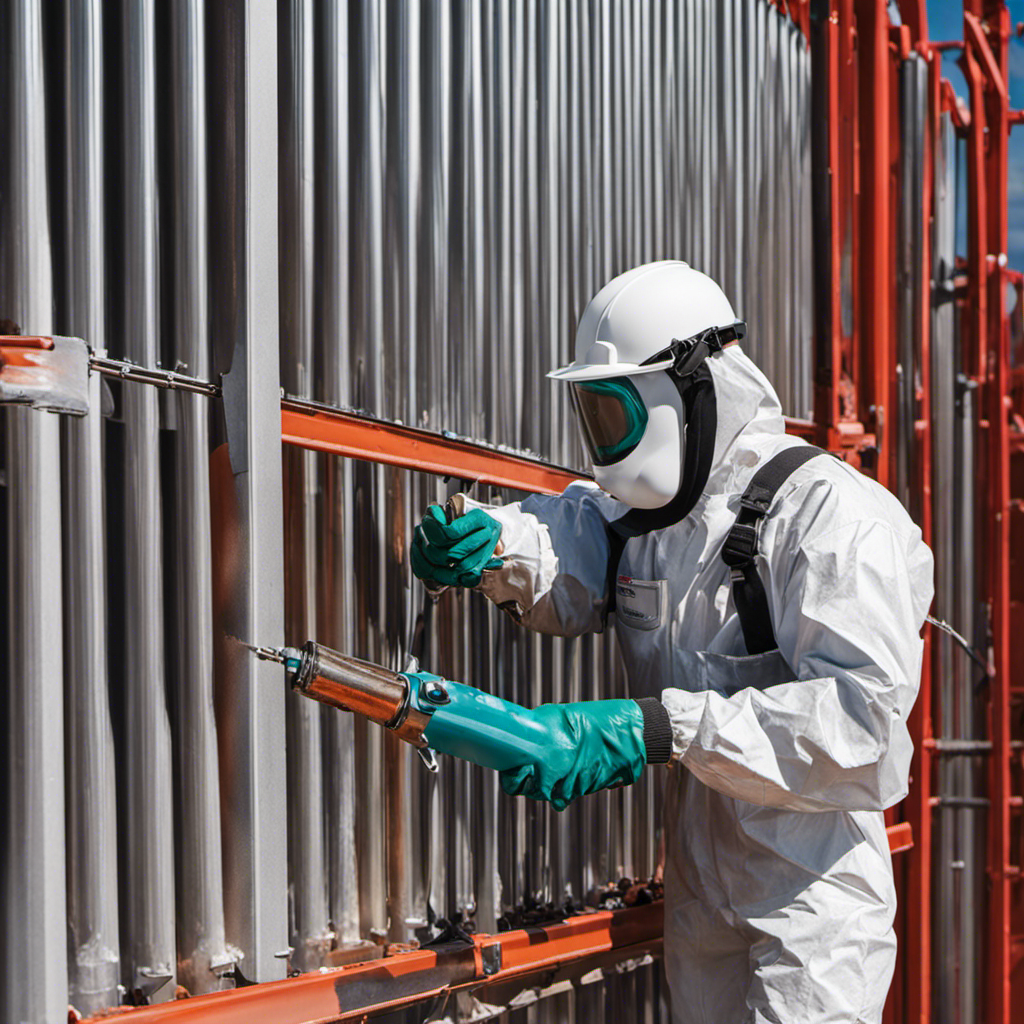
Practicing Proper Safety Precautions While Painting With an Airless Sprayer

Practicing proper safety precautions is essential when using an airless sprayer. The painter should wear goggles, gloves, and a mask to protect themselves from paint fumes and splatters. Safety gear is important to prevent eye and skin irritation, as well as inhalation of harmful chemicals present in paint.

In addition to wearing safety gear, proper ventilation is crucial for a safe working environment. Adequate airflow helps dissipate paint fumes and reduces the risk of respiratory issues. It is recommended to work in a well-ventilated area or use exhaust fans to remove airborne particles.

Advertisement

To further minimize exposure to paint fumes, the painter should take breaks in well-ventilated spaces. This will help protect their health and ensure they can complete their work safely.

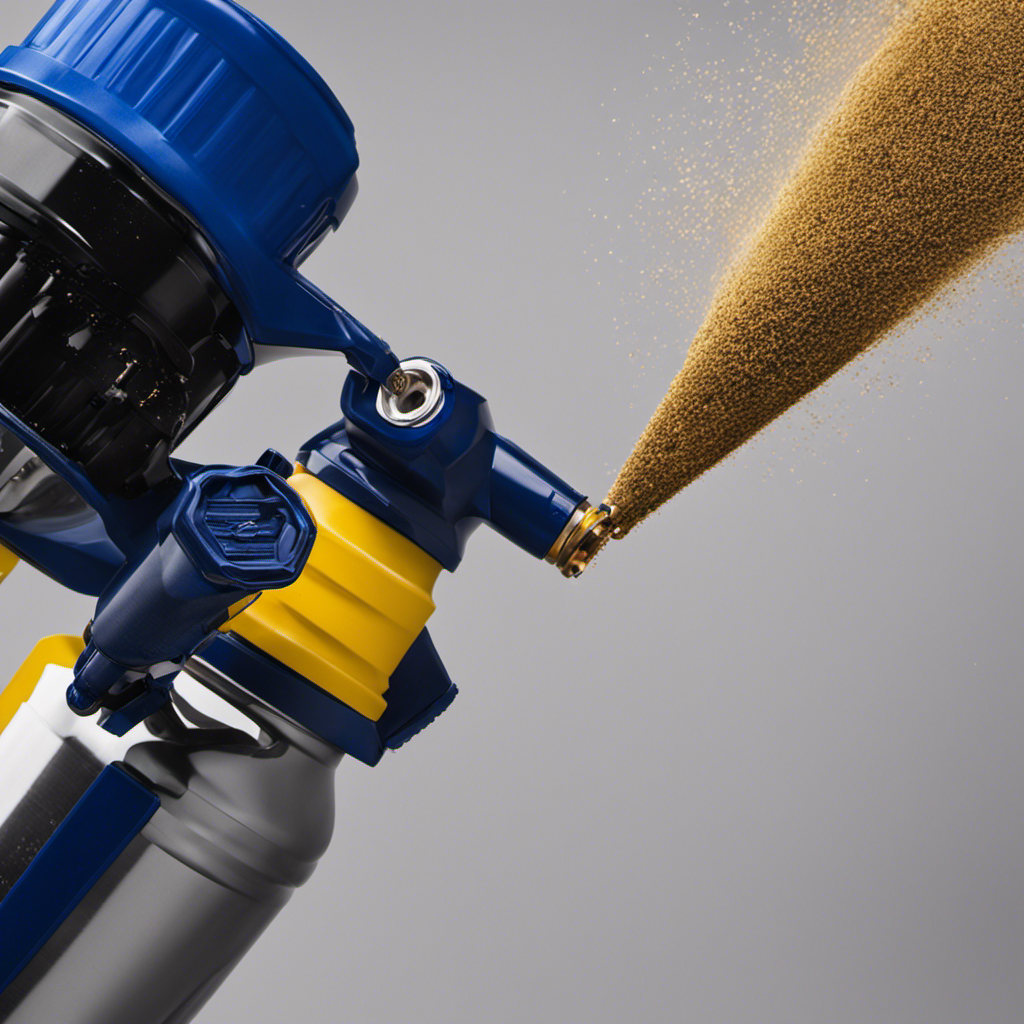
Starting the Painting Process With the Right Technique and Angles

Using the proper technique and angles, the painter can ensure an even and smooth application of paint on the underside of the pipe fence. Starting the painting process with the right technique is crucial to achieve a professional finish when using an airless sprayer.

Here are some tips and tricks to avoid common mistakes:

  • Properly prepare the surface by cleaning and removing any rust or loose paint.
  • Use a primer designed for metal to improve adhesion and protect against corrosion.
  • Choose the correct spray tip size for the type of paint being used and the desired coverage.

Achieving a professional finish requires attention to detail and precision. The painter should maintain a consistent distance from the surface and use overlapping strokes to ensure even coverage. It is also important to avoid overspray and reach hard-to-access areas by adjusting the spray pattern and angle of the sprayer.

Avoiding Overspray and Reaching Hard-To-Access Areas of Your Pipe Fence

The painter can achieve an even application of paint on hard-to-access areas of the pipe fence by adjusting the spray pattern and angle of the sprayer. By using specific techniques and angles, they can avoid overspray and ensure that every nook and cranny is properly coated. Reaching tight corners can be challenging, but with the right approach, it can be accomplished effectively. One technique is to adjust the spray pattern to a narrower width, allowing for more precision in those hard-to-reach areas. Another technique is to hold the sprayer at a slight angle, directing the paint towards the targeted spot. This helps to avoid excessive overspray and ensures that the paint is evenly distributed. With these techniques, the painter can achieve a professional finish on their pipe fence.

Technique Description
Adjust spray pattern Narrow the width for precision
Hold sprayer at an angle Direct paint towards target area
Use a smaller nozzle Helps to reach tight corners

Inspecting and Touching up Your Painted Pipe Fence as Needed

After successfully painting your pipe fence with an airless sprayer, it is essential to inspect and touch up the painted surface as needed. Regular maintenance ensures that your fence remains in optimal condition and continues to enhance the overall aesthetic appeal of your property.

Advertisement

Inspecting the painted pipe fence allows you to identify any areas that may require touch-ups. By addressing these areas promptly, you can prevent rust spots from forming and maintain the fence’s color and shine.

To touch up the painted surface, gather the necessary materials, such as the paint color used initially and a small brush or roller. Apply a thin layer of paint to the affected areas, ensuring even coverage.

Cleaning up and Properly Storing Your Painting Equipment

Once the painting process is complete, it is important for the painter to clean up and properly store their equipment. This not only ensures the longevity of the equipment but also promotes a safe working environment. Proper cleaning and storage practices prevent the build-up of paint residue, which can affect the performance of the equipment in future projects.

To convey the importance of cleaning and storing equipment, a table can be used to outline the necessary steps and safety precautions. The table would consist of two columns and three rows, with the first column listing the steps and the second column detailing the safety precautions. This visual representation allows the audience to quickly understand and follow the process.

Below is an example of the table:

Advertisement
Step Safety Precautions
Clean paint brushes and rollers Wear gloves and protective eyewear
Dispose of paint properly Follow local regulations for paint disposal
Store equipment in a dry place Keep away from heat sources and flammable materials

Admiring the Enhanced Aesthetic Appeal of Your Newly Painted Pipe Fence

Upon completion of the painting process, the painter can appreciate the newly revitalized appearance of their pipe fence. The fresh coat of paint enhances the overall curb appeal of the property, adding a touch of elegance and sophistication.

A well-painted pipe fence not only provides a visually appealing boundary but also increases the value of the property. However, it is crucial to remember the importance of regular maintenance to ensure the longevity of the painted pipe fence.

Regular inspections should be conducted to identify any signs of damage, such as rust or peeling paint, and address them promptly. Additionally, periodic touch-ups may be required to maintain the fence’s pristine appearance and protect against the elements.

Performing Regular Inspections to Ensure the Durability and Longevity of Your Pipe Fence

After admiring the enhanced aesthetic appeal of a newly painted pipe fence, it is important to perform regular inspections to ensure its durability and longevity. By performing regular maintenance, you can identify common problems and address them promptly, preventing further damage and prolonging the lifespan of your fence.

To emphasize the importance of performing regular inspections, here is a table highlighting some common problems that may arise with a pipe fence:

Advertisement
Common Problems Causes Solutions
Rust and corrosion Exposure to moisture and harsh weather conditions Regularly inspect and touch up with rust-resistant paint
Loose or damaged components Wear and tear over time Replace or repair damaged components
Fence leaning or sagging Improper installation or ground shifting Reinforce fence posts and ensure proper alignment

Addressing Common Concerns and Troubleshooting Tips for Painting With an Airless Sprayer

To troubleshoot common concerns when using an airless sprayer, individuals should ensure that the paint color chosen is specifically designed for metal surfaces and practice proper safety precautions.

Some common mistakes to avoid include using the wrong paint color, failing to properly prepare the surface, and not practicing proper spraying techniques.

Troubleshooting techniques for these concerns include selecting a paint color that is specifically designed for metal surfaces to ensure proper adhesion and durability. Additionally, individuals should thoroughly clean and sand the surface to remove any rust or loose paint before applying a coat of primer.

It is also important to practice proper spraying techniques, such as maintaining the correct distance and angle, to ensure even coverage and avoid overspray.

Frequently Asked Questions

Can I Use a Regular Paintbrush or Roller Instead of an Airless Sprayer to Paint My Pipe Fence?

Using a regular paintbrush or roller instead of an airless sprayer to paint a pipe fence has its pros and cons. While it may be a more affordable option and allow for more control, it can be time-consuming and may not provide as even of coverage.

Advertisement

To achieve a professional finish without an airless sprayer, proper technique is key. It’s important to apply thin, even coats and to take the time to cover hard-to-reach areas.

Ultimately, the choice between a regular paintbrush and an airless sprayer depends on personal preference and the desired outcome.

How Long Does It Take for the Paint to Dry on a Pipe Fence After Using an Airless Sprayer?

The paint on a pipe fence typically dries within a few hours after using an airless sprayer. However, the exact drying time can vary depending on factors such as temperature and humidity.

It is important to allow sufficient time for the paint to fully dry before touching or applying additional coats.

Following proper preparation techniques, such as cleaning and sanding the surface, and choosing the right paint color for your pipe fence can help ensure optimal drying and long-lasting results.

Advertisement

Is It Necessary to Apply a Second Coat of Paint for Better Protection and Durability?

Applying a second coat of paint to a pipe fence after using an airless sprayer is not necessary for better protection and durability.

The benefits of using primer before applying the first coat of paint include improved adhesion and enhanced durability.

Properly cleaning and preparing the surface of a pipe fence before painting involves sanding to remove rust and loose paint, applying a coat of primer, and choosing a paint color designed for metal.

Can I Paint My Pipe Fence in Cold or Humid Weather Conditions?

In the world of pipe fence painting, there are certain painting techniques that must be followed. One of the most important factors to consider is the weather conditions in which you choose to paint.

It is highly recommended to avoid painting your pipe fence in cold or humid weather conditions. These conditions can affect the drying time and adhesion of the paint, resulting in a subpar finish.

Advertisement

It is best to wait for more favorable weather conditions to ensure a successful paint job.

What Should I Do if I Accidentally Get Paint Overspray on Nearby Plants or Surfaces?

To safely remove paint overspray from nearby plants and surfaces, there are a few steps to follow.

First, wipe off any wet paint with a cloth or paper towel.

For dried paint, carefully scrape it off using a plastic scraper or a putty knife.

If the overspray is stubborn, use a mild solvent like rubbing alcohol or paint thinner. Apply it with a cloth and gently rub the affected area.

Advertisement

To prevent paint overspray, cover nearby plants and surfaces with plastic sheets or drop cloths before beginning the painting process.

Conclusion

In conclusion, painting your pipe fence with an airless sprayer is a meticulous process that yields numerous benefits.

By choosing the right paint color, sanding the surface, and applying a coat of primer, you can protect your fence from rust, corrosion, and moisture seepage.

Additionally, this method enhances the aesthetic appeal and property value of your fence.

By properly setting up your work area, gathering the necessary materials, and using the correct technique, you can achieve a long-lasting and visually pleasing result.

Advertisement

Regular inspections and maintenance will ensure the durability and longevity of your pipe fence.

So, why wait? Transform your fence today and enjoy the countless advantages it brings!

Continue Reading
Advertisement

Paint Sprayer Maintenance and Troubleshooting

Maximize Your Airless Paint Sprayer’s Lifespan With These Essential Tips

Published

on

By

An image showcasing a well-maintained airless paint sprayer: a clean nozzle, properly lubricated parts, and a debris-free filter

Are you fed up with your paint sprayer malfunctioning when you need it the most? No need to fret, we’ve got your back!

In this article, we’ll provide you with essential tips to maximize the lifespan of your airless paint sprayer. Imagine a paint sprayer that lasts longer, performs reliably, and saves you time and money.

By following these simple yet effective techniques, you’ll ensure proper storage, regular cleaning, and maintenance, and the use of high-quality replacement parts.

So, let’s dive in and make your airless paint sprayer last for years to come!

Key Takeaways

  • Proper storage and protection: Clean and dry the sprayer before storage, find a cool and dry place, invest in a protective case, and keep it away from extreme temperatures and moisture.
  • Regular cleaning: Clean the spray gun after each use, check and clean the filters regularly, flush out the system, and keep the storage area clean to prevent clogs and blockages.
  • Lubrication: Follow manufacturer’s recommendations for oil type and usage, regularly check oil levels, and apply oil to moving parts for smooth operation.
  • High-quality replacement parts: Invest in durable and reputable replacement parts, replace worn-out or damaged parts promptly, and use genuine parts to maintain performance and reliability.

Proper Storage and Protection

Advertisement

To maximize your airless paint sprayer’s lifespan, follow these steps:

  1. Clean the sprayer thoroughly before storage. Ensure all components are dry.
  2. Find a cool and dry place to store the sprayer.
  3. Proper sprayer maintenance and effective storage techniques are crucial for keeping your equipment in optimal condition.

After each use:

  1. Clean the spray gun and check and clean the filters regularly.
  2. Flush out the entire system with water or a cleaning solution to prevent clogs and blockages.
  3. Lubricate the sprayer with the manufacturer-recommended oil to reduce friction, wear, and corrosion.

Remember to:

  1. Invest in high-quality replacement parts to ensure durability and functionality.
  2. Cheap parts wear out quickly and require frequent replacements.

Thorough Cleaning

Regularly clean the spray gun after each use to prevent clogs and maintain optimal performance. Thorough cleaning techniques are essential to ensure the longevity of your airless paint sprayer.

Start by disassembling the spray gun and removing any paint residue or debris. Use a cleaning solution recommended by the manufacturer and thoroughly clean all the components, including the nozzle and filter.

Pay close attention to the hoses, as they can also become clogged with dried paint. Flush out the entire system with water or the appropriate cleaning solution to ensure all paint particles are removed.

After cleaning, dry all the components thoroughly before reassembling the spray gun. By following these thorough cleaning techniques and using the best cleaning solutions, you can keep your airless paint sprayer in optimal condition and avoid any performance issues.

Regular Filter Maintenance

Advertisement

Ensure you clean and inspect the filters of your airless paint sprayer on a consistent basis to maintain optimal performance. Cleaning the filters regularly is essential to prevent clogs and ensure smooth operation.

The frequency of cleaning will depend on the type and amount of paint being sprayed. As a general rule, it’s recommended to clean the filters after every use or at least once a week for heavy use.

Start by removing the filters from the sprayer and rinse them thoroughly with water or a cleaning solution. Use a soft brush or toothbrush to remove any stubborn debris. Allow the filters to dry completely before reinserting them into the sprayer.

Regularly checking and cleaning the filters will prolong the lifespan of your airless paint sprayer and ensure consistent, high-quality results.

Advertisement

Flushing the System

Flushing the system is an important step in maintaining the performance of your airless paint sprayer. Regular system maintenance ensures optimal performance and prevents clogs or blockages.

To flush the system, start by removing any remaining paint from the sprayer. Then, fill the paint container with a cleaning solution recommended by the manufacturer.

Attach the sprayer to a water source and turn it on. Allow the cleaning solution to flow through the system, flushing out any paint residue or debris. Run the cleaning solution through all components, including the hoses, filters, and nozzle.

Once the cleaning solution runs clear, disconnect the sprayer from the water source and thoroughly rinse the system with clean water.

This flushing technique will help maintain the efficiency and longevity of your airless paint sprayer.

Advertisement

Clean Storage Area

To maintain the cleanliness of your storage area, keep it free from dust or dirt that could potentially enter critical components. Here are some cleaning techniques and tips to prevent dust accumulation:

  • Regularly dust and sweep the storage area to remove any loose dirt or debris.
  • Use a vacuum cleaner with a brush attachment to clean hard-to-reach areas.
  • Wipe down surfaces with a damp cloth to remove any stubborn dust or grime.
  • Consider using air purifiers or dehumidifiers to maintain a clean and dry environment.

Store your airless paint sprayer in a protective case or bag to prevent dust from settling on it. Avoid storing the sprayer in areas prone to moisture or dust, such as basements or garages. Cover the sprayer with a cloth or plastic sheet when not in use to further protect it from dust.

Nozzle and Filter Cleaning

Now that you understand the importance of keeping your storage area clean, let’s move on to the next crucial aspect of maintaining your airless paint sprayer: nozzle and filter cleaning.

Regularly cleaning the nozzle and filters is essential for optimal performance and preventing common nozzle issues.

Advertisement

To start, always follow the manufacturer’s instructions for cleaning the nozzle. Typically, this involves removing the nozzle from the spray gun and soaking it in a cleaning solution or using a specialized cleaning brush to remove any paint residue or debris. Be sure to clean the nozzle thoroughly, as any build-up can lead to clogs or uneven spray patterns.

Additionally, it’s crucial to regularly check and clean the filters. These filters help prevent debris from entering the sprayer and can become clogged over time. Simply remove the filters and rinse them with water or a cleaning solution, ensuring all dirt and debris are removed.

Hose Inspection and Cleaning

Make sure you regularly inspect and clean the hoses of your airless paint sprayer to ensure optimal performance. Here are some troubleshooting tips for hose maintenance:

  • Check for any cracks or leaks in the hoses
  • Inspect the hose fittings for any signs of wear or damage
  • Clean the hoses thoroughly after each use to remove any paint residue or debris
  • Use a soft brush or cloth to clean the exterior of the hoses
  • Flush out the hoses with water or a cleaning solution to remove any clogs or blockages
  • Pay attention to any kinks or twists in the hoses and straighten them out if necessary
  • Replace any damaged or worn-out hoses promptly to prevent further issues
  • Store the hoses in a clean and dry area to prevent them from being exposed to moisture or dust

Lubrication Guidelines

Ensure you consult the manufacturer’s recommendations for the correct oil type to use in your airless paint sprayer. Using the right oil is crucial for optimal performance and longevity. Lightweight mineral-based oil designed for high-pressure applications is typically recommended.

Regularly check the oil level in your sprayer and top up or change the oil as recommended by the manufacturer. Following the proper oiling frequency is important to reduce friction, wear, and corrosion. Apply oil to moving parts to ensure smooth operation, but be cautious not to over-lubricate as it can attract dust and debris.

Regularly check oil levels and refill as needed to maintain the sprayer’s efficiency. By using the appropriate oil and following the recommended lubrication frequency, you can maximize the lifespan of your airless paint sprayer.

Advertisement

Correct Oil Type

Using the recommended lightweight mineral-based oil for high-pressure applications is crucial to ensure optimal performance and longevity of your airless paint sprayer. Choosing the right oil and proper lubrication techniques are essential for maintaining your sprayer.

Here are some key points to consider:

  • Use a lightweight mineral-based oil designed for high-pressure applications.
  • Regularly check the oil level in the sprayer and top up or change it as recommended.
  • Proper oil usage reduces friction, wear, and corrosion in the internal components.
  • Apply oil to the moving parts to ensure smooth operation.
  • Avoid over-lubricating, as it can attract dust and debris.
  • Follow the manufacturer’s guidelines for oiling frequency.
  • Regularly check oil levels and refill as needed.

Regular Oil Level Check

Check the oil level in your sprayer regularly to ensure optimal performance and prevent unnecessary wear and tear.

Regular oil level monitoring is crucial for maintaining the efficiency of your airless paint sprayer. Oil acts as a lubricant, reducing friction and preventing corrosion within the internal components.

By regularly checking the oil level and topping up or changing it as recommended by the manufacturer, you can ensure smooth operation and extend the lifespan of your sprayer.

Regular oil changes are important because over time, the oil can become contaminated with debris and lose its lubricating properties. By staying on top of oil changes, you can prevent damage to the sprayer and avoid costly repairs.

Advertisement

Make it a habit to monitor the oil level in your sprayer and perform regular oil changes to keep it running smoothly.

High-Quality Replacement Parts

When it comes to maintaining your airless paint sprayer, using high-quality replacement parts is essential. Genuine parts offer several benefits that can significantly impact the lifespan and performance of your sprayer.

Here are some reasons why using genuine parts is important:

  1. Superior Durability and Functionality:

    • Genuine parts are designed specifically for your sprayer model, ensuring a perfect fit and optimal performance.
    • They are made from high-quality materials, making them more durable and resistant to wear and tear.
    • Using genuine parts eliminates the risk of leaks or malfunctions, providing a reliable and efficient spraying experience.
  2. Reduced Repairs and Downtime:

    • High-quality replacement parts minimize the need for frequent repairs, saving you time and money.
    • Genuine parts are less likely to fail or break, preventing unexpected project delays.
    • By investing in genuine parts, you can avoid costly downtime and keep your sprayer working at its best.
  3. Maintenance and Reliability:

    • Genuine parts are manufactured to meet the highest standards, ensuring consistent performance and reliability.
    • Regular maintenance, including the use of genuine replacement parts, is crucial for maximizing the lifespan of your sprayer.
    • By following recommended maintenance practices and using genuine parts, you can enjoy a reliable and long-lasting airless paint sprayer.

Importance of Premium Parts

Investing in high-quality replacement parts for your airless paint sprayer is essential for durability and optimal performance. Premium parts offer several benefits. Firstly, they are designed to fit and function perfectly, eliminating leaks or malfunctions that can occur with cheaper alternatives. Additionally, premium parts have a longer lifespan, reducing the need for frequent replacements. When choosing replacement parts, consider reputable manufacturers who offer warranties for their products. Ensure that the replacement parts are compatible with your specific sprayer model. Using genuine parts is crucial to maintain performance and reliability. By investing in high-quality replacement parts, you can minimize repairs, extend the lifespan of your sprayer, and ultimately save time and money in the long run.

Reputable Manufacturers for Replacement Parts

Look for warranties provided by reputable manufacturers to ensure the quality and reliability of replacement parts for your airless paint sprayer.

When it comes to finding reliable suppliers for replacement parts, here are a few things to consider:

Advertisement
  • Warranty coverage: Reputable manufacturers often offer warranties on their replacement parts, giving you peace of mind and assurance that the parts are of high quality and built to last.

  • Reputation: Look for manufacturers with a strong reputation in the industry. Reliable suppliers are known for producing top-notch replacement parts that meet or exceed industry standards.

  • Compatibility: Ensure that the replacement parts you choose are compatible with your specific airless paint sprayer model. Reputable manufacturers provide detailed information about compatibility to help you make the right choice.

Timely Replacement of Worn-Out Parts

To ensure optimal performance, regularly replacing worn-out parts is crucial for keeping your airless paint sprayer running smoothly. Timely replacement of worn-out parts is essential for the proper functioning of your sprayer and to avoid any potential breakdowns during your painting projects.

By replacing worn-out parts in a timely manner, you can prevent further damage to your sprayer and ensure its longevity. Not only does timely replacement of parts help maintain the performance of your sprayer, but it also has numerous maintenance benefits. It reduces the risk of malfunctions, leaks, and inefficient paint application. Additionally, it minimizes the need for costly repairs and downtime, saving you both time and money.

Cost and Time Savings With Proper Maintenance

To ensure maximum longevity and performance from your airless paint sprayer, regular maintenance is crucial. By investing a little time and effort into proper care, you can save yourself both money and time in the long run.

Here are the key reasons why regular maintenance is important and the benefits of investing in a protective case:

  1. Importance of Regular Maintenance:

    • Prevents clogs and blockages, ensuring smooth operation and consistent spray patterns.
    • Reduces friction, wear, and corrosion, extending the lifespan of your sprayer.
    • Protects the sprayer from cold-related issues, such as freezing or damage to seals and valves.
  2. Benefits of Investing in a Protective Case:

    • Shields the sprayer from accidental drops, bumps, and impacts.
    • Guards against dust, moisture, and other environmental factors that can damage critical components.
    • Provides convenient storage and organization for accessories and spare parts.

Frequently Asked Questions

How Often Should I Clean the Spray Gun After Each Use?

To ensure optimal performance, clean the spray gun after each use. This is a crucial step in airless paint sprayer maintenance. Use a cleaning solution recommended by the manufacturer and thoroughly clean all components, including the nozzle and filter.

Regular cleaning prevents clogs and blockages, ensuring smooth operation. By following best practices for cleaning your airless paint sprayer, you can maximize its lifespan and avoid costly repairs.

Advertisement

Can I Use Any Type of Oil for Lubricating the Airless Paint Sprayer?

Yes, you can use any type of oil for lubricating your airless paint sprayer. However, it is important to use the correct oil recommended by the manufacturer for optimal performance and lifespan.

Using the wrong type of oil can lead to friction, wear, and corrosion, causing damage to the internal components. Avoid common mistakes in lubricating airless paint sprayers by consulting the manufacturer’s guidelines and using lightweight mineral-based oil designed for high-pressure applications.

Regularly check the oil level and refill as needed to ensure smooth operation.

How Frequently Should I Check and Clean the Filters?

To extend the lifespan of your airless paint sprayer, it’s important to regularly check and clean the filters. This ensures optimal performance and prevents clogs and blockages. The frequency of checking and cleaning the filters depends on the usage and the type of paint being sprayed.

However, as a general guideline, it is recommended to check and clean the filters after every use or at least once a week for heavy usage. Proper maintenance of the filters will help maximize the lifespan of your airless paint sprayer.

Advertisement

What Are the Benefits of Using High-Quality Replacement Parts?

Using high-quality replacement parts for your airless paint sprayer offers a multitude of benefits. These durable parts ensure proper functionality, eliminating leaks and malfunctions. By investing in premium parts, you can reduce the need for frequent repairs and project downtime.

This not only saves you time but also money in the long run. High-quality replacement parts extend the lifespan of your sprayer, providing reliable performance and enhancing efficiency. So, opt for reputable manufacturers and genuine parts to maximize the durability and longevity of your airless paint sprayer.

How Can Proper Maintenance of the Airless Paint Sprayer Save Me Money and Time in the Long Run?

Proper maintenance of your airless paint sprayer can save you both time and money in the long run. By ensuring proper storage, you protect the sprayer from damage caused by extreme temperatures, moisture, and dust.

Regular maintenance, such as cleaning the spray gun and filters, prevents clogs and blockages that can lead to costly repairs. Using high-quality replacement parts enhances efficiency and reduces project downtime.

Taking these steps will maximize the lifespan of your airless paint sprayer and provide reliable performance.

Advertisement

Conclusion

So there you have it, with these essential tips, you can maximize the lifespan of your airless paint sprayer and enjoy its reliable performance for years to come.

By properly storing and protecting your sprayer, cleaning it thoroughly after each use, and regularly maintaining the filters and system, you can ensure its longevity.

Investing in high-quality replacement parts from reputable manufacturers and timely replacements of worn-out parts will also contribute to cost and time savings.

So take care of your airless paint sprayer and witness the benefits of proper maintenance firsthand.

Advertisement

Continue Reading

Paint Sprayer Maintenance and Troubleshooting

Painting Brick Walls With an Airless Sprayer: a Complete Guide

Published

on

By

An image showcasing an airless sprayer in action, with a skilled painter effortlessly coating a brick wall with smooth, even strokes

Painting brick walls with an airless sprayer can bring them back to life. This comprehensive guide walks you through every step of the process, from preparing the surface to ensuring an even coat.

With the right tools and materials, including a high-quality primer, you can enhance the durability and resistance of your brick walls. Expert tips and safety precautions ensure a smooth finish and a transformation that will leave your walls looking brand-new.

Get ready to bring new vibrancy and timeless beauty to your space.

Key Takeaways

  • Preparation and surface cleaning is essential before painting brick walls with an airless sprayer.
  • Selecting the right paint color and gathering the necessary materials and equipment are crucial for a successful painting project.
  • Cleaning and maintaining the painted brick walls regularly will help them stay in good condition.
  • Priming the walls with a high-quality primer designed for masonry surfaces enhances adhesion, durability, and resistance to moisture and alkali.

Surface Preparation: Tools and Cleaning

The homeowner gathers the necessary tools, including a wire brush, scraper, and power washer, to remove loose paint and dirt from the brick walls. Acquiring these tools is essential for proper cleaning techniques.

Advertisement

Using the wire brush and scraper, the homeowner meticulously removes any loose paint and dirt from the surface of the brick walls. After that, a power washer is used to thoroughly clean the walls, ensuring a clean and smooth surface for painting.

It is important to allow the walls to dry completely before proceeding to the next step. By acquiring the necessary tools and following proper cleaning techniques, the homeowner ensures a clean and well-prepared surface for painting the brick walls.

Selecting the Right Paint Colors and Materials

When selecting paint colors and materials, it is important to consider the desired aesthetic and gather the necessary tools. Choosing paint colors that complement the overall look and feel of the space is crucial for achieving the desired result.

Additionally, having the right materials is essential for a successful painting project. Following a step-by-step guide for surface preparation is also crucial. This includes gathering tools such as a wire brush, scraper, and power washer. It is important to remove loose paint and dirt from the surface using the wire brush and scraper, and then thoroughly clean the area with a power washer.

Once the surface is clean and dry, you can proceed with choosing the appropriate paint color and gathering the necessary materials and equipment like paint, primer, drop cloth, painters tape, and sandpaper.

Advertisement

Essential Equipment for Painting Brick Walls

To achieve a flawless result, one must ensure they have the essential equipment necessary for painting brick walls. This includes proper airless sprayer maintenance and choosing the right paintbrush.

Here are three key items to consider:

  • Well-maintained airless sprayer: Regularly clean and inspect the sprayer to ensure it functions properly. This will ensure consistent paint application and prevent clogging or uneven spraying.

  • High-quality paintbrush: Choose a brush that is suitable for masonry surfaces and the type of paint being used. A good brush will provide smooth and even coverage, allowing for precise detailing and edges.

  • Safety equipment: Protect yourself while painting by wearing safety goggles, gloves, and a mask to prevent inhalation of fumes or particles.

Achieving Even Coverage With an Airless Sprayer

Using an airless sprayer ensures even coverage when painting brick walls. This method is great for achieving consistent results.

Advertisement

However, there are some common issues that may arise when using an airless sprayer. One common issue is overspray, which occurs when the paint is applied too heavily or the sprayer is held too close to the surface. To troubleshoot this issue, adjust the spray nozzle to a narrower setting and maintain a consistent distance from the wall.

Another common issue is clogging of the sprayer tip due to debris or dried paint. To avoid this, strain the paint before pouring it into the sprayer and clean the tip regularly during the painting process.

Proper Technique: Starting From the Top

Starting from the top ensures that the paint is applied evenly and avoids drips or streaks on the brick walls. This technique allows for better control and coverage, ensuring a professional-looking finish.

Advertisement

When starting at the bottom, gravity can cause the paint to run down the wall, leading to uneven application and potential drips. By beginning at the top, the paint can be evenly distributed downwards, avoiding any potential issues.

However, it is important to troubleshoot common issues that may arise when painting brick walls with an airless sprayer. These issues can include clogging of the sprayer nozzle, uneven spray pattern, or overspray.

Cleaning and Maintenance Tips for Painted Brick Walls

Regular cleaning and maintenance is essential for preserving the appearance and longevity of painted brick walls. To keep them looking their best, it’s important to use proper cleaning techniques and know how to remove stubborn stains.

Light dirt can be easily removed with warm water and dish soap. Gently scrub the walls with a soft-bristle brush to avoid damaging the paint.

For stubborn stains, create a solution of white vinegar and water and treat the affected areas. Rinse the walls with clean water to remove any residue.

Advertisement

The Importance of Priming Masonry Surfaces

Priming masonry surfaces is crucial for enhancing adhesion, durability, and resistance to moisture and alkali. A high-quality primer designed for masonry surfaces is essential for paint longevity and a successful painting project.

Without proper priming, paint may not adhere well to the surface, leading to peeling and chipping over time. Primer acts as a barrier, preventing moisture and alkali from seeping into the paint, which can cause it to deteriorate.

However, common issues with primer can occur, such as poor coverage, uneven application, or improper drying. To troubleshoot these problems, ensure the walls are clean and dry before applying primer, use the recommended primer for masonry surfaces, and allow sufficient drying time.

Drying Time for Primer Application

After applying primer to the masonry surfaces, it is important to allow sufficient drying time of approximately 24 hours. This drying time is crucial to ensure that the primer properly adheres to the surface and creates a strong foundation for the paint.

It also allows the primer to fully cure, enhancing its durability and resistance to moisture and alkali. While waiting for the primer to dry, it is essential to protect the surface from any potential damage or contamination.

Advertisement

Additionally, it is worth considering alternative priming methods, such as using a tinted primer or a primer/sealer combination, which can provide additional benefits like improved color coverage or added protection against stains.

Advantages of Primer: Adhesion, Durability, and Resistance

Applying a high-quality primer to masonry surfaces ensures strong adhesion, increased durability, and enhanced resistance to moisture and alkali. The advantages of using primer go beyond these benefits and extend to cost savings, as it helps paint adhere better, reducing the need for multiple coats.

Additionally, primer improves the overall appearance and finish of the painted surface, giving it a smooth and professional look. When it comes to application techniques, primer can be easily applied using a brush, roller, or sprayer, making it suitable for different preferences and skill levels.

Its quick drying time allows for efficient completion of painting projects. Overall, using primer before painting brick walls with an airless sprayer is a wise choice, offering numerous advantages in terms of cost and application techniques.

Expert Tips for a Smooth Paint Finish

To achieve a smooth paint finish on the brick walls, homeowners should consider using a high-quality paint roller for even coverage. This is one of the most important tips for paint application on brick surfaces.

Advertisement

Another common mistake to avoid is using a low-quality roller, which can leave streaks and uneven texture on the walls. It is also essential to choose the right roller nap thickness for the type of brick surface. A thicker nap is typically recommended for rough or textured brick, while a thinner nap works well for smooth brick walls.

Additionally, homeowners should apply the paint in thin, even coats to prevent drips and runs. Taking these tips into consideration can help homeowners achieve a professional-looking smooth paint finish on their brick walls.

Safety Precautions When Using an Airless Sprayer

Using an airless sprayer requires homeowners to wear protective goggles, gloves, and a respirator mask to ensure their safety. The powerful spray of the airless sprayer can create a fine mist of paint particles that can be harmful if inhaled or make contact with the eyes or skin.

To maintain the airless sprayer, regular cleaning is essential to prevent clogs and ensure proper functioning. Troubleshooting common issues like uneven spray pattern or loss of pressure can be resolved by checking for clogs, adjusting the nozzle, or cleaning the filters.

Regular maintenance and troubleshooting will help homeowners achieve a smooth and efficient painting process with their airless sprayer, allowing them to achieve professional-looking results.

Advertisement

The Transformation: Freshly Painted Brick Walls

After taking the necessary safety precautions when using an airless sprayer, the transformation of freshly painted brick walls can be truly remarkable. The impact of color choice cannot be underestimated, as it can completely change the look and feel of a space. Whether it’s a timeless neutral or a bold, vibrant color, a fresh coat of paint can breathe new life into a room. In addition to the aesthetic benefits, there are also practical benefits to consider. Professional painting services can ensure a high-quality finish, saving time and effort for homeowners. They have the expertise to properly prepare the surface, choose the right materials, and apply the paint evenly. The result is a beautifully transformed space that adds value to the home.

The Impact of Color Choice Benefits of Professional Painting Services
Completely changes the look High-quality finish
and feel of a space Saves time and effort
Timeless or vibrant options Expertise in surface preparation
Adds value to the home Proper material selection
Even application of paint

Frequently Asked Questions

How Long Does It Typically Take for Brick Walls to Dry Completely After Cleaning?

Brick walls typically take some time to dry completely after cleaning. The drying time can depend on factors such as weather conditions and the level of humidity. However, using the best cleaning methods for brick walls, such as using a power washer and allowing the walls to air dry, can help expedite the drying process.

It is important to ensure that the walls are thoroughly dry before proceeding with any painting or priming to achieve the best results.

Can I Use a Regular Primer on Brick Walls or Is There a Specific Primer for Masonry Surfaces?

When painting brick walls, it’s important to use the right primer for optimal results. While a regular primer may work on some surfaces, there are specific primers designed for masonry surfaces that are recommended for brick walls.

These masonry primers are specially formulated to enhance adhesion, durability, and resistance to moisture and alkali. By choosing the appropriate primer for brick walls, you can ensure better paint adherence and longevity of the paint job.

Advertisement

How Often Should Painted Brick Walls Be Cleaned and Maintained?

Painted brick walls should be cleaned and maintained regularly to keep them looking their best. The cleaning frequency will depend on the level of dirt and grime buildup, but generally, it is recommended to clean them at least once or twice a year.

To maintain the painted surface, homeowners should use warm water and dish soap to remove light dirt and gently scrub the walls with a soft-bristle brush. Stubborn stains can be treated with a solution of white vinegar and water.

Regular cleaning and maintenance will help preserve the appearance and longevity of the painted brick walls.

Is It Necessary to Apply Multiple Coats of Paint for a Smooth Finish?

Applying multiple coats of paint is necessary for achieving a smooth finish on brick walls. Using a roller or brush may not provide the same level of smoothness as an airless sprayer.

The multiple coats allow for better coverage and a more uniform appearance. The airless sprayer ensures even distribution of paint, resulting in a flawless finish.

Advertisement

Are There Any Potential Risks or Dangers Associated With Using an Airless Sprayer for Painting Brick Walls?

Using an airless sprayer for painting brick walls can pose potential risks and dangers. The high-pressure nature of the sprayer can create a fine mist of paint particles, which can be harmful if inhaled. Additionally, there is a risk of overspray, which can result in paint getting on unintended surfaces.

It is important to take safety precautions, such as wearing protective gear and properly ventilating the area. Proper training and experience with using an airless sprayer is also recommended to minimize these risks.

Conclusion

In conclusion, painting brick walls with an airless sprayer can provide a fresh and updated look to any space. It is important to properly prepare the surface by cleaning and removing loose paint and dirt.

Using the right paint colors and materials, along with a high-quality primer, will ensure long-lasting adhesion, durability, and resistance to moisture and alkali. Following the proper technique and safety precautions when using an airless sprayer is crucial.

An interesting statistic to consider is that painting brick walls can increase a home’s value by up to 5%.

Advertisement

Continue Reading

Paint Sprayer Maintenance and Troubleshooting

Setting Up and Cleaning the Graco 390 Airless Paint Sprayer

Published

on

By

An image capturing the step-by-step process of setting up and cleaning the Graco 390 Airless Paint Sprayer

It is essential to properly prepare and maintain the Graco 390 Airless Paint Sprayer to achieve a high-quality paint job. This paint sprayer is efficient and easy to use thanks to its simple setup and user-friendly features. Understanding how to adjust the spray settings using the pressure control knob, spray gun, and hose will help users meet their specific painting requirements.

Additionally, proper cleaning and maintenance ensure the longevity of the paint sprayer. In this article, we will guide you through the step-by-step process of setting up and cleaning the Graco 390 Airless Paint Sprayer, providing you with the knowledge and confidence to achieve outstanding paint results.

Key Takeaways

  • Inspect all equipment for good condition before assembly
  • Familiarize yourself with adjusting spray pressure for desired coverage
  • Regularly clean and maintain the paint sprayer, including the spray gun
  • Troubleshoot common issues such as paint viscosity, spray pattern, and clogs in the spray tip

Gathering and Unboxing the Necessary Equipment

The user gathers and unboxes the necessary equipment for setting up the Graco 390 Airless Paint Sprayer. Before starting the setup process, it is important to inspect all the equipment to ensure that everything is in good condition.

This includes checking the paint sprayer unit itself, as well as the spray gun, hose, and any additional accessories that may have been included. The unboxing process involves carefully opening the packaging and removing each component from its protective wrapping. It is important to handle the equipment with care to avoid any damage.

Advertisement

Once all the equipment has been unboxed, the user can proceed to the next step of assembling the components and getting ready for painting.

Assembling the Graco 390 Airless Paint Sprayer

To assemble the Graco 390 Airless Paint Sprayer, simply follow the instructions provided by the manufacturer.

Before starting the assembly process, inspect the components of the sprayer to ensure they are in good condition and nothing is missing. This includes checking the spray gun, hose, and pressure control knob.

Once the inspection is complete, understand how the pressure control works. The pressure control knob allows users to adjust the pressure of the paint being sprayed, which affects the coverage and finish of the paint job. Familiarize yourself with this feature to achieve optimal results with your paint sprayer.

Overall, assembling the Graco 390 Airless Paint Sprayer is a straightforward process that can be easily accomplished by following the manufacturer’s instructions.

Advertisement

Preparing the Surface and Adjusting Spray Settings

After gathering the necessary equipment and materials, the user inspects the surface and cleans it thoroughly before adjusting the spray settings for desired coverage. This is an important step in ensuring a smooth and even paint application.

Preparing the surface involves removing any dirt, dust, or debris that may interfere with the paint adhering properly. This can be done by using a broom, vacuum cleaner, or a damp cloth, depending on the type of surface.

Once the surface is clean, the user can then choose the paint color that best suits their preference and the overall aesthetic they want to achieve. It is important to consider factors such as lighting, room size, and personal taste when selecting paint colors.

Advertisement

Cleaning and Maintaining the Graco 390 Airless Paint Sprayer

In order to ensure optimal performance, it is essential for the user to regularly clean and maintain their Graco 390 Airless Paint Sprayer. Cleaning techniques and a recommended maintenance routine are necessary to keep the sprayer in good working condition.

After each use, it is important to disassemble and clean the spray gun thoroughly. This includes removing any remaining paint and debris from the gun’s components. Additionally, the paint sprayer system should be flushed with a cleaning solution to remove any paint residue.

Proper storage and maintenance of the sprayer is also crucial. This involves storing the sprayer in a clean and dry area, and inspecting it regularly for any signs of wear or damage.

Troubleshooting Common Issues With the Paint Sprayer

Advertisement

The user can check the spray tip for clogs and ensure that the paint viscosity and spray pattern are correct in order to troubleshoot common issues with the paint sprayer. Here are some steps to follow in order to identify and fix paint spray pattern issues:

  1. Check paint viscosity: Make sure the paint is properly mixed and thinned according to the manufacturer’s instructions. If the paint is too thick or too thin, it can affect the spray pattern.

  2. Inspect the spray pattern: Use a test board or piece of cardboard to spray a test pattern. Look for any irregularities, such as streaks, splotches, or uneven coverage. This can indicate issues with the spray tip or pressure settings.

  3. Adjust settings and clean the spray tip: If the spray pattern is not satisfactory, adjust the pressure control knob and clean the spray tip to remove any clogs or debris. A clean spray tip and proper pressure settings are essential for a consistent and even spray pattern.

Frequently Asked Questions

How Long Does It Take to Assemble the Graco 390 Airless Paint Sprayer?

Assembling time for the Graco 390 Airless Paint Sprayer depends on the user’s familiarity with the product. On average, it takes about 10-15 minutes to fully assemble the paint sprayer.

The required tools for assembly include a wrench and screwdriver. Users should carefully follow the instructions provided in the manual to ensure proper assembly and functionality of the sprayer.

What Is the Warranty Period for the Graco 390 Airless Paint Sprayer?

The warranty period for the Graco 390 Airless Paint Sprayer is an important aspect to consider. It provides peace of mind and reassurance to the user.

Additionally, knowing the assembly time required for the paint sprayer can help with planning and scheduling painting projects effectively.

Advertisement

These factors, along with the product’s features and performance, contribute to the overall satisfaction and convenience of using the Graco 390 Airless Paint Sprayer.

Can the Graco 390 Airless Paint Sprayer Be Used With Different Types of Paint?

The Graco 390 Airless Paint Sprayer is compatible with various types of paint, including latex, acrylic, and oil-based paints. This versatility allows users to tackle different painting projects with ease.

The advantages of using the Graco 390 Airless Paint Sprayer with different types of paint include efficient and even coverage, reducing the need for multiple coats. Its high-pressure system ensures excellent paint atomization, resulting in a professional finish.

Overall, the Graco 390 Airless Paint Sprayer is a reliable choice for any painting job.

What Is the Recommended Cleaning Solution for the Graco 390 Airless Paint Sprayer?

The recommended cleaning solution for the Graco 390 Airless Paint Sprayer is a mixture of warm water and a mild detergent. This solution effectively removes any residual paint or debris from the sprayer’s components.

Advertisement

It is important to thoroughly clean the spray gun, hose, and other parts after each use to maintain optimal performance. By following proper cleaning techniques and using the recommended cleaning solution, users can ensure the longevity and efficiency of their Graco 390 Airless Paint Sprayer.

How Often Should the Spray Gun of the Graco 390 Airless Paint Sprayer Be Cleaned?

The spray gun of the Graco 390 Airless Paint Sprayer should be cleaned regularly to ensure optimal performance. Cleaning the spray gun helps troubleshoot common issues such as clogs and improper spray patterns.

It is recommended to clean the spray gun after each use to prevent paint residue from building up and affecting the quality of the spray. By maintaining the spray gun properly, users can extend the lifespan of their Graco 390 Airless Paint Sprayer and achieve consistent, professional results.

Conclusion

In conclusion, setting up and cleaning the Graco 390 Airless Paint Sprayer is an essential task for achieving professional paint finishes. Following the step-by-step guide and familiarizing oneself with the equipment ensures smooth operation and efficient painting.

A clean and well-maintained paint sprayer saves time and money in the long run. It also provides exceptional painting results. Embrace the irony of the tedious cleaning process, knowing that it is the key to effortless and stunning paint jobs.

Advertisement

Continue Reading

Trending

Copyright © 2024 Paint Sprayer Zone Affiliate disclaimer As an affiliate, we may earn a commission from qualifying purchases. We get commissions for purchases made through links on this website from Amazon and other third parties.