
To clean faster by cleaning smarter, plan your disassembly order carefully. Start with larger, easily removable items and organize fasteners and small parts as you go. Use the right tools and follow safety measures to avoid delays, and tailor your approach to each room’s layout and clutter. Keeping track of fragile or complex parts reduces backtracking and damage. Stick with a logical sequence, and you’ll see your cleaning efficiency improve—more tips await to help you streamline even further.
Key Takeaways
- Plan disassembly in order of size and fragility to minimize handling and prevent damage.
- Remove larger, easily accessible components first to streamline cleaning and reassembly.
- Organize small parts in containers during disassembly to avoid loss and save time.
- Use correct tools and gentle techniques for stubborn or delicate parts to prevent delays.
- Tailor disassembly sequence to each room’s furniture and clutter for maximum efficiency.
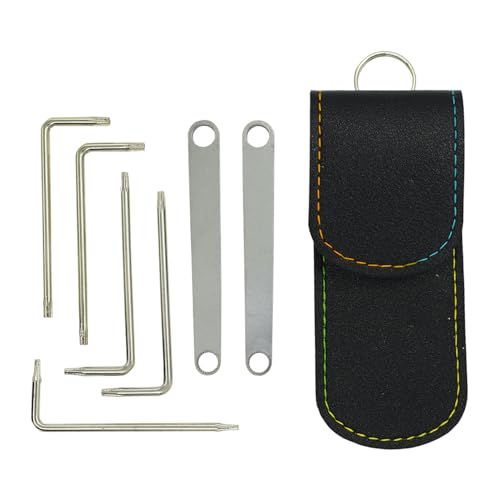
Handy 7Pack Mutitool Wrench Kit for L-eatherman Multi-Tools,Ideal for muti-tool maintenance Knurled Nut Wrenches Wide Compatibility with wave Rebar, Bond, PST, Charge+,Surge(NOT SUIT MICRA)
- Premium Material & Durability: 304 stainless steel and high-grade 45# steel
- Wide Compatibility with Leatherman Models: Fits Rebar, Bond, PST, Charge+, Surge, and more
- Full Range of Screw Adaptability: T6/T8/T10 bits cover 90% of screws
As an affiliate, we earn on qualifying purchases.
As an affiliate, we earn on qualifying purchases.
Why the Right Disassembly Order Can Speed Up Your Cleaning

Choosing the right disassembly order is essential because it prevents unnecessary movements and reduces the risk of damaging components. When you plan your disassembly sequence, you can efficiently organize storage solutions for each part, making reassembly smoother. This approach also allows you to keep your cleaning tools accessible, so you don’t waste time searching for them. By starting with larger, easily removable components, you minimize handling and potential damage. Proper order ensures you clean each part thoroughly before moving on, maintaining a logical flow. This not only speeds up your overall process but also helps you avoid accidental breakage. Additionally, considering innovative cloud solutions can provide digital checklists or guides to optimize your disassembly process. Ultimately, a strategic disassembly order keeps your workspace organized, saves time, and makes your cleanup more effective.
How to Assess Your Space and Plan the Disassembly

To start disassembling effectively, you need a clear understanding of your space and the layout of the items involved. Begin by evaluating your storage solutions—identify where tools, parts, and disassembled pieces will go. This helps you plan the order of disassembly, avoiding unnecessary movement and clutter. Choose the right tools upfront; having a well-selected set saves time and reduces frustration. Walk through the area, noting fragile items, connections, and difficult spots. Create a rough plan that prioritizes removing larger or more obstructive items first, then smaller components. This assessment ensures you approach disassembly systematically, minimizing backtracking and rework. Incorporating smart organization techniques can further streamline your workflow and prevent misplacement of parts. Additionally, considering tool compatibility helps ensure you have the right equipment for each task, reducing delays and potential damage. Paying attention to sound healing science principles, such as reducing noise disturbances during disassembly, can also improve focus and efficiency. Recognizing the importance of essential oils for safety and focus can help create a calming environment that enhances concentration during complex disassembly tasks. Moreover, using mindful planning techniques can support a more efficient and less stressful disassembly process.
Disassemble Items Quickly With These Step-By-Step Tips
Starting disassembly with a clear plan can save you time and frustration. Begin by selecting the right tools for each component—using the correct screwdriver or wrench prevents stripped screws or damage. Always follow safety precautions: wear gloves and eye protection, and disconnect power sources when working on electrical items. Organize screws and small parts in containers to avoid losing them. Work systematically, removing fasteners in a logical order to prevent unnecessary steps. Keep your workspace tidy to reduce clutter and accidental damage. If you encounter stubborn parts, apply gentle force or use appropriate lubricants rather than rushing. Proper disassembly techniques can also help prevent accidental damage and ensure a smoother process. Preparation and planning before starting can significantly streamline the process. Additionally, understanding wood movement can help you anticipate and avoid damage during disassembly. Being aware of material properties can further improve your disassembly strategy and protect your tools from unnecessary wear. By choosing the right tools and prioritizing safety, you’ll disassemble items efficiently, making the cleanup process faster and smoother.
Avoid These Common Mistakes That Slow Down Cleaning
Many common mistakes can slow down your cleaning process and make it more frustrating. One major error is neglecting equipment mistakes, like using the wrong tools or not prepping them properly. This can lead to wasted time and potential damage. Additionally, overlooking hazards can cause accidents or delays, such as missing spills or ignoring electrical risks. Rushing through disassembly without a clear plan often results in unnecessary backtracking. Failing to identify and address hazards ahead of time increases the chance of injury or damage, which stalls progress. To keep things moving efficiently, double-check your equipment before starting, follow a logical order, and stay alert for potential hazards. Incorporating proper planning and preparation can significantly improve your efficiency during disassembly. Being aware of grocery savings strategies can help you allocate more time to cleaning rather than worrying about costs. Moreover, understanding disassembly order can streamline your process and prevent unnecessary delays. Recognizing common mistakes and correcting them early can make your cleaning more effective and less stressful. Focusing on tools and equipment maintenance and ensuring they’re in good condition can also prevent unexpected issues. Avoid these mistakes, and you’ll clean smarter, not harder.
Adapting Your Disassembly Strategy for Different Rooms

Adapting your disassembly strategy for different rooms guarantees you work efficiently and safely. Consider furniture intricacy and clutter levels to determine your approach. In a bedroom with simple furniture and minimal clutter, focus on quick disassembly of beds and small fixtures. In contrast, a living room with elaborate furniture and high clutter requires a systematic plan to avoid damage and chaos. Use the table below to guide your strategy:
| Room Type | Key Focus |
|---|---|
| Bedroom | Simplify disassembly; prioritize bed and wardrobe |
| Living Room | Break down complex furniture; clear clutter first |
| Kitchen | Remove bulky appliances; organize disassembled parts |
Tailoring your disassembly order ensures faster, safer cleaning tailored to each room’s furniture complexity and clutter levels. Incorporating essential oils into your cleaning routine can further promote a fresh and calming environment during the process.
Frequently Asked Questions
How Do I Prioritize Which Items to Disassemble First?
You should start by evaluating which items are easiest to disassemble and will give you quick wins, following a logical disassembly sequence. Use prioritization strategies like removing the most accessible parts first to free up space and reduce clutter. Focus on disassembling components that are essential for cleaning or maintenance, and plan your sequence to minimize backtracking. This approach saves time and makes the process more efficient.
What Tools Are Essential for Efficient Disassembly?
You need a sharp screwdriver set, pliers, and a utility knife for efficient disassembly. Focus on proper tool selection based on the fastener types you encounter, and always follow your disassembly checklist to stay organized. Keep these tools handy, and you’ll reduce time spent fumbling, making the process smoother. Having the right tools guarantees you can quickly disassemble items without damaging parts, saving you time and effort.
How Often Should I Reevaluate My Disassembly Order?
A stitch in time saves nine, so you should reevaluate your disassembly order regularly—ideally every few months or after completing significant cleaning tasks. By doing this, you enhance disassembly efficiency and keep your cleaning schedule on track. Changes in equipment, wear, or new tools may impact your process, so staying proactive ensures you maintain peak efficiency and avoid unnecessary delays.
Can Disassembly Order Impact Safety During Cleaning?
Yes, your disassembly order can impact safety during cleaning. Proper disassembly safety involves following a logical sequence to reduce hazards, like avoiding sharp edges or unstable parts. By prioritizing hazard awareness, you prevent accidents and injuries. When you plan your disassembly carefully, you minimize risks, ensure a safer work environment, and make the cleaning process more efficient. Always stay alert to potential hazards and adjust your order as needed for maximum safety.
How Do I Handle Fragile or Delicate Items During Disassembly?
Handle fragile items with finesse, focusing on delicate handling to prevent damage. Use gentle grips and padded protection, ensuring fragile protection during disassembly. Carefully label delicate components and keep them separate from rougher parts. By prioritizing fragile protection and practicing delicate handling, you reduce risks of breakage. This careful, cautious approach keeps your disassembly safe, smooth, and stress-free, saving you time and trouble in the long run.
Conclusion
When you master the art of strategic disassembly, every room becomes a canvas for efficiency. As you develop your plan, you might notice how small adjustments lead to big time savings—almost like the space itself guides you. Remember, cleaning smarter isn’t just about speed; it’s about syncing with your environment. Sometimes, the right order reveals itself when you least expect it, turning routine tasks into moments of effortless flow.