An airless paint sprayer is essential for both DIY enthusiasts and professional painters, providing a range of benefits that enhance the painting process.
Imagine effortlessly achieving a smooth and consistent finish on any surface, whether it’s a wall, furniture, or even a vehicle. With its high pressure and efficient coverage, this sprayer saves time and increases productivity.
Plus, it’s user-friendly and can handle different paint viscosities, ensuring versatility. Say goodbye to overspray and wasted paint, as the airless paint sprayer minimizes both, saving you time and money.
Key Takeaways
- Consistent and even coats for a smooth finish
- Quick and efficient coverage of large areas
- Better paint penetration and adhesion due to high pressure
- User-friendly and easy to operate

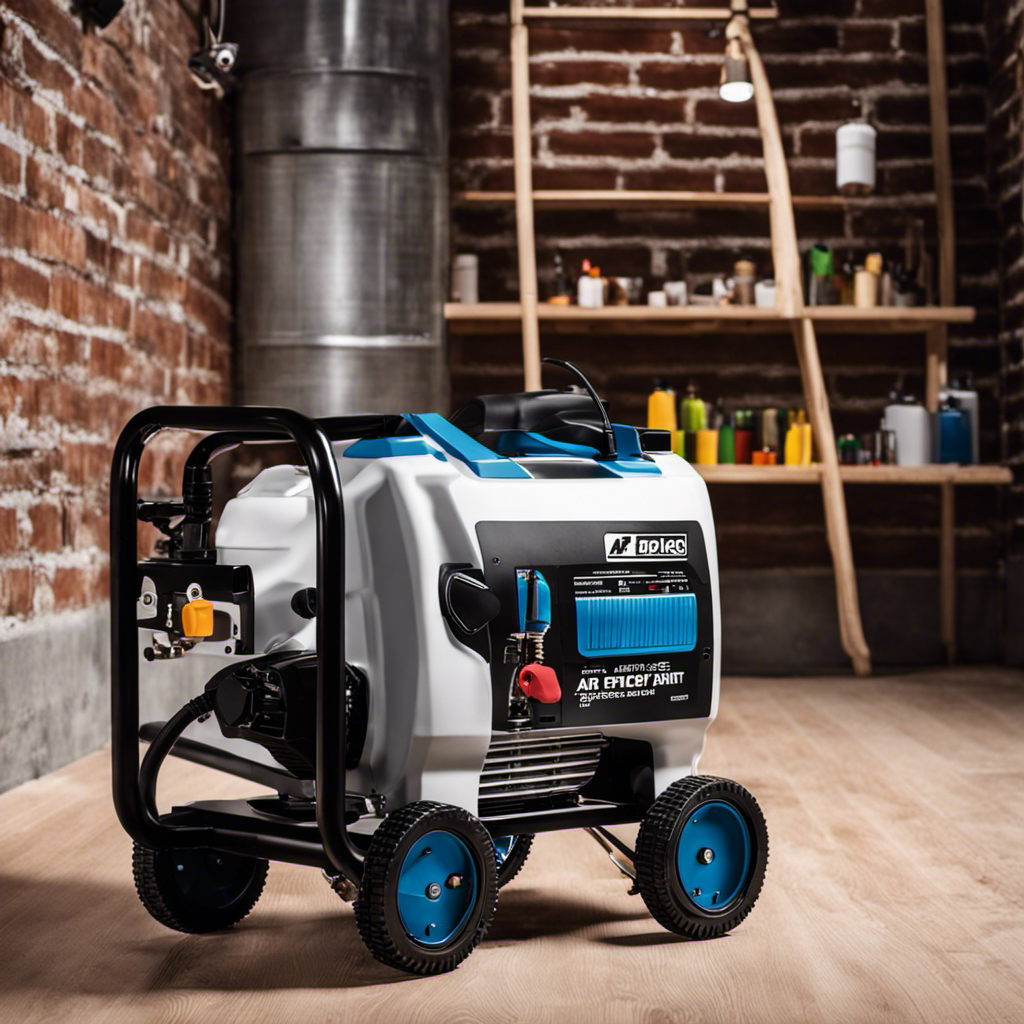
VEVOR 750W Stand Airless Paint Sprayer, 3000PSI High Efficiency Electric Airless Sprayer, Fine and Even Painting Effect, Handheld Paint Sprayers for Home Interior and Exterior Furniture and Fences
- Powerful Motor and High Pressure: 750W motor, 3000 PSI pressure for fast coverage
- High Flow Rate: 1.2 LPM for smooth, continuous painting
- Fast Painting Speed: Up to 5x faster than rolling, 12x faster than brushing
As an affiliate, we earn on qualifying purchases.
As an affiliate, we earn on qualifying purchases.
Consistency in Paint Application
Using an airless paint sprayer ensures consistent application, eliminating the need for manual touch-ups. This tool provides a reliable and uniform coat of paint on various surfaces.
To improve paint adhesion, it is essential to prepare the surface properly by cleaning, sanding, and priming if necessary.
Common mistakes to avoid when using an airless paint sprayer include using the wrong tip size, spraying too close or too far from the surface, and not maintaining the correct pressure.
Choosing the right tip size ensures proper atomization and coverage.
Maintaining a consistent distance of 12-18 inches from the surface allows for optimal spray pattern and paint distribution.
Adjusting the pressure according to the paint viscosity and surface type is crucial for achieving the desired results.
Efficiency in Coverage
The airless paint sprayer quickly covers large surface areas, allowing for a more efficient painting process.
-
Increased productivity: With its high-pressure spraying, the airless paint sprayer covers large areas in less time compared to manual methods. This means you can complete your painting projects faster and move on to other tasks.
-
Improved paint adhesion: The airless paint sprayer delivers paint with high pressure, ensuring better penetration and adhesion to surfaces. This results in a longer-lasting finish that is less prone to chipping or peeling.
-
Versatility: The airless paint sprayer can be used on a variety of surfaces, including walls, ceilings, furniture, and outdoor surfaces. Its ability to handle different paint viscosities makes it suitable for various projects.
Achieving a Smooth Finish
Achieving a flawless result, the airless paint sprayer atomizes paint into tiny droplets for a mist-like spray. This technique ensures improved coverage and a smooth finish, eliminating visible brush strokes or roller marks. The airless paint sprayer handles a wide range of paint viscosities, making it versatile for different surfaces such as walls, ceilings, furniture, and outdoor areas like fences and decks. It delivers a consistent and professional finish every time. However, like any tool, it may encounter common issues that can be easily troubleshooted. Some common problems include clogged nozzles, uneven spray pattern, or paint splattering. To troubleshoot these issues, ensure proper cleaning and maintenance of the sprayer, check for proper paint viscosity, and adjust the pressure settings accordingly. By following these paint sprayer techniques and troubleshooting common issues, users can achieve a smooth and flawless finish with their airless paint sprayer.
| Common Issues | Troubleshooting Techniques |
|---|---|
| Clogged nozzles | Clean the nozzle thoroughly |
| Uneven spray pattern | Adjust the pressure settings |
| Paint splattering | Check paint viscosity and thin if necessary |
Versatility on Different Surfaces
The airless paint sprayer is a must-have tool for any project because it adapts to various surfaces. It can easily paint walls, ceilings, furniture, and outdoor surfaces like fences and decks. It can handle different materials such as wood, metal, and concrete, providing consistent and professional results.
One of the key advantages of the airless paint sprayer is its enhanced paint adhesion. The high-pressure spraying ensures better penetration into the surface, resulting in improved paint adhesion. This reduces the risk of peeling or chipping over time and creates a strong bond between the paint and the surface, enhancing the longevity of the finish.
The airless paint sprayer also offers versatile performance. It can handle a wide range of paint viscosities, allowing for use on different surfaces. With adjustable pressure settings and various tip sizes, it provides precise control and coverage for any project.
Waste Reduction and Overspray Control
By minimizing excess paint and providing precise control, the airless paint sprayer helps to reduce waste and control overspray. This waste reduction and overspray control contribute to a reduced environmental impact.
The airless paint sprayer achieves this by atomizing paint into fine particles, which reduces the amount of paint used and minimizes overspray. With adjustable pressure settings and a wide range of tip sizes, the sprayer allows for precise spray control on different surfaces.
This not only ensures even distribution of paint but also eliminates the need for excessive touch-ups or reapplication. The airless paint sprayer’s ability to minimize waste and control overspray makes it an efficient and environmentally friendly tool for any painting project.
Time and Cost Savings
Using an airless paint sprayer saves both time and money due to its quick and efficient coverage of large areas. Here are some pros and cons of using airless paint sprayers:
Pros:
- Consistent and even coats for a smooth finish
- Better paint penetration and adhesion due to high pressure
- User-friendly and easy to operate
- Suitable for both DIY enthusiasts and professional painters
Cons:
- Requires more setup and cleanup compared to manual methods
- Can produce overspray if not used correctly
- Requires more paint compared to traditional methods
When choosing the best airless paint sprayers, consider factors such as power, pressure range, and durability. Look for sprayers that offer adjustable pressure settings and a wide range of tip sizes to accommodate different surfaces. Additionally, check customer reviews and ratings to ensure reliability and performance.
Overall, airless paint sprayers offer time and cost savings by providing quick and efficient coverage, but it is important to weigh the pros and cons before making a decision.
Professional-Quality Results
Achieving professional-quality results is possible with an airless paint sprayer due to its ability to deliver a flawless and even finish. This tool provides professional grade performance, ensuring a flawless paint application every time.
The high-pressure spraying system atomizes paint into fine particles, resulting in a mist-like spray that eliminates visible brush strokes or roller marks. It handles a wide range of paint viscosities, making it suitable for different surfaces such as walls, ceilings, furniture, and outdoor surfaces like fences and decks.
The airless paint sprayer’s versatility and consistent performance ensure improved coverage and paint adhesion. Additionally, it minimizes overspray and waste, reducing the amount of paint used and saving both time and money.
With an airless paint sprayer, achieving professional-quality results is within reach for DIY enthusiasts and professional painters alike.
Frequently Asked Questions
Are Airless Paint Sprayers Suitable for All Types of Paint?
Airless paint sprayers are suitable for a wide range of paint types, including latex, oil-based, and acrylic paints. They provide excellent coverage and adhesion due to their high-pressure spraying mechanism. However, it’s important to note that certain specialty paints, such as textured or metallic finishes, may not work well with airless sprayers.
Additionally, airless sprayers can create overspray, which may require careful masking and protection of surrounding areas.
Overall, airless paint sprayers offer efficient and consistent results for most paint types.
Can Airless Paint Sprayers Be Used on Textured Surfaces?
Airless paint sprayers are recommended for textured surfaces as they can effectively handle the unique challenges presented by these surfaces. The high-pressure spraying mechanism ensures that the paint reaches all the nooks and crannies, providing even coverage.
However, it is important to choose the right type of paint for textured surfaces to ensure optimal adhesion. Latex or acrylic paints are generally recommended as they have good flexibility and can adhere well to textured surfaces, creating a smooth and professional finish.
How Do Airless Paint Sprayers Handle Corners and Edges?
Airless paint sprayers excel at handling challenges when it comes to corners and edges. With proper technique, they can achieve a smooth and even finish in these areas.
One tip is to angle the sprayer slightly towards the corner or edge to ensure proper coverage. It is also important to maintain a consistent distance from the surface and use a steady hand to avoid overspray.
With these techniques, airless paint sprayers can effectively tackle corners and edges with precision.
Is It Necessary to Thin Paint Before Using an Airless Paint Sprayer?
Thinning paint is not always necessary when using an airless paint sprayer. However, it is recommended to check the manufacturer’s instructions for the specific sprayer model and the type of paint being used.
Some thicker paints may require slight thinning to ensure proper atomization and smooth spray application. Generally, latex and oil-based paints are suitable for airless sprayers, while thicker paints like primers and textured coatings may need to be thinned for optimal performance.
Can Airless Paint Sprayers Be Used for Small-Scale Projects or Touch-Ups?
Airless paint sprayers are not just limited to large-scale projects; they can also be used for small-scale projects or touch-ups. These sprayers offer several benefits when it comes to furniture refinishing.
They provide consistent and even coverage, ensuring a smooth finish. The high-pressure spraying allows for better paint penetration and adhesion. Additionally, the adjustable pressure settings and wide range of tip sizes make it easy to control and achieve precise results.
Overall, airless paint sprayers are a versatile tool for any painting task, big or small.
Conclusion
In conclusion, the airless paint sprayer proves to be a true champion in the world of painting. Like a skilled artist with a magic brush, it brings consistency and precision to every stroke, ensuring a flawless and professional finish.
With its lightning-fast coverage, it swiftly conquers even the largest of surfaces, saving valuable time and effort. Its adaptability to different viscosities and surfaces makes it a versatile tool in any painter’s arsenal.
And let’s not forget its eco-friendly nature, as it minimizes waste and overspray, keeping the painting process efficient and cost-effective.
Embrace the power of the airless paint sprayer, and watch your painting projects come to life with unparalleled beauty and efficiency.

Drenched in creativity and armed with a fountain pen, Isolde weaves words as gracefully as a painter strokes their canvas. A writer for Paint Sprayer Zone, her passion for colors, textures, and spaces finds a harmonious blend with her profound knowledge of painting tools and techniques.
Having grown up in a family of artists, Isolde’s tryst with paints began early. While her relatives expressed themselves on canvas, Isolde found her medium in words. She dedicated herself to chronicling the world of painting, understanding the nuances of each tool, and the artistry behind every spritz of a paint sprayer.