Connect with us

How-To & Tips

Assembly and Safety Tips for Spraytech EP2105 Airless Paint Sprayer

Published

on

An image showcasing the step-by-step assembly process of the Spraytech EP2105 Airless Paint Sprayer, highlighting key safety tips

The Spraytech EP2105 airless paint sprayer has become a favorite among professional painters and enthusiastic DIY enthusiasts alike. Its solid performance and ease of use have made it a top selection for numerous projects.

In this article, we will explore the assembly and safety tips for this paint sprayer, ensuring that users can confidently and efficiently complete their painting projects.

From unboxing and organizing the components to attaching the handle and trigger assembly, we will provide step-by-step instructions to help readers get started.

So let’s dive in and discover the secrets to successful assembly and safe operation of the Spraytech EP2105.

Key Takeaways

  • Proper assembly and organization of components is important for a smooth painting experience.
  • Wearing protective gear while using the sprayer is essential for safety.
  • Regular maintenance and cleaning of the sprayer is crucial for optimal performance and longevity.
  • Familiarize yourself with the different parts of the sprayer and their functions.

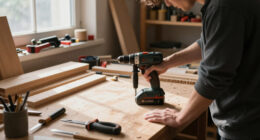
Unboxing and Component Organization

Advertisement

The user should unbox the Spraytech EP2105 and gather all the components in order to proceed with the assembly process. To ensure a smooth painting experience, here are some unboxing tips and guidelines for organizing the components.

Handle the spray gun with care to avoid any damage. It is recommended to read the instruction manual for specific unboxing tips and safety information.

Once unboxed, organize the components on a clean, flat surface. Lay out the spray gun, hose, nozzle, and any additional accessories provided. By organizing the components beforehand, it will be easier to locate and assemble each part during the assembly process.

Taking the time to properly unbox and organize the components will contribute to a successful and efficient assembly of the Spraytech EP2105 airless paint sprayer.

Familiarization With Sprayer Parts and Assembly

To become familiar with the different parts of the sprayer, one should start by understanding the motor and pump responsible for pressurizing and delivering the paint. These two components work together to ensure a smooth and consistent flow of paint.

Advertisement
Sprayer Parts Description
Motor and Pump Pressurizes the paint and delivers it through the nozzle
Nozzle and Spray Gun Controls the spray pattern and flow rate
Hoses and Filters Connect the pump to the spray gun and ensure a smooth flow of paint
Protective Gear Goggles, gloves, and a respirator should be worn to ensure safety
Handle and Trigger Assembly attaches the handle and trigger to prepare the sprayer for use

Once the motor and pump are understood, one can move on to assembling the handle and trigger assembly. This involves aligning the holes and tightening the screws to securely attach the handle. The trigger is then slid onto the handle and secured with a screw. It is important to ensure that the handle and trigger assembly is securely attached before moving on to attaching the spray gun and hose to the sprayer.

Handle and Trigger Assembly

Align the holes and tighten the screws to securely attach the handle during the assembly of the Spraytech EP2105 airless paint sprayer. Proper attachment of the handle and trigger assembly is crucial for the smooth operation of the sprayer. Here are some tips for ensuring a secure assembly:

  1. Double-check alignment: Make sure the holes on the handle and the sprayer body are properly aligned before tightening the screws. This will ensure a stable attachment.

  2. Tighten screws securely: Use a screwdriver or wrench to tighten the screws firmly. Avoid over-tightening, as this may cause damage to the components.

  3. Test for stability: After attaching the handle, give it a gentle tug to ensure it is securely in place. If there is any wobbling or movement, recheck the alignment and tighten the screws further if necessary.

  4. Regular maintenance: Periodically inspect the handle and trigger assembly for any signs of loosening or damage. Replace any worn-out screws or components immediately to prevent accidents during operation.

It is important to securely attach the handle and trigger assembly to ensure the safe and effective use of the Spraytech EP2105 airless paint sprayer. Improper assembly may result in issues such as leaks or loss of control during painting. Follow these tips to avoid common problems and ensure a smooth painting experience.

Advertisement

Remember to always wear appropriate safety gear, such as goggles and gloves, when operating the sprayer.

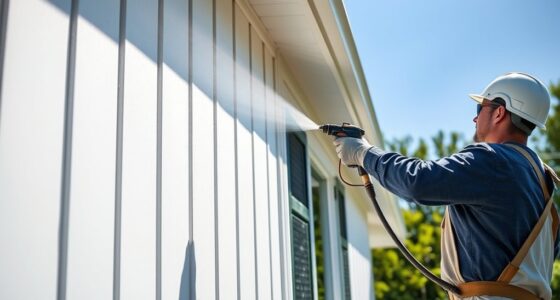
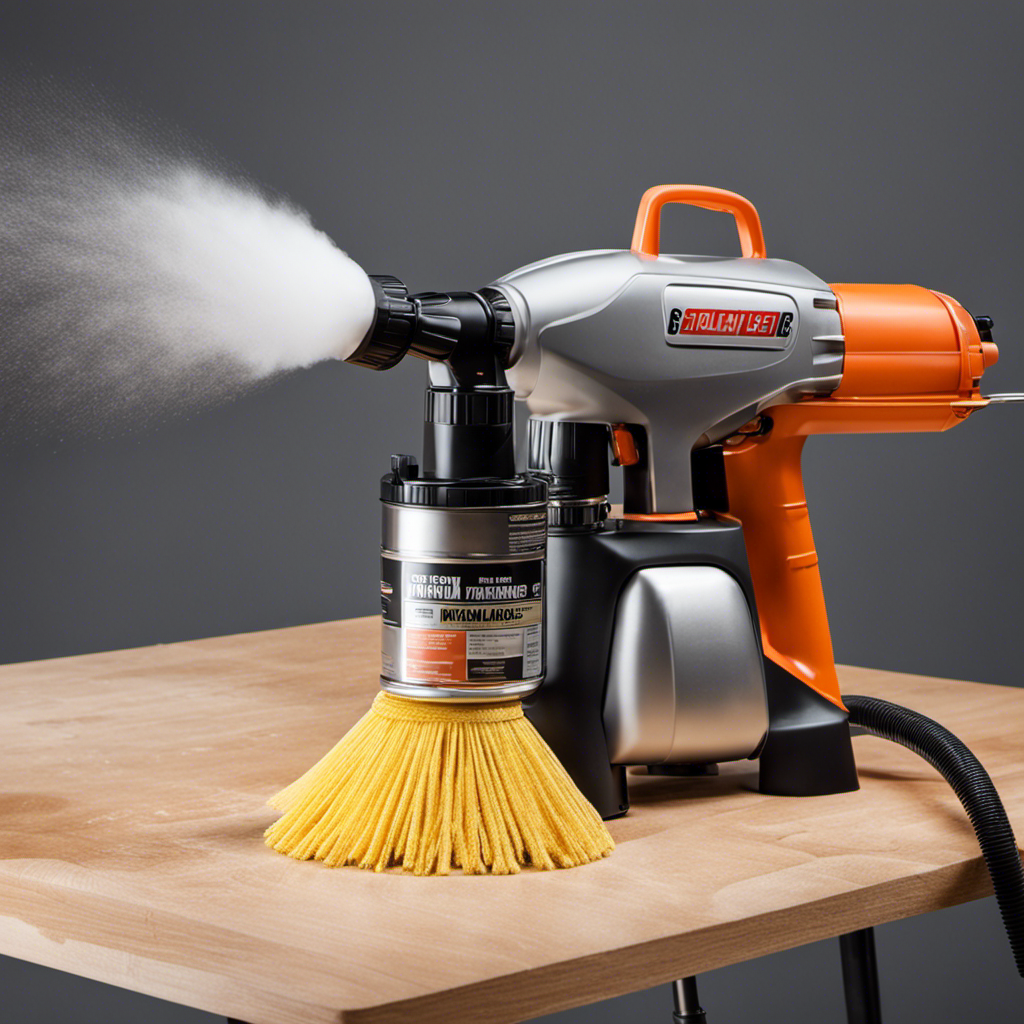
Spray Gun and Hose Attachment

After cleaning the spray gun to remove any paint residue, securely attach the hose to prevent leaks when using the Spraytech EP2105 airless paint sprayer.

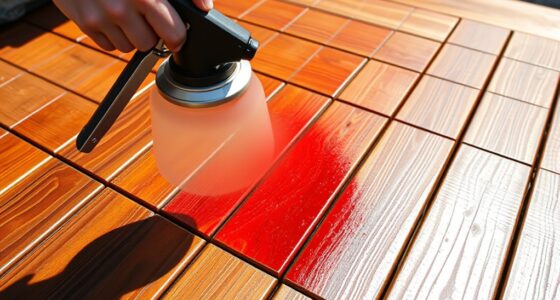
For optimal performance and desired finishes, it is important to select the appropriate spray tip. The Spraytech EP2105 offers different spray tip options to accommodate various painting techniques. Whether you want a fine finish or a broader coverage, there is a spray tip available to meet your needs.

Experimenting with different spray tips can help you achieve different effects and textures in your painting projects.

Additionally, the EP2105 allows for alternative painting techniques such as airless spraying, which provides a more even distribution of paint and reduces overspray.

Advertisement

Testing, Cleaning, and Storage

When testing the Spraytech EP2105 airless paint sprayer, it is important to start with a small surface to ensure proper functionality before beginning a larger project.

Here are some key points to consider regarding testing, cleaning, and storage of the sprayer:

  1. Proper cleaning techniques: After each use, thoroughly clean the sprayer to remove any paint residue. This will prevent clogs and ensure optimal performance in future projects.

  2. Importance of regular maintenance: Regular maintenance is crucial for the longevity of the sprayer. This includes checking and cleaning filters, lubricating moving parts, and inspecting hoses for any signs of wear or damage.

  3. Testing on a small surface: Before embarking on a larger project, it is recommended to test the sprayer on a small surface. This allows you to familiarize yourself with the spray pattern and adjust settings if needed.

  4. Storage: Store the sprayer in a safe and dry place to protect it from damage. This will help to extend its lifespan and ensure it is ready for future use.

Troubleshooting and Maintenance Tips

The user can troubleshoot common issues and ensure proper maintenance of the airless paint sprayer by following these helpful tips.

Advertisement

When encountering common issues with the Spraytech EP2105 airless paint sprayer, there are a few steps to resolve them.

If the spray pattern is uneven or blotchy, check if the nozzle is clogged and clean it using a nozzle cleaning tool.

If the sprayer is not priming properly, check if the suction tube is securely attached and try priming again.

To keep your Spraytech EP2105 airless paint sprayer in top condition, it is essential to perform regular maintenance.

Clean the sprayer thoroughly after each use to prevent paint buildup and clogging.

Advertisement

Inspect the hoses and filters for any damage and replace if necessary.

Additionally, lubricate the moving parts of the sprayer to ensure smooth operation.

Frequently Asked Questions

How Do I Properly Clean the Spray Gun and Hose After Each Use?

To properly clean the spray gun and hose after each use, it is important to follow proper cleaning techniques. This ensures the longevity and optimal performance of the Spraytech EP2105 airless paint sprayer.

Cleaning should be done immediately after use to prevent paint from drying and clogging the components. Use a cleaning solution recommended by the manufacturer and thoroughly rinse the spray gun and hose.

Maintenance frequency may vary depending on usage, but regular cleaning is essential for proper functioning.

Advertisement

Can the Spraytech EP2105 Airless Paint Sprayer Be Used With Different Types of Paint, Such as Oil-Based or Latex?

The Spraytech EP2105 airless paint sprayer is compatible with different types of paint, including oil-based and latex. This versatility is one of the key advantages of using an airless paint sprayer.

Unlike traditional paint sprayers, the EP2105 can handle a variety of paints, allowing for greater flexibility in your painting projects. Whether you’re working with oil-based or latex paint, this sprayer can provide a smooth and even finish.

Is There a Specific Technique for Achieving Different Spray Patterns, Such as Horizontal, Vertical, or Circular?

Achieving consistent spray patterns with the Spraytech EP2105 airless paint sprayer involves maintaining the proper distance from the surface, choosing the right nozzle size, and adjusting the pressure settings.

By keeping a consistent distance from the surface, the spray pattern will remain uniform.

Selecting the appropriate nozzle size will determine the width and shape of the pattern, whether it’s horizontal, vertical, or circular.

Advertisement

Adjusting the pressure settings will also affect the spray pattern, allowing for finer or broader coverage.

What Safety Precautions Should I Take When Using the Spraytech EP2105 Airless Paint Sprayer?

Proper safety precautions should be taken when using the Spraytech EP2105 airless paint sprayer. It is important to wear protective gear such as goggles, gloves, and a respirator to protect against paint fumes and splatters. Adequate ventilation in the work area is also essential.

Additionally, cleaning techniques should be followed to ensure the sprayer is properly maintained. After each use, the sprayer should be thoroughly cleaned to remove any paint residue and prevent clogs or malfunctions.

How Often Should I Perform Maintenance on the Motor and Pump of the Spray Gun, and What Does It Entail?

How often should one perform maintenance on the motor and pump of the spray gun, and what does it entail?

Regular maintenance of the motor and pump is essential for optimal performance. Cleaning the spray gun and hose after each use helps prevent clogs and ensures a smooth flow of paint.

Advertisement

Regularly inspecting and lubricating the motor and pump components can help extend their lifespan. Following the manufacturer’s guidelines for maintenance and cleaning will help keep the spray gun in good working condition.

Conclusion

In conclusion, the assembly and safety tips for the Spraytech EP2105 airless paint sprayer provide users with a comprehensive guide to ensure proper organization, assembly, and maintenance of the sprayer.

By following these steps, users can optimize the performance and longevity of the sprayer while ensuring their safety.

One interesting statistic to note is that regular cleaning after each use can increase the lifespan of the sprayer by up to 50%.

With these tips, users can confidently tackle their painting projects with efficiency and ease.

Advertisement

Continue Reading
Advertisement

How-To & Tips

Mastering Airless Sprayer Techniques for Perfect Ceiling Painting

Published

on

By

An image showcasing a skilled painter effortlessly operating an airless sprayer, flawlessly coating a ceiling with even layers of paint, capturing the precision and finesse required to achieve a flawless finish

Mastering the use of airless sprayers is essential for achieving a professional finish when painting ceilings. Proper preparation and technique are key factors that make up 90% of the success of a ceiling painting project.

In this comprehensive guide, beginners and DIY enthusiasts will learn the importance of selecting the right equipment, protecting the surrounding area, and maintaining a consistent distance from the ceiling.

With tips on cleaning, overlapping passes for complete coverage, and evaluating the finished result, this article will help you achieve flawless ceilings every time.

Key Takeaways

  • Proper preparation and equipment selection are crucial for achieving a professional finish when painting a ceiling with an airless sprayer.
  • Maintaining a consistent distance from the ceiling and overlapping each pass slightly ensures complete coverage.
  • Allow sufficient drying time before applying a second coat and touch up any areas with thin coverage or uneven paint.
  • Proper cleanup and storage of the sprayer and painting equipment are essential for easy maintenance and future touch-ups.

Importance of Proper Preparation

The painter must use drop cloths or plastic sheets to protect the floor and furniture when preparing for ceiling painting. Proper preparation is crucial for achieving a flawless finish.

Advertisement

Preparation techniques include inspecting and repairing any cracks or holes in the ceiling, as well as cleaning the ceiling to remove dirt and dust. Common mistakes to avoid include skipping the preparation steps and not protecting the surrounding surfaces.

To ensure a flawless finish, here are some preparation tips: thoroughly clean the ceiling before painting, patch any imperfections, and consider the overall aesthetic of the room when choosing a paint color.

Selecting the Right Equipment

When selecting the right equipment, it is important to consider factors such as the size and texture of the ceiling.

Choosing the right nozzle is crucial for achieving a smooth and even spray pattern. Different nozzles offer different spray widths and fan patterns, so it’s important to select one that suits the size of the ceiling.

Troubleshooting common issues with the equipment is also essential for a successful painting job. If the sprayer is clogging or producing uneven coverage, it may be due to improper setup or maintenance. Regularly cleaning the sprayer and inspecting the filters and tips can help prevent these issues.

Advertisement

Protecting the Surrounding Area

To protect the surrounding area, it’s important to use drop cloths or plastic sheets and inspect for any cracks or holes in the ceiling. This will prevent paint from splattering onto furniture and other objects.

Additionally, taking the following steps can help prevent overspray and ensure a smooth painting process:

  • Covering furniture with drop cloths or plastic sheets
  • Securing the drop cloths or plastic sheets with tape or clamps
  • Masking off any areas that should not be painted, such as light fixtures or vents

Inspecting and Repairing Ceiling Imperfections

Inspecting and repairing any cracks or holes in the ceiling is an essential step in achieving a professional finish when using an airless sprayer.

Before starting the painting process, it is important to thoroughly inspect the ceiling for any imperfections. Cracks and holes can disrupt the smoothness of the final paint job and may require additional touch-ups later on.

Advertisement

To repair cracks, use a joint compound or spackling paste to fill them in, making sure to smooth out the surface. For smaller holes, a lightweight spackle can be used.

Once the repairs are complete, allow sufficient drying time before proceeding with painting.

Cleaning the Ceiling Surface

Using a damp cloth or sponge, you can easily clean the ceiling surface to remove any dirt or dust particles.

Advertisement

To ensure a thorough cleaning, here are some effective cleaning techniques and the best cleaning solutions to use:

  • Dusting: Start by gently dusting the ceiling with a microfiber cloth or a feather duster to remove loose particles.

  • Vacuuming: If the ceiling is heavily soiled, use a vacuum cleaner with a soft brush attachment to help remove stubborn dirt and cobwebs.

  • Mild soap solution: Mix a small amount of mild dish soap with warm water. Dip the cloth or sponge into the solution and wring out excess moisture. Wipe the ceiling in gentle, circular motions to remove any stains or grime.

Remember to always test a small, inconspicuous area before cleaning the entire ceiling.

Additionally, avoid using abrasive cleaners or excessive moisture, as they can damage the ceiling surface.

Choosing the Perfect Paint Color

When selecting the ideal paint color, homeowners should consider the overall aesthetic of the room. Choosing the right paint finish and creating a color scheme are crucial for achieving the desired look.

To create a color scheme, homeowners can start by identifying the main color they want to use and then selecting complementary or contrasting colors for accents or trim. It’s important to consider factors such as natural light, room size, and existing furniture or decor when choosing paint colors.

Advertisement

Additionally, homeowners should consider the desired mood or atmosphere they want to create in the room. By carefully selecting paint colors and finishes, homeowners can create a cohesive and visually pleasing space.

Setting the Correct Sprayer Pressure

To achieve a smooth finish, homeowners need to ensure they set the correct sprayer pressure for their painting project. Adjusting sprayer settings is crucial in preventing overspray and achieving professional results. Here are some key points to consider:

  • Consult the sprayer’s manual or manufacturer’s instructions for recommended pressure settings.
  • Start with a low pressure setting and gradually increase until the desired coverage is achieved.
  • Test the sprayer on a small surface to check for any inconsistencies or overspray.
  • Adjust the nozzle settings to control the spray pattern and reduce overspray.
  • Maintain a consistent distance from the ceiling while spraying to ensure even coverage.
  • Use a sweeping motion and overlap each pass slightly for complete and uniform application.

Preparing the Airless Sprayer

When it comes to preparing the airless sprayer for painting, there are several steps to follow to ensure a smooth and efficient process.

One of the pros of using an airless sprayer is that it allows for quick and even application of paint on large surfaces like ceilings.

However, there are also some cons to consider, such as the potential for overspray and the need for proper ventilation.

Before starting, it is important to troubleshoot common issues with airless sprayers, such as clogs or uneven spray patterns.

Advertisement

This can be done by checking the sprayer’s filters and tips, and adjusting the pressure and nozzle settings accordingly.

Additionally, it is crucial to clean the sprayer immediately after use to prevent clogs and to properly store all painting equipment for future use.

Testing the Sprayer’s Performance

The painter checks the sprayer’s performance by testing it on a small surface to ensure it’s working correctly. This step is crucial in identifying any issues with the sprayer settings and troubleshooting them before starting the actual painting process.

Here are some important things to consider when testing the sprayer’s performance:

  • Start by setting the sprayer pressure to the recommended level for the type of paint being used.
  • Adjust the sprayer’s nozzle settings to achieve the desired spray pattern.
  • Test the sprayer on a small surface, such as a piece of cardboard or scrap wood, to observe the spray pattern, coverage, and consistency.
  • Look for any issues like uneven spray, clogs, or drips and make the necessary adjustments or repairs.
  • Ensure that the sprayer is delivering the paint smoothly and evenly to achieve a professional finish.

Adjusting Spray Pattern for Even Coverage

Adjusting the sprayer’s nozzle settings allows the painter to achieve an even spray pattern for consistent coverage.

To adjust the spray pattern, the painter can start by adjusting the nozzle size. A smaller nozzle size will result in a narrower spray pattern, while a larger nozzle size will create a wider pattern. This allows for flexibility in covering different areas of the ceiling.

Advertisement

Additionally, troubleshooting common sprayer issues can help ensure an even spray pattern. For example, if the sprayer is producing an uneven pattern, it may be due to a clogged nozzle. Cleaning or replacing the nozzle can help resolve this issue.

Maintaining Consistent Distance From the Ceiling

Maintaining a consistent distance from the ceiling ensures an even and smooth application of paint when using an airless sprayer. This technique helps prevent overspray and ensures that the paint is evenly distributed across the surface.

To achieve this, follow these steps:

  • Stand at a distance of about 12-16 inches from the ceiling.
  • Hold the sprayer at a slight angle to the surface, pointing it towards the ceiling.
  • Move the sprayer in a steady and controlled motion, keeping the distance consistent.
  • Overlap each pass slightly to ensure complete coverage.
  • Take breaks when needed to prevent fatigue and maintain accuracy.

Overlapping Each Pass for Complete Coverage

To achieve complete coverage when using an airless sprayer, it is important to overlap each pass slightly. This technique ensures that no areas are missed and helps avoid paint drips. By overlapping the spray pattern, the paint is applied evenly across the entire surface, resulting in a professional finish. Additionally, overlapping the passes helps to blend the paint and eliminate any visible lines or streaks.

When troubleshooting common sprayer issues, such as clogging or uneven spray patterns, overlapping each pass can be a helpful solution. It allows for better distribution of the paint and helps to prevent any blockages in the sprayer nozzle. By following this technique, painters can achieve consistent coverage and avoid potential problems during the painting process.

Remember to maintain a steady and consistent distance from the ceiling while overlapping each pass to ensure optimal results.

Advertisement

Allowing Sufficient Drying Time

Allowing enough time for the paint to dry is crucial in achieving a smooth and professional finish. To ensure a successful drying process, there are a few key steps to follow:

  • Avoiding paint drips:

  • Apply thin and even coats of paint to prevent drips from forming.

  • Use a high-quality brush or roller to minimize the risk of drips.

  • Check for any drips or excess paint and immediately smooth them out before they dry.

  • Using proper lighting:

  • Ensure that the room is well-lit to accurately evaluate the drying progress.

  • Use natural or artificial light sources to identify any missed spots or imperfections.

  • Adjust the lighting angle to reveal any areas that may need touch-ups.

Evaluating and Touching Up the Painted Ceiling

The painter evaluates the painted ceiling for any areas that may need touch-ups or additional coverage. This step is crucial to ensure a professional finish. They carefully inspect the ceiling, using proper lighting to identify any missed spots or imperfections. They consider the paint’s sheen and adjust the lighting accordingly for accurate evaluation.

If they find areas with thin coverage or uneven paint, they use touch-up techniques to correct them. This may involve using a brush or roller to apply additional paint to those areas. They make sure to blend the touch-up paint seamlessly with the rest of the ceiling to achieve a smooth and consistent appearance.

Frequently Asked Questions

Can an Airless Sprayer Be Used on Textured Ceilings?

Yes, an airless sprayer can be used on textured ceilings. However, there are some pros and cons to consider.

The main advantage is that the high pressure of the sprayer can easily cover the uneven surface of the texture. This saves time and ensures a more even finish.

Advertisement

On the other hand, the texture can make it harder to control overspray, which may require additional masking and protection. Regular airless sprayer maintenance is also important to prevent clogs and ensure optimal performance.

How Do You Prevent Overspray When Using an Airless Sprayer?

To prevent overspray when using an airless sprayer, it’s crucial to maintain proper maintenance and follow some key techniques.

First, ensure the sprayer is set at the correct pressure and nozzle settings for an even spray pattern.

Second, maintain a consistent distance from the ceiling while spraying and overlap each pass slightly for complete coverage.

Lastly, regularly clean the sprayer to prevent clogs and ensure optimal performance.

Advertisement

What Is the Best Method for Cleaning the Sprayer After Use?

The best method for cleaning the sprayer after use involves several maintenance tips.

First, it’s important to clean the sprayer immediately to prevent clogs.

Next, remove and clean any paint filters or tips.

Dispose of unused paint properly according to local regulations.

Store leftover paint in airtight containers for future touch-ups.

Advertisement

Finally, properly clean and store all other painting equipment.

Following these steps will ensure that the sprayer remains in good condition for future use.

How Long Should Paint Dry Before Applying a Second Coat?

The paint should be allowed to dry for a sufficient amount of time before applying a second coat. This ensures that the first coat has properly adhered to the ceiling and avoids any smudging or blending of the layers.

The exact drying time can vary depending on factors such as temperature and humidity, so it is important to refer to the paint manufacturer’s instructions for specific guidance.

Can an Airless Sprayer Be Used on Popcorn Texture Ceilings?

Using an airless sprayer on popcorn texture ceilings can be challenging due to the uneven surface. However, with proper maintenance and technique, it is possible to achieve satisfactory results.

Advertisement

Regular maintenance of the sprayer, such as cleaning and adjusting the pressure and nozzle settings, is crucial for optimal performance.

The benefits of using an airless sprayer, such as faster application and better coverage, still apply to popcorn texture ceilings.

It’s important to practice and test on a small area before tackling the entire ceiling.

Conclusion

In conclusion, mastering airless sprayer techniques is crucial for achieving a flawless finish when painting ceilings. By following the proper preparation steps, selecting the right equipment, and protecting the surrounding area, DIY enthusiasts can achieve professional-looking results.

For example, John, a DIY enthusiast, used the airless sprayer techniques outlined in this guide to paint his textured ceiling. He followed the recommended distance, overlapping each pass, and allowed sufficient drying time between coats. The end result was a perfectly painted ceiling that enhanced the overall look of his room.

Advertisement

By following these techniques, anyone can achieve a flawless finish when painting ceilings.

Continue Reading

How-To & Tips

Mastering Airless Sprayer Techniques for Flawless Paint Finish

Published

on

By

An image showcasing a skilled painter effortlessly using an airless sprayer, evenly coating a surface with flawless precision

Are you in search of the perfect paint finish? You’ve come to the right place. Mastering the use of an airless sprayer is essential for achieving professional-quality results.

In this article, we will delve into the world of airless sprayers and explore the proper techniques that will leave your surfaces streak-free and flawless.

From understanding the sprayer system to choosing the right paint and adjusting the spray pressure, we will cover all the essential steps to help you achieve a smooth and impeccable finish every time.

So, let’s dive in and master those airless sprayer techniques!

Key Takeaways

  • Choosing the right tip size ensures proper atomization and even application of paint.
  • Maintaining a consistent distance from the surface and moving in a steady, overlapping motion helps prevent streaks.
  • Proper maintenance and correct usage of the sprayer system are crucial to avoid paint streaks.
  • Thinning paint allows for better atomization and smoother application.

Understanding the Airless Sprayer System and Proper Technique

Advertisement

The airless sprayer system uses high pressure to force paint through a small opening, creating a fine mist that ensures a smooth and even application of paint. Proper sprayer maintenance and troubleshooting techniques are essential for achieving optimal results.

Regularly cleaning the sprayer and inspecting and replacing worn parts can prevent issues that may result in paint streaks. Lubricating the sprayer properly ensures smooth operation. Troubleshooting techniques, such as checking for clogs or blockages in the sprayer and adjusting the spray pattern and pressure, help address any problems that arise during the painting process.

Proper Surface Preparation for a Flawless Finish

Inspecting the surface for imperfections and rough spots before painting is an essential step in achieving a professional-looking result. To ensure a flawless finish, one must use proper sanding techniques to smooth out any bumps or uneven areas.

Choosing sandpaper with the appropriate grit is crucial for achieving the desired level of smoothness. After sanding, it is important to thoroughly clean the surface to remove dust and debris.

Once the surface is clean, applying a primer is the next step in the priming process. The primer seals the surface and provides a smooth base for paint adhesion.

Advertisement

Proper surface preparation, including sanding and priming, minimizes the chances of paint streaks and ensures a professional-looking finish. Taking the time to properly prepare the surface will result in a flawless paint application.

Choosing the Right Paint and Thinning Ratio

To achieve a smooth and even application of paint, one must consider the appropriate paint type and thinning ratio. The importance of proper paint storage and handling cannot be overstated.

Storing paint in a cool, dry place and sealing the containers tightly help maintain its quality. Before starting a project, it is crucial to mix the paint thoroughly to ensure consistent color and texture.

Advertisement

Achieving optimal paint coverage also relies on the right spraying technique. Maintaining a consistent distance from the surface and moving in a steady, overlapping motion ensures an even coat. Adjusting the spray pressure and using the correct tip size further contribute to a flawless finish.

Adjusting the Spray Pressure for Consistent Results

Achieving consistent results with an airless sprayer relies on adjusting the spray pressure to find the optimal setting for the desired spray pattern. Here are some spray pressure adjustment tips and troubleshooting techniques to ensure a flawless paint finish:

  1. Start with a low pressure setting and gradually increase it until the desired spray pattern is achieved.
  2. Use a pressure gauge to accurately measure and adjust the spray pressure.
  3. Check the manufacturer’s recommendations for the optimal pressure range for the specific paint.

By testing the spray pattern on a scrap surface before starting the project and making proper spray pressure adjustments, you can eliminate paint streaks and achieve professional-looking results.

Troubleshooting common spray pressure issues involves checking for clogs or blockages in the sprayer and adjusting the pressure as needed. Regularly cleaning and maintaining the sprayer, as well as using filters and strainers, will help prevent issues and ensure a smooth spraying experience.

Preventing Clogs and Blockages for Smooth Spraying Experience

Advertisement

Regularly cleaning and maintaining the sprayer, as well as using filters and strainers, helps prevent clogs and blockages, ensuring a smooth spraying experience. Cleaning techniques and troubleshooting tips are essential for maintaining an airless sprayer system. By incorporating these practices into your routine, you can minimize the risk of clogs and blockages that can disrupt the paint flow and lead to uneven application. Additionally, using filters and strainers helps catch debris or particles in the paint, preventing them from entering the sprayer and causing potential issues. To provide a visual representation of the importance of cleaning and maintaining the sprayer, here is a table outlining some effective cleaning techniques and troubleshooting tips:

Cleaning Techniques Troubleshooting Tips
Regularly clean the sprayer after each use Check for clogs or blockages in the sprayer
Thoroughly clean all parts of the sprayer, including the nozzle and hose Adjust the spray pattern and pressure as needed
Inspect and replace worn or damaged parts Properly lubricate the sprayer for smooth operation
Use filters and strainers to catch debris or particles in the paint Address any problems that arise during the painting process

Frequently Asked Questions

What Are Some Common Mistakes to Avoid When Using an Airless Sprayer?

When using an airless sprayer, there are some common mistakes to avoid in order to achieve even coverage.

One mistake is not properly maintaining the sprayer, which can lead to clogs and streaks.

Another mistake is not choosing the right tip size, resulting in uneven application of paint.

Additionally, not adjusting the spray pressure correctly can cause paint streaks.

Advertisement

How Can I Achieve a Smooth Finish on Textured Surfaces With an Airless Sprayer?

Achieving even coverage on textured surfaces with an airless sprayer requires careful consideration of nozzle selection. Choosing the right nozzle size ensures proper atomization and distribution of paint.

A larger nozzle size may be necessary for textured surfaces to allow the paint to flow smoothly and cover the surface evenly.

Additionally, adjusting the spray pressure and maintaining a consistent distance from the surface while moving in a steady, overlapping motion will help achieve a flawless finish on textured surfaces.

What Are Some Tips for Avoiding Overspray When Using an Airless Sprayer?

To avoid overspray when using an airless sprayer, proper cleaning techniques and avoiding clogging issues are essential.

First, regularly clean the sprayer after each use to remove any residual paint or debris that could cause clogs.

Advertisement

Additionally, use filters and strainers to catch any particles in the paint that could lead to clogging.

Can I Use an Airless Sprayer to Apply Different Types of Paint, Such as Latex and Oil-Based?

Using an airless sprayer for intricate paint designs has its pros and cons when it comes to different paint types.

While airless sprayers are versatile and can handle both latex and oil-based paints, it’s important to consider a few factors.

Latex paints are generally easier to spray and clean up, but they may require more thinning for optimal atomization.

Oil-based paints can be more challenging due to their higher viscosity, but they provide a smoother finish.

Advertisement

Proper thinning and adjusting the spray pressure are crucial for achieving flawless results with different paint types.

How Do I Troubleshoot and Fix Uneven Spray Patterns With an Airless Sprayer?

To troubleshoot and fix uneven spray patterns with an airless sprayer, there are a few techniques to keep in mind.

First, check the spray tip for any clogs or blockages and clean it thoroughly.

Next, adjust the spray pressure to ensure a consistent flow of paint.

Additionally, make sure the sprayer is held at a consistent distance from the surface and moved in a steady, overlapping motion.

Advertisement

These troubleshooting techniques will help you achieve a flawless paint finish.

Conclusion

In conclusion, mastering airless sprayer techniques is essential for achieving a flawless paint finish. By using the proper sprayer system and technique, one can avoid those dreaded paint streaks.

It’s ironic how such a seemingly simple task can require attention to detail and precise execution. But fear not, with the right tips, consistent distance, and steady motion, anyone can become a pro at this art.

Just remember to properly maintain your sprayer, prepare your surface, choose the right paint, adjust the spray pressure, and prevent clogs.

Happy painting!

Advertisement

Continue Reading

How-To & Tips

The Importance of Lubrication for Airless Paint Sprayers

Published

on

By

An image showcasing the significance of lubrication for airless paint sprayers

It is crucial to keep airless paint sprayers properly lubricated to maintain their efficiency and enhance their longevity. Regular lubrication can prevent costly repairs and increase the service life of the equipment. It allows for smooth and effective operation by preventing clogs and reducing wear. By reducing friction and wear on moving parts, lubrication improves overall performance.

Different types of lubricants, such as silicone, mineral oil, and synthetic lubricants, can be used. Following manufacturer instructions for regular maintenance, including cleaning the sprayer before lubrication and applying the appropriate amount, is essential for optimal performance.

Troubleshooting tips and maintenance advice are also provided in this article.

Key Takeaways

  • Using the right lubricant is crucial for maintaining an airless paint sprayer.
  • Regular lubrication helps prevent costly repairs and extends the lifespan of the equipment.
  • Proper lubrication is important for smooth and efficient operation, preventing clogs or damage.
  • Lubricating reduces friction and wear on moving parts, extending the lifespan and enhancing efficiency.

The Benefits of Regular Lubrication

Regular lubrication helps prevent costly repairs and extends the lifespan of the equipment. It also ensures smooth and efficient operation of airless paint sprayers. The importance of regular lubrication cannot be overstated. Lubrication plays a crucial role in enhancing the efficiency and lifespan of the equipment. By reducing friction and wear on moving parts, lubrication helps to maintain consistent performance and prevent clogs or damage. It also minimizes the risk of breakdowns and costly repairs.

Advertisement

Proper lubrication ensures that the airless paint sprayer operates smoothly and efficiently, resulting in a high-quality paint finish. Regular maintenance and lubrication are essential for optimal working condition and to maximize the longevity and efficiency of the equipment.

Types of Lubricants for Airless Paint Sprayers

Silicone lubricants provide excellent lubrication, high heat resistance, and water repellency for airless paint sprayers. When it comes to choosing the best lubricant for your airless paint sprayer, silicone lubricants are the top choice. They offer superior lubrication properties that ensure smooth and efficient operation of the equipment.

Additionally, silicone lubricants have high heat resistance, preventing the lubricant from breaking down under the high temperatures generated by the sprayer. They also provide water repellency, protecting the equipment from moisture damage.

As for the lubrication frequency, it is recommended to lubricate your airless paint sprayer according to the manufacturer’s instructions. Regular lubrication is essential for maintaining the longevity and optimal performance of your equipment.

Steps to Properly Lubricate Your Equipment

Advertisement

To properly lubricate the equipment, the user should first clean the sprayer to remove any debris or paint residue. This ensures that the lubricant can effectively coat the necessary parts and provide optimal performance. After cleaning, the following steps should be followed for proper lubrication techniques:

  1. Refer to the manufacturer’s instructions: Different airless paint sprayers may have specific lubrication requirements, so it’s important to follow the guidelines provided.

  2. Use the recommended lubricant: Using the wrong type of lubricant can lead to inadequate lubrication or even damage to the equipment. It’s essential to use the lubricant recommended by the manufacturer for optimal results.

  3. Apply the lubricant to the appropriate parts: Focus on lubricating the moving components of the sprayer, such as the piston rod, packings, and seals. Apply the lubricant evenly and ensure proper coverage.

  4. Avoid over-lubrication: Applying too much lubricant can cause excess buildup, leading to clogs and decreased performance. Use the correct amount of lubricant as specified by the manufacturer.

Troubleshooting Common Lubrication Issues

Properly maintaining the equipment includes troubleshooting common lubrication issues to ensure optimal performance.

Airless paint sprayers may encounter a few common lubrication problems that can affect their efficiency and lifespan.

One common issue is the presence of debris or paint residue in the lubrication system, leading to clogs and reduced lubrication. This can be resolved by thoroughly cleaning the sprayer before applying lubricant.

Advertisement

Another problem is the use of incorrect lubricant or using too much of it, which can cause build-up and interfere with the sprayer’s operation. It is important to use the recommended lubricant and apply the correct amount.

Additionally, improper storage or lack of regular maintenance can also result in lubrication issues.

Maintenance Tips for Extending the Lifespan of Your Sprayer

Regular maintenance and proper storage are key factors in extending the lifespan of an airless paint sprayer. To ensure the longevity of your equipment, follow these storage techniques and cleaning methods:

Advertisement
  1. Store in a clean and dry area: Keep your paint sprayer in a clean and dry environment to prevent dust and moisture buildup, which can lead to clogs and damage.

  2. Clean after each use: Thoroughly clean the sprayer after each use to remove any paint residue or debris that may affect its performance. Use appropriate cleaning solutions and follow the manufacturer’s instructions.

  3. Protect sensitive parts: Cover the spray tip and other sensitive parts with protective caps when not in use to prevent damage and maintain their effectiveness.

  4. Use quality storage containers: Store your paint sprayer in a sturdy and well-sealed container to protect it from accidental damage and ensure its safety during transportation or storage.

Commonly Asked Questions About Lubrication for Airless Paint Sprayers

Using the correct type of lubricant is crucial for maintaining the optimal performance and longevity of an airless paint sprayer. The frequency of lubrication and the choice of lubricant are important factors to consider. To help you make an informed decision, here are some commonly asked questions about lubrication for airless paint sprayers:

Question Answer
Can I use any type of lubricant on my airless paint sprayer? It is recommended to use lubricants specifically designed for airless paint sprayers.
How often should I lubricate my airless paint sprayer? The lubrication frequency depends on the manufacturer’s guidelines, but typically, it is recommended to lubricate the sprayer after every 50 hours of use.
Can I over-lubricate my airless paint sprayer? Yes, over-lubrication can lead to clogs and other issues. Follow the manufacturer’s instructions for the correct amount of lubricant to use.
What are the signs that my airless paint sprayer needs lubrication? If you notice increased friction, unusual noises, or decreased performance, it may be time to lubricate your sprayer.
Are there any specific maintenance tips I should follow to keep my airless paint sprayer in good condition? In addition to regular lubrication, proper storage, cleaning, and inspection of parts are essential for maintaining your airless paint sprayer’s longevity.

Expert Tips for Maintaining Optimal Performance

To ensure optimal performance, experts recommend following the manufacturer’s guidelines for lubrication frequency and choice of lubricant for maintenance of an airless paint sprayer. Proper maintenance is essential for maintaining the longevity and efficiency of the equipment.

Here are some expert tips to help you maintain optimal performance:

  1. Determine the maintenance frequency: Consult the manufacturer’s guidelines to determine how often your airless paint sprayer needs to be lubricated. Regular lubrication is essential for smooth and efficient operation.

  2. Choose the right lubricant: Selecting the appropriate lubricant is crucial for preventing wear and tear on moving parts. Consider factors such as heat resistance, water repellency, and rust prevention when choosing the lubricant.

  3. Clean before lubrication: Before applying the lubricant, ensure that the sprayer is clean and free from any debris or paint residue. This will help prevent clogs and ensure proper lubrication.

  4. Follow the instructions: Apply the lubricant to the recommended parts as per the manufacturer’s instructions. Use the correct amount of lubricant to ensure proper coverage and performance.

Frequently Asked Questions

Can I Use WD-40 or Other General-Purpose Lubricants on My Airless Paint Sprayer?

Using WD-40 or other general-purpose lubricants on an airless paint sprayer is not recommended. Using alternative lubricants can have adverse effects on the equipment. It may not provide the necessary lubrication needed for smooth operation and can potentially cause damage to the sprayer.

It is important to use the lubricants recommended by the manufacturer to ensure optimal performance and to maintain the longevity of the equipment.

Advertisement

Is It Necessary to Use a Specific Brand of Lubricant Recommended by the Manufacturer?

Using alternative lubricants for airless paint sprayers is not recommended. The potential consequences of using the wrong lubricant on an airless paint sprayer can be detrimental to its performance and lifespan. Manufacturers usually provide specific lubricant recommendations for their equipment, and it is necessary to follow these guidelines.

Using a lubricant that is not recommended may result in decreased efficiency, increased wear and tear, and potential damage to the paint sprayer. It is best to stick to the lubricants recommended by the manufacturer to ensure optimal operation and longevity.

How Do I Know if I Have Applied Enough Lubricant to My Airless Paint Sprayer?

To ensure the lifespan of an airless paint sprayer, it’s important to know if enough lubricant has been applied. Common signs of insufficient lubrication include increased friction, sticking parts, and decreased performance.

To maintain the sprayer’s lifespan, it’s crucial to evenly apply the recommended amount of lubricant to the appropriate parts. This will prevent wear and tear, ensure smooth operation, and extend the equipment’s longevity.

Proper lubrication is essential for optimal performance and to avoid costly repairs.

Advertisement

Can I Use a Lubricant That Is Not Recommended for High Heat Resistance on My Sprayer?

Using non-recommended lubricants on airless paint sprayers can pose potential risks and consequences. It is important to use heat-resistant lubricants specifically designed for airless paint sprayers. These lubricants provide the necessary protection against high temperatures and ensure smooth operation without compromising the equipment’s performance.

Using a lubricant that is not recommended for high heat resistance may lead to overheating, damage to the equipment, and decreased efficiency. It is crucial to follow the manufacturer’s guidelines and use the appropriate lubricant for optimal results.

Are There Any Alternative Methods of Lubrication for Airless Paint Sprayers?

Alternative lubrication methods for airless paint sprayers provide additional options for maintaining optimal performance. While using the recommended lubricants is crucial, some users may prefer to explore alternatives.

However, it is important to note that alternative methods may not offer the same level of effectiveness and benefits as the recommended lubricants.

Regular lubrication, using the appropriate lubricant, helps prevent costly repairs, extends equipment lifespan, and ensures smooth operation.

Advertisement

Conclusion

In conclusion, regular lubrication is crucial for the efficient and long-lasting performance of airless paint sprayers. By reducing friction and wear on moving parts, proper lubrication enhances the sprayer’s efficiency and prevents costly repairs.

Choosing the right lubricant, following manufacturer’s instructions, and performing regular maintenance are key steps in ensuring optimal working condition. Remember, ‘a well-oiled machine’ is not just an idiom but a literal expression of the importance of lubrication in maintaining the sprayer’s functionality.

So, keep your sprayer well-lubricated to keep it running smoothly and extend its lifespan.

Continue Reading

Trending

Copyright © 2024 Paint Sprayer Zone Affiliate disclaimer As an affiliate, we may earn a commission from qualifying purchases. We get commissions for purchases made through links on this website from Amazon and other third parties.