
TL;DR

Get business pricing on tools and workshop supplies
- Business-only prices and quantity discounts
- Tax-exempt purchasing
- Multiple users, one account, clear invoices
Airless paint sprayers use a high-pressure pump (1,500–3,000 PSI) to force paint through a small tip, atomizing it without compressed air — making them 5–10x faster than rollers on large surfaces. The tradeoffs are real: 20–30% more paint used, heavy overspray, and 20–45 minutes of cleanup after every session. For one-off projects, renting a pro unit for $70–120 a day often beats buying.
My neighbor spent two full weekends rolling the exterior siding on his 1960s ranch — then watched a painting crew spray an identical house next door in about six hours. Same paint. Same finish quality. The difference wasn’t skill. It was the tool.
An airless paint sprayer is the closest thing DIY painting has to a cheat code. It’s 5–10x faster than a roller on big flat surfaces, it lays down a finish with zero roller texture or brush marks, and it reaches places a roller simply can’t — lattice, fences, shutters, textured ceilings.
But it’s not magic. Overspray drifts, cleanup is a chore, and the learning curve eats your first gallon of paint. Here’s what you actually need to know before you pull the trigger.
Airless sprayers run at 1,500–3,000 PSI to force paint through a small tip, atomizing it without compressed air — and they spray latex with little or no thinni…
Speed gain is 5–10x over rolling, but expect 20–30% more paint consumption and 20–45 minutes of cleanup after every session.
For one-time projects, rent a contractor unit ($70–120/day) instead of buying; buy a $150–400 DIY unit only if you’ll spray several projects a year.
Match the tip to the material: 515 for latex walls, 312–412 for cabinets and enamel, 311–413 for stains — and strain every can of paint.
Never point the gun at skin; high-pressure paint injection is a medical emergency. Clean the pump immediately after use — dried paint is the #1 killer of these…
How Airless Sprayers Work (In Plain English)
An airless paint sprayer uses a high-pressure pump — typically 1,500 to 3,000+ PSI — to force paint through a small tip, atomizing it without compressed air. That’s the whole trick. No air compressor, no turbine. Just brute hydraulic pressure turning a solid stream of paint into a fine fan of droplets.
Why does that matter to you? Because pressure is the variable that drives every other experience you’ll have with the tool. High pressure is what lets an airless unit handle thick coatings like latex paint straight from the can, with little or no thinning — HVLP sprayers (the kind hobbyists use on furniture) need paint thinned to near-ink consistency, which alters color and coverage. Airless doesn’t care. It’ll push undiluted exterior latex through a tip the size of a pen point all afternoon. The flip side of that same pressure is overspray and safety risk: the finer you atomize paint, the more of it becomes airborne mist. Everything people love and hate about airless spraying traces back to PSI.
Inside the machine, a piston or diaphragm pump does the pushing. Piston pumps cost more but last longer — that’s the spec that separates a $300 DIY unit from a $1,000 contractor workhorse. The practical implication: a diaphragm pump on a budget unit will likely survive a handful of projects but sag under weekly use, so if you’re renovating a whole house, the piston premium pays for itself in avoided replacements.
The tip is where the physics happens. Tip sizes look like a code — a 515 tip means a 10-inch fan (the 5) and a 0.015-inch orifice (the 15). Bigger orifice, more paint per second. What’s less obvious is that the tip also controls your finish quality and your speed independently: the fan width sets how many passes you need, while the orifice sets how wet each pass goes on. That’s why pros carry a pocketful of tips and swap constantly — it’s the cheapest way to change the machine’s behavior without touching the pressure dial.
What You Gain and What You Give Up: The Honest Tradeoff
Is an airless sprayer worth it for DIY projects? For large or textured surfaces, yes — the speed and finish quality beat a roller decisively. For small jobs like a single door or a bathroom, the setup and cleanup time can erase every minute you saved spraying.
Here’s the honest scorecard:
| Factor | Airless Sprayer | Roller/Brush |
|---|---|---|
| Speed on large areas | 5–10x faster | Baseline |
| Finish quality | Smooth, no texture | Roller stipple, brush marks |
| Awkward surfaces (fences, lattice) | Excellent | Painful and slow |
| Paint used | 20–30% more | Baseline |
| Prep/masking | Heavy — overspray travels | Minimal |
| Cleanup | 20–45 minutes, every time | 5–10 minutes |
| Cost to start | $100–400 (DIY tier) | Under $50 |
That 20–30% extra paint consumption surprises people. Some of it becomes overspray mist that drifts onto your ladder, your grass, and your car if you’re careless. Budget a spare gallon per project.
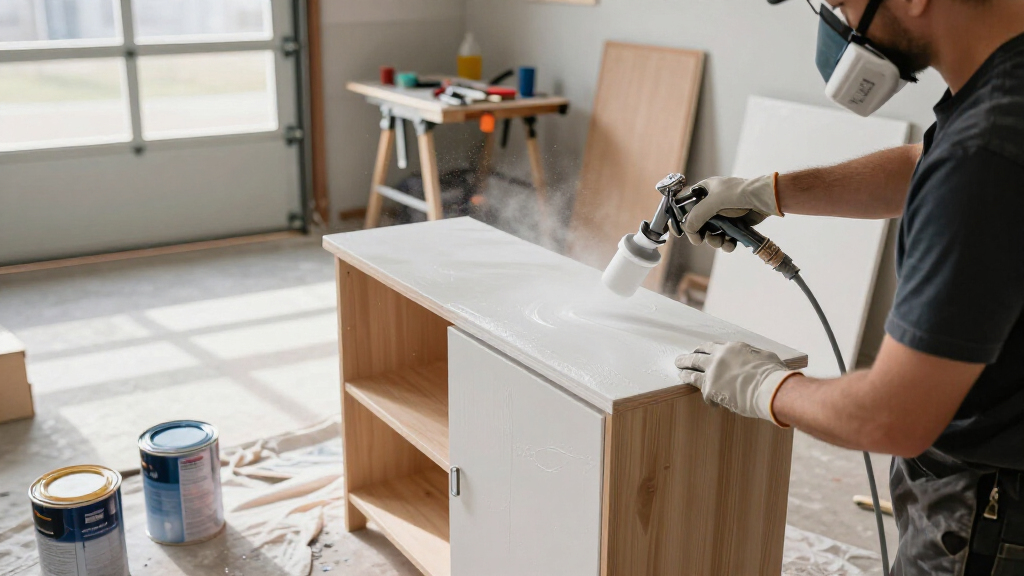
Overspray is the tax you pay for speed. Mask like you mean it, or spend Sunday scrubbing fogged paint off every surface within fifteen feet.
Buy or Rent? The $70 Question That Saves You Hundreds
Should you buy or rent an airless sprayer? Buy if you’ll spray at least two or three projects a year; rent if it’s a one-off. That’s the whole decision, and the math is simple.
Renting a genuine contractor unit — a Graco or Titan that would cost $1,000+ to buy — runs about $70–120 per day at most tool rental counters. For a one-weekend fence or siding job, that’s a fraction of even a budget sprayer’s price, and you get a better machine with more pressure and a real piston pump.
Buying makes sense when projects stack up. A Graco Magnum X5 or Wagner FLEXiO in the $150–350 range handles occasional interior walls, fences, and furniture without complaint. Step up to the $400–900 prosumer tier (Graco TC Pro, Ultra series) if you’re renovating a whole house.
- Rent if: one big project, no storage space, or you want to try before buying
- Buy budget ($100–400): 2–4 projects a year, mostly exterior or big interiors
- Buy prosumer ($400–900): whole-house renovation, regular use, thicker coatings
One more angle: HEA (High Efficiency Airless) models cut operating pressure roughly in half, which means dramatically less overspray. If most of your work is indoors, that feature alone justifies the upgrade.
Pick the Right Tip: The 30-Second Cheat Sheet
What tip size do you need? Match the orifice to your material: thin stuff gets small tips, thick latex gets big ones. Using the wrong tip is the #1 cause of frustration — either spitting globs or a weak, sputtering pattern.
Why? Because the orifice has to pass the paint’s solids. Thick latex is loaded with pigment and solids; force it through a small hole and the tip can’t keep up, so the pattern starves and sputters mid-pass — leaving stripes you’ll see after it dries. Go too big, though, and you’re flooding the surface faster than it can level out, which means sags and runs on anything that isn’t a flat, porous wall. Tip selection is really about matching paint flow to what the surface can absorb and level.
- Stains and sealers: 311 or 411 tip (0.011″) — thin materials need small orifices so the tip doesn’t just dump liquid
- Deck stain: 413 tip — a touch more flow for rough, absorbent wood
- Interior walls and ceilings (latex): 515 tip — the DIY default, sized for full-bodied wall paint
- Cabinets and trim (enamel): 312 or 412 for fine control — narrow fan, less paint per pass, more room for error
- Exterior siding and fences (heavy latex): 517 or 519 — big orifices for thick exterior paints over large areas
Example: spraying kitchen cabinets with a 515 wall tip will flood the doors and cause runs — a 515 moves roughly double the paint per second of a 312, and a cabinet door simply can’t hold that much wet film. Swap to a 312 and suddenly the finish looks sprayed-in-a-factory smooth. Tips wear out too, and wear is sneaky: the orifice erodes oval over time, so a tip that’s sprayed 50–100 gallons gradually shifts from a clean fan to a pattern shaped like a peanut. Your first clue is usually using 20% more paint than you planned. Replace it.
And strain your paint every time, even fresh cans. A single skin or clump will clog the tip mid-stroke, and you’ll be disassembling the gun with paint dripping down your arm. Clogs matter more than people expect: every stop-to-clear resets your rhythm, and uneven coats are where drips hide.
Your First Spray Session: 6 Steps That Make You Look Experienced
How do you use an airless sprayer without making a mess? Follow this sequence and your first hour will look like your tenth project. Every step exists because someone skipped it and paid for it.
- Mask and cover everything. Plastic sheeting, tape, drop cloths — overspray drifts 10+ feet. Prep is 80% of the job.
- Strain the paint into the bucket, then test-spray on cardboard to check the pattern.
- Prime the pump per the manual — usually spraying water or solvent through until paint flows clean.
- Hold the gun 10–12 inches from the surface, perpendicular, and overlap each pass by about 50%.
- Keep moving. Pull the trigger after your arm starts moving, release before it stops. Spraying while stationary creates a shiny drip within two seconds.
- Back-roll heavy coatings on rough surfaces with a dry roller to work paint into crevices.
The classic beginner mistake is arcing — swinging the wrist in a rainbow motion. That lays paint on heavy in the middle and ghost-thin at the edges. Move your whole arm, flat and parallel to the wall, like a printer carriage.
Cleanup: Where Sprayers Go to Die (Don’t Let Yours)
How long does cleanup take? Plan on 20–45 minutes with water for latex, longer for oil-based paints that need mineral spirits. And it’s non-negotiable — paint drying inside the pump and hose is the single biggest killer of these tools.
The routine: flush the system with clean water until it runs clear, then run a bucket of soapy water, then clear water again. Pull the tip, soak it, and clear clogs with a brush — never a needle or wire, which ruins the orifice. Pump a bit of pump armor (glycol storage fluid) through if the sprayer will sit for more than a few weeks.
Real-world scenario: a friend finished spraying a fence at dusk, left the Graco in the garage “to clean tomorrow.” The latex skinned over inside the hose overnight. New hose, new gun filter, two hours of flushing — a $120 lesson on a $200 sprayer. Clean immediately. Every single time.
Safety: The Warning That Isn’t Fine Print
Are airless paint sprayers dangerous? They can be — the same 3,000 PSI that atomizes paint can inject it through skin in an instant, and paint injection injuries are surgical emergencies, not band-aid events. Never point the gun at anyone, and never clear a clog by hand while the system is pressurized.
- Never spray toward skin — high-pressure injection requires immediate ER treatment
- Engage the trigger lock whenever you set the gun down
- Wear a respirator rated for paint mist (not a dust mask), plus goggles and gloves
- Ventilate indoor spaces and keep combustible paints away from ignition sources
- Relieve system pressure before changing tips or cleaning
Also protect the space: cover outlets, plants, windows, and vehicles. Overspray mist is fine enough to float on air currents you can’t feel. If you’re working near a property line, tell your neighbor — drift is real, and so is their freshly washed car.
Frequently Asked Questions
Do I need to thin paint for an airless sprayer?
Usually no — airless sprayers handle latex paint straight from the can at full pressure. What matters more is straining the paint to remove clumps and skins that clog the tip. If a tip clogs repeatedly with clean, strained latex, one step up in tip size usually solves it.
How much overspray does an airless sprayer produce?
Traditional airless units produce a noticeable mist that can drift 10–15 feet, which is why masking and drop cloths matter so much. HEA (High Efficiency Airless) models cut operating pressure roughly in half, reducing overspray dramatically — a strong choice for indoor work. Either way, cover anything you don’t want painted.
Is spraying actually faster once you count prep and cleanup?
On small jobs, sometimes not — masking and 20–45 minutes of cleanup can eat the savings on a single door. But on anything large (a fence, a room, exterior siding), the 5–10x spraying speed overwhelms prep time. A two-day rolling job often becomes a half-day spray job.
What’s the best budget airless sprayer for DIY use?
In the under-$400 tier, the Graco Magnum X5/X7 and Wagner Control/FLEXiO lines are the most commonly recommended DIY units. Graco leans more durable; Wagner leans cheaper and lighter. If you’ll spray regularly, the $400–900 prosumer tier (Graco TC Pro, Ultra) lasts far longer.
How do I maintain the sprayer so it lasts?
Flush with water (latex) or mineral spirits (oil-based) immediately after every use until it runs clear. Clean the tip with a brush — never wire — and the gun filter too. If the unit will sit unused for weeks, pump storage fluid (like Pump Armor) through the system. Dried paint in the pump and hose is the most common cause of failure.
Conclusion
If your project involves large flat surfaces, fences, or anything textured, an airless sprayer will repay you in saved weekends. Just respect the two laws of the tool: prep like overspray is coming (it is), and clean the machine the moment you stop (paint dries fast, regret lasts longer).
Ask yourself one question before buying: will this machine see three projects a year? If yes, buy. If not, rent the good one for a day and spray like the crew that finished my neighbor’s street in a single afternoon.
Fall Picks
fall essentials
As an affiliate, we earn on qualifying purchases.