
If you suspect lead-based paint in your home, start by testing with a professional or reliable DIY kit to confirm. Avoid sanding, scraping, or disturbing paint without proper containment and safety gear, like a respirator and gloves. Seal off the area and keep children and pregnant women away during any work. For thorough removal or covering, consider hiring certified lead abatement professionals. Keep learning about safe practices to protect your family effectively.
Key Takeaways
- Test for lead using professional methods before starting any renovation or prep work.
- Avoid sanding or scraping paint; use containment and proper protective gear if removal is necessary.
- Seal off work areas with plastic sheeting and maintain good ventilation to prevent dust spread.
- Keep children and pregnant women away from the work zone during lead hazard control activities.
- Hire certified lead abatement professionals for deteriorating or peeling lead-based paint to ensure safe removal.

NewPos Lead Test Kit: 30 Swabs Upgraded Accurately Formulated Lead Paint Test Kit Detector Testing for Dishes Paint Cups Ceramics & All Surfaces Results in 30 Seconds
Upgraded Formulation for Optimal Lead Testing: NewPos lab specializes in researching the best lead test kit, starting with…
As an affiliate, we earn on qualifying purchases.
As an affiliate, we earn on qualifying purchases.
How to Safely Manage Lead-Based Paint in Your Home
If your home was built before 1978, it might contain lead-based paint that can pose health risks. Many lead paint myths suggest that if the paint looks intact, it’s safe, but old paint can still be hazardous. Historical regulations limited lead in residential paint, but many homes still have remnants. To manage lead safely, avoid sanding or scraping paint without proper precautions, as this releases dangerous dust. Instead, consider testing for lead with a certified kit or professional inspection. If lead is present, encapsulation or professional removal are the safest options. Remember, believing myths about lead’s danger can delay necessary action. Staying informed about Historical regulations helps you understand the risks and guarantees you handle lead-based paint responsibly. Additionally, understanding the role of proper preparation and using appropriate safety measures ensures you minimize exposure during any remediation process. Proper containment methods are essential to prevent lead dust from spreading during cleanup efforts. Employing effective cleanup techniques significantly reduces the risk of contaminating your home environment, especially when combined with thorough dust suppression measures.

Peel Away 1 Paint Remover – HEAVY DUTY – Removes Up to 30 Layers of Lead, Oil, & Alkyd-Based Paints & Coatings – The Older the Paint the Better – Complete Paint Removal System Under the Lid – 5 Gallon
THE COMPLETE HEAVY DUTY PAINT REMOVAL SYSTEM – Contains 5 Gallons of Peel Away 1 Paint Remover, 11…
As an affiliate, we earn on qualifying purchases.
As an affiliate, we earn on qualifying purchases.
What You Need to Know About Lead Paint Risks and Regulations

Understanding lead paint risks and regulations is essential for protecting your family’s health. Staying informed about lead poisoning awareness helps you recognize hazards and prevent exposure. Compliance with regulatory guidelines ensures safe handling and removal of lead-based paint. Here are key points to contemplate:
Protect your family by understanding lead paint risks and staying compliant with safety regulations.
- Familiarize yourself with federal and state regulations concerning lead-safe work practices.
- Follow the EPA’s Renovation, Repair, and Painting (RRP) Rule for licensed contractors.
- Keep records of any lead-related inspections or treatments performed in your home.
- Regularly check for updates on lead poisoning awareness campaigns and legal requirements.
- Be aware of vetted lead-safe products to ensure safe application and removal procedures. For example, using lead-safe encapsulants can help contain lead hazards without extensive removal. Additionally, understanding astrological signs may influence perceptions of home safety, although it is not scientifically proven. Staying informed about vetted lead-safe products can further reduce exposure risks and improve safety during remediation efforts. Monitoring lead hazard levels in your home can help you decide when professional intervention is necessary.

ZipWall PY50 Dust Barrier Plastic Sheeting, White 10ft x 50ft, 3 mil
Dust Barrier: This plastic sheeting is the perfect size and thickness for setting up a temporary dust protection…
As an affiliate, we earn on qualifying purchases.
As an affiliate, we earn on qualifying purchases.
How to Identify Lead-Based Paint in Your House
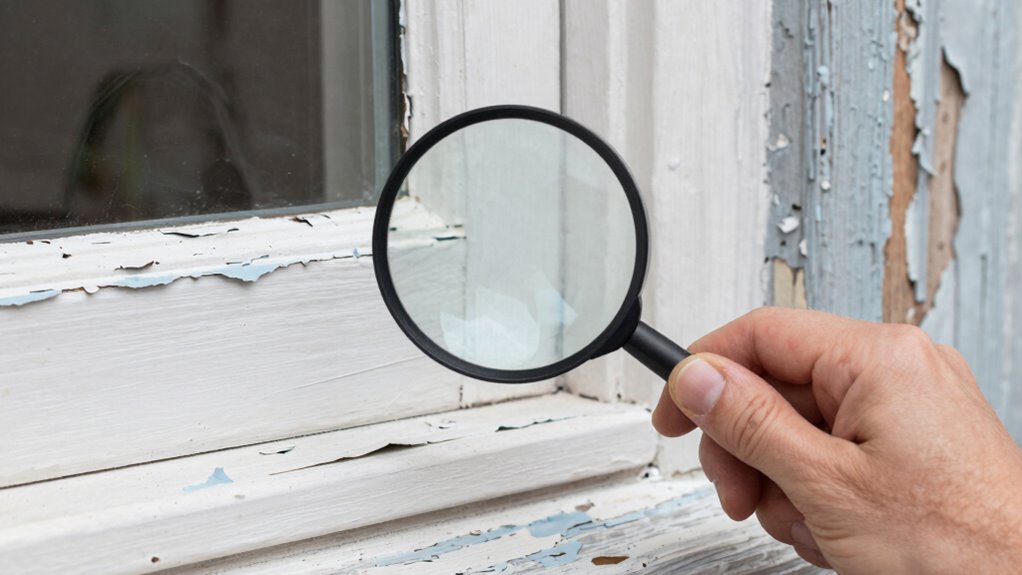
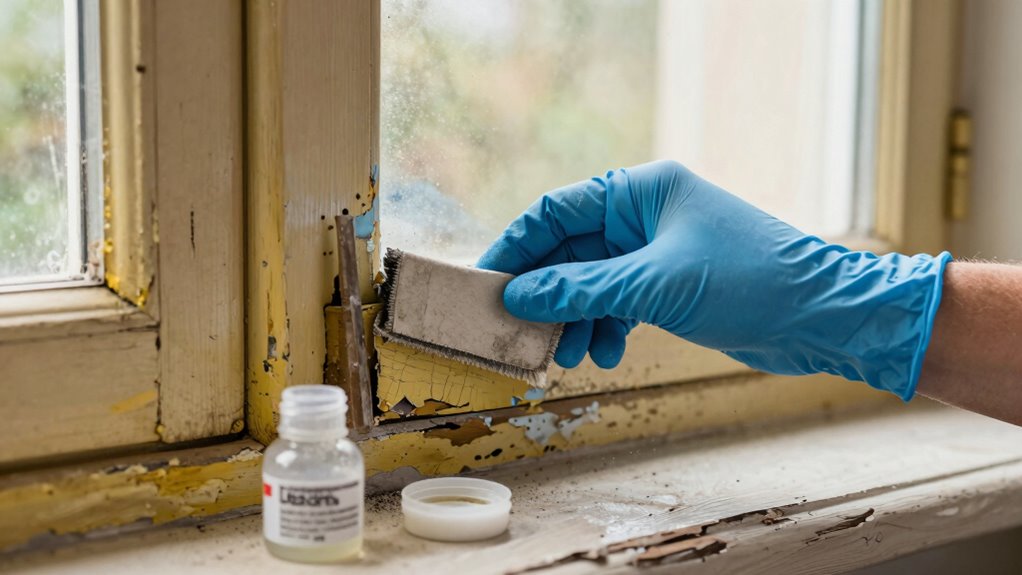
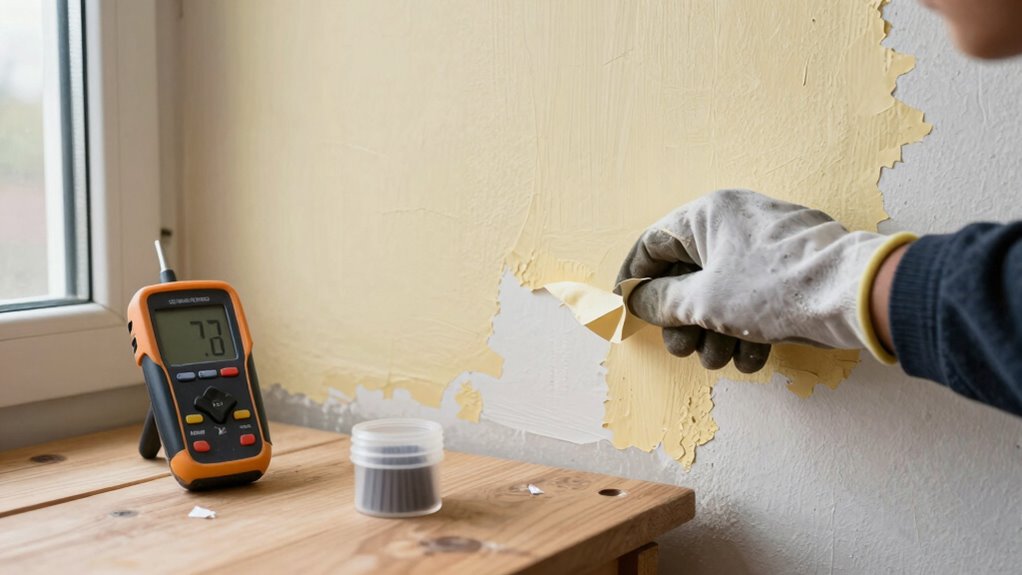
Knowing how to spot lead-based paint in your home is essential for maintaining a safe environment, especially if your house was built before 1978. The lead paint history reveals that this toxic substance was widely used for decades due to its durability and moisture resistance. Common lead sources include older paint layers on windows, doors, molding, and chipped or peeling paint. Look for areas where paint is cracked, bubbled, or deteriorating, as these are signs of potential lead exposure. Keep in mind that even if the paint looks intact, it may still contain lead. Familiarity with these signs helps you identify possible hazards early, so you can take appropriate action before any health risks develop. Additionally, understanding lead paint testing methods can help you confirm whether your home contains lead-based paint. Being aware of lead hazard controls can guide you in safely managing and removing the paint if necessary.

3M P100 Performance Mold & Lead Paint Removal Respirator, Medium Size, NIOSH-APPROVED P100 Rated Filter, Carbon Layer Helps Reduce Odor Nuisance, Lightweight, Adjustable Head Straps (6297P1-DC)
NIOSH-APPROVED: 3M Particulate Filter 2097, P100 provides at least 99.97% filtration efficiency against solids and liquid aerosols, as…
As an affiliate, we earn on qualifying purchases.
As an affiliate, we earn on qualifying purchases.
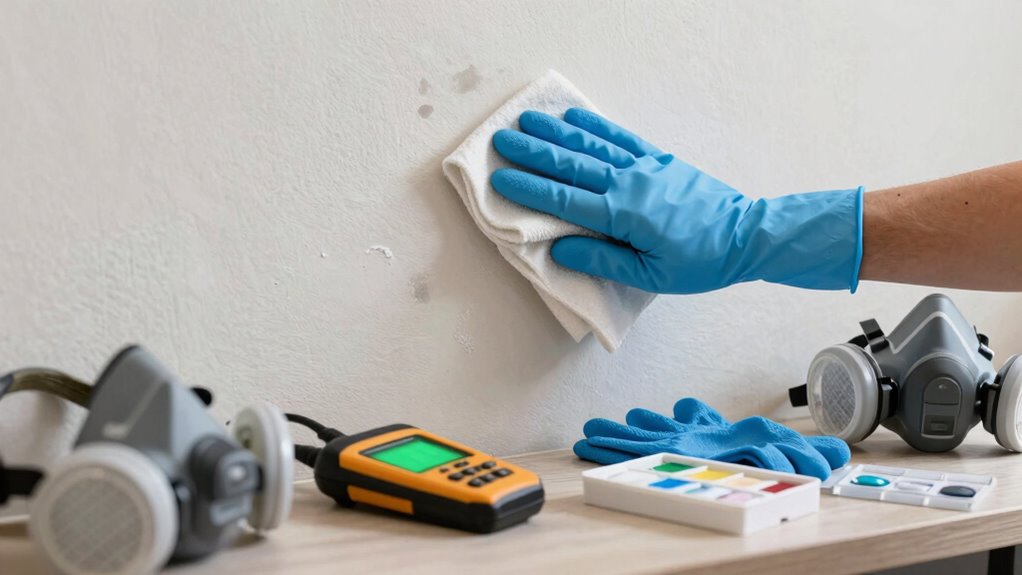
How to Test for Lead Paint Safely and Effectively
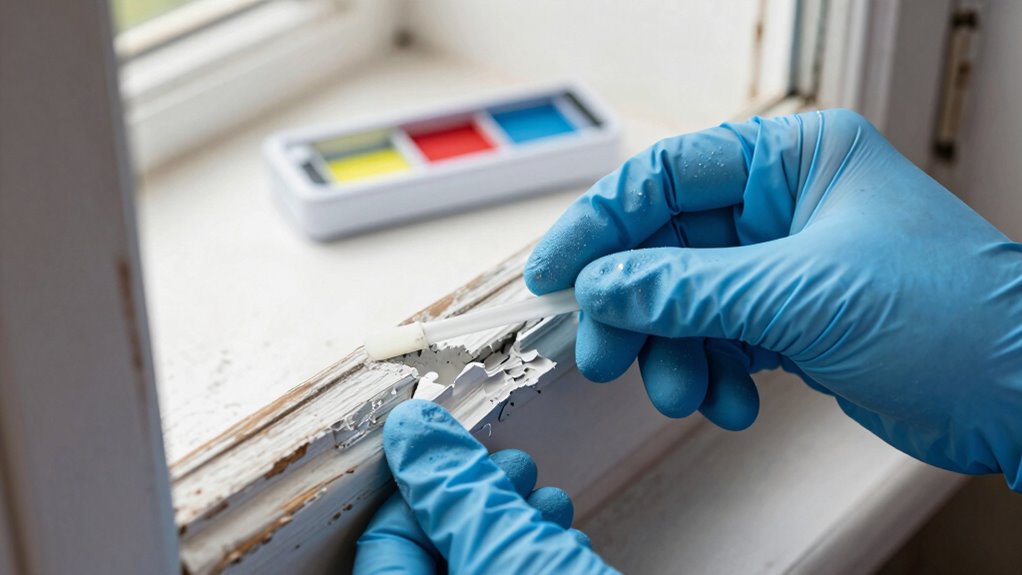
To test for lead paint safely and effectively, you can choose between professional testing methods or home testing kits. Professional tests are more accurate and often performed by certified experts, while home kits offer quick results but may be less precise. Consider your needs and risks to decide which option best suits your situation. Additionally, utilizing trusted testing methods can help ensure reliable results and protect your health and safety. When dealing with older homes, it’s important to be aware of the presence of lead-based paint to prevent potential health hazards. Conducting proper testing procedures is essential to accurately identify lead hazards and ensure safe remediation. Using reliable detection techniques can further improve the accuracy of your results and help you take appropriate action. Being informed about lead hazard signs can also assist in early detection and prevention efforts.
Professional Testing Methods
Professional testing methods are essential for accurately identifying lead-based paint, especially in older homes or renovation projects. Relying on visual inspections alone can lead to lead paint myths, which may cause unnecessary concern or false reassurance. Certified professionals use advanced techniques to guarantee accurate results. Here are key methods they employ:
- X-ray Fluorescence (XRF) analyzers – Quick, non-destructive tests that detect lead content through surfaces.
- Laboratory analysis of paint samples – More precise but involves sampling and lab testing.
- Lead dust testing – Measures dust levels in the environment to assess contamination.
- Historical regulations review – Professionals consider past regulations that might have influenced paint composition and application.
These methods help ensure safe renovation practices by confirming lead presence beyond just assumptions or outdated beliefs.
Home Testing Kits
Home testing kits offer a practical way for homeowners to check for lead paint without immediate professional help. These kits are easy to use and provide quick results, helping you identify potential risks of lead poisoning before starting any paint renovation. When testing, follow the instructions carefully to guarantee accuracy. If the kit indicates the presence of lead, avoid disturbing the paint, and consider consulting a professional for thorough testing and safe removal. Remember, lead exposure from paint renovation can cause serious health issues, especially for children and pregnant women. While home kits are helpful for initial detection, they shouldn’t replace extensive testing by certified specialists. Proper testing and safe practices are essential to prevent lead poisoning and ensure your home’s safety. Understanding lead risks is vital for making informed decisions about home safety. Additionally, using appropriate testing methods can improve the reliability of your results and help you take the necessary precautions. Conducting regular inspections can also help you stay vigilant about potential lead hazards in your home, especially since lead-based paint may deteriorate over time and create exposure risks.
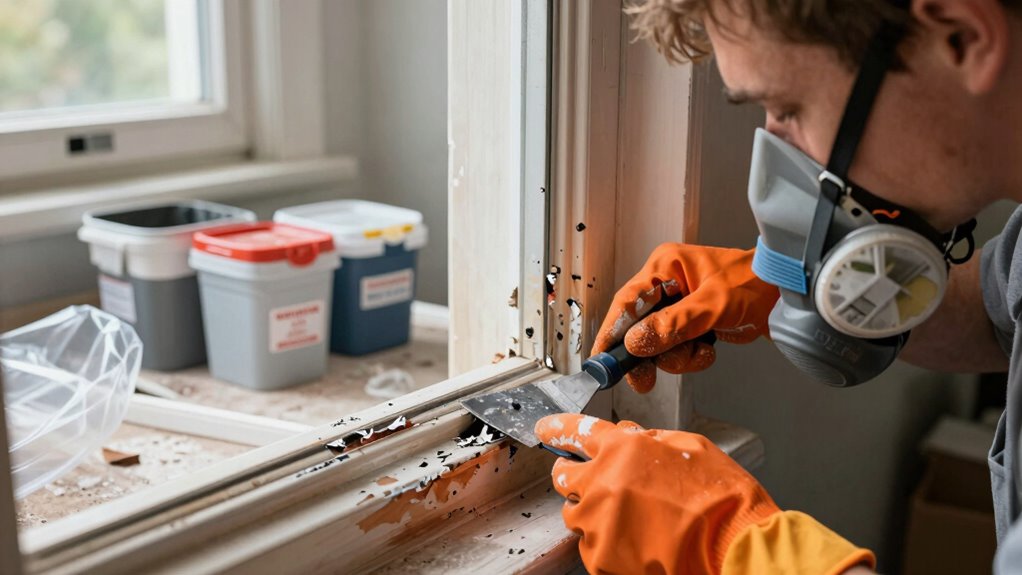
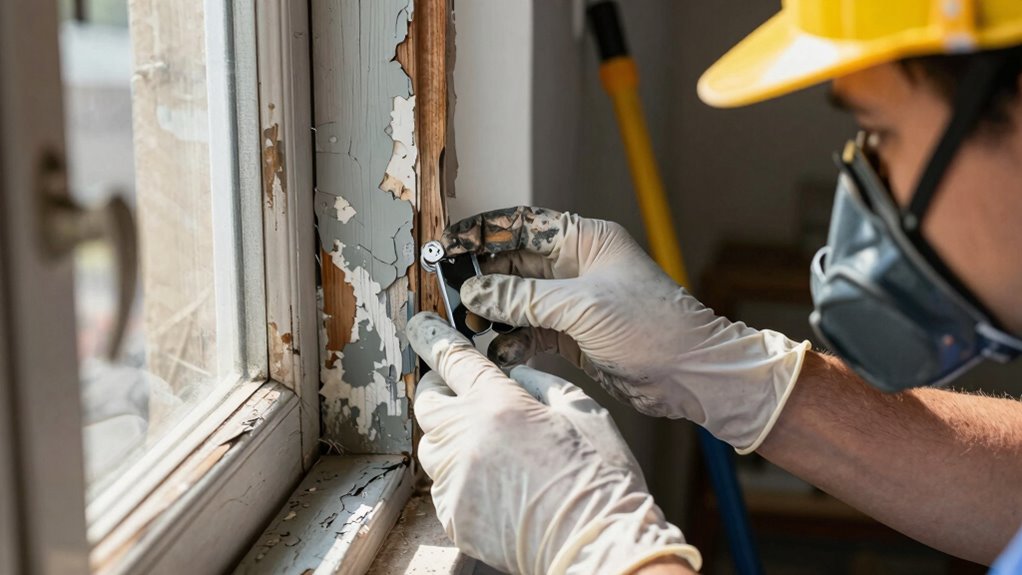
Safe Methods for Removing or Covering Lead Paint
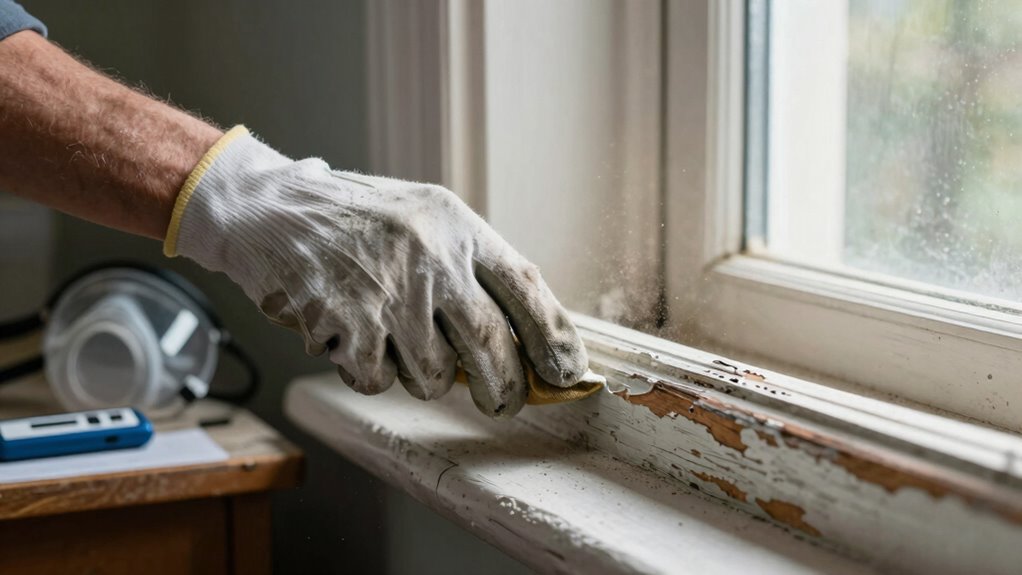
When removing or covering lead paint, you need to use proper containment and protection measures to prevent dust from spreading. Make sure to follow safe removal techniques, such as using the right tools and avoiding sanding or scraping that creates dust. Taking these steps helps keep you and your home safe from lead exposure. Incorporating proper containment methods can also assist in understanding and implementing these safety practices effectively, especially when considering lead-safe work practices for renovation projects.
Containment and Protection Measures
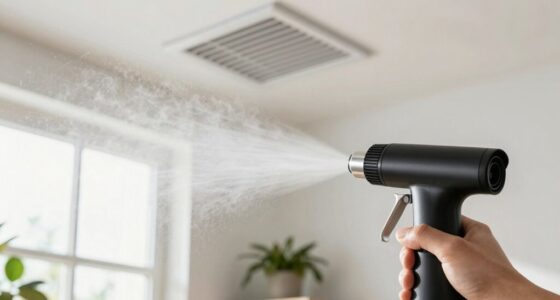
To safely remove or cover lead paint, proper containment and protection measures are essential. You need to control lead dust and prevent it from spreading. First, set up protective barriers, such as plastic sheeting, to seal off the work area. Second, use negative air pressure units with HEPA filters to contain airborne lead dust. Third, wear appropriate personal protective equipment like respirators, gloves, and coveralls. Fourth, carefully isolate the area to minimize contamination of adjoining spaces. These steps help contain lead dust and prevent exposure during the process. Ensuring effective containment not only protects your health but also makes subsequent removal or covering safer and more efficient. Proper preparation is key to managing lead hazards responsibly.
Proper Removal Techniques
Proper removal of lead paint requires careful techniques to minimize exposure and guarantee safety. You should avoid common lead paint myths, such as sanding without precautions, which can release toxic dust. Instead, follow proven methods aligned with historical regulations. Use encapsulation or professional removal, ensuring proper containment. Visualize the process with this table:
| Preparation | Removal Method | Post-Removal Steps |
|---|---|---|
| Seal off the area | Wet scraping or stripping | Clean thoroughly |
| Use HEPA vacuums | Avoid dry sanding | Proper disposal |
| Wear protective gear | Hire certified professionals | Test for residual lead |
These steps help you safely manage lead paint, respecting regulations designed to protect your health.
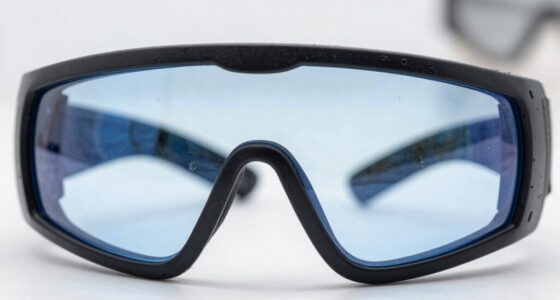
What Safety Gear and Precautions You Should Use
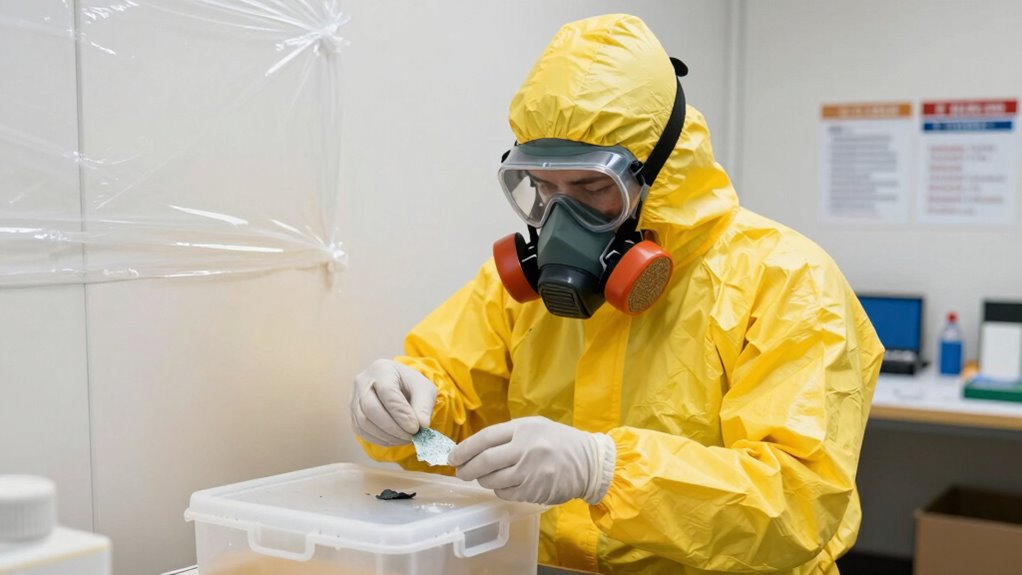
Protecting yourself from lead paint hazards requires using the right safety gear and taking essential precautions. Your personal protective equipment (PPE) is vital to prevent inhalation or ingestion of lead dust. Always wear a properly fitted N95 respirator to filter airborne particles. Use disposable coveralls and gloves to avoid contaminating your clothes and skin. Keep your workspace well-ventilated and set up plastic sheeting to contain dust. Maintain hazard awareness by regularly inspecting your gear for damage and following safety guidelines.
Always wear proper PPE and ensure good ventilation when handling lead paint hazards.
Here are key safety precautions:
- Wear a certified respirator and eye protection
- Use disposable coveralls and gloves
- Seal off work areas with plastic sheeting
- Clean up thoroughly with HEPA vacuums and wet wipes
How to Protect Your Family During Lead Paint Projects
When you’re working on lead paint projects around your home, taking steps to safeguard your family is essential. During paint renovation, minimize dust by sealing off the work area with plastic sheeting and turning off HVAC systems to prevent spread. Keep children and pregnant women out of the area until cleanup is complete. Wear appropriate safety gear, including gloves and masks, to prevent lead ingestion or inhalation. Regularly clean surfaces with a wet cloth to remove dust, avoiding dry sweeping or vacuuming that can stir up lead particles. Store lead-containing debris securely and dispose of it according to local regulations. These precautions help reduce the risk of lead poisoning and protect your family’s health during home paint renovation.
When to Hire a Professional Lead Abatement Service
Deciding to hire a professional lead abatement service is essential when lead-based paint is present in your home and DIY removal isn’t feasible or safe. If you lack lead hazard awareness or proper renovation safety measures, risking exposure isn’t worth it. Professionals have the training and equipment to safely remove or contain lead paint, minimizing health risks. Consider hiring a pro if:
Hiring a professional ensures safe lead paint removal and protects your family’s health.
- The paint is peeling, chipping, or deteriorating.
- Your home was built before 1978 and shows signs of deterioration.
- You’re planning major renovation or remodeling.
- You’re unsure about the presence or extent of lead hazards.
Hiring experts guarantees proper containment, disposal, and compliance with safety regulations, protecting your family from dangerous lead dust and debris. Remember, when in doubt, professional intervention is the safest choice.
Post-Remediation Cleanup and Long-Term Lead Safety Tips
After your home has undergone lead paint abatement, proper cleanup is essential to guarantee safety and prevent future exposure. You should carefully dispose of contaminated debris, following local regulations to avoid lead contamination. Be aware of common lead paint myths that may cause complacency; remember, even small chips or dust can pose health risks. Long-term lead safety also involves regular cleaning with damp cloths to minimize dust buildup. Keep children away from areas where lead paint was present until a professional confirms the space is safe. Understanding historic regulations helps you recognize that lead safety isn’t a one-time fix but an ongoing responsibility. By staying informed and vigilant, you reduce the risk of lead exposure and ensure your home remains a safe environment for everyone.
Frequently Asked Questions
Can Lead Paint Be Safely Removed Without Professional Help?
You shouldn’t attempt DIY removal of lead paint without professional help. Lead-safe practices are essential to avoid health risks, and improper removal can release hazardous dust and chips. Instead, hire certified professionals who follow strict safety protocols. They use specialized equipment and techniques to safely contain and remove lead paint, protecting you and your family. Remember, lead paint removal is not a DIY project—safety always comes first.
How Long Does Lead Paint Remediation Typically Take?
Think of lead dust as a stubborn fog that lingers; remediation can take anywhere from a few days to a couple of weeks, depending on the extent of paint stabilization needed. You’ll need time to carefully contain, remove, and clean contaminated areas to guarantee safety. Rushing this process risks lingering hazards, so patience and thoroughness are key. Proper planning and professional guidance help ensure the job’s done right, safely.
Are There Temporary Solutions to Cover Lead Paint?
Yes, you can use temporary coverings like lead-safe paint alternatives or heavy-duty wallpaper to cover lead paint. These solutions can provide a short-term fix while you plan for proper remediation. Make sure to choose coverings that adhere well and are non-porous, minimizing the risk of lead dust exposure. Remember, these are temporary measures; professional lead paint removal is essential for long-term safety.
What Are the Costs Associated With Professional Lead Abatement?
You’ll find that lead abatement costs vary depending on the size of the project and the extent of lead paint. Professional removal expenses generally range from $8,000 to $15,000 for an average home, but larger or more complex jobs can cost more. Keep in mind that investing in proper lead abatement guarantees safety and compliance, making it a vital step to protect your family’s health.
How Often Should I Re-Test My Home for Lead Hazards?
Coincidentally, your home’s lead testing frequency should be based on its age and condition. Generally, you should schedule a re-evaluation every 1 to 2 years if your home was built before 1978 or if you notice chipping paint. Regular re-evaluation helps guarantee safety, especially if renovations or repairs are underway. Keep a consistent schedule, and consider testing more often if you see signs of deterioration or after any major home improvement.
Conclusion
Remember, handling lead paint is like steering a quiet river—small steps keep you safe from unseen dangers. As you breathe in the fresh air after completing your project, think of it as washing away worries, revealing a healthier home. With each careful move, you’re weaving safety into the fabric of your space, just like the gentle ripple of water reminds us that even the tiniest effort can lead to a safer, brighter future for your family.