
To create a custom mural with a paint sprayer and stencils, start by choosing stencils that match your design and space size. Secure the stencils well and use a light spray to prevent bleeding, blending spray with brushwork for fine details and depth. Practice feathering and dabbing techniques to add texture and shadows. With patience and the right tools, you can achieve a professional look. Keep exploring, and you’ll discover even more tips to perfect your mural.
Key Takeaways
- Secure stencils firmly and use light spray pressure to prevent bleeding and achieve clean edges.
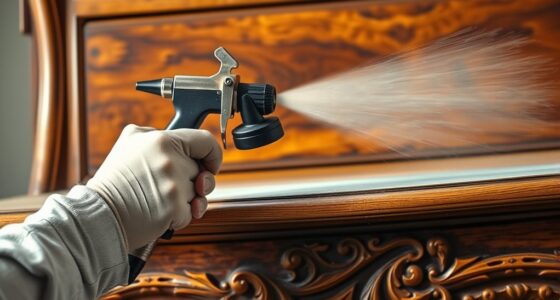
- Apply spray paint for broad backgrounds, then switch to brushes for fine details and finishing touches.
- Choose durable, reusable stencils with fine details that match your mural’s theme and scale.
- Practice combining spray techniques with brushwork like feathering and stippling for texture and depth.
- Patience and proper tool handling are essential for a professional, polished mural finish.

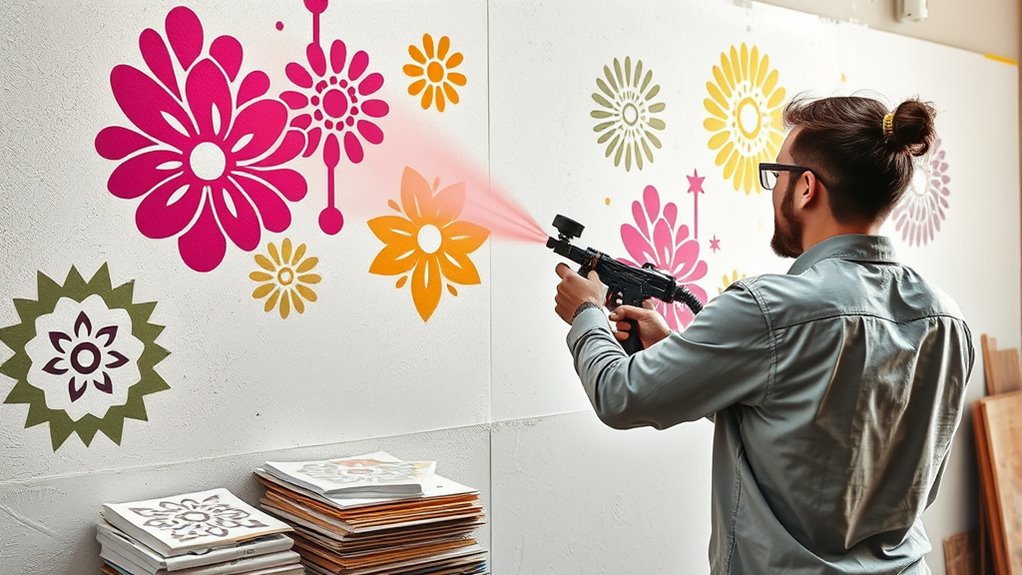
Creating a custom mural is a dynamic way to transform any space into a reflection of your personality or vision. When you’re ready to take on this project, using a paint sprayer combined with stencils is a smart move that allows for precision and creativity. Before you start, it’s essential to understand how brush techniques and stencil selection play vital roles in achieving a professional look. These elements will help you control your design, add depth, and ensure your mural stands out.
First, focus on your brush techniques. Even if you’re primarily using a paint sprayer, practicing your brushwork is crucial for detailing and touch-ups. For example, feathering with a small, angled brush can seamlessly blend colors and soften edges, making your mural look cohesive. Dabbing with a sponge or stippling brushes can add texture or highlight certain areas, giving your artwork more dimension. When working with stencils, your brush techniques should complement the spray paint. Light, dry brushing around the edges of your stencil can create subtle shadows and prevent harsh lines, helping your design look more natural and integrated into the wall.
Master brush techniques like feathering and stippling to enhance your mural’s depth and cohesion.
Choosing the right stencil selection is equally important. Select stencils that match your intended theme and fit the scale of your space. For intricate designs, opt for stencils with fine details, but ensure they’re sturdy enough to withstand multiple uses. If you’re new to stenciling, start with simpler shapes and patterns to build confidence. Make sure your stencils are made from durable material like mylar or plastic, which can be cleaned easily for reuse. Proper stencil selection also involves considering the size and orientation of your design elements. Larger stencils are perfect for creating bold backgrounds, while smaller ones work well for accents or detailed patterns.
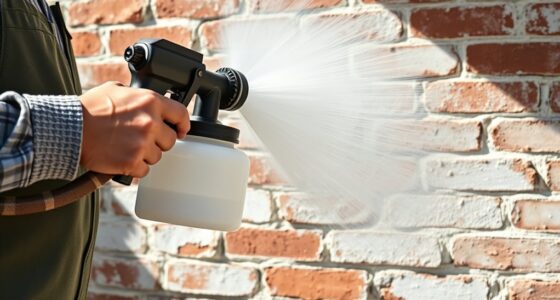
As you combine your brush techniques with a carefully chosen stencil, you’ll find that layering different textures and details becomes easier. Use your spray gun to lay down broad backgrounds or base colors quickly, then switch to brushes for finer details and finishing touches. When applying stencils, secure them firmly to prevent shifting, and use a light, consistent spray to avoid bleeding underneath. If you want to add depth or shadow effects, experiment with different spray distances or lightly dry brushing over stencil edges. Remember that selecting the right painting tools and techniques is essential for achieving the desired professional finish.
In the end, creating a stunning mural with a paint sprayer and stencils requires patience and practice. By mastering your brush techniques and selecting the right stencils, you’ll bring your artistic vision to life with precision and style. The key is to stay flexible, enjoy the process, and let your creativity lead the way.

6-Piece Wildflower Stencil for Painting – Large Reusable Floral Design for DIY Furniture Decor | Modular Stencil Kit for Wood, Walls & Home Art
1. 🎭2×3 Modular Mural Kits: Create 14.5×33" Custom Wall Art These reusable wild flower stencils, Snap 3 interchangeable…
As an affiliate, we earn on qualifying purchases.
As an affiliate, we earn on qualifying purchases.
Frequently Asked Questions
What Types of Paint Are Best for Murals With a Paint Sprayer?
When choosing paint types for your mural, consider durability and ease of use. Latex or acrylic paints work best because they spray smoothly and dry quickly, giving you good control. Opt for finishes like matte or semi-gloss, depending on the look you want. These finish options enhance durability and make cleaning easier. Make sure to select high-quality paints for vibrant colors and long-lasting results.
How Do I Prevent Paint Drips and Overspray During Mural Creation?
To prevent paint drips and overspray, you should use proper masking methods to protect surrounding areas. Keep a consistent distance from the wall and use a smooth, sweeping brush technique to control paint flow. Practice on scrap surfaces first, and adjust your sprayer’s pressure settings. This way, you’ll maintain a clean, professional look while minimizing mess, ensuring your mural turns out just how you envision it.
Can I Create Murals on Textured or Uneven Walls?
Did you know that over 60% of murals are painted on textured walls? Yes, textured or uneven surfaces can pose challenges to mural adhesion, but they’re not impossible. You can create murals on such walls by priming the surface thoroughly and using the right paint sprayer techniques. Sanding rough patches and applying a bonding primer helps smooth out wall texture, making your mural durable and visually appealing.
How Long Does a Typical Mural Painting Project Take?
A typical mural painting project varies based on size, complexity, and your experience. You should consider time management and project planning to stay on track. Smaller murals might take a few days, while larger ones could span several weeks. Break the project into stages, set realistic deadlines, and allocate extra time for drying and touch-ups. Being organized guarantees you complete your mural efficiently without feeling overwhelmed.
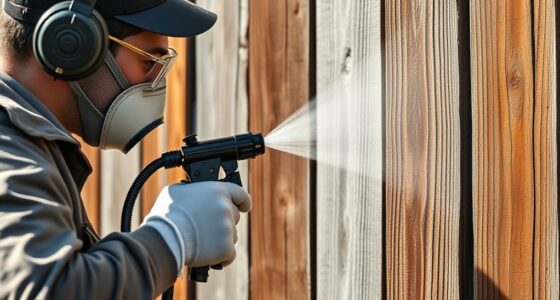
What Safety Precautions Should I Follow When Using a Paint Sprayer?
You might think safety isn’t vital, but it’s essential. Always wear protective gear like masks, goggles, and gloves to shield against fumes and paint splatters. Make certain proper ventilation considerations, opening windows and using fans to disperse fumes. Keep your workspace clean and follow manufacturer instructions. This way, you protect your health and guarantee a smooth project, making your creative process safer and more enjoyable.

VONFORN Paint Sprayer, 700W HVLP Spray Gun with Cleaning & Blowing Joints, 4 Nozzles and 3 Patterns, Easy to Clean, for Furniture, Cabinets, Fence, Walls, Door, Garden Chairs etc. VF803 Yellow
【4 Nozzles & 3 Spray Patterns】VONFORN 700W paint sprayer includes 4 nozzle sizes (1.0mm, 1.5mm, 2.0mm, 3.0mm) to…
As an affiliate, we earn on qualifying purchases.
As an affiliate, we earn on qualifying purchases.
Conclusion
Don’t let fear of imperfection hold you back—every stroke adds personality and charm to your space. With a paint sprayer and stencils, you can create stunning murals that reflect your unique style, even if you’re new to art. Remember, the beauty lies in your effort and passion. Embrace the process, and soon you’ll be proud of a personalized masterpiece that transforms your home and boosts your confidence to try more creative projects.

6 Pack Nylon Stencil Brushes Set, Wood Handle for Stenciling, Watercolor & Acrylic Paint 6 Sizes for Fabric, Canvas, Detail Work & DIY Crafts
Soft Nylon Bristles for Smooth Application : Crafted with high-quality, soft synthetic nylon filaments that provide a smooth,…
As an affiliate, we earn on qualifying purchases.
As an affiliate, we earn on qualifying purchases.

Patelai Knockdown Texture Sponge Drywall Wall Patch Ceiling Texture Sponge Home Decor for Repair DIY Painting Ceiling(2 Pieces,13 x 15 x 6 cm)
Function: the knockdown sponge is intended for small repairs and areas that need textured, which blends well with…
As an affiliate, we earn on qualifying purchases.
As an affiliate, we earn on qualifying purchases.

Franz came aboard the Paint Sprayer Zone team with a background in both journalism and home renovation. His articulate writing style, combined with a passion for DIY projects, makes him an invaluable asset. Franz has a knack for breaking down technical jargon into easy-to-understand content, ensuring that even the most novice of readers can grasp the complexities of paint sprayers.