
To achieve a brush-free finish when spray painting trim and doors, start by thoroughly cleaning and lightly sanding surfaces, then apply primer for better adhesion. Hold your spray gun 6 to 12 inches from the surface, using smooth, overlapping strokes with consistent speed and pressure. Practice on scrap material to perfect your technique, and adjust the spray pattern as needed. For expert tips on flawless results, keep going to learn more about spray techniques and troubleshooting.
Key Takeaways
- Thoroughly clean and lightly sand surfaces to improve paint adhesion and achieve a smooth, professional finish.
- Maintain a consistent spray distance of 6-12 inches and use even, overlapping strokes for uniform coverage.
- Adjust spray pattern and pressure according to manufacturer instructions, testing on scrap before application.
- Use proper masking techniques to protect adjacent areas and prevent overspray for a clean, brush-free look.
- Practice steady hand movements and maintain perpendicular angles to ensure a smooth, streak-free surface.
Have you ever wondered how to achieve a smooth, professional finish when painting trim and doors? The secret lies in mastering spray gun techniques and properly preparing your paint and workspace. When you’re ready to get started, the first step is understanding the importance of paint prep tips. Proper preparation ensures that your finish looks flawless and lasts longer. Start by cleaning all surfaces thoroughly to remove dust, grease, and any residues. Sand the trim and doors lightly with fine-grit sandpaper to create a smooth surface that helps the paint adhere better. Wipe away any dust with a tack cloth or a damp rag, and let everything dry completely before moving on.
Proper surface prep is key to a flawless, durable paint finish on trim and doors.
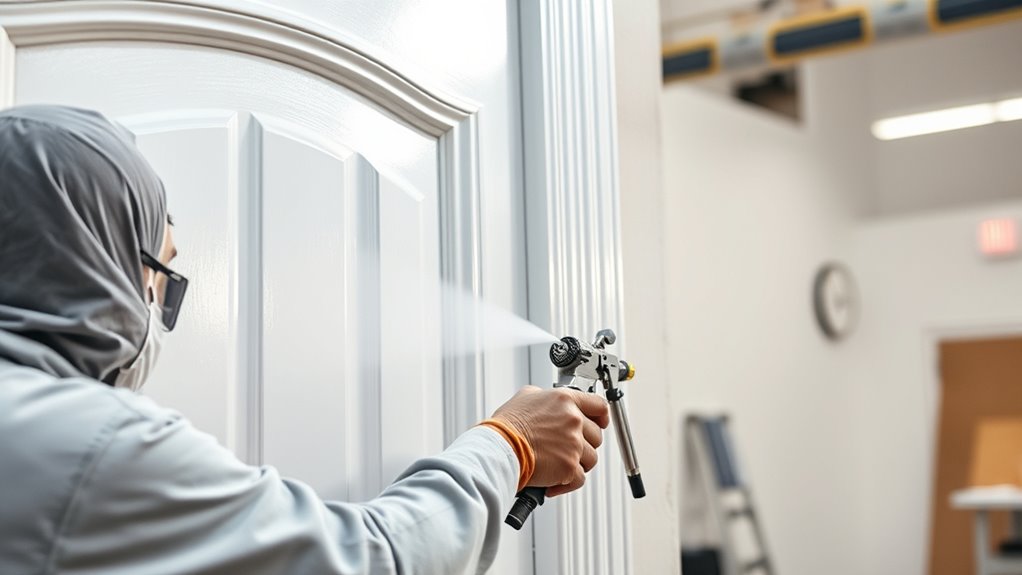
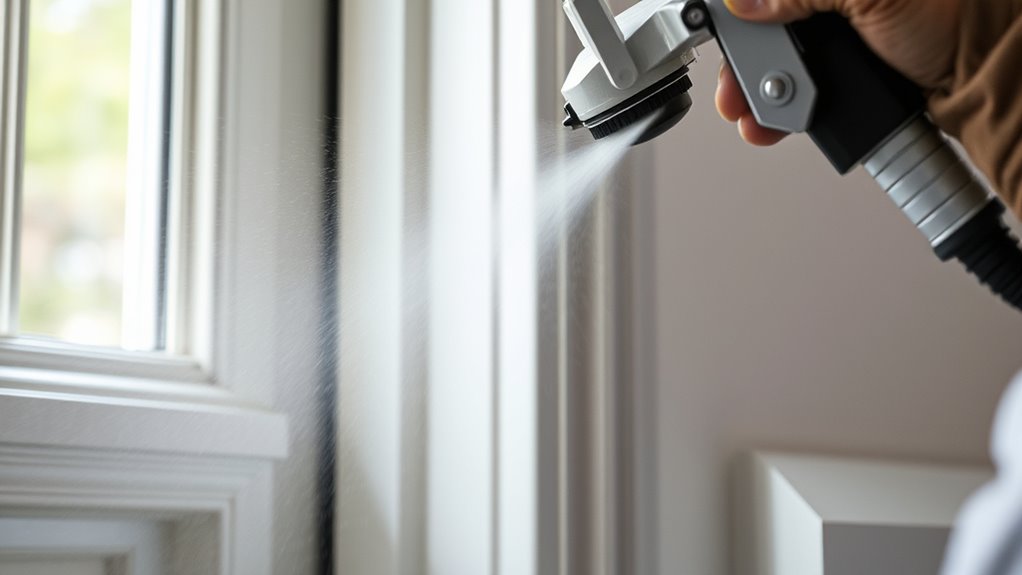
Once your surfaces are prepped, focus on your spray gun techniques. Using a spray gun requires a steady hand and consistent motion. Hold the gun about 6 to 12 inches from the surface, depending on the type of spray gun and paint viscosity. Keep your hand moving in smooth, even strokes, overlapping each pass by about 50%. This overlap prevents streaks and uneven coverage. Adjust the spray pattern and pressure according to the manufacturer’s instructions, and always test on a scrap piece or cardboard first. This helps you fine-tune your settings for ideal atomization and spray pattern.
Another key spray gun technique is maintaining a consistent speed. Moving too fast can cause thin spots, while going too slow might lead to drips and runs. Practice your technique on a scrap surface if you’re new to spraying, so you can develop a feel for the right pace. Keep the spray gun perpendicular to the surface and avoid tilting it, which can create uneven spray patterns. When spraying around intricate details or corners, use a lighter touch or switch to smaller nozzles for better control. Additionally, selecting the right top-rated spray paint can significantly improve your results by providing better coverage and durability.
In addition to spray gun techniques, pay attention to your paint prep tips. Thin your paint if necessary—most spray paints are designed to be used straight from the can, but thinning might improve flow and atomization. Use a high-quality primer if your surfaces need extra adhesion or stain blocking. Proper masking is essential to protect areas you don’t want painted, and remove painter’s tape promptly after finishing each section to prevent peeling or smudging.

Safeworld Instant Aerosol Trigger Handle Can-Gun, Converts Spray Cans to Spray Guns, Full Hand Grip, Reusable, Easy Clip-On/Off, and Universal Fit for Paint, Adhesives, and Lubricants (2- Pack)
Effortless Spray Control: Full-grip E-Z pull trigger provides precise spray control and flawless streak-free finishes while ensuring, more…
As an affiliate, we earn on qualifying purchases.
As an affiliate, we earn on qualifying purchases.
Frequently Asked Questions
What Safety Gear Is Recommended for Spray Painting Indoors?
When spray painting indoors, you need the right personal protective equipment to stay safe. Wear a respirator mask to protect your lungs from fumes and airborne particles. Use safety goggles to shield your eyes from overspray, and gloves to prevent skin contact. Guarantee proper ventilation safety by opening windows and using fans to keep fumes out. Always follow manufacturer instructions and local safety regulations to minimize health risks while achieving a smooth, professional finish.
How Do I Prevent Paint Drips During Spray Application?
Imagine this: you’re channeling a modern-day Da Vinci with your spray gun. To prevent paint drips, focus on steady, even spray technique tips—keep the gun perpendicular, maintain consistent distance, and move smoothly. Avoid lingering in one spot to prevent over-application. Practice on scrap first. Proper paint drip prevention comes down to control and finesse, ensuring a flawless, brush-free finish every time you spray.
Can I Spray Paint Over Existing Finishes Without Sanding?
You can spray paint over existing finishes without sanding if you guarantee compatibility and proper surface prep. Check the spray paint compatibility with your current finish, and clean the surface thoroughly to remove dirt, grease, and loose paint. Use a primer suitable for the surface to improve adhesion. Proper surface preparation techniques will help you achieve a smooth, durable finish without the need for sanding, saving you time and effort.
What Is the Best Drying Time Between Coats?
You might think the best drying time between coats is just a few minutes, but it’s actually more nuanced. For ideal coat application, wait until the previous layer is thoroughly dry—usually 1 to 2 hours, depending on paint type and conditions. Rushing this step can cause drips or uneven coverage. Always check the paint manufacturer’s guidelines for specific drying times to guarantee a smooth, durable finish.
How Do I Clean Spray Equipment After Use?
To keep your spray equipment in top shape, you should clean it thoroughly after each use. Use appropriate cleaning techniques, like flushing with solvent or water, depending on your paint type. Disassemble parts for a deep clean, and wipe down all surfaces. Proper equipment maintenance prevents clogs and guarantees smooth application next time. Regular cleaning extends your equipment’s lifespan and guarantees consistent, professional results every time you spray.

4 Pack Hand Sanding Sponge Set -120 220 320 400 Grit- Coarse Medium Fine Grit Sanding Block, Sander Sponges for Wood-Working Drywall Metal, Washable and Reusable Sponge for Rust Removal Polishing
Assorted Grit Sanding Blocks – This set includes 4 sponge sanding blocks (4 x 2.6 x 0.7 inches)…
As an affiliate, we earn on qualifying purchases.
As an affiliate, we earn on qualifying purchases.
Conclusion
By mastering spray painting trim and doors, you transform your space with a flawless, brush-free finish that’s as smooth as glass. Think of your project as a blank canvas waiting for your touch — a chance to showcase your craftsmanship and elevate your home’s look. So, why settle for mediocre when you can create perfection? Grab your spray gun, follow these tips, and let your vision shine through a stunning, professional-quality result that leaves everyone in awe.

4 Rolls Premium Painters Tape, Blue Tape, Masking Tape, Paint Tape for Multi-Purpose, Painting, Painter's, DIY Crafts Arts (88yd =0.94IN*22yd*4) Decoration Labeling No Residue, Easy Removal
Professional Mask Tape – Multi-Surface adhesive tape made of high quality blue crepe paper not easy to lift…
As an affiliate, we earn on qualifying purchases.
As an affiliate, we earn on qualifying purchases.
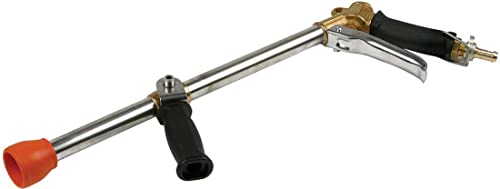
Hypro 17" Adjustable Pattern Spray Gun (3381-0010)
Brand: Hypro
As an affiliate, we earn on qualifying purchases.
As an affiliate, we earn on qualifying purchases.

Franz came aboard the Paint Sprayer Zone team with a background in both journalism and home renovation. His articulate writing style, combined with a passion for DIY projects, makes him an invaluable asset. Franz has a knack for breaking down technical jargon into easy-to-understand content, ensuring that even the most novice of readers can grasp the complexities of paint sprayers.