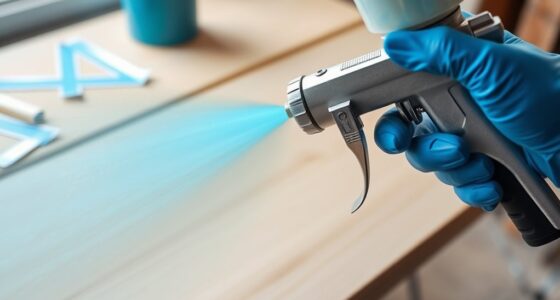
Connect with us

How-To & Tips

Thinning Latex Paint for Airless Sprayers: Achieving Optimal Performance

Published

on

An image showcasing an airless sprayer with a paint bucket, demonstrating the precise mixing of latex paint and thinner, emphasizing the ideal consistency required for optimal performance

Thinning latex paint is an essential task for optimal use with airless spray devices. Did you know that the density of the paint greatly influences the efficiency of the sprayer? To achieve an even spray pattern, prevent clogs, and secure a superior finish, it is critical to correctly dilute the paint.

Thick paint can lead to uneven coverage, strain on the sprayer, and potential malfunctions. This article explores the importance of thinning latex paint, provides guidance on following manufacturer recommendations, and offers tips for troubleshooting and achieving flawless application.

Key Takeaways

  • Thinning latex paint is crucial for optimal performance and results when using an airless sprayer.
  • Properly diluted consistency ensures smooth flow, prevents clogging, and delivers a professional-looking finish.
  • Gradually thin the paint and test the consistency to achieve a flawless application.
  • Use paint strainers, mix thoroughly, and follow manufacturer’s guidelines for pressure adjustments to ensure consistent spray patterns and prevent uneven application.
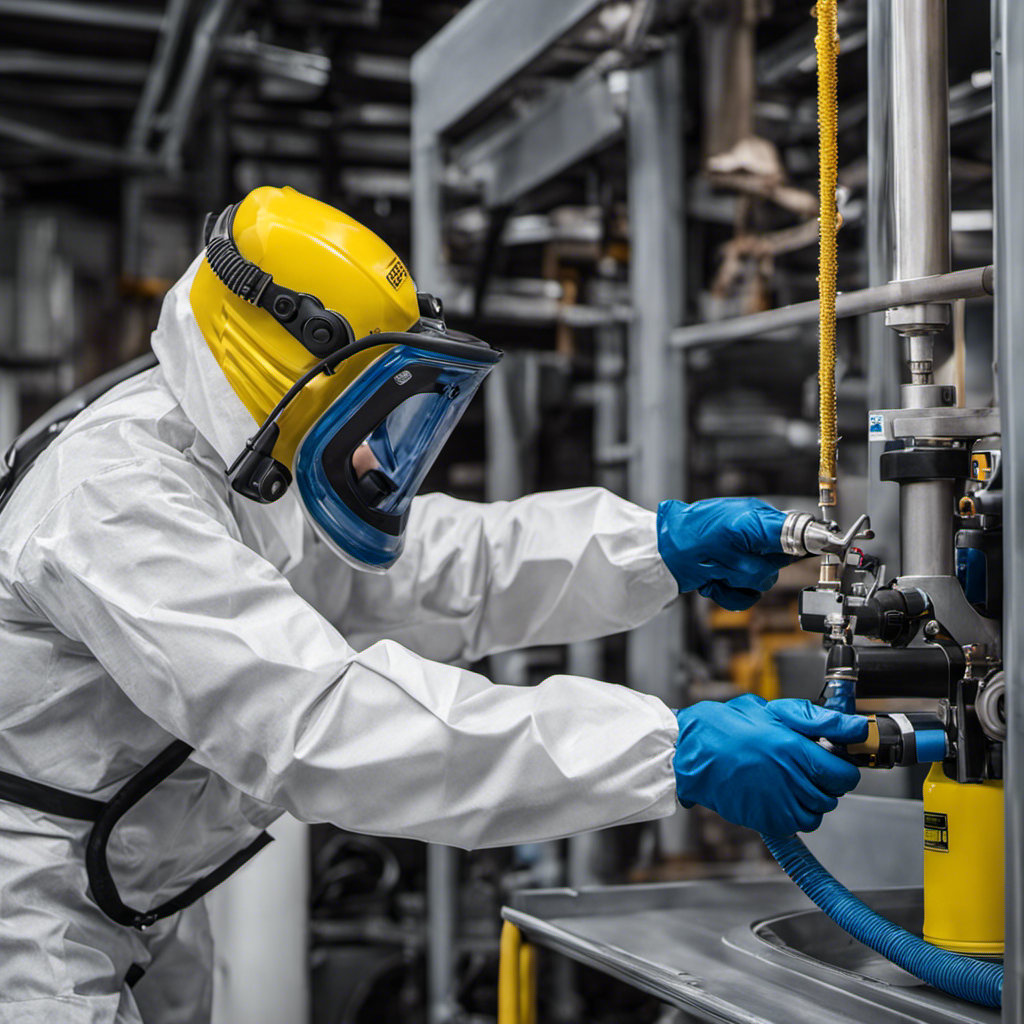
Importance of Thinning Latex Paint for Airless Sprayers

Thinning latex paint is crucial for airless sprayers to achieve optimal performance and ensure a professional-looking finish. Understanding paint viscosity is key in this process.

The viscosity of the paint refers to its thickness, and it greatly affects the performance of the sprayer. When the paint is too thick, it can lead to uneven coverage, strain on the sprayer, and potential malfunctions or premature wear.

Advertisement

Troubleshooting paint thinning issues is important to achieve the desired consistency. Gradually thinning the paint and testing the consistency is recommended. Paint thinners, water, latex paint conditioners, and commercial paint thinners can be used for thinning.

It is essential to follow the manufacturer’s recommended thinning ratios for the specific paint and sprayer model to ensure smooth flow and prevent clogging.

Understanding the Viscosity of Latex Paint

Understanding the viscosity of latex paint is crucial for achieving smooth flow and preventing clogging when using an airless sprayer. The viscosity refers to the thickness or resistance to flow of the paint. It is measured in Krebs Units (KU) or seconds (s) using a viscometer.

The impact of viscosity on the spray pattern is significant. If the paint is too thick, it will not flow properly through the sprayer and may result in uneven coverage or clogging. On the other hand, if the paint is too thin, it may cause the spray pattern to become distorted or splatter.

Finding the right viscosity is essential for a consistent and professional-looking finish. Referencing the manufacturer’s guidelines and using a viscosity cup for testing can help determine the appropriate thinning ratio to achieve optimal viscosity.

Advertisement

The Role of Consistency in Achieving Optimal Performance

Maintaining the proper consistency of the paint is crucial for achieving optimal results when using an airless sprayer. The impact of paint texture cannot be underestimated in achieving consistent results.

When the paint is too thick, it can lead to uneven coverage and strain on the sprayer, potentially causing malfunctions or premature wear. On the other hand, if the paint is too thin, it can result in poor coverage, streaks, uneven color, and running paint.

Achieving the right consistency involves following the manufacturer’s guidelines for thinning ratios, gradually thinning the paint while testing the consistency, and adjusting ratios as needed. It is important to use the appropriate thinning agents, such as paint thinners or water, and to mix the paint thoroughly to achieve a uniform mixture.

Advertisement

Effects of Thick Paint on Airless Sprayer Performance

Excessive thickness of the paint can strain the airless sprayer and result in uneven coverage, potential malfunctions, or premature wear.

When paint is over-thinned, it can cause a whole new set of issues. The consistency becomes too thin, leading to poor coverage, streaks, uneven color, and running paint.

Achieving a smooth flow and preventing clogging is essential for optimal performance. To ensure this, follow the manufacturer’s recommended thinning ratios for the specific paint and sprayer model. Gradually thin the paint, testing the consistency along the way.

Paint thinners, water, latex paint conditioners, and commercial paint thinners can be used for thinning.

Properly preparing the paint and equipment, as well as calculating and mixing the thinning ratio accurately, will help prevent potential problems and ensure a professional-looking finish.

Advertisement

Following Manufacturer’s Recommendations for Thinning Ratios

Following the manufacturer’s recommendations is crucial for achieving the desired consistency and preventing potential issues when diluting latex paint for airless sprayers. Here are four important points to consider when following the recommended thinning ratios:

  1. Thinning ratio variations: Different paint brands and airless sprayer models may have varying thinning ratios. It is essential to consult the manufacturer’s guidelines to determine the correct ratio for your specific combination.

  2. Gradual thinning and troubleshooting over-thinned paint: It is recommended to thin the paint gradually, testing the consistency along the way. This approach allows for adjustments if the paint becomes over-thinned. Over-thinned paint can result in poor coverage, streaks, uneven color, and running paint.

  3. Consistency testing and adjustment: Use a viscosity cup or test surface to measure the consistency of the thinned paint. Based on the test results, adjustments can be made to achieve the desired consistency.

  4. Following guidelines for pressure adjustments: In addition to following the thinning ratio, it is important to adjust the airless sprayer’s pressure according to the manufacturer’s guidelines. This ensures consistent spray patterns and prevents uneven application.

Gradual Thinning Technique for Smooth Application

When thinning latex paint for airless sprayers, it is important to consider the technique used.

One technique is gradual thinning, which involves adding small amounts of thinning agent incrementally until the desired consistency is achieved. This method allows for better control over the viscosity of the paint and helps to prevent over-thinning.

Advertisement

In contrast, immediate thinning involves adding a larger amount of thinning agent all at once. While this method may seem quicker, it can be harder to achieve the desired consistency and may result in over-thinning the paint.

The choice of thinning agent can also impact the final outcome. Different thinning agents, such as water, latex paint conditioners, or commercial paint thinners, can have varying effects on the paint’s viscosity and flow.

It is important to choose the appropriate thinning agent based on the specific paint and sprayer model being used.

Choosing the Right Thinning Agents for Latex Paint

Water, latex paint conditioners, and commercial paint thinners are some options to consider when choosing the right thinning agents for latex paint. Thinning latex paint is essential for achieving optimal performance when using airless sprayers. To ensure the best results, it is important to use the proper techniques for thinning latex paint. Here are some key points to keep in mind:

  1. Consider the type of thinning agent: Water is a common and cost-effective option for thinning latex paint. Latex paint conditioners can improve the flow and leveling properties of the paint. Commercial paint thinners are specifically designed for thinning latex paint and may offer better performance.

  2. Follow manufacturer’s recommendations: Different paints and sprayers may have specific thinning ratios. It is important to follow these guidelines to achieve the desired consistency for spraying.

  3. Gradually thin and test the paint: Start by adding a small amount of thinning agent and gradually increase until the desired consistency is achieved. Test the paint’s flow and coverage on a test surface to ensure it is suitable for spraying.

  4. Avoid over-thinning: Over-thinning the paint can lead to poor coverage, streaks, and running paint. It is important to find the right balance to achieve optimal performance.

Mixing Ratios: Finding the Perfect Balance

To achieve the perfect balance in mixing ratios, the painter gradually adds the thinning agent and tests the consistency until it is just right. Finding the right dilution is crucial for achieving optimal performance when thinning latex paint for airless sprayers.

Advertisement

The painter must carefully follow the manufacturer’s guidelines for the recommended thinning ratio, as it can vary depending on the type of latex paint and airless sprayer being used. By measuring and calculating the proper proportions, the painter can pour the measured paint into a clean container and gradually add the thinner while stirring continuously. It is essential to thoroughly blend the mixture until a consistent mixture is achieved.

Troubleshooting thinning issues can be done by using a viscosity cup or test surface to measure the consistency of the thinned paint and making adjustments accordingly. By following these techniques and guidelines, the painter can achieve optimal performance and avoid common mistakes such as over-thinning the paint or not following recommended thinning ratios.

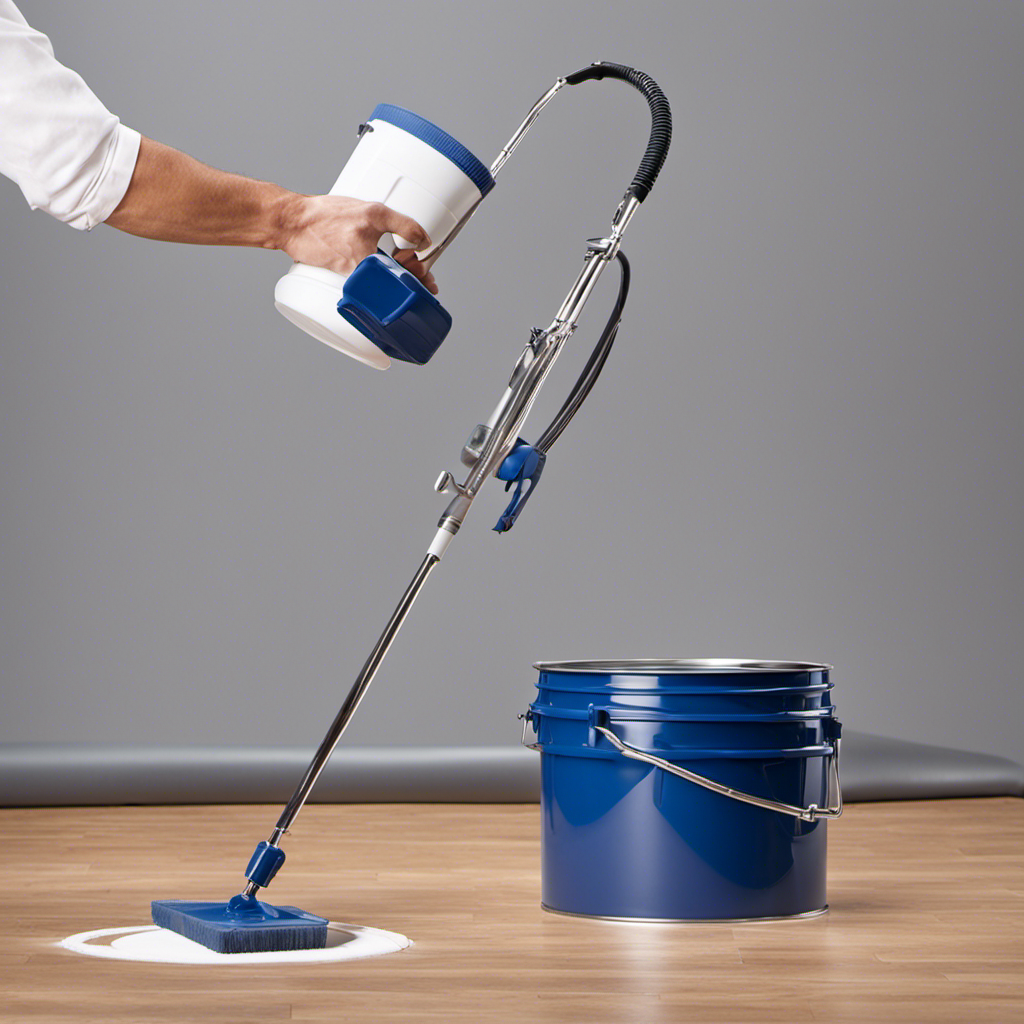
Preparing Paint and Equipment for Airless Spraying

The painter strains the paint and thoroughly mixes it with a stir stick to ensure a uniform consistency before using the airless sprayer. This step is crucial in preparing the paint and equipment for airless spraying.

To achieve optimal performance, the painter must also adjust the nozzles, tips, and spray patterns for airless spraying. This ensures a precise and even application of the paint.

Additionally, cleaning and maintaining the airless sprayers is essential for long-term use. Regular maintenance, such as cleaning the filters, flushing the system with clean water, and inspecting the spray gun for any clogs or damages, will prolong the lifespan of the sprayer and maintain its efficiency.

Advertisement

Following these procedures will ensure consistent and professional results with airless sprayers.

Using Paint Strainers to Ensure Clean Application

When preparing latex paint for airless spraying, using paint strainers is a beneficial practice to ensure a clean application. Paint strainers are designed to remove impurities and clumps from the paint, preventing clogs and ensuring a smooth flow through the sprayer. By using a paint strainer, the risk of uneven application and potential malfunctions can be minimized.

To help you better understand the benefits and best practices of using paint strainers, here is a table that highlights key information:

Benefits of Using Paint Strainers Best Practices for Using Paint Strainers
1. Removes impurities and clumps 1. Place the paint strainer over the container or sprayer
2. Prevents clogs in the sprayer 2. Pour the paint through the strainer slowly
3. Ensures a smooth flow of paint 3. Use a stir stick to gently press the paint through the strainer
4. Minimizes the risk of uneven application 4. Dispose of the strained impurities properly

Thoroughly Mixing Paint for Uniform Consistency

Mixing the paint thoroughly with a stir stick is crucial to achieve a uniform consistency. This step ensures that the paint is properly blended, preventing any clumps or separation. Here are some important mixing techniques to keep in mind:

  1. Use a stir stick with a flat end to scrape the sides and bottom of the container, ensuring all the paint is incorporated.
  2. Mix in a circular motion, starting from the center and gradually working your way outwards.
  3. Avoid vigorous stirring, as it can introduce air bubbles into the paint, which can affect the finish.
  4. Take your time and be patient, as rushing the mixing process can lead to an uneven consistency.

Common mistakes to avoid when mixing paint include not stirring thoroughly enough, using a stir stick that is too small, and not scraping the sides of the container. By following these mixing techniques and avoiding these common mistakes, you can achieve a smooth and consistent paint mixture for your airless sprayer.

Adjusting Airless Sprayer Pressure for Proper Application

To ensure a smooth and even application, adjusting the pressure of the airless sprayer is crucial. Properly adjusting the paint pressure is essential for achieving optimal performance and avoiding application issues.

Advertisement

When the pressure is too high, it can cause the paint to atomize excessively, leading to overspray and wasted material. On the other hand, if the pressure is too low, the paint may not atomize properly, resulting in a poor quality finish.

Troubleshooting application issues can often be resolved by adjusting the paint pressure. By carefully monitoring the pressure and making necessary adjustments, painters can achieve the desired spray pattern and coverage.

It is important to consult the manufacturer’s guidelines for recommended pressure settings and to test the spray pattern before starting the project. Adjusting the paint pressure is a critical step in achieving professional and consistent results.

Calculating Thinning Ratios for Latex Paint

The manufacturer’s guidelines provide the recommended thinning ratio for calculating the proper consistency of latex paint. To achieve the desired results when using an airless sprayer, it is crucial to calculate the thinning ratios accurately.

Here are the key points to consider when calculating thinning ratios and achieving the proper consistency:

Advertisement
  1. Follow the manufacturer’s recommended thinning ratios for the specific paint and sprayer model.

  2. Gradually thin the paint and test the consistency to achieve a smooth and flawless application.

  3. Various substances like paint thinners, water, latex paint conditioners, and commercial paint thinners can be used for thinning.

  4. Mixing ratios can vary depending on the specific paint and sprayer model. It is essential to adjust the ratios as needed to achieve the desired consistency.

Calculating the thinning ratios accurately ensures optimal performance and a professional finish when using latex paint with an airless sprayer.

Measuring and Mixing Thinning Proportions

When measuring and blending the proportions for thinning, it is important to follow the recommended guidelines provided by the manufacturer. This ensures that the paint is properly diluted and the desired consistency is achieved. To help visualize the process, here is a table demonstrating the measuring techniques and troubleshooting tips for thinning latex paint:

Measuring Techniques Troubleshooting Tips
Gradually thin the paint Start with the recommended thinning ratio
Test the consistency Mix thoroughly to avoid clumps
Adjust ratios as needed Avoid over-thinning the paint
Use a viscosity cup or test surface to measure consistency Follow manufacturer’s guidelines for pressure adjustments

Testing and Troubleshooting Thinned Latex Paint

Using a viscosity cup or test surface, one can accurately measure the consistency of the thinned paint. This step is crucial in ensuring the paint is properly diluted for optimal performance with an airless sprayer.

Here are some testing techniques and troubleshooting tips for thinned latex paint:

  1. Conduct a consistency test using a viscosity cup or by applying the paint to a test surface. This will help determine if the paint is too thick or thin.

  2. Adjust the thinning ratio if necessary. If the paint is too thick, add more thinner or water. If it’s too thin, add more paint.

  3. Check for any clogging or uneven spray patterns. If there are issues, adjust the spray pressure or clean the sprayer nozzle.

  4. Avoid over-thinning the paint, as it can result in poor coverage, streaks, uneven color, and running paint. Follow the manufacturer’s guidelines and recommendations to achieve the best results.

Frequently Asked Questions

Can I Use Any Type of Thinner for Thinning Latex Paint for Airless Sprayers?

Using alternative thinners for thinning latex paint for airless sprayers has its pros and cons. While water is the most commonly used and easily accessible thinner, it may not be the best option for all situations.

Advertisement

Other types of thinners, such as paint conditioners or commercial thinners, offer different benefits such as improved flow and leveling. However, it’s important to carefully read the manufacturer’s guidelines and consider the specific paint and sprayer model before using any alternative thinners to ensure optimal performance and avoid potential issues.

How Do I Know if I Have Over-Thinned the Latex Paint?

How can one determine if they have over-thinned latex paint?

Signs of over-thinned latex paint include poor coverage, streaks, uneven color, and running paint.

To fix over-thinned latex paint, one can add small amounts of undiluted paint to the mixture and stir thoroughly until the desired consistency is achieved.

It is important to avoid adding too much paint at once to prevent over-thinning again.

Advertisement

Regular testing and adjustments are crucial to achieve optimal performance and avoid over-thinning.

What Are Some Common Problems That Can Occur if the Latex Paint Is Not Properly Thinned?

Common problems with not properly thinned latex paint include poor coverage and an uneven finish.

When latex paint is not thinned correctly, it can result in areas where the paint is too thick and doesn’t spread evenly, leading to uneven color and streaks. Additionally, the paint may not adhere properly to the surface, resulting in poor coverage and a patchy appearance.

It is crucial to follow the recommended thinning ratios and techniques to achieve optimal performance and a professional-looking finish.

Can I Use Water as a Thinner for Latex Paint?

Yes, water can be used as a thinner for latex paint. However, it is important to note that using alternative thinners for latex paint may have different effects on the paint’s performance and final result.

Advertisement

Over-thinning latex paint can lead to poor coverage, streaks, uneven color, and running paint. It is recommended to follow the manufacturer’s guidelines for thinning ratios and to test the consistency of the thinned paint before application.

Can I Use a Different Brand of Paint Conditioner or Thinner Than What Is Recommended by the Manufacturer?

Different brands of paint conditioners and thinners can be used as alternatives to the ones recommended by the manufacturer. However, it is important to note that using a different brand may affect the performance and results of the paint and sprayer.

It is advisable to consult the manufacturer’s guidelines or conduct a test to ensure compatibility and desired outcomes. Following the manufacturer’s recommendations for paint conditioners and thinners is generally the best practice for achieving optimal performance with an airless sprayer.

Conclusion

In conclusion, thinning latex paint for airless sprayers is crucial for achieving optimal performance and a professional finish. By understanding the viscosity of latex paint and the role of consistency, users can prevent clogging, uneven coverage, and strain on the sprayer.

Following manufacturer’s recommendations for thinning ratios and adjusting airless sprayer pressure ensures proper application. Interestingly, studies have shown that properly thinned latex paint can increase efficiency by up to 50%, allowing for faster and more effective painting.

Advertisement

By measuring, mixing, testing, and troubleshooting thinned paint, users can ensure a smooth flow and flawless application.

Continue Reading
Advertisement

How-To & Tips

The Importance of Lubrication for Airless Paint Sprayers

Published

on

By

An image showcasing the significance of lubrication for airless paint sprayers

It is crucial to keep airless paint sprayers properly lubricated to maintain their efficiency and enhance their longevity. Regular lubrication can prevent costly repairs and increase the service life of the equipment. It allows for smooth and effective operation by preventing clogs and reducing wear. By reducing friction and wear on moving parts, lubrication improves overall performance.

Different types of lubricants, such as silicone, mineral oil, and synthetic lubricants, can be used. Following manufacturer instructions for regular maintenance, including cleaning the sprayer before lubrication and applying the appropriate amount, is essential for optimal performance.

Troubleshooting tips and maintenance advice are also provided in this article.

Key Takeaways

  • Using the right lubricant is crucial for maintaining an airless paint sprayer.
  • Regular lubrication helps prevent costly repairs and extends the lifespan of the equipment.
  • Proper lubrication is important for smooth and efficient operation, preventing clogs or damage.
  • Lubricating reduces friction and wear on moving parts, extending the lifespan and enhancing efficiency.

The Benefits of Regular Lubrication

Regular lubrication helps prevent costly repairs and extends the lifespan of the equipment. It also ensures smooth and efficient operation of airless paint sprayers. The importance of regular lubrication cannot be overstated. Lubrication plays a crucial role in enhancing the efficiency and lifespan of the equipment. By reducing friction and wear on moving parts, lubrication helps to maintain consistent performance and prevent clogs or damage. It also minimizes the risk of breakdowns and costly repairs.

Advertisement

Proper lubrication ensures that the airless paint sprayer operates smoothly and efficiently, resulting in a high-quality paint finish. Regular maintenance and lubrication are essential for optimal working condition and to maximize the longevity and efficiency of the equipment.

Types of Lubricants for Airless Paint Sprayers

Silicone lubricants provide excellent lubrication, high heat resistance, and water repellency for airless paint sprayers. When it comes to choosing the best lubricant for your airless paint sprayer, silicone lubricants are the top choice. They offer superior lubrication properties that ensure smooth and efficient operation of the equipment.

Additionally, silicone lubricants have high heat resistance, preventing the lubricant from breaking down under the high temperatures generated by the sprayer. They also provide water repellency, protecting the equipment from moisture damage.

As for the lubrication frequency, it is recommended to lubricate your airless paint sprayer according to the manufacturer’s instructions. Regular lubrication is essential for maintaining the longevity and optimal performance of your equipment.

Steps to Properly Lubricate Your Equipment

Advertisement

To properly lubricate the equipment, the user should first clean the sprayer to remove any debris or paint residue. This ensures that the lubricant can effectively coat the necessary parts and provide optimal performance. After cleaning, the following steps should be followed for proper lubrication techniques:

  1. Refer to the manufacturer’s instructions: Different airless paint sprayers may have specific lubrication requirements, so it’s important to follow the guidelines provided.

  2. Use the recommended lubricant: Using the wrong type of lubricant can lead to inadequate lubrication or even damage to the equipment. It’s essential to use the lubricant recommended by the manufacturer for optimal results.

  3. Apply the lubricant to the appropriate parts: Focus on lubricating the moving components of the sprayer, such as the piston rod, packings, and seals. Apply the lubricant evenly and ensure proper coverage.

  4. Avoid over-lubrication: Applying too much lubricant can cause excess buildup, leading to clogs and decreased performance. Use the correct amount of lubricant as specified by the manufacturer.

Troubleshooting Common Lubrication Issues

Properly maintaining the equipment includes troubleshooting common lubrication issues to ensure optimal performance.

Airless paint sprayers may encounter a few common lubrication problems that can affect their efficiency and lifespan.

One common issue is the presence of debris or paint residue in the lubrication system, leading to clogs and reduced lubrication. This can be resolved by thoroughly cleaning the sprayer before applying lubricant.

Advertisement

Another problem is the use of incorrect lubricant or using too much of it, which can cause build-up and interfere with the sprayer’s operation. It is important to use the recommended lubricant and apply the correct amount.

Additionally, improper storage or lack of regular maintenance can also result in lubrication issues.

Maintenance Tips for Extending the Lifespan of Your Sprayer

Regular maintenance and proper storage are key factors in extending the lifespan of an airless paint sprayer. To ensure the longevity of your equipment, follow these storage techniques and cleaning methods:

Advertisement
  1. Store in a clean and dry area: Keep your paint sprayer in a clean and dry environment to prevent dust and moisture buildup, which can lead to clogs and damage.

  2. Clean after each use: Thoroughly clean the sprayer after each use to remove any paint residue or debris that may affect its performance. Use appropriate cleaning solutions and follow the manufacturer’s instructions.

  3. Protect sensitive parts: Cover the spray tip and other sensitive parts with protective caps when not in use to prevent damage and maintain their effectiveness.

  4. Use quality storage containers: Store your paint sprayer in a sturdy and well-sealed container to protect it from accidental damage and ensure its safety during transportation or storage.

Commonly Asked Questions About Lubrication for Airless Paint Sprayers

Using the correct type of lubricant is crucial for maintaining the optimal performance and longevity of an airless paint sprayer. The frequency of lubrication and the choice of lubricant are important factors to consider. To help you make an informed decision, here are some commonly asked questions about lubrication for airless paint sprayers:

Question Answer
Can I use any type of lubricant on my airless paint sprayer? It is recommended to use lubricants specifically designed for airless paint sprayers.
How often should I lubricate my airless paint sprayer? The lubrication frequency depends on the manufacturer’s guidelines, but typically, it is recommended to lubricate the sprayer after every 50 hours of use.
Can I over-lubricate my airless paint sprayer? Yes, over-lubrication can lead to clogs and other issues. Follow the manufacturer’s instructions for the correct amount of lubricant to use.
What are the signs that my airless paint sprayer needs lubrication? If you notice increased friction, unusual noises, or decreased performance, it may be time to lubricate your sprayer.
Are there any specific maintenance tips I should follow to keep my airless paint sprayer in good condition? In addition to regular lubrication, proper storage, cleaning, and inspection of parts are essential for maintaining your airless paint sprayer’s longevity.

Expert Tips for Maintaining Optimal Performance

To ensure optimal performance, experts recommend following the manufacturer’s guidelines for lubrication frequency and choice of lubricant for maintenance of an airless paint sprayer. Proper maintenance is essential for maintaining the longevity and efficiency of the equipment.

Here are some expert tips to help you maintain optimal performance:

  1. Determine the maintenance frequency: Consult the manufacturer’s guidelines to determine how often your airless paint sprayer needs to be lubricated. Regular lubrication is essential for smooth and efficient operation.

  2. Choose the right lubricant: Selecting the appropriate lubricant is crucial for preventing wear and tear on moving parts. Consider factors such as heat resistance, water repellency, and rust prevention when choosing the lubricant.

  3. Clean before lubrication: Before applying the lubricant, ensure that the sprayer is clean and free from any debris or paint residue. This will help prevent clogs and ensure proper lubrication.

  4. Follow the instructions: Apply the lubricant to the recommended parts as per the manufacturer’s instructions. Use the correct amount of lubricant to ensure proper coverage and performance.

Frequently Asked Questions

Can I Use WD-40 or Other General-Purpose Lubricants on My Airless Paint Sprayer?

Using WD-40 or other general-purpose lubricants on an airless paint sprayer is not recommended. Using alternative lubricants can have adverse effects on the equipment. It may not provide the necessary lubrication needed for smooth operation and can potentially cause damage to the sprayer.

It is important to use the lubricants recommended by the manufacturer to ensure optimal performance and to maintain the longevity of the equipment.

Advertisement

Is It Necessary to Use a Specific Brand of Lubricant Recommended by the Manufacturer?

Using alternative lubricants for airless paint sprayers is not recommended. The potential consequences of using the wrong lubricant on an airless paint sprayer can be detrimental to its performance and lifespan. Manufacturers usually provide specific lubricant recommendations for their equipment, and it is necessary to follow these guidelines.

Using a lubricant that is not recommended may result in decreased efficiency, increased wear and tear, and potential damage to the paint sprayer. It is best to stick to the lubricants recommended by the manufacturer to ensure optimal operation and longevity.

How Do I Know if I Have Applied Enough Lubricant to My Airless Paint Sprayer?

To ensure the lifespan of an airless paint sprayer, it’s important to know if enough lubricant has been applied. Common signs of insufficient lubrication include increased friction, sticking parts, and decreased performance.

To maintain the sprayer’s lifespan, it’s crucial to evenly apply the recommended amount of lubricant to the appropriate parts. This will prevent wear and tear, ensure smooth operation, and extend the equipment’s longevity.

Proper lubrication is essential for optimal performance and to avoid costly repairs.

Advertisement

Can I Use a Lubricant That Is Not Recommended for High Heat Resistance on My Sprayer?

Using non-recommended lubricants on airless paint sprayers can pose potential risks and consequences. It is important to use heat-resistant lubricants specifically designed for airless paint sprayers. These lubricants provide the necessary protection against high temperatures and ensure smooth operation without compromising the equipment’s performance.

Using a lubricant that is not recommended for high heat resistance may lead to overheating, damage to the equipment, and decreased efficiency. It is crucial to follow the manufacturer’s guidelines and use the appropriate lubricant for optimal results.

Are There Any Alternative Methods of Lubrication for Airless Paint Sprayers?

Alternative lubrication methods for airless paint sprayers provide additional options for maintaining optimal performance. While using the recommended lubricants is crucial, some users may prefer to explore alternatives.

However, it is important to note that alternative methods may not offer the same level of effectiveness and benefits as the recommended lubricants.

Regular lubrication, using the appropriate lubricant, helps prevent costly repairs, extends equipment lifespan, and ensures smooth operation.

Advertisement

Conclusion

In conclusion, regular lubrication is crucial for the efficient and long-lasting performance of airless paint sprayers. By reducing friction and wear on moving parts, proper lubrication enhances the sprayer’s efficiency and prevents costly repairs.

Choosing the right lubricant, following manufacturer’s instructions, and performing regular maintenance are key steps in ensuring optimal working condition. Remember, ‘a well-oiled machine’ is not just an idiom but a literal expression of the importance of lubrication in maintaining the sprayer’s functionality.

So, keep your sprayer well-lubricated to keep it running smoothly and extend its lifespan.

Continue Reading

How-To & Tips

The Importance of Pressure Adjustment: Achieving an Even Paint Application

Published

on

By

An image showcasing a professional painter adjusting pressure on a spray gun while applying paint to a smooth surface

Achieving a flawless paint job necessitates the correct adjustment of pressure. Picture a painter meticulously working on a surface, only to be left with streaks and uneven patches. This scenario underscores the significance of pressure adjustment.

By fine-tuning the pressure on a paint sprayer, one can ensure consistent and even paint coverage, resulting in a smooth and professional finish.

In this article, we will explore the importance of pressure adjustment and provide valuable tips for achieving an even paint application.

Key Takeaways

  • Adjusting pressure ensures even and consistent paint application
  • Using proper tools, such as a pressure gauge and wrench/screwdriver, is important for accurate pressure readings
  • Conducting a test spray on a scrap piece of cardboard helps determine if pressure needs adjustment
  • Fine-tuning pressure settings and experimenting with techniques can improve the spray pattern and coverage

The Basics of Pressure Adjustment

Adjusting the pressure ensures that the paint is applied evenly and consistently, allowing for the desired coverage and avoiding streaks or uneven spots. Proper pressure adjustment is of utmost importance when using a paint sprayer.

One common mistake in pressure adjustment is using the wrong tools. It is crucial to gather the necessary tools such as a pressure gauge and a wrench or screwdriver to accurately measure and adjust the pressure.

Another mistake is not consulting the sprayer’s manual. The manual provides instructions for pressure adjustment settings and troubleshooting solutions to common issues.

Advertisement

Neglecting to test the spray before starting the actual painting is another error. Conducting a test spray on a scrap piece of material helps determine if pressure needs adjustment and allows for the identification of clogs or issues with paint viscosity.

Selecting the Right Tools for Pressure Adjustment

Using the correct tools for pressure adjustment is crucial to ensuring accurate readings and maintaining the quality of the paint job.

When it comes to choosing the correct pressure gauge, there are a few factors to consider. First, make sure the gauge is compatible with your sprayer model. Different sprayers may require different types of gauges, so it’s important to check the manufacturer’s recommendations.

Additionally, understanding pressure adjustments is essential for achieving the desired paint application. The pressure gauge allows you to monitor and adjust the pressure levels to ensure even and consistent coverage.

Conducting a Test Spray for Pressure Adjustment

Advertisement

To determine if the pressure needs adjustment, the user can start by conducting a test spray on a scrap piece of cardboard. This step is crucial to achieving an even paint application.

By using a pressure gauge for the test spray, the user can accurately measure and monitor the pressure. This ensures that the desired coverage and consistency are achieved.

Adjusting the pressure is especially important when working with different paint viscosities. Thick or thin paints require different pressure settings to achieve optimal results.

Using a pressure gauge allows the user to make precise adjustments and avoid streaks or uneven spots.

Advertisement

Fine-Tuning and Experimenting With Pressure Settings

The user can experiment with different pressure settings to achieve a variety of spray patterns and enhance their painting skills. By fine-tuning the pressure, they can control the overspray and minimize wastage.

Adjusting the spray distance from the surface also allows for different spray patterns to be created. It is important to practice and experiment with different techniques to improve painting skills.

The user can adjust the pressure and distance to achieve a smooth and even finish on their painting project. It is crucial to avoid over-adjusting the pressure, as this can lead to potential risks.

Cleaning and Maintenance for Optimal Pressure Adjustment

Advertisement

Regularly cleaning and maintaining the sprayer ensures optimal performance and longevity, allowing for accurate pressure adjustment and a smooth painting process. To prevent paint clogs, it is important to use a recommended cleaning solution.

After each use, thoroughly clean the sprayer by flushing the system to remove paint residue from the gun, nozzle, and filters. Regularly inspect and clean filters to prevent blockages. Lubricate moving parts to ensure smooth operation. If the nozzle gets clogged, clean it with a cleaning solution and remove stubborn clogs.

Troubleshooting Common Issues With Pressure Adjustment

Cleaning and maintaining the sprayer regularly ensures that common issues with pressure adjustment can be effectively troubleshooted. Adjusting pressure for different surfaces and preventing overspray and wastage are crucial for achieving an even paint application. Troubleshooting common issues with pressure adjustment requires attention to detail and proper knowledge.

Here are five steps to help troubleshoot common issues:

  • Check for clogs in the nozzle or hose and ensure suitable paint viscosity.
  • Inspect hoses and connections for air leaks and tighten loose connections.
  • Clean clogged nozzle with a cleaning solution and remove stubborn clogs.
  • Adjust pressure or thin paint to achieve a consistent spray pattern.
  • Regularly inspect and clean filters to prevent blockages.

Best Practices for Achieving an Even Paint Application

To achieve a smooth and flawless finish, painters should start by conducting a test spray on a scrap piece of material. This allows them to observe the spray pattern and coverage and determine if any pressure adjustment techniques are needed. Fine-tuning the pressure settings is crucial for achieving smooth finishes.

Experimentation and practice with different techniques can also enhance skills. Adjusting the pressure and distance from the surface can create different spray patterns. It is important to clean and maintain the sprayer regularly to ensure optimal performance. Troubleshooting common issues, such as clogs or air leaks, is essential for a smooth painting process.

Advertisement

Frequently Asked Questions

Can Pressure Adjustment Be Done on Any Type of Paint Sprayer?

Pressure adjustment can be done on most types of paint sprayers. However, it is important to note that different types of sprayers may have different methods of adjusting pressure. Some sprayers have built-in pressure adjustment settings, while others may require the use of additional tools such as a pressure gauge and wrench.

It is essential to consult the sprayer’s manual for specific instructions on how to adjust pressure for optimal paint application. Understanding the pros and cons of different types of sprayers can help determine which one is best suited for a particular project.

What Are the Potential Risks of Not Adjusting the Pressure Properly?

Improper pressure adjustment while using a paint sprayer can lead to various risks and negatively impact the quality of the paint application. It may result in uneven coverage, streaks, or spots, which can be visually unappealing.

Additionally, if the pressure is too high, it can cause overspray and wastage of paint. On the other hand, if the pressure is too low, it may result in a thin and insufficient coating.

Therefore, it is crucial to properly adjust the pressure to achieve an even and satisfactory paint application.

Advertisement

How Often Should Pressure Adjustments Be Made During a Paint Job?

Frequency of pressure adjustments during a paint job depends on various factors. These include the type of paint being used, the surface being painted, and the desired coverage and finish.

It is recommended to make pressure adjustments as needed to achieve an optimal spray pattern and coverage. Regularly monitoring the pressure and fine-tuning as necessary will ensure an even paint application.

Additionally, referring to the sprayer’s manual for recommended pressure ranges can help achieve the desired results.

Are There Any Safety Precautions to Take When Adjusting the Pressure?

When it comes to pressure adjustment and safety precautions, it’s important to take the necessary steps to ensure a smooth painting process. Proper pressure adjustment techniques can help achieve an even paint application and avoid any potential risks.

Safety precautions include wearing protective gear such as gloves and goggles, ensuring proper ventilation in the painting area, and following the manufacturer’s guidelines for the specific sprayer being used.

Advertisement

Can Pressure Adjustment Affect the Drying Time of the Paint?

Pressure adjustment can have an effect on the drying time of paint. By adjusting the pressure, the paint can be applied more evenly and consistently, which can impact the quality of the paint job. Proper pressure adjustment can also improve paint adhesion to the surface.

However, it is important to note that excessive pressure can lead to overspray and longer drying times. It is recommended to follow the manufacturer’s guidelines and conduct test sprays to ensure optimal pressure adjustment for the desired drying time.

Conclusion

In conclusion, achieving an even paint application is of utmost importance, and pressure adjustment plays a vital role in accomplishing this goal.

By using the correct tools and conducting a test spray, one can fine-tune the pressure settings for optimal results.

Regular cleaning and maintenance are necessary to ensure the sprayer’s performance remains at its best.

Advertisement

Troubleshooting common issues is also essential to overcome any obstacles.

By following these best practices, painters can enjoy the satisfaction of a smooth and flawless paint finish.

Continue Reading

How-To & Tips

The Importance of Filters in the Magnum Airless Paint Sprayer

Published

on

By

An image showcasing the intricate internal structure of the Magnum Airless Paint Sprayer's filters

The success of any painting project greatly depends on how well the Magnum Airless Paint Sprayer performs, and at the heart of its outstanding operation is the often overlooked hero: the filter. This component plays a critical role in ensuring a clean, debris-free flow of paint, which is vital for achieving flawless finishes. The filter is crucial in preventing clogs and ensuring smooth results, underscoring its importance as a fundamental part of the device.

In this article, we will delve into the importance of filters in the Magnum Airless Paint Sprayer and explore the techniques for proper maintenance and upgrading for optimal performance.

Key Takeaways

  • Investing in high-quality filters is crucial for the longevity and durability of the Magnum Airless Paint Sprayer.
  • Proper filtration ensures clean and debris-free paint flow, resulting in a smooth and even spray.
  • Regularly cleaning and maintaining filters is essential for optimal performance and longevity.
  • Choosing the right filters enhances the efficiency and effectiveness of your Magnum sprayer.

The Significance of Proper Filtration

Proper filtration ensures clean and debris-free paint flow, resulting in a smooth and even spray. The benefits of proper filtration in the Magnum Airless Paint Sprayer are numerous.

By using long-lasting filters, impurities and contaminants are effectively removed from the paint, preventing clogs and ensuring professional finishes. Clean and debris-free paint not only saves time during painting projects but also reduces frustration.

Advertisement

Filters are crucial in achieving optimal performance and efficiency with the Magnum airless paint sprayer. Using filters improves spray performance, reduces nozzle clogging, and extends the equipment’s life.

Ensuring Clean and Debris-Free Paint Flow

To achieve a smooth and even spray, users should regularly clean and maintain their filters in the Magnum Airless Paint Sprayer to ensure clean and debris-free paint flow. Regular filter maintenance offers several benefits, including improved performance, longer filter lifespan, and enhanced paint coverage.

Clean filters prevent clogs and blockages, ensuring optimal paint flow and spray performance. This leads to professional finishes and improved paint coverage. Regular maintenance extends the life of filters, reducing the need for frequent replacement.

Choosing the right filter size is also crucial for effective filtration and paint application. The mesh size determines the level of filtration, and selecting the appropriate filter material ensures compatibility and performance.

Preventing Clogs and Achieving Professional Finishes

Advertisement

Regular maintenance and cleaning of the filters in the Magnum Airless Paint Sprayer help prevent clogs and ensure professional finishes.

Proper filtration is crucial for achieving optimal performance and efficiency. By removing impurities and contaminants, filters prevent clogs and ensure a smooth and even spray. Clean paint flow not only saves time and frustration during painting projects but also improves spray performance and extends the life of the equipment.

It is important to choose the right filters, considering size and material, to ensure proper filtration and paint application. Regular inspection, cleaning, and replacement of filters, if necessary, are essential for optimal performance.

Troubleshooting filter issues and maintaining filters through proper care and cleaning help prevent painting problems and save time and money in the long run.

Advertisement

Time-Saving Benefits of Clean and Debris-Free Paint

Achieving a clean and debris-free paint flow saves time and frustration during painting projects, resulting in more efficient and satisfying results.

  • Benefits of clean and debris-free paint:
  • Time-saving: With a clean and debris-free paint flow, painters can maintain a steady and uninterrupted workflow, saving valuable time.
  • Improved efficiency: Clean paint ensures smooth and even coverage, reducing the need for touch-ups and rework.
  • Enhanced results: By eliminating debris, the final finish is professional-looking and visually appealing, leading to greater customer satisfaction.

By investing in high-quality filters for the Magnum Airless Paint Sprayer, painters can experience these time-saving benefits. Proper filtration removes impurities and contaminants, preventing clogs and ensuring a consistent paint flow.

Regularly cleaning and maintaining the filters is essential for optimal performance and longevity. With clean and debris-free paint, painters can complete projects more efficiently and achieve superior results.

Improving Performance and Efficiency With Filters

By properly maintaining and upgrading their filters, painters can significantly enhance the performance and efficiency of their Magnum airless paint sprayer. Filters play a crucial role in increasing durability and maximizing paint coverage. These filters ensure a clean and debris-free paint flow, resulting in a smooth and even spray.

Advertisement

By removing impurities and contaminants, filters prevent clogs and ensure professional finishes. Clean and debris-free paint not only saves time during painting projects but also improves the overall quality of the final result. Regular inspection, cleaning, and replacement of filters when necessary are essential for optimal performance and longevity.

Choosing the right filter size and material, as well as upgrading to high-quality filters, can further enhance the efficiency and effectiveness of the Magnum airless paint sprayer. Proper care and maintenance of filters are crucial for impeccable painting results and improved efficiency.

Locating and Cleaning Filters in the Magnum Airless Paint Sprayer

When maintaining the Magnum airless paint sprayer, painters can easily locate and clean the filters in two main areas: the suction tube and the spray gun.

Regular filter maintenance is of utmost importance for the optimal performance and longevity of the equipment. By using high-quality filters, painters can enjoy several benefits, including a smooth and even spray, prevention of clogs and blockages, and time-saving during painting projects.

Cleaning the filters removes dirt, dust, and particles, ensuring uninterrupted paint flow. It is essential to regularly inspect and clean the filters, as well as replace them if necessary, to maintain optimal performance. Proper filter maintenance not only extends the life of the Magnum airless paint sprayer but also improves spray performance and reduces nozzle clogging.

Advertisement

The Suction Tube and Spray Gun Filter Locations

Painters can easily locate the filters in the suction tube and spray gun of the Magnum airless paint sprayer. Regular filter maintenance is of utmost importance for optimal performance and longevity.

Using high-quality filters offers several benefits, such as ensuring clean and debris-free paint flow, resulting in a smooth and even spray. Filters remove impurities and contaminants, preventing clogs and ensuring professional finishes.

The suction tube filter is situated at the bottom of the paint container, while the spray gun filter is located near the trigger. Regularly inspecting and cleaning these filters, as well as replacing them if necessary, is crucial for maintaining optimal performance.

Effective Techniques for Cleaning Filters

Regularly cleaning and maintaining the filters in the suction tube and spray gun of the Magnum airless paint sprayer is essential for optimal performance and longevity. Here are some effective cleaning techniques and maintenance tips to ensure the filters are in top condition:

  • Clean the suction tube filter by removing the container and unscrewing the filter housing. Soak the spray gun filter in a cleaning solution.

  • Regularly inspect and clean the filters to remove dirt, dust, and particles that can cause clogs and blockages.

  • Troubleshoot filter issues by thoroughly cleaning them or replacing damaged or worn-out filters.

  • Choose the right filter size and material based on the manufacturer’s recommendations for proper compatibility and performance.

  • Upgrade filters to enhance paint flow and improve coverage, ensuring efficient and effective painting.

  • Maintain filters after each use, looking out for tears or holes, to prevent clogs and affect the spray pattern.

Don’t neglect filters for impeccable painting results. Follow these cleaning techniques and maintenance tips to ensure optimal performance and longevity.

Advertisement

Regular Inspection and Maintenance for Optimal Performance

Regular inspection and maintenance are essential for ensuring optimal performance and extending the life of the Magnum Airless Paint Sprayer. By regularly inspecting the filters, users can identify any signs of wear or damage, such as tears or holes, and promptly address them. This proactive approach prevents clogs and blockages that can affect the spray pattern and overall performance of the sprayer.

Furthermore, regular maintenance, including thorough cleaning after each use, removes dirt, dust, and particles that may accumulate in the filters over time. By keeping the filters clean and in good condition, users can maximize the efficiency and longevity of their Magnum Airless Paint Sprayer.

Neglecting regular maintenance can lead to reduced performance, increased downtime, and the need for premature replacement of equipment, highlighting the importance of regular maintenance for extending the life of the sprayer.

Troubleshooting and Maintenance of Filters

When troubleshooting and maintaining the filters in the Magnum Airless Paint Sprayer, users should ensure they are cleaning the filters thoroughly after each use and promptly addressing any signs of wear or damage. This is important to ensure optimal performance and prevent painting problems.

To evoke emotion in the audience, consider the following:

Advertisement
  • Frustration: Clogged filters can cause frustration and delays during painting projects.
  • Efficiency: Regular maintenance and troubleshooting techniques improve filter efficiency, saving time and money in the long run.
  • Longevity: Proper care and cleaning of filters extend their lifespan, ensuring consistent performance and professional finishes.

Tips for Choosing and Upgrading Filters for the Magnum Airless Paint Sprayer

After understanding the importance of troubleshooting and maintaining filters in the Magnum Airless Paint Sprayer, it is crucial to focus on selecting and upgrading filters to optimize its performance. When choosing filter material, it is essential to consider the level of filtration required and the compatibility with the sprayer. To assist in this process, manufacturers often provide recommendations regarding the appropriate filter size and material. Upgrading filters offers numerous benefits, including enhanced paint flow, improved paint coverage, and increased painting efficiency. High-quality filters also tend to have a longer lifespan, resulting in cost savings in the long run. By choosing and upgrading filters, users can ensure that their Magnum Airless Paint Sprayer operates at its best, delivering impeccable painting results.

Choosing Filter Material Benefits of Upgraded Filters
Consider level of filtration Enhanced paint flow
Check compatibility with sprayer Improved paint coverage
Consult manufacturer’s recommendations Increased painting efficiency
Longer lifespan

Frequently Asked Questions

What Is the Recommended Frequency for Cleaning the Filters in the Magnum Airless Paint Sprayer?

The recommended cleaning frequency for filters in the Magnum Airless Paint Sprayer is after every use.

Proper cleaning solutions should be used to ensure thorough removal of dirt, dust, and particles.

Cleaning the filters regularly prevents clogs and blockages, maintaining optimal performance.

Neglecting filter maintenance can affect the spray pattern and overall painting results.

Can I Use Any Cleaning Solution for Soaking the Spray Gun Filter, or Are There Specific Recommendations?

When it comes to soaking the spray gun filter in the Magnum Airless Paint Sprayer, it’s important to choose compatible cleaning solutions.

Advertisement

While there may be alternative cleaning methods, it’s recommended to follow the manufacturer’s guidelines for the appropriate cleaning solution.

Using the wrong cleaning solution could potentially damage the filter or affect its performance.

Therefore, it’s crucial to choose a cleaning solution that is specifically recommended for soaking the spray gun filter to ensure optimal cleaning and maintenance.

Are There Any Specific Signs or Symptoms That Indicate a Clogged Filter in the Magnum Airless Paint Sprayer?

Signs of a clogged filter in the Magnum Airless Paint Sprayer include reduced paint flow, uneven spray patterns, and increased pressure fluctuations.

Cleaning techniques, such as removing and soaking the filters in a cleaning solution, are crucial for preventing clogged filters.

Advertisement

Regular inspection, maintenance, and replacement of filters when necessary are essential to ensure optimal performance and prevent painting problems.

Are There Any Alternative Methods for Cleaning the Filters if I Don’t Have Access to a Cleaning Solution?

If access to a cleaning solution is limited, there are alternative methods for cleaning the filters of the Magnum Airless Paint Sprayer.

One method is to use warm soapy water to soak and gently scrub the filters.

Another option is to use a mild household detergent or vinegar solution to dissolve any paint residue.

It is important to rinse the filters thoroughly after cleaning to ensure all debris is removed.

Advertisement

Regular filter cleaning is of utmost importance to maintain optimal performance and prevent clogs in the paint sprayer.

Besides the Manufacturer’s Recommendations, Are There Any Other Factors to Consider When Choosing Upgraded Filters for the Magnum Airless Paint Sprayer?

When choosing upgraded filters for the Magnum Airless Paint Sprayer, there are several factors to consider.

Firstly, one should consider the mesh size of the filter, as it determines the level of filtration.

Additionally, the material of the filter is crucial for proper compatibility and performance.

Upgraded filters offer benefits such as enhanced paint flow and improved paint coverage.

Advertisement

They also have a longer lifespan and improve painting efficiency.

Considering these factors ensures optimal performance and longevity of the paint sprayer.

Conclusion

In conclusion, the importance of filters in the Magnum Airless Paint Sprayer cannot be overstated. These filters act as the gatekeepers, ensuring a smooth and even spray by removing impurities and contaminants from the paint flow. They prevent clogs, enhance performance, and achieve professional finishes.

Just like a vigilant guard, regular inspection and maintenance of filters are crucial for optimal performance. Choosing the right filter size and material is like selecting the perfect tool for the job.

So, remember to treat your filters with care and watch as they effortlessly transform your painting experience into a masterpiece.

Advertisement

Continue Reading

Trending

Copyright © 2024 Paint Sprayer Zone