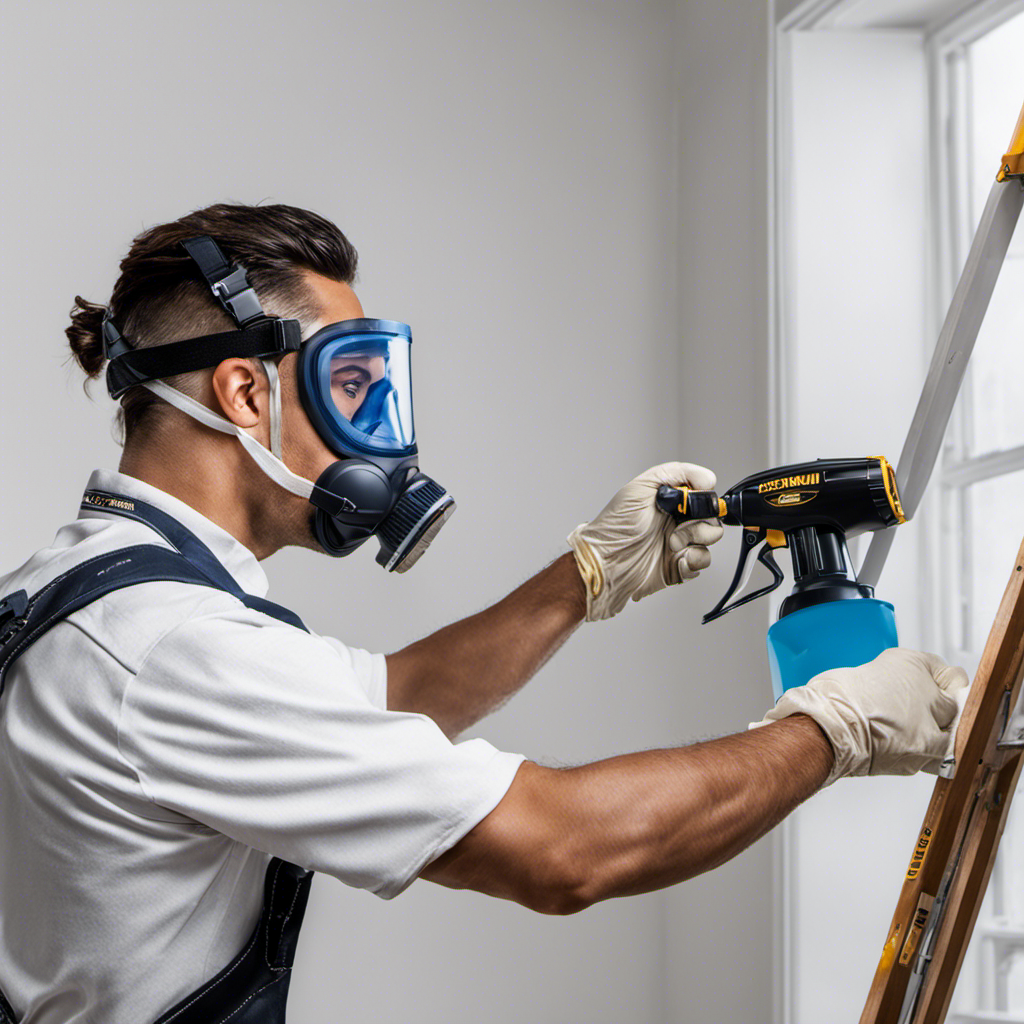
Connect with us

How-To & Tips

Mastering Airless Paint Sprayer Techniques for a Smooth Finish

Published

on

An image showcasing a skilled painter effortlessly maneuvering an airless paint sprayer, flawlessly coating a wall with a fine mist of paint

Achieving a perfect finish with an airless paint sprayer requires mastering the proper techniques.

Imagine painting a room and noticing thin, uneven lines of paint known as tails ruining the look. By holding the sprayer nozzle at the proper distance from the surface, maintaining a steady speed, and ensuring a consistent overlap between each stroke, these issues can be avoided.

Adjusting the pressure settings, choosing the right nozzle size, and troubleshooting common problems are also crucial for a flawless result.

Key Takeaways

  • Proper technique is crucial to avoid creating tails and achieve a smooth finish.
  • Maintain a consistent speed, distance, and overlap when using an airless paint sprayer.
  • Use multiple thin coats instead of one thick coat for better control and coverage.
  • Adjust pressure settings and choose the right nozzle size based on the paint type and desired finish.

Understanding How an Airless Paint Sprayer Works

An airless paint sprayer propels paint with force, creating a smooth finish. This method of painting offers several advantages over traditional brush or roller techniques.

Advertisement

Airless sprayers allow for a faster application of paint, saving both time and effort. They also provide a more even coverage, reducing the likelihood of streaks or brush marks.

However, there are common mistakes that should be avoided when using an airless paint sprayer. One such mistake is creating ‘tails’ – thin, uneven lines of paint. This can be prevented by mastering the proper technique, which includes holding the sprayer nozzle at the correct distance from the surface, maintaining a steady speed, and ensuring consistent overlap between each stroke.

Proper Paint Application Techniques

To achieve a consistent and even application of paint, one must hold the sprayer nozzle at a distance of 8-12 inches from the surface. Proper paint application techniques are essential for achieving a glossy finish and ensuring that the paint dries properly. Maintaining a steady speed while moving the sprayer across the surface is crucial. It is important to ensure a consistent overlap of about 50% between each stroke to avoid thick areas and drips. Additionally, using multiple thin coats instead of one thick coat helps to achieve a smoother finish. Applying a primer before painting can also improve adhesion and create a smooth surface for the paint. By following these techniques, one can achieve professional results and a beautiful glossy finish.

Proper Paint Application Techniques
– Hold sprayer nozzle 8-12 inches from surface
– Maintain a steady speed while moving sprayer
– Ensure consistent 50% overlap between strokes
– Use multiple thin coats instead of one thick coat
– Apply a primer before painting

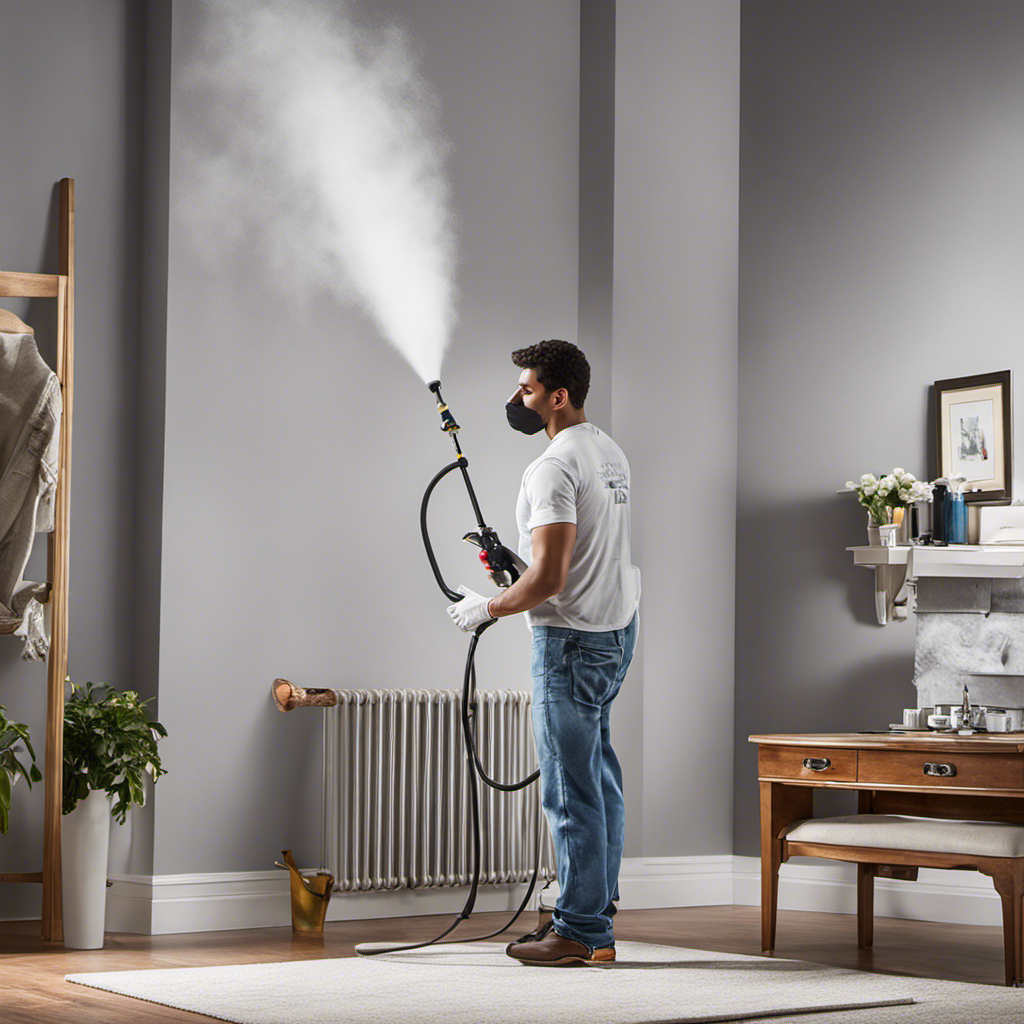
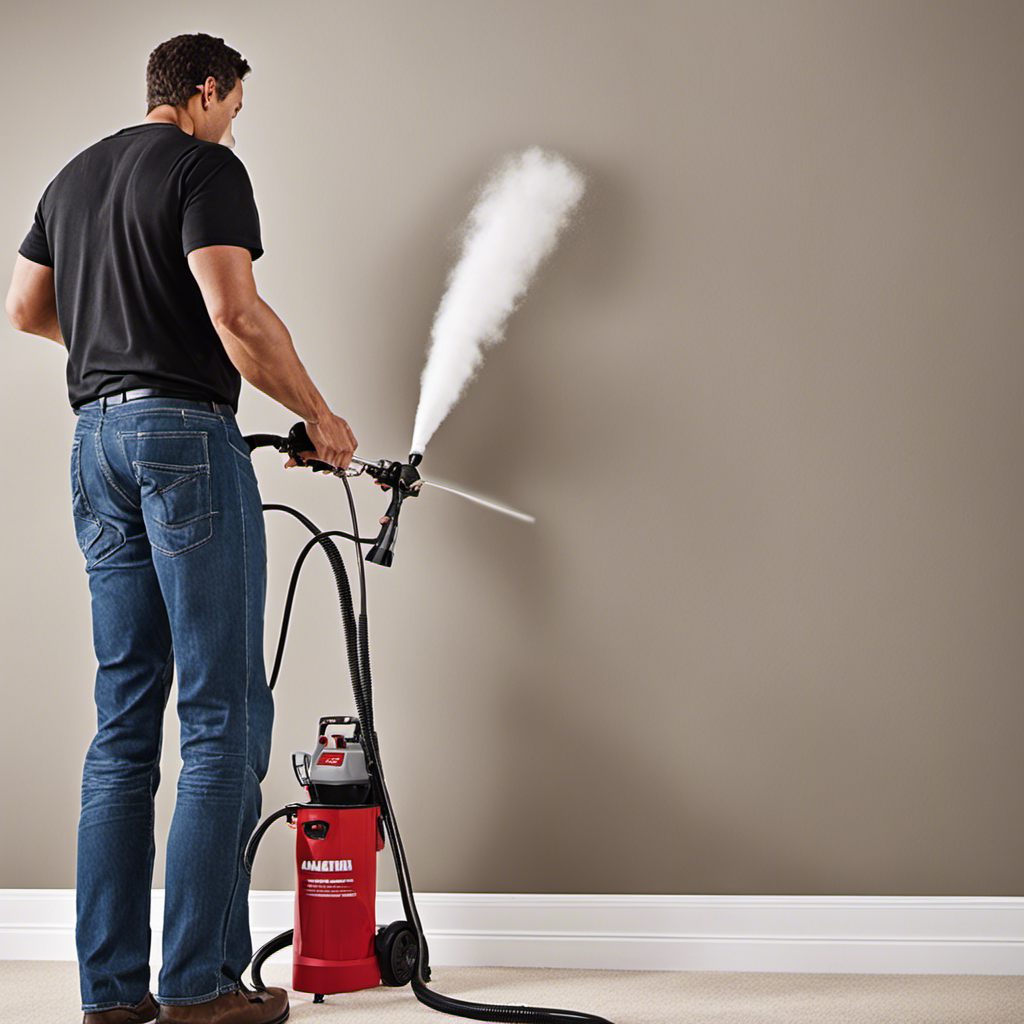
Hold the Sprayer Nozzle at the Right Distance

Advertisement

The user should hold the sprayer nozzle at the correct distance from the surface to achieve an even application of paint. Achieving consistent spray patterns and preventing drips and runs are key goals when using an airless paint sprayer.

Holding the sprayer nozzle at a distance of 8-12 inches from the surface is recommended. This distance allows for better control and helps in maintaining a consistent spray pattern. Holding the sprayer too close can cause excessive build-up of paint, leading to drips and runs. On the other hand, holding it too far away can result in thin and inconsistent coverage.

Maintain a Steady Speed While Moving the Sprayer

Maintaining a steady speed while moving the sprayer across the surface ensures an even and consistent application of paint. This is crucial for achieving a smooth finish with an airless paint sprayer.

To maintain a consistent speed, consider the following tips:

  • Find a comfortable and balanced stance to ensure stability and control.
  • Start the sprayer before reaching the surface to avoid buildup of paint in one spot.
  • Use smooth and fluid motions while moving the sprayer, avoiding sudden stops or jerky movements.
  • Practice maintaining a steady pace, neither too fast nor too slow, to ensure the paint is applied evenly.

Ensure Consistent Overlap Between Each Stroke

Advertisement

Consistency in the overlap between each stroke is important to ensure an even and uniform distribution of paint. Achieving a seamless blend between each stroke is crucial for a smooth finish. It helps to eliminate any noticeable lines or marks that can occur when the strokes are not properly blended. Ensuring a uniform distribution of paint coverage is also essential. This means that each stroke should cover the surface evenly, without any areas that are missed or have too much paint. To achieve this, painters should maintain a steady speed while moving the sprayer across the surface and maintain a consistent overlap of about 50% between each stroke. By following these techniques, painters can achieve a professional and flawless finish.

Discussion Ideas
Achieving a seamless blend between each stroke
Ensuring a uniform distribution of paint coverage

Avoid Overlapping Too Much or Too Little

Achieving an even distribution of paint coverage requires painters to avoid overlapping too much or too little while using an airless paint sprayer. This is essential to avoid drips and runs and to achieve even coverage with multiple thin coats.

To achieve optimal results, painters should follow these guidelines:

  • Maintain a consistent speed throughout the painting process to prevent uneven coverage.
  • Hold the sprayer nozzle at a distance of 8-12 inches from the surface.
  • Ensure a consistent overlap of about 50% between each stroke to avoid gaps and uneven coverage.
  • Use multiple thin coats instead of one thick coat to achieve a smooth finish.

Maintain a Consistent Speed Throughout the Process

To ensure an even distribution of paint, painters should maintain a steady speed throughout the process when using an airless paint sprayer. Maintaining a consistent speed is of utmost importance to achieve a smooth and even application of paint. Moving too quickly can result in uneven coverage, while moving too slowly can lead to drips and runs.

By maintaining a steady speed, painters can ensure that the paint is applied evenly across the surface, avoiding any streaks or uneven areas. Additionally, it is important to maintain a consistent distance between the sprayer and the surface being painted to achieve optimal results.

Use Multiple Thin Coats Instead of One Thick Coat

Using multiple thin coats instead of one thick coat is recommended to achieve a more even and durable application of paint with an airless paint sprayer. This technique allows for better control and a smoother distribution of paint.

Advertisement

To improve the finish, consider using a paint conditioner, which can reduce imperfections and enhance the overall appearance of the painted surface.

Additionally, it is important to properly adjust the pressure settings on the sprayer to ensure a smooth and impressive finish. Proper pressure adjustment is key in achieving a consistent flow of paint and preventing uneven application.

Apply a Primer Before Painting

Applying a primer before painting helps create a smooth surface for the paint and improves adhesion for a durable finish. When choosing the appropriate paint color, it is essential to consider the type of surface and the desired outcome.

To achieve a flawless finish, here are some tips to follow. Firstly, ensure the surface is clean and free from any dirt or debris. Use a high-quality primer that is compatible with the paint you will be using. Apply the primer evenly and allow it to dry completely before starting the painting process. This will help create a uniform base and enhance the adherence of the paint.

Additionally, consider using a paint conditioner to reduce imperfections and achieve a smoother finish. By following these tips, you can achieve a flawless and professional-looking paint job.

Advertisement

Consider Using a Paint Conditioner

A paint conditioner can be helpful in reducing imperfections and achieving a smoother and more professional-looking paint job. Some benefits of using a paint conditioner include:

  • Improved paint flow and leveling: A paint conditioner helps to thin the paint and improve its flow, reducing brush marks and uneven texture.
  • Enhanced adhesion: The conditioner helps the paint adhere better to the surface, ensuring a longer-lasting finish.
  • Minimized brush strokes and roller marks: By improving the paint’s flow, a conditioner helps to minimize visible brush strokes and roller marks.
  • Reduced drying time: The conditioner can speed up the drying time of the paint, allowing for quicker completion of the project.

To achieve a flawless finish with a paint conditioner, consider the following tips:

  • Follow the manufacturer’s instructions on the proper ratio of conditioner to paint.
  • Mix the conditioner thoroughly into the paint to ensure even distribution.
  • Apply the paint with smooth and consistent strokes, using the appropriate brush or roller.
  • Allow sufficient drying time between coats to prevent smudging or streaking.

Adjusting the Pressure Settings for a Smooth Finish

The user can achieve a more consistent and even application of paint by adjusting the pressure settings on the sprayer. Pressure adjustment techniques are essential for a smooth finish.

By considering the paint viscosity and testing pressure settings on a sample surface, the user can ensure consistent flow and prevent uneven application.

It is important to watch out for pressure fluctuations caused by clogs or worn parts. Troubleshooting nozzle clogs is crucial for maintaining optimal performance.

Checking for paint clogs in the spray gun or hose, cleaning the nozzle, and using the correct tip size for the type of paint and desired finish can help prevent issues.

Choosing the Right Nozzle Size for Your Project

When choosing a nozzle size for a project, it is important to consider the type of surface and desired spray pattern. The right nozzle size can greatly impact the quality and efficiency of the paint application. Here are some key factors to keep in mind:

Advertisement
  • Choosing the right paint type: Different paints have different viscosities, and using the appropriate nozzle size for each type can prevent nozzle clogs and ensure a smooth finish.

  • Troubleshooting nozzle clogs: Nozzle clogs can occur due to various reasons, such as paint buildup or debris. Regularly inspecting and cleaning the nozzle can help prevent clogs and maintain optimal performance.

  • Optimal spray pattern: The desired spray pattern should also be considered when selecting a nozzle size. Different projects may require different patterns, such as a narrow fan for precise work or a wide fan for larger surfaces.

  • Professional results: By choosing the right nozzle size, you can achieve precise and professional results, with even coverage and minimal overspray.

Troubleshooting Common Issues and Cleaning the Sprayer

After choosing the right nozzle size for your project, it’s important to be prepared for any troubleshooting that may arise during the painting process.

One common issue that can occur is nozzle clogs. To troubleshoot nozzle clogs, it is essential to clean the sprayer properly. Begin by checking for paint clogs in the spray gun or hose and clean the nozzle thoroughly.

Adjusting the pressure can also help reduce overspray and achieve a controlled spray pattern. Additionally, using the correct tip size for the type of paint and desired finish is crucial.

To maintain optimal performance, it is necessary to clean the sprayer after each use by flushing it with water or a cleaning solution. Regularly inspecting and maintaining the sprayer’s components, such as the filters, spray tip, pump, hoses, and connections, will help prevent issues and ensure a professional finish.

Maintaining the Sprayer for Optimal Performance

To ensure optimal performance, regular maintenance of the sprayer is necessary. Cleaning techniques and preventing nozzle clogs are essential for maintaining the sprayer and achieving a smooth finish. Here are four important tips to keep in mind:

Advertisement
  • Clean the sprayer after each use by flushing it with water or a cleaning solution.
  • Pay attention to cleaning the filters and removing debris to prevent clogs.
  • Check the spray tip for any clogs or build-up and clean or replace it as needed.
  • Regularly lubricate the pump to prevent issues with the piston or packing.

Frequently Asked Questions

How Do I Prevent Tails From Appearing When Using an Airless Paint Sprayer?

To prevent tails when using an airless paint sprayer, the user should ensure proper technique and equipment maintenance. Hold the sprayer nozzle at the recommended distance from the surface and maintain a consistent speed and overlap between strokes.

Check for any clogs or worn parts that may cause pressure fluctuations and adjust the pressure accordingly. Choosing the correct nozzle size for the paint type and surface is also crucial.

Regularly clean and maintain the sprayer to prevent issues that could lead to streaks.

What Is the Recommended Distance Between the Sprayer Nozzle and the Surface Being Painted?

The recommended distance between the sprayer nozzle and the surface being painted is typically 8-12 inches. This distance allows for proper paint coverage and prevents excessive build-up or thin and inconsistent coverage.

It is important to maintain a consistent distance throughout the painting process to achieve a smooth finish. Proper surface preparation, such as cleaning and priming, is also crucial for optimal paint adhesion and a professional result.

How Do I Choose the Right Paint Type to Avoid Nozzle Clogs?

To avoid nozzle clogs, it’s important to choose the right paint type for your project. Consider the surface you’re painting and select a paint that is compatible. For example, use latex paint for walls and oil-based paint for trim. This will help prevent clogs and ensure a smooth finish.

Advertisement

Additionally, to prevent paint splatters and drips, make sure to use thin coats and maintain a consistent speed and distance while spraying. These tips will help you achieve a professional-looking result.

What Should I Do if I Encounter Overspray While Using an Airless Paint Sprayer?

When encountering overspray while using an airless paint sprayer, there are several techniques and solutions to deal with it.

First, adjusting the pressure settings can help reduce overspray and achieve a controlled spray pattern.

Another solution is to use a smaller nozzle size, which can provide more precision and reduce overspray.

Additionally, maintaining a consistent distance between the sprayer and the surface being painted can help minimize overspray.

Advertisement

How Often Should I Clean and Maintain My Airless Paint Sprayer to Ensure Optimal Performance?

Cleaning and maintaining an airless paint sprayer regularly is essential for optimal performance. Neglecting this task can lead to clogs and decreased efficiency, so it’s important to take the time to do it.

To ensure smooth operation, it’s recommended to clean the sprayer after each use. This includes inspecting hoses, filters, and connections for any damage. Regular maintenance also includes lubricating the pump and checking the spray tip for clogs or build-up.

Following these cleaning frequency and maintenance tips will help keep your airless paint sprayer in top condition.

Conclusion

In conclusion, mastering airless paint sprayer techniques is essential for achieving a smooth finish. By understanding how the sprayer works and following proper paint application techniques, one can avoid common issues such as tails and uneven lines.

Holding the sprayer nozzle at the right distance, maintaining a steady speed, and ensuring a consistent overlap between each stroke are key factors in achieving a flawless result. Adjusting pressure settings, choosing the right nozzle size, troubleshooting issues, and regular maintenance are also crucial.

Advertisement

Just like a skilled artist with a brush, mastering these techniques will help you create a finish as smooth as silk.

Continue Reading
Advertisement

How-To & Tips

Mastering Airless Sprayer Techniques for Perfect Ceiling Painting

Published

on

By

An image showcasing a skilled painter effortlessly operating an airless sprayer, flawlessly coating a ceiling with even layers of paint, capturing the precision and finesse required to achieve a flawless finish

Mastering the use of airless sprayers is essential for achieving a professional finish when painting ceilings. Proper preparation and technique are key factors that make up 90% of the success of a ceiling painting project.

In this comprehensive guide, beginners and DIY enthusiasts will learn the importance of selecting the right equipment, protecting the surrounding area, and maintaining a consistent distance from the ceiling.

With tips on cleaning, overlapping passes for complete coverage, and evaluating the finished result, this article will help you achieve flawless ceilings every time.

Key Takeaways

  • Proper preparation and equipment selection are crucial for achieving a professional finish when painting a ceiling with an airless sprayer.
  • Maintaining a consistent distance from the ceiling and overlapping each pass slightly ensures complete coverage.
  • Allow sufficient drying time before applying a second coat and touch up any areas with thin coverage or uneven paint.
  • Proper cleanup and storage of the sprayer and painting equipment are essential for easy maintenance and future touch-ups.

Importance of Proper Preparation

The painter must use drop cloths or plastic sheets to protect the floor and furniture when preparing for ceiling painting. Proper preparation is crucial for achieving a flawless finish.

Advertisement

Preparation techniques include inspecting and repairing any cracks or holes in the ceiling, as well as cleaning the ceiling to remove dirt and dust. Common mistakes to avoid include skipping the preparation steps and not protecting the surrounding surfaces.

To ensure a flawless finish, here are some preparation tips: thoroughly clean the ceiling before painting, patch any imperfections, and consider the overall aesthetic of the room when choosing a paint color.

Selecting the Right Equipment

When selecting the right equipment, it is important to consider factors such as the size and texture of the ceiling.

Choosing the right nozzle is crucial for achieving a smooth and even spray pattern. Different nozzles offer different spray widths and fan patterns, so it’s important to select one that suits the size of the ceiling.

Troubleshooting common issues with the equipment is also essential for a successful painting job. If the sprayer is clogging or producing uneven coverage, it may be due to improper setup or maintenance. Regularly cleaning the sprayer and inspecting the filters and tips can help prevent these issues.

Advertisement

Protecting the Surrounding Area

To protect the surrounding area, it’s important to use drop cloths or plastic sheets and inspect for any cracks or holes in the ceiling. This will prevent paint from splattering onto furniture and other objects.

Additionally, taking the following steps can help prevent overspray and ensure a smooth painting process:

  • Covering furniture with drop cloths or plastic sheets
  • Securing the drop cloths or plastic sheets with tape or clamps
  • Masking off any areas that should not be painted, such as light fixtures or vents

Inspecting and Repairing Ceiling Imperfections

Inspecting and repairing any cracks or holes in the ceiling is an essential step in achieving a professional finish when using an airless sprayer.

Before starting the painting process, it is important to thoroughly inspect the ceiling for any imperfections. Cracks and holes can disrupt the smoothness of the final paint job and may require additional touch-ups later on.

Advertisement

To repair cracks, use a joint compound or spackling paste to fill them in, making sure to smooth out the surface. For smaller holes, a lightweight spackle can be used.

Once the repairs are complete, allow sufficient drying time before proceeding with painting.

Cleaning the Ceiling Surface

Using a damp cloth or sponge, you can easily clean the ceiling surface to remove any dirt or dust particles.

Advertisement

To ensure a thorough cleaning, here are some effective cleaning techniques and the best cleaning solutions to use:

  • Dusting: Start by gently dusting the ceiling with a microfiber cloth or a feather duster to remove loose particles.

  • Vacuuming: If the ceiling is heavily soiled, use a vacuum cleaner with a soft brush attachment to help remove stubborn dirt and cobwebs.

  • Mild soap solution: Mix a small amount of mild dish soap with warm water. Dip the cloth or sponge into the solution and wring out excess moisture. Wipe the ceiling in gentle, circular motions to remove any stains or grime.

Remember to always test a small, inconspicuous area before cleaning the entire ceiling.

Additionally, avoid using abrasive cleaners or excessive moisture, as they can damage the ceiling surface.

Choosing the Perfect Paint Color

When selecting the ideal paint color, homeowners should consider the overall aesthetic of the room. Choosing the right paint finish and creating a color scheme are crucial for achieving the desired look.

To create a color scheme, homeowners can start by identifying the main color they want to use and then selecting complementary or contrasting colors for accents or trim. It’s important to consider factors such as natural light, room size, and existing furniture or decor when choosing paint colors.

Advertisement

Additionally, homeowners should consider the desired mood or atmosphere they want to create in the room. By carefully selecting paint colors and finishes, homeowners can create a cohesive and visually pleasing space.

Setting the Correct Sprayer Pressure

To achieve a smooth finish, homeowners need to ensure they set the correct sprayer pressure for their painting project. Adjusting sprayer settings is crucial in preventing overspray and achieving professional results. Here are some key points to consider:

  • Consult the sprayer’s manual or manufacturer’s instructions for recommended pressure settings.
  • Start with a low pressure setting and gradually increase until the desired coverage is achieved.
  • Test the sprayer on a small surface to check for any inconsistencies or overspray.
  • Adjust the nozzle settings to control the spray pattern and reduce overspray.
  • Maintain a consistent distance from the ceiling while spraying to ensure even coverage.
  • Use a sweeping motion and overlap each pass slightly for complete and uniform application.

Preparing the Airless Sprayer

When it comes to preparing the airless sprayer for painting, there are several steps to follow to ensure a smooth and efficient process.

One of the pros of using an airless sprayer is that it allows for quick and even application of paint on large surfaces like ceilings.

However, there are also some cons to consider, such as the potential for overspray and the need for proper ventilation.

Before starting, it is important to troubleshoot common issues with airless sprayers, such as clogs or uneven spray patterns.

Advertisement

This can be done by checking the sprayer’s filters and tips, and adjusting the pressure and nozzle settings accordingly.

Additionally, it is crucial to clean the sprayer immediately after use to prevent clogs and to properly store all painting equipment for future use.

Testing the Sprayer’s Performance

The painter checks the sprayer’s performance by testing it on a small surface to ensure it’s working correctly. This step is crucial in identifying any issues with the sprayer settings and troubleshooting them before starting the actual painting process.

Here are some important things to consider when testing the sprayer’s performance:

  • Start by setting the sprayer pressure to the recommended level for the type of paint being used.
  • Adjust the sprayer’s nozzle settings to achieve the desired spray pattern.
  • Test the sprayer on a small surface, such as a piece of cardboard or scrap wood, to observe the spray pattern, coverage, and consistency.
  • Look for any issues like uneven spray, clogs, or drips and make the necessary adjustments or repairs.
  • Ensure that the sprayer is delivering the paint smoothly and evenly to achieve a professional finish.

Adjusting Spray Pattern for Even Coverage

Adjusting the sprayer’s nozzle settings allows the painter to achieve an even spray pattern for consistent coverage.

To adjust the spray pattern, the painter can start by adjusting the nozzle size. A smaller nozzle size will result in a narrower spray pattern, while a larger nozzle size will create a wider pattern. This allows for flexibility in covering different areas of the ceiling.

Advertisement

Additionally, troubleshooting common sprayer issues can help ensure an even spray pattern. For example, if the sprayer is producing an uneven pattern, it may be due to a clogged nozzle. Cleaning or replacing the nozzle can help resolve this issue.

Maintaining Consistent Distance From the Ceiling

Maintaining a consistent distance from the ceiling ensures an even and smooth application of paint when using an airless sprayer. This technique helps prevent overspray and ensures that the paint is evenly distributed across the surface.

To achieve this, follow these steps:

  • Stand at a distance of about 12-16 inches from the ceiling.
  • Hold the sprayer at a slight angle to the surface, pointing it towards the ceiling.
  • Move the sprayer in a steady and controlled motion, keeping the distance consistent.
  • Overlap each pass slightly to ensure complete coverage.
  • Take breaks when needed to prevent fatigue and maintain accuracy.

Overlapping Each Pass for Complete Coverage

To achieve complete coverage when using an airless sprayer, it is important to overlap each pass slightly. This technique ensures that no areas are missed and helps avoid paint drips. By overlapping the spray pattern, the paint is applied evenly across the entire surface, resulting in a professional finish. Additionally, overlapping the passes helps to blend the paint and eliminate any visible lines or streaks.

When troubleshooting common sprayer issues, such as clogging or uneven spray patterns, overlapping each pass can be a helpful solution. It allows for better distribution of the paint and helps to prevent any blockages in the sprayer nozzle. By following this technique, painters can achieve consistent coverage and avoid potential problems during the painting process.

Remember to maintain a steady and consistent distance from the ceiling while overlapping each pass to ensure optimal results.

Advertisement

Allowing Sufficient Drying Time

Allowing enough time for the paint to dry is crucial in achieving a smooth and professional finish. To ensure a successful drying process, there are a few key steps to follow:

  • Avoiding paint drips:

  • Apply thin and even coats of paint to prevent drips from forming.

  • Use a high-quality brush or roller to minimize the risk of drips.

  • Check for any drips or excess paint and immediately smooth them out before they dry.

  • Using proper lighting:

  • Ensure that the room is well-lit to accurately evaluate the drying progress.

  • Use natural or artificial light sources to identify any missed spots or imperfections.

  • Adjust the lighting angle to reveal any areas that may need touch-ups.

Evaluating and Touching Up the Painted Ceiling

The painter evaluates the painted ceiling for any areas that may need touch-ups or additional coverage. This step is crucial to ensure a professional finish. They carefully inspect the ceiling, using proper lighting to identify any missed spots or imperfections. They consider the paint’s sheen and adjust the lighting accordingly for accurate evaluation.

If they find areas with thin coverage or uneven paint, they use touch-up techniques to correct them. This may involve using a brush or roller to apply additional paint to those areas. They make sure to blend the touch-up paint seamlessly with the rest of the ceiling to achieve a smooth and consistent appearance.

Frequently Asked Questions

Can an Airless Sprayer Be Used on Textured Ceilings?

Yes, an airless sprayer can be used on textured ceilings. However, there are some pros and cons to consider.

The main advantage is that the high pressure of the sprayer can easily cover the uneven surface of the texture. This saves time and ensures a more even finish.

Advertisement

On the other hand, the texture can make it harder to control overspray, which may require additional masking and protection. Regular airless sprayer maintenance is also important to prevent clogs and ensure optimal performance.

How Do You Prevent Overspray When Using an Airless Sprayer?

To prevent overspray when using an airless sprayer, it’s crucial to maintain proper maintenance and follow some key techniques.

First, ensure the sprayer is set at the correct pressure and nozzle settings for an even spray pattern.

Second, maintain a consistent distance from the ceiling while spraying and overlap each pass slightly for complete coverage.

Lastly, regularly clean the sprayer to prevent clogs and ensure optimal performance.

Advertisement

What Is the Best Method for Cleaning the Sprayer After Use?

The best method for cleaning the sprayer after use involves several maintenance tips.

First, it’s important to clean the sprayer immediately to prevent clogs.

Next, remove and clean any paint filters or tips.

Dispose of unused paint properly according to local regulations.

Store leftover paint in airtight containers for future touch-ups.

Advertisement

Finally, properly clean and store all other painting equipment.

Following these steps will ensure that the sprayer remains in good condition for future use.

How Long Should Paint Dry Before Applying a Second Coat?

The paint should be allowed to dry for a sufficient amount of time before applying a second coat. This ensures that the first coat has properly adhered to the ceiling and avoids any smudging or blending of the layers.

The exact drying time can vary depending on factors such as temperature and humidity, so it is important to refer to the paint manufacturer’s instructions for specific guidance.

Can an Airless Sprayer Be Used on Popcorn Texture Ceilings?

Using an airless sprayer on popcorn texture ceilings can be challenging due to the uneven surface. However, with proper maintenance and technique, it is possible to achieve satisfactory results.

Advertisement

Regular maintenance of the sprayer, such as cleaning and adjusting the pressure and nozzle settings, is crucial for optimal performance.

The benefits of using an airless sprayer, such as faster application and better coverage, still apply to popcorn texture ceilings.

It’s important to practice and test on a small area before tackling the entire ceiling.

Conclusion

In conclusion, mastering airless sprayer techniques is crucial for achieving a flawless finish when painting ceilings. By following the proper preparation steps, selecting the right equipment, and protecting the surrounding area, DIY enthusiasts can achieve professional-looking results.

For example, John, a DIY enthusiast, used the airless sprayer techniques outlined in this guide to paint his textured ceiling. He followed the recommended distance, overlapping each pass, and allowed sufficient drying time between coats. The end result was a perfectly painted ceiling that enhanced the overall look of his room.

Advertisement

By following these techniques, anyone can achieve a flawless finish when painting ceilings.

Continue Reading

How-To & Tips

Mastering Airless Sprayer Techniques for Flawless Paint Finish

Published

on

By

An image showcasing a skilled painter effortlessly using an airless sprayer, evenly coating a surface with flawless precision

Are you in search of the perfect paint finish? You’ve come to the right place. Mastering the use of an airless sprayer is essential for achieving professional-quality results.

In this article, we will delve into the world of airless sprayers and explore the proper techniques that will leave your surfaces streak-free and flawless.

From understanding the sprayer system to choosing the right paint and adjusting the spray pressure, we will cover all the essential steps to help you achieve a smooth and impeccable finish every time.

So, let’s dive in and master those airless sprayer techniques!

Key Takeaways

  • Choosing the right tip size ensures proper atomization and even application of paint.
  • Maintaining a consistent distance from the surface and moving in a steady, overlapping motion helps prevent streaks.
  • Proper maintenance and correct usage of the sprayer system are crucial to avoid paint streaks.
  • Thinning paint allows for better atomization and smoother application.

Understanding the Airless Sprayer System and Proper Technique

Advertisement

The airless sprayer system uses high pressure to force paint through a small opening, creating a fine mist that ensures a smooth and even application of paint. Proper sprayer maintenance and troubleshooting techniques are essential for achieving optimal results.

Regularly cleaning the sprayer and inspecting and replacing worn parts can prevent issues that may result in paint streaks. Lubricating the sprayer properly ensures smooth operation. Troubleshooting techniques, such as checking for clogs or blockages in the sprayer and adjusting the spray pattern and pressure, help address any problems that arise during the painting process.

Proper Surface Preparation for a Flawless Finish

Inspecting the surface for imperfections and rough spots before painting is an essential step in achieving a professional-looking result. To ensure a flawless finish, one must use proper sanding techniques to smooth out any bumps or uneven areas.

Choosing sandpaper with the appropriate grit is crucial for achieving the desired level of smoothness. After sanding, it is important to thoroughly clean the surface to remove dust and debris.

Once the surface is clean, applying a primer is the next step in the priming process. The primer seals the surface and provides a smooth base for paint adhesion.

Advertisement

Proper surface preparation, including sanding and priming, minimizes the chances of paint streaks and ensures a professional-looking finish. Taking the time to properly prepare the surface will result in a flawless paint application.

Choosing the Right Paint and Thinning Ratio

To achieve a smooth and even application of paint, one must consider the appropriate paint type and thinning ratio. The importance of proper paint storage and handling cannot be overstated.

Storing paint in a cool, dry place and sealing the containers tightly help maintain its quality. Before starting a project, it is crucial to mix the paint thoroughly to ensure consistent color and texture.

Advertisement

Achieving optimal paint coverage also relies on the right spraying technique. Maintaining a consistent distance from the surface and moving in a steady, overlapping motion ensures an even coat. Adjusting the spray pressure and using the correct tip size further contribute to a flawless finish.

Adjusting the Spray Pressure for Consistent Results

Achieving consistent results with an airless sprayer relies on adjusting the spray pressure to find the optimal setting for the desired spray pattern. Here are some spray pressure adjustment tips and troubleshooting techniques to ensure a flawless paint finish:

  1. Start with a low pressure setting and gradually increase it until the desired spray pattern is achieved.
  2. Use a pressure gauge to accurately measure and adjust the spray pressure.
  3. Check the manufacturer’s recommendations for the optimal pressure range for the specific paint.

By testing the spray pattern on a scrap surface before starting the project and making proper spray pressure adjustments, you can eliminate paint streaks and achieve professional-looking results.

Troubleshooting common spray pressure issues involves checking for clogs or blockages in the sprayer and adjusting the pressure as needed. Regularly cleaning and maintaining the sprayer, as well as using filters and strainers, will help prevent issues and ensure a smooth spraying experience.

Preventing Clogs and Blockages for Smooth Spraying Experience

Advertisement

Regularly cleaning and maintaining the sprayer, as well as using filters and strainers, helps prevent clogs and blockages, ensuring a smooth spraying experience. Cleaning techniques and troubleshooting tips are essential for maintaining an airless sprayer system. By incorporating these practices into your routine, you can minimize the risk of clogs and blockages that can disrupt the paint flow and lead to uneven application. Additionally, using filters and strainers helps catch debris or particles in the paint, preventing them from entering the sprayer and causing potential issues. To provide a visual representation of the importance of cleaning and maintaining the sprayer, here is a table outlining some effective cleaning techniques and troubleshooting tips:

Cleaning Techniques Troubleshooting Tips
Regularly clean the sprayer after each use Check for clogs or blockages in the sprayer
Thoroughly clean all parts of the sprayer, including the nozzle and hose Adjust the spray pattern and pressure as needed
Inspect and replace worn or damaged parts Properly lubricate the sprayer for smooth operation
Use filters and strainers to catch debris or particles in the paint Address any problems that arise during the painting process

Frequently Asked Questions

What Are Some Common Mistakes to Avoid When Using an Airless Sprayer?

When using an airless sprayer, there are some common mistakes to avoid in order to achieve even coverage.

One mistake is not properly maintaining the sprayer, which can lead to clogs and streaks.

Another mistake is not choosing the right tip size, resulting in uneven application of paint.

Additionally, not adjusting the spray pressure correctly can cause paint streaks.

Advertisement

How Can I Achieve a Smooth Finish on Textured Surfaces With an Airless Sprayer?

Achieving even coverage on textured surfaces with an airless sprayer requires careful consideration of nozzle selection. Choosing the right nozzle size ensures proper atomization and distribution of paint.

A larger nozzle size may be necessary for textured surfaces to allow the paint to flow smoothly and cover the surface evenly.

Additionally, adjusting the spray pressure and maintaining a consistent distance from the surface while moving in a steady, overlapping motion will help achieve a flawless finish on textured surfaces.

What Are Some Tips for Avoiding Overspray When Using an Airless Sprayer?

To avoid overspray when using an airless sprayer, proper cleaning techniques and avoiding clogging issues are essential.

First, regularly clean the sprayer after each use to remove any residual paint or debris that could cause clogs.

Advertisement

Additionally, use filters and strainers to catch any particles in the paint that could lead to clogging.

Can I Use an Airless Sprayer to Apply Different Types of Paint, Such as Latex and Oil-Based?

Using an airless sprayer for intricate paint designs has its pros and cons when it comes to different paint types.

While airless sprayers are versatile and can handle both latex and oil-based paints, it’s important to consider a few factors.

Latex paints are generally easier to spray and clean up, but they may require more thinning for optimal atomization.

Oil-based paints can be more challenging due to their higher viscosity, but they provide a smoother finish.

Advertisement

Proper thinning and adjusting the spray pressure are crucial for achieving flawless results with different paint types.

How Do I Troubleshoot and Fix Uneven Spray Patterns With an Airless Sprayer?

To troubleshoot and fix uneven spray patterns with an airless sprayer, there are a few techniques to keep in mind.

First, check the spray tip for any clogs or blockages and clean it thoroughly.

Next, adjust the spray pressure to ensure a consistent flow of paint.

Additionally, make sure the sprayer is held at a consistent distance from the surface and moved in a steady, overlapping motion.

Advertisement

These troubleshooting techniques will help you achieve a flawless paint finish.

Conclusion

In conclusion, mastering airless sprayer techniques is essential for achieving a flawless paint finish. By using the proper sprayer system and technique, one can avoid those dreaded paint streaks.

It’s ironic how such a seemingly simple task can require attention to detail and precise execution. But fear not, with the right tips, consistent distance, and steady motion, anyone can become a pro at this art.

Just remember to properly maintain your sprayer, prepare your surface, choose the right paint, adjust the spray pressure, and prevent clogs.

Happy painting!

Advertisement

Continue Reading

How-To & Tips

The Importance of Lubrication for Airless Paint Sprayers

Published

on

By

An image showcasing the significance of lubrication for airless paint sprayers

It is crucial to keep airless paint sprayers properly lubricated to maintain their efficiency and enhance their longevity. Regular lubrication can prevent costly repairs and increase the service life of the equipment. It allows for smooth and effective operation by preventing clogs and reducing wear. By reducing friction and wear on moving parts, lubrication improves overall performance.

Different types of lubricants, such as silicone, mineral oil, and synthetic lubricants, can be used. Following manufacturer instructions for regular maintenance, including cleaning the sprayer before lubrication and applying the appropriate amount, is essential for optimal performance.

Troubleshooting tips and maintenance advice are also provided in this article.

Key Takeaways

  • Using the right lubricant is crucial for maintaining an airless paint sprayer.
  • Regular lubrication helps prevent costly repairs and extends the lifespan of the equipment.
  • Proper lubrication is important for smooth and efficient operation, preventing clogs or damage.
  • Lubricating reduces friction and wear on moving parts, extending the lifespan and enhancing efficiency.

The Benefits of Regular Lubrication

Regular lubrication helps prevent costly repairs and extends the lifespan of the equipment. It also ensures smooth and efficient operation of airless paint sprayers. The importance of regular lubrication cannot be overstated. Lubrication plays a crucial role in enhancing the efficiency and lifespan of the equipment. By reducing friction and wear on moving parts, lubrication helps to maintain consistent performance and prevent clogs or damage. It also minimizes the risk of breakdowns and costly repairs.

Advertisement

Proper lubrication ensures that the airless paint sprayer operates smoothly and efficiently, resulting in a high-quality paint finish. Regular maintenance and lubrication are essential for optimal working condition and to maximize the longevity and efficiency of the equipment.

Types of Lubricants for Airless Paint Sprayers

Silicone lubricants provide excellent lubrication, high heat resistance, and water repellency for airless paint sprayers. When it comes to choosing the best lubricant for your airless paint sprayer, silicone lubricants are the top choice. They offer superior lubrication properties that ensure smooth and efficient operation of the equipment.

Additionally, silicone lubricants have high heat resistance, preventing the lubricant from breaking down under the high temperatures generated by the sprayer. They also provide water repellency, protecting the equipment from moisture damage.

As for the lubrication frequency, it is recommended to lubricate your airless paint sprayer according to the manufacturer’s instructions. Regular lubrication is essential for maintaining the longevity and optimal performance of your equipment.

Steps to Properly Lubricate Your Equipment

Advertisement

To properly lubricate the equipment, the user should first clean the sprayer to remove any debris or paint residue. This ensures that the lubricant can effectively coat the necessary parts and provide optimal performance. After cleaning, the following steps should be followed for proper lubrication techniques:

  1. Refer to the manufacturer’s instructions: Different airless paint sprayers may have specific lubrication requirements, so it’s important to follow the guidelines provided.

  2. Use the recommended lubricant: Using the wrong type of lubricant can lead to inadequate lubrication or even damage to the equipment. It’s essential to use the lubricant recommended by the manufacturer for optimal results.

  3. Apply the lubricant to the appropriate parts: Focus on lubricating the moving components of the sprayer, such as the piston rod, packings, and seals. Apply the lubricant evenly and ensure proper coverage.

  4. Avoid over-lubrication: Applying too much lubricant can cause excess buildup, leading to clogs and decreased performance. Use the correct amount of lubricant as specified by the manufacturer.

Troubleshooting Common Lubrication Issues

Properly maintaining the equipment includes troubleshooting common lubrication issues to ensure optimal performance.

Airless paint sprayers may encounter a few common lubrication problems that can affect their efficiency and lifespan.

One common issue is the presence of debris or paint residue in the lubrication system, leading to clogs and reduced lubrication. This can be resolved by thoroughly cleaning the sprayer before applying lubricant.

Advertisement

Another problem is the use of incorrect lubricant or using too much of it, which can cause build-up and interfere with the sprayer’s operation. It is important to use the recommended lubricant and apply the correct amount.

Additionally, improper storage or lack of regular maintenance can also result in lubrication issues.

Maintenance Tips for Extending the Lifespan of Your Sprayer

Regular maintenance and proper storage are key factors in extending the lifespan of an airless paint sprayer. To ensure the longevity of your equipment, follow these storage techniques and cleaning methods:

Advertisement
  1. Store in a clean and dry area: Keep your paint sprayer in a clean and dry environment to prevent dust and moisture buildup, which can lead to clogs and damage.

  2. Clean after each use: Thoroughly clean the sprayer after each use to remove any paint residue or debris that may affect its performance. Use appropriate cleaning solutions and follow the manufacturer’s instructions.

  3. Protect sensitive parts: Cover the spray tip and other sensitive parts with protective caps when not in use to prevent damage and maintain their effectiveness.

  4. Use quality storage containers: Store your paint sprayer in a sturdy and well-sealed container to protect it from accidental damage and ensure its safety during transportation or storage.

Commonly Asked Questions About Lubrication for Airless Paint Sprayers

Using the correct type of lubricant is crucial for maintaining the optimal performance and longevity of an airless paint sprayer. The frequency of lubrication and the choice of lubricant are important factors to consider. To help you make an informed decision, here are some commonly asked questions about lubrication for airless paint sprayers:

Question Answer
Can I use any type of lubricant on my airless paint sprayer? It is recommended to use lubricants specifically designed for airless paint sprayers.
How often should I lubricate my airless paint sprayer? The lubrication frequency depends on the manufacturer’s guidelines, but typically, it is recommended to lubricate the sprayer after every 50 hours of use.
Can I over-lubricate my airless paint sprayer? Yes, over-lubrication can lead to clogs and other issues. Follow the manufacturer’s instructions for the correct amount of lubricant to use.
What are the signs that my airless paint sprayer needs lubrication? If you notice increased friction, unusual noises, or decreased performance, it may be time to lubricate your sprayer.
Are there any specific maintenance tips I should follow to keep my airless paint sprayer in good condition? In addition to regular lubrication, proper storage, cleaning, and inspection of parts are essential for maintaining your airless paint sprayer’s longevity.

Expert Tips for Maintaining Optimal Performance

To ensure optimal performance, experts recommend following the manufacturer’s guidelines for lubrication frequency and choice of lubricant for maintenance of an airless paint sprayer. Proper maintenance is essential for maintaining the longevity and efficiency of the equipment.

Here are some expert tips to help you maintain optimal performance:

  1. Determine the maintenance frequency: Consult the manufacturer’s guidelines to determine how often your airless paint sprayer needs to be lubricated. Regular lubrication is essential for smooth and efficient operation.

  2. Choose the right lubricant: Selecting the appropriate lubricant is crucial for preventing wear and tear on moving parts. Consider factors such as heat resistance, water repellency, and rust prevention when choosing the lubricant.

  3. Clean before lubrication: Before applying the lubricant, ensure that the sprayer is clean and free from any debris or paint residue. This will help prevent clogs and ensure proper lubrication.

  4. Follow the instructions: Apply the lubricant to the recommended parts as per the manufacturer’s instructions. Use the correct amount of lubricant to ensure proper coverage and performance.

Frequently Asked Questions

Can I Use WD-40 or Other General-Purpose Lubricants on My Airless Paint Sprayer?

Using WD-40 or other general-purpose lubricants on an airless paint sprayer is not recommended. Using alternative lubricants can have adverse effects on the equipment. It may not provide the necessary lubrication needed for smooth operation and can potentially cause damage to the sprayer.

It is important to use the lubricants recommended by the manufacturer to ensure optimal performance and to maintain the longevity of the equipment.

Advertisement

Is It Necessary to Use a Specific Brand of Lubricant Recommended by the Manufacturer?

Using alternative lubricants for airless paint sprayers is not recommended. The potential consequences of using the wrong lubricant on an airless paint sprayer can be detrimental to its performance and lifespan. Manufacturers usually provide specific lubricant recommendations for their equipment, and it is necessary to follow these guidelines.

Using a lubricant that is not recommended may result in decreased efficiency, increased wear and tear, and potential damage to the paint sprayer. It is best to stick to the lubricants recommended by the manufacturer to ensure optimal operation and longevity.

How Do I Know if I Have Applied Enough Lubricant to My Airless Paint Sprayer?

To ensure the lifespan of an airless paint sprayer, it’s important to know if enough lubricant has been applied. Common signs of insufficient lubrication include increased friction, sticking parts, and decreased performance.

To maintain the sprayer’s lifespan, it’s crucial to evenly apply the recommended amount of lubricant to the appropriate parts. This will prevent wear and tear, ensure smooth operation, and extend the equipment’s longevity.

Proper lubrication is essential for optimal performance and to avoid costly repairs.

Advertisement

Can I Use a Lubricant That Is Not Recommended for High Heat Resistance on My Sprayer?

Using non-recommended lubricants on airless paint sprayers can pose potential risks and consequences. It is important to use heat-resistant lubricants specifically designed for airless paint sprayers. These lubricants provide the necessary protection against high temperatures and ensure smooth operation without compromising the equipment’s performance.

Using a lubricant that is not recommended for high heat resistance may lead to overheating, damage to the equipment, and decreased efficiency. It is crucial to follow the manufacturer’s guidelines and use the appropriate lubricant for optimal results.

Are There Any Alternative Methods of Lubrication for Airless Paint Sprayers?

Alternative lubrication methods for airless paint sprayers provide additional options for maintaining optimal performance. While using the recommended lubricants is crucial, some users may prefer to explore alternatives.

However, it is important to note that alternative methods may not offer the same level of effectiveness and benefits as the recommended lubricants.

Regular lubrication, using the appropriate lubricant, helps prevent costly repairs, extends equipment lifespan, and ensures smooth operation.

Advertisement

Conclusion

In conclusion, regular lubrication is crucial for the efficient and long-lasting performance of airless paint sprayers. By reducing friction and wear on moving parts, proper lubrication enhances the sprayer’s efficiency and prevents costly repairs.

Choosing the right lubricant, following manufacturer’s instructions, and performing regular maintenance are key steps in ensuring optimal working condition. Remember, ‘a well-oiled machine’ is not just an idiom but a literal expression of the importance of lubrication in maintaining the sprayer’s functionality.

So, keep your sprayer well-lubricated to keep it running smoothly and extend its lifespan.

Continue Reading

Trending

Copyright © 2024 Paint Sprayer Zone Affiliate disclaimer As an affiliate, we may earn a commission from qualifying purchases. We get commissions for purchases made through links on this website from Amazon and other third parties.