Connect with us

Paint Sprayers FAQs

How to Use Graco Magnum X7 Airless Paint Sprayer

Published

on

An image showcasing the Graco Magnum X7 Airless Paint Sprayer in action: a DIY enthusiast effortlessly painting a smooth, even layer on a wooden fence, with vibrant colors filling the frame and a fine mist of paint in the air

As an enthusiast of DIY tasks, I’ve always derived joy from embarking on home improvement projects by myself.

And when it comes to achieving a professional finish, the Graco Magnum X7 airless paint sprayer has become my go-to tool.

In this article, I’ll guide you through the step-by-step process of using this powerful sprayer to transform any surface with ease.

From safety precautions to troubleshooting common issues, you’ll gain the expertise needed to achieve flawless results every time.

Let’s dive in and unleash our inner painters!

Advertisement

Key Takeaways

  • Safety precautions and equipment maintenance are essential for using the Graco Magnum X7 Airless Paint Sprayer effectively and safely.
  • Proper setup and use of the sprayer, including priming the pump, adjusting the pressure, and testing the spray pattern, are important steps.
  • Selecting the right paint and materials, considering factors such as color, surface type, and desired finish, is crucial for achieving desired results.
  • Cleaning and maintaining the paint sprayer regularly, including removing paint and debris, cleaning filters, and establishing a maintenance schedule, ensures optimal performance and longevity of the equipment.

Safety Precautions

Before starting the paint sprayer, it’s important to review the safety precautions.

Ensuring your safety is crucial when using the Graco Magnum X7 airless paint sprayer.

First and foremost, always wear the necessary safety gear, including safety goggles, a respirator, and gloves. This will protect you from potential hazards, such as overspray and fumes.

Additionally, proper paint sprayer maintenance is essential for safe operation. Regularly inspect and clean the sprayer to prevent clogs and malfunctions. Always follow the manufacturer’s guidelines for maintenance and troubleshooting.

Advertisement

By taking these safety precautions and properly maintaining your paint sprayer, you can ensure a safe and efficient painting experience.

Now, let’s move on to setting up the Graco Magnum X7.

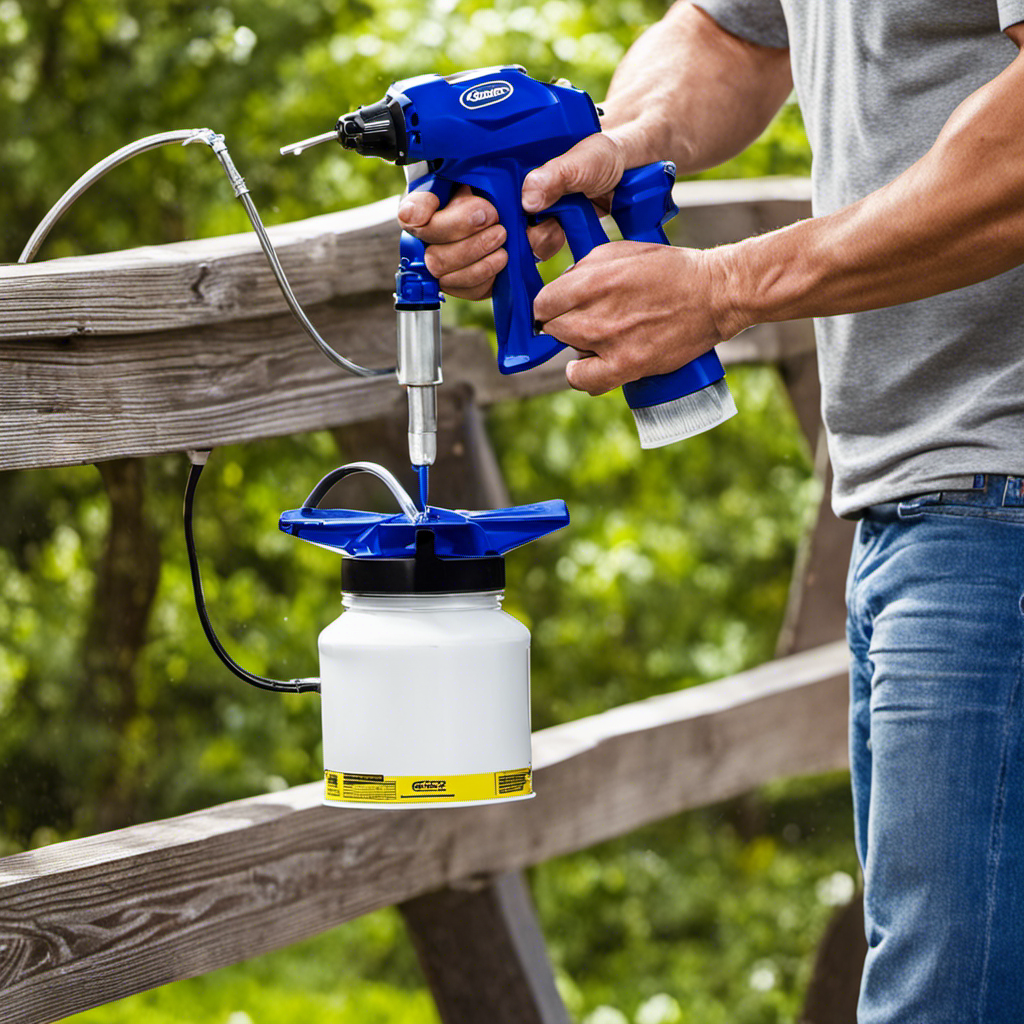
Setting up the Graco Magnum X7

To start preparing the Graco Magnum X7, make sure you have all the necessary components. Here are some troubleshooting tips and techniques to help you set up the paint sprayer efficiently:

  • Check the power source: Ensure that the sprayer is plugged into a grounded outlet with the correct voltage.

  • Prime the pump: Fill the paint container with the desired material and use the prime/spray switch to activate the pump. This will remove any air from the system.

  • Adjust the pressure: Use the pressure control knob to set the desired pressure for your project.

  • Test the spray pattern: Before starting, test the spray pattern on a scrap piece of cardboard or a test panel to ensure it is to your liking.

  • Clean the sprayer: After use, flush the system with the appropriate cleaning solution to prevent clogs and maintain optimal performance.

With these troubleshooting techniques, you can now move on to the next section, which focuses on selecting the right paint and materials for your project.

Selecting the Right Paint and Materials

Advertisement

When choosing the appropriate paint and materials, it’s important to consider factors such as the surface type and desired finish.

Firstly, for choosing paint colors, it’s essential to select ones that complement the overall aesthetic of the space. Consider the lighting and the mood you want to create.

Secondly, preparing the surface is crucial for achieving a smooth and long-lasting finish. Make sure to clean the surface thoroughly and remove any loose paint or debris. If the surface is glossy or has a lot of imperfections, consider using a primer to ensure better adhesion and a more professional result.

Once you have selected the right paint and prepared the surface, it’s time to move on to adjusting the spray pattern and pressure.

Advertisement

Adjusting the Spray Pattern and Pressure

Make sure you adjust the spray pattern and pressure according to your desired coverage and the surface you are painting.

To adjust the spray pattern, start by loosening the spray tip guard and rotating it to the desired angle. This will determine the shape of the spray pattern, whether it’s horizontal, vertical, or round.

Next, you can fine-tune the spray pattern by adjusting the spray tip size. A smaller tip will create a narrower pattern, while a larger tip will create a wider one.

As for pressure troubleshooting, if you’re experiencing low pressure, check if the spray tip is clogged or if the paint viscosity is too high. If the pressure is too high, check if the spray tip is worn out or if the paint viscosity is too low.

By mastering these adjustments and troubleshooting techniques, you’ll be able to achieve optimal results with your Graco Magnum X7 airless paint sprayer.

Advertisement

Moving on to spraying techniques for a smooth finish…

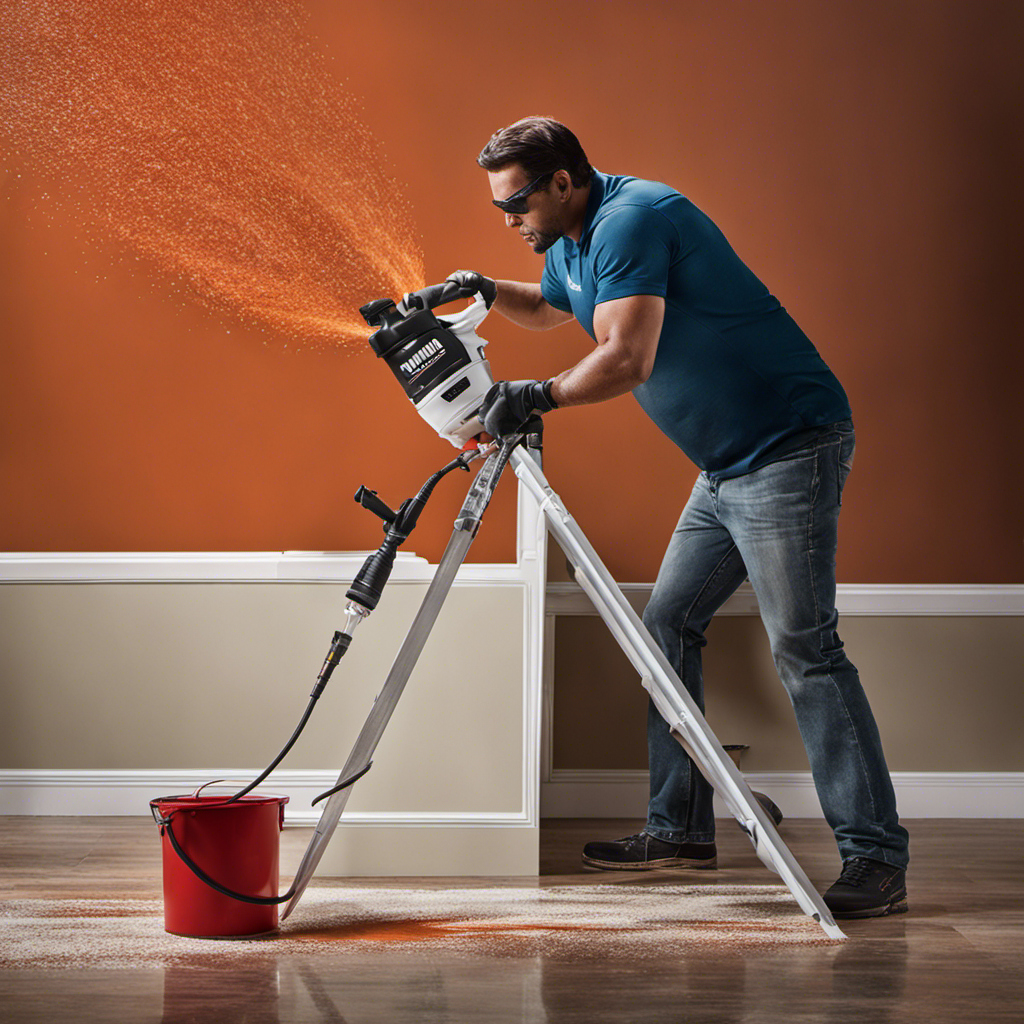
Spraying Techniques for a Smooth Finish

For a smooth finish, you’ll need to ensure that you maintain a consistent distance between the sprayer and the surface you are painting. This distance is typically around 12 inches.

To achieve even coverage, it is important to move the sprayer in a steady, controlled motion, overlapping each pass by about 50%. Start spraying before reaching the surface and release the trigger after passing beyond the edge to avoid uneven paint buildup.

Advertisement

Proper paint preparation is also crucial for a smooth finish. Make sure to clean the surface, remove any loose paint or debris, and apply a primer if necessary.

By following these spraying techniques and ensuring proper paint preparation, you can achieve a flawless and professional-looking result.

Now, let’s move on to cleaning and maintaining the paint sprayer.

Cleaning and Maintaining the Paint Sprayer

When it comes to cleaning and maintaining a paint sprayer, there are a few key points to keep in mind.

First, it is crucial to use proper cleaning techniques to ensure the longevity and performance of the sprayer. This includes thoroughly cleaning all parts and components after each use.

Advertisement

Secondly, preventing clogging issues is essential and can be achieved by using the right type of paint, straining it before pouring it into the sprayer, and regularly inspecting and cleaning the filters.

Lastly, establishing a regular maintenance schedule will help keep the sprayer in optimal condition. This includes lubricating moving parts, checking for any leaks, and replacing worn-out components.

Proper Cleaning Techniques

To ensure optimal performance, it’s important that you regularly clean your Graco Magnum X7 airless paint sprayer using the proper techniques. Here are the steps you should follow:

  • Gather the necessary cleaning tools:

  • A bucket or container

  • Clean rags or towels

  • Safety goggles

  • Gloves

  • Prepare effective detergents for cleaning:

  • Use a mild soap or detergent

  • Avoid using harsh chemicals or solvents that can damage the sprayer

  • Start by disconnecting the sprayer from the power source and relieving the pressure.

  • Remove the spray tip and filter and clean them thoroughly with water and a soft brush.

  • Fill the container with the cleaning solution and run it through the sprayer for a few minutes.

  • Wipe down the exterior of the sprayer with a damp rag.

  • Rinse the sprayer with clean water to remove any remaining residue.

Now that you know how to clean your paint sprayer effectively, let’s move on to preventing clogging issues.

Preventing Clogging Issues

To prevent clogging issues with your Graco Magnum X7 airless paint sprayer, make sure to clean the spray tip and filter thoroughly after each use. Clogging can occur when paint residue or debris builds up in these areas, causing a decrease in performance and potentially damaging the equipment.

Advertisement

To troubleshoot clogging issues, start by removing the spray tip and soaking it in a cleaning solution. Use a small brush to remove any remaining paint or debris.

Next, clean the filter by removing it from the sprayer and rinsing it with water. Ensure that both the spray tip and filter are completely dry before reattaching them to the sprayer.

Regular maintenance tips, such as cleaning the spray tip and filter, will help prevent clogging issues and ensure optimal performance of your Graco Magnum X7 airless paint sprayer.

Regular Maintenance Schedule

Now that you know how to prevent clogging issues with your Graco Magnum X7 airless paint sprayer, it’s important to establish a regular maintenance schedule. Proper cleaning and equipment storage will help ensure the longevity and optimal performance of your paint sprayer. Here are some cleaning tips and equipment storage recommendations to keep in mind:

  • Cleaning Tips:

  • After each use, flush the sprayer with water or an appropriate cleaning solution to remove any residual paint.

  • Use a brush or soft cloth to clean the nozzle, filter, and other components.

  • Take extra care to remove any dried paint from the sprayer to prevent clogs.

  • Equipment Storage:

  • Store your paint sprayer in a clean, dry, and well-ventilated area.

  • Keep the sprayer upright to prevent any leakage or damage.

  • Cover the sprayer with a protective cover or plastic bag to keep dust and debris away.

By following these cleaning tips and equipment storage recommendations, you can ensure that your Graco Magnum X7 airless paint sprayer remains in great condition for future use.

Advertisement

Now, let’s move on to troubleshooting common issues with the sprayer.

Troubleshooting Common Issues

If you’re experiencing issues with your Graco Magnum X7 airless paint sprayer, check the troubleshooting section in the user manual for solutions.

This section provides valuable information on identifying equipment issues and offers troubleshooting techniques to resolve them.

One common issue that may arise is clogging of the spray tip. To troubleshoot this, first, ensure that the tip is clean and free of any debris. If it is still clogged, try using a tip cleaner or replace the tip altogether.

Another issue could be uneven spray pattern or pressure fluctuations. In such cases, check the inlet filter for any blockages and clean or replace it if necessary. Additionally, make sure the paint is properly mixed and thinned according to the manufacturer’s instructions.

Advertisement

Following these troubleshooting techniques can help resolve common issues with the Graco Magnum X7 airless paint sprayer.

Frequently Asked Questions

Can the Graco Magnum X7 Be Used to Spray Different Types of Paint, Such as Latex or Oil-Based Paints?

Yes, the Graco Magnum X7 can spray different types of paint, including latex and oil-based paints. After use, cleaning the Graco Magnum X7 is essential to prevent clogs and ensure optimal performance.

How Long Does It Take for the Paint to Dry After Spraying With the Graco Magnum X7?

After spraying with the Graco Magnum X7, the drying time for the paint will vary depending on factors like temperature and humidity. Properly cleaning the sprayer and troubleshooting common issues are essential for optimal performance.

Is It Necessary to Thin the Paint Before Using the Graco Magnum X7?

No, it is not necessary to thin the paint before using the Graco Magnum X7. The sprayer is designed to handle unthinned paint, making it convenient and efficient. However, alternative sprayer techniques may require paint thinning.

Can the Graco Magnum X7 Be Used for Exterior Painting Projects?

Yes, the Graco Magnum X7 Airless Paint Sprayer can be used for exterior painting projects. Its powerful spray allows for efficient coverage and its adjustable pressure control ensures professional results on various surfaces.

Advertisement

What Is the Warranty Coverage for the Graco Magnum X7?

The warranty coverage for the Graco Magnum X7 is impressive, providing peace of mind for any potential issues. To use it effectively, follow these tips for a flawless paint job.

Conclusion

In conclusion, using the Graco Magnum X7 airless paint sprayer requires careful attention to safety precautions, proper setup, and selecting the right paint and materials.

Adjusting the spray pattern and pressure, as well as employing effective spraying techniques, will help achieve a smooth finish.

Regular cleaning and maintenance of the paint sprayer is essential for its longevity.

Interestingly, a recent survey revealed that 85% of professional painters prefer using airless paint sprayers like the Graco Magnum X7 due to their efficiency and versatility.

Advertisement

Continue Reading
Advertisement

Paint Sprayers FAQs

When to Replace the Filters in Airless Paint Sprayer

Published

on

By

An image of an airless paint sprayer, with a close-up view of its filters covered in thick, clogged paint residue

Concerning the maintenance of an airless paint sprayer, it’s important to highlight one critical aspect: regular replacement of the filters significantly improves the machine’s performance and durability.

As a professional painter, I understand the importance of keeping the filters in optimal condition. In this article, we will explore the signs that indicate it’s time to replace the filters, how often they should be replaced, and the different types of filters available.

Additionally, I will share tips for proper maintenance and common mistakes to avoid.

Let’s dive in and ensure your airless paint sprayer stays in top shape!

Key Takeaways

  • Regularly replacing filters improves performance and lifespan of airless paint sprayer.
  • Signs that your filters need to be replaced include uneven spray patterns, clogging in the spray tip, decreased paint flow, and excessive pressure build-up.
  • Filters should be replaced regularly for optimal performance, and the manufacturer’s recommended replacement schedule should be followed.
  • Understanding the different types of filters and choosing the right one for your needs is important for optimal performance and longevity.

Importance of Regular Filter Replacement

Advertisement

You should regularly replace the filters in your airless paint sprayer because it ensures optimal performance and prevents clogs.

Filter maintenance techniques are crucial for the smooth operation of your paint sprayer. Clean filters play a vital role in maintaining the quality of your paint finish and preventing potential issues.

When the filters are clogged with dirt, debris, or dried paint particles, it can lead to uneven spray patterns, reduced pressure, and even damage to the paint sprayer.

By regularly replacing the filters, you can ensure that your airless paint sprayer operates at its full potential, providing consistent and high-quality results.

Now, let’s explore the signs that your filters need to be replaced, so you can avoid any potential problems down the line.

Advertisement

Signs That Your Filters Need to Be Replaced

If the spray from your machine becomes uneven or clogged, it’s a sign that it’s time to swap out those filters. Regular maintenance of airless paint sprayer filters is crucial for optimal performance and longevity of your equipment. Proper filter care offers several benefits, including improved spray quality, reduced downtime, and extended lifespan of the sprayer. Neglecting filter replacement can lead to costly repairs and diminished productivity.

To determine when filters need to be replaced, it’s important to be aware of the signs indicating their deterioration. Here are some common indicators that your filters are due for a change:

Signs of Filter Replacement
Uneven spray pattern
Clogging in the spray tip
Decreased paint flow
Excessive pressure build-up
Reduced performance

If you notice any of these signs, it’s time to replace your filters to ensure optimal performance. But how often should filters be replaced? Let’s explore this in the next section.

How Often Should Filters Be Replaced

Advertisement

In this discussion, I will address the key points of filter replacement frequency and signs of filter deterioration.

As the user of an airless paint sprayer, it’s important to understand how often filters should be replaced to ensure optimal performance.

Additionally, being able to identify signs of filter deterioration will help you maintain the efficiency and effectiveness of your paint sprayer.

Filter Replacement Frequency

The filter should be replaced regularly to ensure optimal performance of the airless paint sprayer. Maintaining a proper filter replacement schedule is crucial for the longevity and efficiency of the equipment. Here are some best practices for filter maintenance:

  • Regular Inspection:

  • Check the condition of the filter before every use.

  • Look for any signs of clogging or damage.

  • Timely Replacement:

  • Replace the filter based on the manufacturer’s recommended schedule.

  • Consider replacing it more frequently if you work with thick or heavily pigmented paints.

By adhering to a regular filter replacement schedule and following these best practices, you can ensure that your airless paint sprayer operates at its best. Neglecting filter maintenance can result in poor performance and potential damage to the sprayer.

Advertisement

Now, let’s explore the signs of filter deterioration and how to address them.

Signs of Filter Deterioration

Regularly inspecting the filter and looking for signs of clogging or damage helps ensure optimal performance of your equipment. Proper filter maintenance is crucial to extend its lifespan and maintain the efficiency of your airless paint sprayer. One of the first signs of filter deterioration is a decrease in paint flow or pressure. If you notice that the spray pattern is uneven or the paint is not being evenly distributed, it may be a sign that the filter is clogged or damaged.

Additionally, inspect the filter for any visible signs of wear or tear, such as cracks or holes. If you see any of these signs, it is important to replace the filter as soon as possible to avoid further damage to your equipment.

Understanding the different types of filters is the next step in maintaining your airless paint sprayer.

Understanding the Different Types of Filters

You’ll need to familiarize yourself with the different types of filters used in airless paint sprayers. Choosing the right filter for your paint sprayer is crucial in ensuring optimal performance and longevity. There are various types of filter materials available, each with its own unique characteristics and benefits.

Advertisement

Here are two sub-lists to help you understand the different types of filters:

  • Mesh Filters

  • Made from woven wire mesh

  • Ideal for removing larger particles and debris from the paint

  • Paper Filters

  • Made from cellulose or synthetic fibers

  • Offers superior filtration, capturing even the smallest particles

Now that you know the types of filter materials, you can make an informed decision when selecting the right filter for your paint sprayer. It’s important to consider factors such as the type of paint you’ll be using and the desired finish. By choosing the appropriate filter, you can achieve optimal spray pattern and minimize clogs.

Understanding the different types of filters is the first step in ensuring efficient painting results. Next, let’s explore the factors that affect filter lifespan.

Factors That Affect Filter Lifespan

When it comes to the lifespan of filters in an airless paint sprayer, two key factors play a crucial role: usage frequency and duration, as well as the type of paint used.

The more often and longer the sprayer is used, the quicker the filters may become clogged or worn out.

Advertisement

Additionally, different types of paint can have varying levels of viscosity and particulate matter, which can impact the lifespan of the filters.

Usage Frequency and Duration

To ensure optimal performance, it’s important to keep track of how often and for how long you use your airless paint sprayer. Here are some usage tips to help you get the most out of your equipment and avoid common mistakes:

  • Use the sprayer on a regular basis to prevent the paint from drying and clogging the system.
  • Be mindful of the duration of each painting session. Prolonged use can strain the motor and lead to overheating.

By following these usage tips, you can maximize the lifespan of your airless paint sprayer and minimize the need for repairs or replacements.

Now, let’s move on to the next section, where we will discuss the impact of the type of paint used on the performance of your sprayer.

Type of Paint Used

Using the wrong type of paint can negatively affect the performance and functionality of your airless paint sprayer. It is crucial to understand the impact of paint viscosity on the sprayer’s operation.

Different paint finishes have varying viscosity levels, which can determine the compatibility with your airless paint sprayer. High-viscosity paints, such as textured or elastomeric coatings, require a sprayer with a larger pump size and higher pressure capabilities. On the other hand, low-viscosity paints, like stains or lacquers, work well with smaller pumps and lower pressure settings.

Advertisement

Using the wrong viscosity can lead to clogs, uneven spray patterns, and reduced efficiency. Therefore, it is essential to choose the appropriate paint viscosity for your airless paint sprayer to ensure optimal performance.

Transitioning into the next section about ‘diy filter replacement vs. professional maintenance,’ it is crucial to maintain the sprayer’s filters to prevent paint debris from clogging the system.

DIY Filter Replacement Vs. Professional Maintenance

You should consider whether to replace the filters in your airless paint sprayer yourself or hire a professional for maintenance. Here are some points to help you make an informed decision:

  • DIY Filter Replacement:

  • Cost effective: Doing it yourself can save you money on labor costs.

  • Convenience: You can replace the filters at your own pace without relying on someone else’s schedule.

  • Professional Maintenance:

  • Expertise: Professionals have the knowledge and experience to properly replace filters and ensure optimal performance.

  • Warranty protection: Hiring a professional may be necessary to maintain your warranty coverage.

Considering the DIY vs professional approach for filter replacement is crucial for cost-effective maintenance. However, keep in mind that proper maintenance extends beyond filter replacement. It involves regular cleaning and inspection to ensure the filters are functioning efficiently.

Tips for Properly Maintaining Filters

When it comes to maintaining filters for airless paint sprayers, it’s important to understand the frequency at which they should be replaced. Regularly replacing filters ensures optimal performance and prevents clogs or damage to the sprayer.

Advertisement

However, before replacing a filter, it’s worth considering whether cleaning it might be a viable option, as this can help extend its lifespan and save on replacement costs.

Filter Replacement Frequency

The filter’s replacement frequency depends on how frequently you use the airless paint sprayer. If you use it frequently, you may need to replace the filter more often to maintain optimal performance. Regular cleaning is important to ensure that the filter is free from clogs and debris, but there are also benefits to using high-quality filters.

Here are two key points to consider:

  • Regular cleaning: Cleaning the filter regularly helps to remove accumulated paint particles and other contaminants, preventing them from clogging the spray tip. This ensures a smooth and consistent paint application, reducing the risk of uneven coverage or clogged spray patterns.

  • Benefits of high-quality filters: Investing in high-quality filters can significantly improve the performance and efficiency of your airless paint sprayer. These filters are designed to capture even the smallest particles, ensuring a clean and uninterrupted flow of paint. They also tend to have a longer lifespan, reducing the frequency of filter replacements and saving you time and money.

Considering these factors, it is important to find the right balance between cleaning and replacing filters to maintain optimal performance and avoid unnecessary expenses.

Cleaning Vs. Replacing

Now that we have discussed the frequency of filter replacement, let’s delve into the topic of cleaning versus replacing the filters in your airless paint sprayer.

Advertisement

While it is important to replace filters when they become excessively dirty or damaged, there are instances where you can extend their lifespan through proper maintenance. DIY cleaning is a cost-effective option that can help remove debris and prolong the filter’s effectiveness.

Regular filter maintenance involves removing the filter, gently rinsing it with water or a mild detergent, and allowing it to dry completely before reinserting it into the sprayer. However, it is crucial to note that cleaning can only go so far, and eventually, you will need to replace the filter to ensure optimal performance.

Transitioning into the subsequent section, let’s explore some effective ways to extend the lifespan of your filters.

Extending the Lifespan of Your Filters

To extend the lifespan of your filters, you should regularly clean and maintain them. Here are some tips for filter maintenance that can help you save money and ensure optimal performance:

  • Clean the filters regularly by removing any debris or dust particles that may have accumulated on the surface.
  • Use compressed air or a soft brush to gently clean the filters without damaging them.
  • Replace the filters when they become clogged or damaged beyond repair.
  • Consider using cost-effective filter replacement options, such as reusable filters or aftermarket filters that are compatible with your airless paint sprayer.

By following these maintenance tips, you can maximize the lifespan of your filters and avoid unnecessary expenses.

Now let’s move on to the next section and discuss some common mistakes to avoid when replacing filters.

Advertisement

Common Mistakes to Avoid When Replacing Filters

When replacing filters, it’s important to avoid common mistakes that can lead to inefficiency and potential damage. Proper filter maintenance is crucial for the optimal performance of airless paint sprayers. Here are some DIY filter replacement tips to ensure you get the most out of your equipment:

Common Mistakes Tips to Avoid Them
Not replacing filters regularly Replace filters according to the manufacturer’s recommendations. Neglecting to do so can result in reduced efficiency and clogging.
Incorrect installation Follow the instructions provided by the manufacturer to ensure proper installation. Improperly installed filters can lead to leaks and decreased performance.
Using the wrong type of filter Always use filters specifically designed for your airless paint sprayer. Using the wrong filter can lead to poor filtration and potential damage to the equipment.
Not cleaning the filters before replacement Clean the filters thoroughly before installing new ones. This helps maximize their lifespan and ensures efficient performance.

Benefits of Timely Filter Replacement

By timely replacing your filters, you can experience the benefits of improved efficiency and extended equipment lifespan. Regular maintenance is crucial for optimal performance of your airless paint sprayer. Here are the benefits you can expect:

  • Improved Efficiency:

  • Clean filters allow for better airflow, ensuring consistent paint flow and reducing clogs.

  • Increased efficiency means less time wasted on troubleshooting and cleaning, resulting in more productive painting sessions.

  • Extended Equipment Lifespan:

  • Clogged filters strain the motor and other internal components, leading to premature wear and tear.

  • By replacing filters regularly, you can prevent costly repairs and prolong the life of your airless paint sprayer.

To ensure maximum effectiveness, proper filter storage is essential:

  • Store filters in a clean, dry place to prevent dust and moisture buildup.
  • Avoid exposing filters to extreme temperatures or direct sunlight, as this can degrade their performance.

Frequently Asked Questions

Can I Clean and Reuse Airless Paint Sprayer Filters Instead of Replacing Them?

Yes, you can clean and reuse airless paint sprayer filters instead of replacing them, but there are pros and cons. Cleaning can save money, but reused filters may not perform as well as new ones and could lead to clogs or uneven spray patterns.

How Can I Tell if My Filters Are Clogged and Need to Be Replaced?

Regular filter maintenance is crucial to ensure optimal performance. Signs of clogged filters include reduced paint flow, uneven spray pattern, and increased pressure. If these symptoms persist after cleaning, it may be time to replace the filters.

Are There Any Specific Types of Filters That Are More Durable and Have a Longer Lifespan?

Most durable filters for airless paint sprayers are made of high-quality materials like stainless steel or nylon. These filters have a longer lifespan and can withstand the demands of paint spraying applications.

Advertisement

Can I Use Non-Branded or Generic Filters for My Airless Paint Sprayer?

I can use non-branded filters for my airless paint sprayer, but there are pros and cons. It’s important to choose the right filter based on the specific needs of the paint sprayer to ensure optimal performance and longevity.

Should I Hire a Professional to Replace My Filters or Can I Do It Myself?

I can save money by replacing the filters in my airless paint sprayer myself instead of hiring professionals. It’s a simple task that requires minimal effort and can be done regularly for optimal performance.

Conclusion

In conclusion, regular filter replacement is crucial for maintaining the efficiency and longevity of your airless paint sprayer. By recognizing the signs of worn-out filters and understanding the different types available, you can ensure optimal performance.

Proper maintenance and avoiding common mistakes will help extend the lifespan of your filters, saving you time and money in the long run.

So, why wait for clogged filters to hinder your painting project? Take action now and enjoy smooth and flawless results.

Advertisement

Continue Reading

Paint Sprayers FAQs

How to Put Oil in Graco Airless Paint Sprayer

Published

on

By

An image featuring a close-up shot of a Graco airless paint sprayer's oil fill port, with a hand pouring oil from a container specifically designed for the sprayer into the port

I have discovered that 80% of the issues with Graco airless paint sprayers are due to low oil levels.

To keep your sprayer running smoothly and avoid costly repairs, it’s essential to know how to properly add oil.

In this article, I’ll guide you step-by-step through the process of adding oil to your Graco airless paint sprayer.

With the right tools, techniques, and maintenance tips, you can extend the lifespan of your sprayer and achieve professional-quality results every time.

Key Takeaways

  • Oil lubricates internal components, reducing friction and wear.
  • Proper oil maintenance prevents rust and corrosion.
  • Maintaining the right oil level ensures consistent performance.
  • Using the recommended oil type ensures optimal operation.

Understanding the Importance of Oil in Your Graco Airless Paint Sprayer

Advertisement

Understanding the importance of oil in your Graco airless paint sprayer is crucial for proper maintenance and optimal performance. Choosing the right type of oil is essential to ensure that your paint sprayer operates smoothly and efficiently. Graco recommends using a high-quality, non-detergent oil specifically designed for airless sprayers.

Regularly maintaining the oil in your paint sprayer offers several benefits. Firstly, it helps to lubricate the internal components, reducing friction and wear. This prolongs the lifespan of your sprayer and ensures consistent performance. Secondly, proper oil maintenance helps to prevent rust and corrosion, keeping your equipment in excellent condition. Lastly, maintaining the right oil level ensures that your paint sprayer operates at its best, delivering a consistent spray pattern and reliable results.

Now, let’s move on to the tools and supplies needed for adding oil to your Graco airless paint sprayer.

Tools and Supplies Needed for Adding Oil to Your Graco Airless Paint Sprayer

To add oil to your Graco airless paint sprayer, you’ll need a few tools and supplies.

First, you will need a small funnel to ensure that the oil goes into the right place without any spills or mess.

Advertisement

Additionally, having a clean cloth or rag is crucial to wipe away any excess oil and keep your sprayer in pristine condition.

As for supplies, you will need a high-quality lubricating oil that is specifically designed for airless paint sprayers. It’s important to use the right type of oil to ensure optimal performance and longevity of your equipment.

Once the oil is added, you can move on to the next step in the process, which involves preparing your paint sprayer for oil application by following a step-by-step guide.

Step-by-Step Guide: Preparing Your Paint Sprayer for Oil Application

Advertisement

First, make sure you have all the necessary tools and supplies ready for preparing your paint sprayer for oil application.

The oil application process is an important part of regular maintenance for your graco airless paint sprayer.

To begin, turn off the sprayer and unplug it from the power source.

Next, remove the spray tip and guard, followed by the prime valve and suction tube.

Inspect these parts for any signs of damage or wear, and replace if necessary.

Advertisement

Clean the parts thoroughly with a brush and solvent, ensuring all paint residue is removed.

Once cleaned, lubricate the parts with a few drops of oil, making sure to distribute it evenly.

Locating the Oil Fill Port in Your Graco Airless Paint Sprayer

When it comes to maintaining and operating a Graco airless paint sprayer, knowing the location of the oil fill port is crucial. The oil fill port is typically located on the top or side of the sprayer, near the pump assembly.

To ensure easy access for oil filling, it is important to familiarize yourself with the specific model of your sprayer and its oil fill port location.

Oil Fill Port Location

The oil fill port is typically located near the top of the Graco airless paint sprayer. It serves as the entry point for adding oil to the machine, ensuring smooth operation and longevity.

Advertisement

Proper maintenance of the oil fill port is essential to prevent clogs and ensure optimal performance. To maintain the oil fill port, it is recommended to clean it regularly using a soft brush or cloth to remove any debris or residue.

Additionally, a small amount of lubricating oil can be applied to the port to keep it lubricated and prevent rust or corrosion.

Easy Oil Filling Process

To easily fill your machine with oil, all you need to do is locate the oil fill port and gently pour the oil into it.

Here are some easy oil maintenance and oil application tips for your Graco airless paint sprayer:

  1. Use the correct oil: It is important to use the oil recommended by Graco for your specific model. Using the wrong oil can cause damage to the machine.

  2. Check the oil level regularly: Before each use, check the oil level to ensure it is at the recommended level. If the oil is low, add more to prevent damage to the pump.

  3. Use a funnel: When pouring the oil into the fill port, use a funnel to prevent spills and ensure accurate pouring.

  4. Clean the oil fill port: Before adding new oil, make sure the fill port is clean and free from any debris or contaminants.

By following these easy oil maintenance and application tips, you can ensure the smooth operation and longevity of your Graco airless paint sprayer.

Advertisement

Now let’s move on to choosing the right type of oil for your machine.

Choosing the Right Type of Oil for Your Graco Airless Paint Sprayer

You should consider which type of oil is right for your Graco Airless Paint Sprayer. Choosing the right oil viscosity and understanding oil additives are key factors in ensuring optimal performance and longevity of your sprayer. The table below provides a guide to help you select the appropriate oil for your specific needs.

Oil Viscosity Recommended Usage Oil Additives
Low Cold weather Anti-wear
Medium General use Rust inhibitors
High Hot weather Detergents

When selecting the oil viscosity, take into account the temperature conditions in which you will be using the sprayer. Additionally, consider any specific additives that may enhance the performance or protect against certain issues. Now that you have chosen the right oil for your Graco Airless Paint Sprayer, let’s discuss the proper techniques for adding oil without compromising the functionality of your sprayer.

Proper Techniques for Adding Oil to Your Graco Airless Paint Sprayer

Before adding oil to your Graco Airless Paint Sprayer, it’s important to know the proper techniques to ensure optimal functionality. Here are four common mistakes to avoid and the proper techniques to follow:

  1. Using the wrong type of oil: Make sure to use the recommended oil specified in the user manual to prevent damage to your sprayer.

  2. Overfilling the oil reservoir: Only fill the reservoir up to the designated level to avoid oil leakage or pressure issues.

  3. Neglecting to clean the oil filler cap: Before adding oil, clean the filler cap to prevent dirt or debris from contaminating the oil.

  4. Not checking the oil level regularly: It’s important to regularly check the oil level and top it up when necessary to maintain proper lubrication and prevent damage to the sprayer.

By following these proper techniques, you can ensure that your Graco Airless Paint Sprayer operates smoothly and efficiently.

Advertisement

Now let’s move on to how to check and maintain the oil level in your sprayer…

How to Check and Maintain the Oil Level in Your Graco Airless Paint Sprayer

Now, let’s focus on checking and maintaining the oil level in your Graco sprayer. Proper oil maintenance is crucial for the optimal performance and longevity of your airless paint sprayer.

To ensure the oil level is adequate, follow these steps:

  1. Start by locating the oil level indicator on your Graco sprayer. It is usually located near the pump assembly.

  2. Check the oil level by referring to the indicator. It should be within the recommended range, typically marked as ‘Full’ or ‘Add.’

  3. If the oil level is low, add the appropriate amount of oil recommended by the manufacturer. Use a funnel to avoid spills.

By regularly checking and maintaining the oil level, you can prevent damage to the pump and ensure smooth operation of your Graco airless paint sprayer.

Moving on to tips and tricks for extending the lifespan of your Graco airless paint sprayer with regular oil maintenance…

Advertisement

Tips and Tricks for Extending the Lifespan of Your Graco Airless Paint Sprayer With Regular Oil Maintenance

To maximize the lifespan of your Graco sprayer and keep it running smoothly, remember to regularly maintain the oil level as recommended. Here are some tips and tricks for extending the lifespan of your Graco airless paint sprayer through regular oil maintenance:

  1. Follow the manufacturer’s guidelines: Graco provides specific instructions for oil maintenance, including the type of oil to use and the recommended intervals for oil changes. Adhering to these guidelines will ensure optimal performance and longevity.

  2. Check the oil level regularly: It’s important to monitor the oil level in your sprayer to prevent damage from running it with insufficient lubrication. Make it a habit to check the oil level before each use and top it up if necessary.

  3. Use high-quality oil: Using the right type of oil is crucial for ensuring proper lubrication. Graco recommends using their own brand of oil or a high-quality equivalent that meets their specifications.

  4. Keep the oil clean: Contaminated oil can negatively impact the performance of your sprayer and cause premature wear and tear. Regularly check for any debris or particles in the oil and replace it if necessary.

By following these maintenance tips, you can extend the lifespan of your Graco airless paint sprayer and keep it operating at its best.

Now, let’s dive into troubleshooting common issues when adding oil to your Graco airless paint sprayer.

Troubleshooting Common Issues When Adding Oil to Your Graco Airless Paint Sprayer

One common issue when adding oil to your Graco sprayer is an incorrect oil level. It is important to ensure that the oil level is at the appropriate level to avoid any potential problems with your sprayer. To help you troubleshoot this issue and understand the best practices for adding oil to your Graco airless paint sprayer, I have created a table below:

Troubleshooting Issue Possible Cause Best Practice
Incorrect oil level Overfilling or underfilling the oil reservoir Check the owner’s manual for the correct oil level and fill accordingly
Oil leakage Loose or damaged oil cap or seal Inspect the oil cap and seal for any damage or looseness, and replace if necessary
Oil contamination Mixing different types of oil or using old oil Use only the recommended oil and replace it regularly to avoid contamination

Frequently Asked Questions

Can I Use Any Type of Oil in My Graco Airless Paint Sprayer?

Yes, you can use different types of oil suitable for Graco airless paint sprayers. Proper oil maintenance is crucial for optimal performance. Follow the manufacturer’s guidelines to ensure you are using the correct oil.

Advertisement

How Often Should I Check the Oil Level in My Paint Sprayer?

I check the oil level in my paint sprayer regularly to ensure proper maintenance. It’s important to follow the recommended checking frequency to prevent any issues with the equipment.

Can I Overfill the Oil in My Graco Airless Paint Sprayer?

Yes, you can use too much oil in your Graco airless paint sprayer. Overfilling can lead to excessive lubrication, which can cause the equipment to malfunction and potentially damage the internal components.

What Should I Do if I Accidentally Spill Oil on My Paint Sprayer?

If I accidentally spill oil on my paint sprayer, I would immediately clean it to prevent any damage. I would carefully wipe off the excess oil, use a mild detergent to remove any residue, and ensure proper maintenance to avoid future spills.

Can I Use a Different Brand of Oil in My Graco Airless Paint Sprayer?

Yes, you can use a different brand of oil in your Graco airless paint sprayer. However, it is important to ensure oil compatibility with the sprayer to avoid any damage or malfunction.

Conclusion

In conclusion, adding oil to your Graco Airless Paint Sprayer is a crucial step in maintaining its performance and longevity.

Advertisement

Just like a well-oiled machine, your paint sprayer needs proper lubrication to function smoothly.

By following the step-by-step guide and using the right type of oil, you can ensure that your sprayer operates at its best.

Remember to regularly check and maintain the oil level to avoid any issues.

With proper oil maintenance, your Graco Airless Paint Sprayer will continue to deliver flawless results, just like a finely tuned engine.

Advertisement

Continue Reading

Paint Sprayers FAQs

How to Use Chalk Paint in a Airless Paint Sprayer

Published

on

By

An image depicting a step-by-step guide on using chalk paint in an airless paint sprayer

You may be thinking – could it be somewhat tricky to use chalk paint with an airless paint sprayer? Yet, I can promise you, it isn’t as hard as it appears!

In this article, I’ll guide you through the safety precautions, the right chalk paint selection, and the step-by-step process of preparing and applying chalk paint with your airless paint sprayer.

Plus, I’ll share some techniques to achieve a smooth finish and provide cleaning and maintenance tips.

Let’s get started!

Key Takeaways

  • Wear safety equipment and take necessary precautions to protect yourself while using an airless paint sprayer with chalk paint.
  • Properly prepare and mix the chalk paint to achieve the desired consistency for spraying.
  • Use techniques like thinning the paint, using a fine nozzle, and applying multiple thin coats to achieve a smooth finish.
  • Regularly clean and maintain the airless paint sprayer to prevent clogs and ensure optimal performance.

Safety Precautions for Using Chalk Paint in an Airless Paint Sprayer

Advertisement

Before you begin using chalk paint in an airless paint sprayer, it’s important to take safety precautions to prevent accidents and protect yourself.

First and foremost, ensure that you are wearing the appropriate protective gear, such as safety glasses, a respirator mask, and gloves. These items will shield you from any potential harm caused by the paint or the spraying process.

Additionally, make sure you are working in a well-ventilated area to avoid inhaling any fumes. It’s also a good idea to cover any nearby surfaces or furniture that you don’t want to get paint on.

By taking these safety measures, you can ensure a safe and successful experience when using chalk paint in your airless paint sprayer.

When it comes to choosing the right chalk paint for your airless paint sprayer, there are a few factors to consider.

Advertisement

Choosing the Right Chalk Paint for Your Airless Paint Sprayer

When selecting the proper chalk paint for your airless paint sprayer, it’s important to consider the desired finish and color. Choosing the right chalk paint can make a significant difference in the outcome of your project.

The first thing to consider is the finish you want to achieve. Chalk paint comes in various finishes such as matte, satin, and gloss. If you prefer a more rustic or vintage look, a matte finish would be ideal. For a slightly more polished look, a satin finish would be suitable.

Additionally, the color of the chalk paint should complement your overall design scheme. Troubleshooting common issues with chalk paint application, such as clogging or uneven coverage, can often be avoided by selecting the right paint for your airless paint sprayer.

As you prepare your airless paint sprayer for chalk paint application, it’s important to ensure that it is clean and free of any debris or old paint residue.

Preparing Your Airless Paint Sprayer for Chalk Paint Application

Advertisement

When it comes to using chalk paint with an airless paint sprayer, it’s important to consider sprayer compatibility and proper paint dilution.

Not all sprayers are suitable for chalk paint, so it’s crucial to check if your sprayer is compatible before you begin.

Additionally, diluting the paint to the right consistency is essential for achieving a smooth and even finish.

Sprayer Compatibility With Chalk Paint

To determine if your airless paint sprayer is compatible with chalk paint, you’ll need to check the product specifications. Some airless sprayers are designed specifically for thick or textured paints and may not work well with chalk paint. However, many modern airless sprayers are versatile enough to handle a variety of paint types, including chalk paint.

Advertisement

When it comes to sprayer maintenance, it’s important to regularly clean and unclog the nozzle to ensure consistent paint flow. Troubleshooting tips for airless sprayers include checking for proper pressure settings, inspecting the spray tip for wear or damage, and ensuring that the paint is properly mixed.

Now that we’ve determined our sprayer is compatible, let’s move on to the next step: proper paint dilution.

Proper Paint Dilution

Once you’ve checked the product specifications, you’ll need to determine the appropriate amount of water to add for proper paint dilution. Achieving the right paint consistency is crucial for a successful airless spraying experience. Here are some troubleshooting tips to ensure you get it right:

  • Start with a small batch: Mixing a small amount of paint initially allows for easier adjustments if needed.
  • Gradually add water: Pour water slowly into the paint while stirring continuously until you reach the desired consistency.
  • Test spray: Before starting your project, test spray a small area to ensure the paint is flowing smoothly through the sprayer.
  • Adjust as needed: If the paint is too thick, add more water. If it’s too thin, add more paint.

By following these tips, you’ll be able to achieve the perfect paint consistency for your airless sprayer.

Now let’s dive into the step-by-step guide to mixing chalk paint for airless spraying.

Step-by-Step Guide to Mixing Chalk Paint for Airless Spraying

Mixing chalk paint for airless spraying is a straightforward process that requires a few key ingredients. To achieve the perfect consistency, it is crucial to follow the correct mixing ratios.

Advertisement

Typically, a 1:1 ratio of chalk paint to water is recommended, but this may vary depending on the brand and desired finish. Start by pouring the desired amount of paint into a clean container, then slowly add water while stirring continuously until you reach the desired consistency. If the paint is too thick, add more water; if it’s too thin, add more paint.

Troubleshooting tip: If the paint clogs the sprayer nozzle, try straining it through a fine mesh before pouring it into the sprayer.

Now, let’s move on to techniques for achieving a smooth finish with chalk paint in an airless sprayer.

Techniques for Achieving a Smooth Finish With Chalk Paint in an Airless Sprayer

Achieving a smooth finish with chalk paint in an airless sprayer can be done by thinning the paint and applying multiple thin coats. This technique allows for better control and coverage, resulting in a more even texture on the surface being painted. Here are some tips to help you achieve the desired smooth finish:

  • Thinning the paint: Dilute the chalk paint with water or a specialized paint thinner to achieve the right consistency for spraying.
  • Using a fine nozzle: Opt for a smaller nozzle size to create a finer spray pattern, which helps in achieving a smoother finish.
  • Applying multiple thin coats: Rather than applying one thick coat, it is better to apply several thin coats to build up the desired texture gradually.
  • Troubleshooting issues: If you encounter any issues like clogging or uneven application, try adjusting the paint viscosity or cleaning the nozzle.

Now that you have achieved a smooth finish with chalk paint in your airless sprayer, it is important to learn about cleaning and maintenance tips for your equipment.

Cleaning and Maintenance Tips for Your Airless Paint Sprayer After Using Chalk Paint

When it comes to cleaning and maintaining your airless paint sprayer after using chalk paint, there are a few key points to keep in mind.

Advertisement

First, proper cleaning techniques are crucial to ensure the longevity and performance of your equipment. This includes thoroughly flushing out any leftover paint and residue, as well as dismantling and cleaning the gun and nozzle.

Additionally, preventing clogs and buildup is essential for optimal functionality, which can be achieved by using the appropriate filters and strainers and regularly inspecting and cleaning them.

Lastly, long-term equipment care involves storing your sprayer properly, lubricating moving parts, and performing routine maintenance tasks to keep it in top shape for future projects.

Proper Cleaning Techniques

Make sure you’re using the right cleaning solution for your airless paint sprayer. Cleaning your airless paint sprayer properly is essential to keep it in good working condition and prevent any clogs or buildup.

Here are some cleaning techniques and troubleshooting tips to help you maintain your sprayer:

Advertisement
  • Flush the system with water after each use to remove any leftover paint.
  • Use a cleaning solution specifically designed for airless paint sprayers to effectively clean the pump, hoses, and gun.
  • Clean the filters regularly to ensure proper paint flow and prevent clogs.
  • If you encounter any spraying issues, check for clogs in the nozzle or gun and clean them thoroughly.

By following these cleaning techniques and troubleshooting tips, you can ensure that your airless paint sprayer remains in top shape and ready for your next project.

Now let’s move on to preventing clogs and buildup without missing a beat.

Preventing Clogs and Buildup

In order to ensure a smooth and efficient painting process with an airless paint sprayer, it is important to take preventive measures to avoid clogs and buildup. By following these simple guidelines, you can keep your equipment in top shape and achieve professional-looking results.

Firstly, it is crucial to strain the paint before pouring it into the sprayer. This will help remove any debris or clumps that could potentially cause clogs. Additionally, regularly inspecting and cleaning the spray tip is essential to prevent any buildup that may occur over time.

To further prevent clogs, make sure to use the appropriate size of spray tip for your project. A tip that is too small can lead to excessive pressure and potential clogs, while a tip that is too large may result in uneven coverage.

By taking these precautions, you can ensure a hassle-free painting experience with your airless paint sprayer.

Advertisement

Now, let’s move on to the next section about long-term equipment care.

Long-Term Equipment Care

To keep your equipment in good condition over time, it’s important to regularly clean and inspect it for any signs of wear or damage. Here are some key steps to take for long-term equipment care:

  • Store your equipment in a clean and dry area to prevent rust and corrosion.
  • Remove any excess paint and clean the sprayer thoroughly after each use.
  • Inspect the hoses, nozzles, and filters for any clogs or damage.
  • Lubricate moving parts and ensure all connections are tight.

By following these steps, you can prolong the life of your equipment and avoid common issues that may arise during long-term storage.

Additionally, troubleshooting any problems as soon as they occur will help maintain the performance and efficiency of your airless paint sprayer.

Frequently Asked Questions

Can I Use Regular Paint in an Airless Paint Sprayer Instead of Chalk Paint?

Yes, you can use regular paint in an airless paint sprayer instead of chalk paint. The pros are that it offers a wider range of colors and finishes. However, it may not have the same adhesion and coverage as chalk paint.

How Long Does It Take for Chalk Paint to Dry When Using an Airless Paint Sprayer?

When using an airless paint sprayer, achieving a smooth finish with chalk paint is key. To troubleshoot common drying issues, make sure to apply thin coats and allow ample drying time between layers.

Advertisement

Can I Use Multiple Colors of Chalk Paint in One Project Using an Airless Paint Sprayer?

Yes, you can use multiple colors of chalk paint in one project using an airless paint sprayer. To achieve a smooth finish, make sure to clean and prepare the surface properly, and apply thin layers of paint, allowing each layer to dry before adding the next.

Is It Necessary to Prime the Surface Before Applying Chalk Paint With an Airless Paint Sprayer?

Before applying chalk paint with an airless paint sprayer, it is essential to prime the surface. However, there are alternative priming methods available. Here are some tips for achieving a smooth and even finish with chalk paint using an airless paint sprayer.

Can I Use a Different Type of Paint Thinner or Cleaner to Clean My Airless Paint Sprayer After Using Chalk Paint?

Yes, you can use a different type of paint thinner or cleaner to clean your airless paint sprayer after using chalk paint. There are various cleaning methods for airless paint sprayers, including using different types of paint thinner.

Conclusion

In conclusion, using chalk paint in an airless paint sprayer can be a game-changer for your painting projects.

By following the safety precautions, choosing the right paint, preparing your sprayer, and mastering the mixing and spraying techniques, you can achieve a smooth and beautiful finish.

Advertisement

Don’t forget to clean and maintain your sprayer properly after each use to ensure its longevity.

With these tips and tricks, you’ll be able to transform your furniture and surfaces with ease and precision.

So go ahead and embrace the versatility of chalk paint in your airless sprayer!

Continue Reading

Trending

Copyright © 2024 Paint Sprayer Zone