As a seasoned painter, I have found that utilizing an airless paint sprayer significantly enhances productivity and helps in attaining high-quality outcomes.
In this article, I will guide you through the step-by-step process of using an airless paint sprayer, with the help of YouTube tutorials.
From safety precautions to troubleshooting tips, I’ll provide you with the knowledge and techniques you need to confidently tackle your next painting project.
So, let’s dive in and unlock the power of the airless paint sprayer together.
Key Takeaways
- Safety precautions are important, including wearing protective gear and maintaining proper ventilation.
- Familiarize yourself with the equipment and regularly maintain and troubleshoot the sprayer.
- Prepare the surface properly by cleaning, protecting, and priming before painting.
- Choose the right paint type for the project and maintain consistent distance, speed, and pressure while painting.

TICONN Anti-Fog Safety Glasses for Men and Women, ANSI Z87.1 Scratch Proof Eye Goggles with Adjustable Arms and UV Protection (Clear, 1PK)
- Durable and Lightweight Material: Made with impact-resistant polycarbonate
- ANSI Z87.1 Certified: Meets safety standards for impact resistance
- Wraparound Panoramic Coverage: Provides full eye protection
As an affiliate, we earn on qualifying purchases.
Safety Precautions
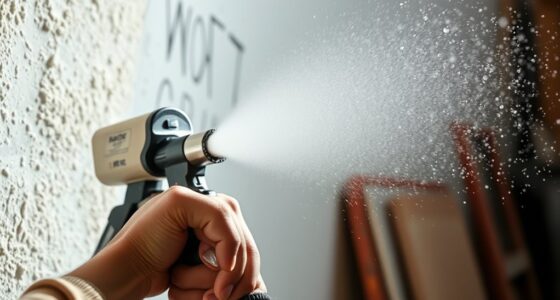
Make sure you’re wearing a mask and safety goggles to protect yourself while using the airless paint sprayer. Safety gear is essential when working with any painting equipment, and an airless paint sprayer is no exception.
In addition to a mask and safety goggles, it’s also important to wear long sleeves, pants, and closed-toe shoes to protect your skin.
Proper ventilation is crucial as well. Before you start painting, ensure that the area you will be working in is well-ventilated, either by opening windows or using fans. This will help to minimize the inhalation of paint fumes.
Understanding the equipment is the next important aspect of using an airless paint sprayer effectively and safely.
Understanding the Equipment
It’s important to familiarize yourself with the equipment before getting started. Understanding how to properly maintain and troubleshoot your airless paint sprayer is crucial for a successful painting project. Here are some key points to consider:
| Equipment Maintenance | Troubleshooting Issues | Safety Precautions |
|---|---|---|
| Regularly clean the sprayer nozzle to prevent clogging. | If the paint is not spraying evenly, check the nozzle for blockages. | Always wear protective goggles and gloves while operating the sprayer. |
| Keep the motor and filters clean to ensure optimal performance. | If the motor is not running, check the power source and connections. | Use the sprayer in a well-ventilated area to avoid inhaling fumes. |
| Lubricate the moving parts to prevent corrosion and damage. | If the sprayer is leaking, check the seals and connections for any damage. | Keep the sprayer away from children and pets to avoid accidents. |
| Store the sprayer in a dry and secure place when not in use. | If the pressure is inconsistent, check the pump and pressure control settings. | Follow the manufacturer’s instructions for proper use and maintenance. |
| Regularly inspect the hoses and fittings for any wear or leaks. | If the sprayer is not priming, check the suction tube and valves. |
Preparing the Surface
When it comes to surface preparation, there are two key points that should not be overlooked: surface cleaning techniques and the importance of proper preparation.
As a professional painter, I’ve learned that thorough cleaning of the surface is crucial for achieving a flawless paint job.
Additionally, taking the time to properly prepare the surface by filling in cracks and sanding rough areas ensures a smooth and long-lasting finish.
Surface Cleaning Techniques
First, assess the surface you’ll be painting with the airless paint sprayer to determine what cleaning techniques you should use. Surface protection and removing stubborn stains are crucial aspects of preparing the area for painting. Before starting, it’s important to protect any surfaces that should not be painted, such as windows, trim, or furniture. Use plastic sheets or drop cloths to cover these areas and secure them in place with tape. To remove stubborn stains, you may need to use specific cleaning solutions or techniques depending on the type of stain. Here is a table that outlines different cleaning techniques for common stains:
| Stain Type | Cleaning Technique |
|---|---|
| Oil-based | Use a degreaser |
| Water-based | Use soap and water |
| Mold and mildew | Use a bleach solution |
| Rust | Use a rust remover |
| Grease | Use a solvent |
Properly cleaning the surface ensures better paint adhesion and a smoother finish. By addressing any stains or contaminants, you are setting the stage for a successful painting job.
Importance of Proper Preparation
To ensure a successful painting job, you’ll want to focus on the importance of properly preparing the surface before you start.
One crucial step in this process is using the right sanding techniques. By sanding the surface, you create a smooth and even canvas for the paint to adhere to. This helps to eliminate any imperfections and ensures a professional finish.
Additionally, applying a primer is essential for proper adhesion and durability of the paint. The primer creates a barrier between the surface and the paint, preventing any stains or discoloration from bleeding through. It also helps the paint to bond better and provides a more even coverage.
Now that we’ve covered the importance of surface preparation, let’s move on to choosing the right paint for your project.
Choosing the Right Paint
When it comes to choosing the right paint for your project, there are several key points to consider.
First, you’ll want to familiarize yourself with the different paint type options available, such as latex, oil-based, and enamel.
Next, it’s important to consult a surface compatibility guide to ensure that the paint you choose will adhere properly to the material you’re painting.
Lastly, color selection tips can help you make informed decisions about the aesthetic aspects of your project, ensuring that you achieve the desired look and feel.
Paint Type Options
Choosing the right paint type for your airless paint sprayer is essential to achieving a flawless finish. Here are three paint types that you can consider for your project:
-
Latex Paint: This popular option is perfect for interior walls and ceilings. It dries quickly, has low odor, and is easy to clean up with water. It provides a smooth and even finish.
-
Oil-based Paint: Ideal for high-traffic areas like doors, cabinets, and trim. It offers excellent durability and a glossy finish. However, it takes longer to dry and requires mineral spirits for cleanup.
-
Stain: If you want to enhance the natural beauty of wood surfaces, stains are the way to go. They come in various shades and can be used on decks, fences, and furniture.
When applying paint with your airless sprayer, remember to maintain a consistent distance and speed, overlap each stroke, and use even pressure.
Now that you know the different paint types, let’s move on to the surface compatibility guide, where we’ll discuss the best paints for specific surfaces.
Surface Compatibility Guide
Now that we have discussed the different types of paint that can be used with an airless paint sprayer, let’s move on to the next important aspect: surface compatibility.
When it comes to painting, ensuring that the paint adheres well to the surface is crucial for a long-lasting and professional finish. Different surfaces require different types of paint for optimal adhesion.
For example, if you are painting a metal surface, it is important to choose a paint specifically designed for metal to ensure it adheres properly and doesn’t peel or chip over time. Similarly, for wood surfaces, using a paint that is compatible with wood will provide better results.
Take the time to research and choose the right paint for the specific surface you are working with to achieve the best outcome.
Now that we understand surface compatibility, let’s move on to the next section: color selection tips.
Color Selection Tips
To ensure a cohesive and visually pleasing result, consider using complementary colors when selecting paint for your project. Complementary colors are opposite each other on the color wheel and create a dynamic and harmonious color scheme.
Here are three color scheme ideas to consider:
-
Analogous Colors: Selecting colors that are next to each other on the color wheel creates a harmonious and soothing effect. For example, using shades of blue and green in a room can create a calm and relaxing atmosphere.
-
Monochromatic Colors: Stick to different shades of the same color for a sophisticated and elegant look. For instance, using various shades of gray can create a modern and timeless feel.
-
Triadic Colors: Choose three colors that are evenly spaced on the color wheel. This creates a vibrant and energetic color scheme. For example, using yellow, blue, and red can create a bold and attention-grabbing look.
When it comes to paint finish options, there are several to choose from. Matte finishes provide a smooth and velvety appearance, while satin finishes have a slight sheen and are more durable. Semi-gloss and gloss finishes offer a high shine and are easy to clean. Consider the desired look and level of durability when selecting the paint finish.
When it comes to mixing and diluting the paint, it’s important to follow the manufacturer’s instructions to achieve the desired consistency.
Mixing and Diluting the Paint
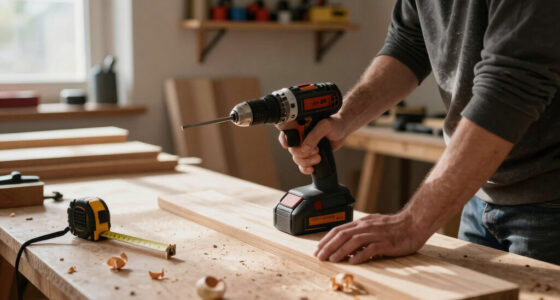
Before starting, it’s important to mix and dilute the paint according to the manufacturer’s instructions. Proper paint mixing ensures that the color is consistent and the particles are evenly distributed throughout the liquid.
To mix the paint, I use a stir stick or a drill with a paint mixing attachment. I start by gently stirring the paint to loosen any settled pigments. Then, I attach the mixing attachment to the drill and insert it into the paint can. I turn on the drill at a low speed and slowly move it up and down to thoroughly mix the paint.
Once the paint is mixed, I check the manufacturer’s instructions to determine the proper dilution ratio. I add the recommended amount of water or paint thinner to the paint and stir it again to achieve the desired consistency.
With the paint properly mixed and diluted, I can now move on to setting up the sprayer.
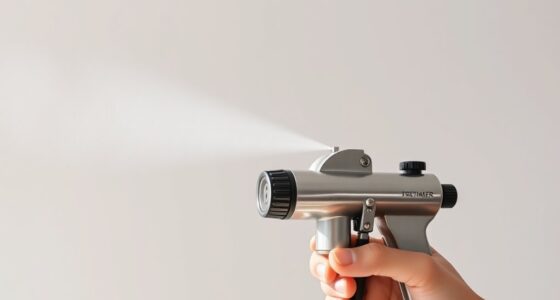
Setting up the Sprayer
Before you can start using your airless paint sprayer, it’s crucial to properly assemble the equipment and adjust the spray pattern.
The first step is to carefully follow the manufacturer’s instructions to assemble the sprayer, ensuring that all components are securely in place.
Once assembled, you’ll need to fine-tune the spray pattern by adjusting the nozzle or tip to achieve the desired width and coverage.
Proper Equipment Assembly
Make sure you’ve got all the necessary parts and tools before you start assembling the airless paint sprayer. Here’s a list of what you’ll need:
-
Pump assembly: This is the heart of the sprayer and includes the motor, piston, and pressure control knob.
-
Spray gun: This is where the paint is delivered from the pump to the surface you’re painting. It has a trigger for controlling the flow of paint.
-
Hose and tip: The hose connects the pump to the spray gun, while the tip determines the spray pattern and size.
Before assembling, it’s important to familiarize yourself with the instructions provided by the manufacturer. Once you’ve assembled the sprayer, you can move on to surface masking techniques and paint application tips. These will help ensure clean lines and even coverage.
Now let’s transition into the next section about adjusting the spray pattern.
Adjusting Spray Pattern
To adjust the spray pattern, start by turning the pressure control knob counterclockwise to decrease the width of the spray. This technique allows for greater control and precision when applying paint. Sometimes, however, issues may arise with the spray pattern, resulting in uneven coverage or overspray. To troubleshoot these problems, refer to the following table:
| Spray Pattern Issue | Solution |
|---|---|
| Uneven coverage | Increase pressure and overlap strokes |
| Overspray | Decrease pressure and adjust nozzle |
| Drips or runs | Reduce pressure and move at a steady pace |
| Clogging | Clean or replace nozzle and filter |
Adjusting the Pressure
You can’t adjust the pressure on an airless paint sprayer without first turning off the machine. Adjusting the pressure is an important step in achieving the desired paint finish and ensuring proper paint application.
Here’s how you can do it:
-
Turn off the airless paint sprayer and unplug it from the power source.
-
Locate the pressure adjustment knob on the sprayer. It is usually located near the pump or on the control panel.
-
Turn the pressure adjustment knob clockwise to increase the pressure or counterclockwise to decrease the pressure.
Adjusting the pressure allows you to control the paint flow and achieve the desired thickness and coverage. Once you have adjusted the pressure, you can move on to learning about spraying techniques to ensure a professional and even paint application.
Spraying Techniques
Learning proper spraying techniques is essential for achieving a smooth and even paint application. When using an airless paint sprayer, it is crucial to have full spraying control to ensure optimal paint coverage.
Start by holding the sprayer nozzle at a consistent distance from the surface, usually around 12 inches. Move your arm in a steady back-and-forth motion, overlapping each pass by about 50%. This technique prevents uneven coverage and creates a seamless finish.
Adjust the spraying speed according to the type of surface you are painting, going slower for intricate areas and faster for larger surfaces. By mastering these spraying techniques, you can achieve professional-looking results with your airless paint sprayer.
Now, let’s move on to the next section, which focuses on cleaning and maintenance to keep your sprayer in top condition.
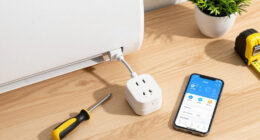
Cleaning and Maintenance
Maintaining your airless paint sprayer regularly is crucial for its longevity and optimal performance. To ensure that your sprayer stays in top shape, follow these cleaning techniques and maintenance tips:
-
Clean the sprayer after each use: Thoroughly flush out any remaining paint by running water or solvent through the system. Pay close attention to the nozzle, filter, and hose.
-
Check and replace worn parts: Regularly inspect the sprayer for any signs of wear or damage. Replace worn or damaged parts, such as seals or gaskets, to prevent leaks and ensure proper functioning.
-
Lubricate moving parts: Apply lubricant to the pump rod and other moving components to reduce friction and keep everything running smoothly.
By following these cleaning techniques and maintenance tips, you can prolong the life of your airless paint sprayer and ensure consistent, high-quality results.
Now, let’s move on to troubleshooting tips to address any issues that may arise during usage.
Troubleshooting Tips
Now that we’ve covered the essential cleaning and maintenance steps for an airless paint sprayer, let’s move on to troubleshooting tips. Even with proper care, you may encounter some common issues while using your sprayer. Here are some tips to help you resolve them quickly and efficiently:
| Common Issue | Possible Cause | Troubleshooting Tips |
|---|---|---|
| Uneven spray pattern | Clogged nozzle or worn tip | Clean or replace the nozzle or tip |
| Paint splattering | Incorrect pressure setting | Adjust the pressure to the recommended level |
| Motor not starting | Power supply issue | Check the power source and connections |
| Excessive overspray | Improper technique or nozzle size | Adjust your technique or use a different nozzle size |
Frequently Asked Questions
Can I Use an Airless Paint Sprayer to Apply Oil-Based Paints?
Yes, you can use an airless paint sprayer to apply oil-based paints. However, it’s important to follow best practices for using an airless paint sprayer indoors without ventilation to ensure safety and achieve the best results.
How Long Does It Take for the Paint to Dry After Using an Airless Paint Sprayer?
How long does it take for the paint to dry after using an airless paint sprayer? Well, it depends on factors like humidity and temperature. Generally, it can take anywhere from a few hours to a day or two for the paint to fully dry.
Can I Use an Airless Paint Sprayer to Paint Textured Surfaces?
Yes, you can use an airless paint sprayer to paint textured surfaces. However, it’s important to follow proper painting techniques and best practices to ensure even coverage and avoid any issues.
What Is the Maximum Distance I Can Spray Paint Using an Airless Paint Sprayer?
The maximum spray distance for an airless paint sprayer depends on the specific model and manufacturer’s recommendations. It is important to follow the recommended spray distance for optimal results and to avoid overspray or uneven coverage.
Can I Use an Airless Paint Sprayer Indoors Without Ventilation?
I wouldn’t recommend using an airless paint sprayer indoors without proper ventilation. It’s important to prioritize safety. Alternatively, you can consider using other methods like brushes or rollers for indoor painting.
Conclusion
In conclusion, using an airless paint sprayer is like wielding a magical wand that transforms dull walls into works of art. With the right precautions and understanding of the equipment, you can unleash your inner Picasso.
Preparing the surface and choosing the perfect paint is key, like a master chef selecting the finest ingredients. Don’t forget to mix and dilute the paint to achieve the perfect consistency.
Adjusting the pressure is like fine-tuning a symphony, ensuring an even and flawless finish. Mastering the spraying techniques is like dancing with grace and precision.
And when the masterpiece is complete, proper cleaning and maintenance will keep your sprayer in tip-top shape.
So go ahead, embrace the power of the airless paint sprayer and create stunning transformations in the blink of an eye.