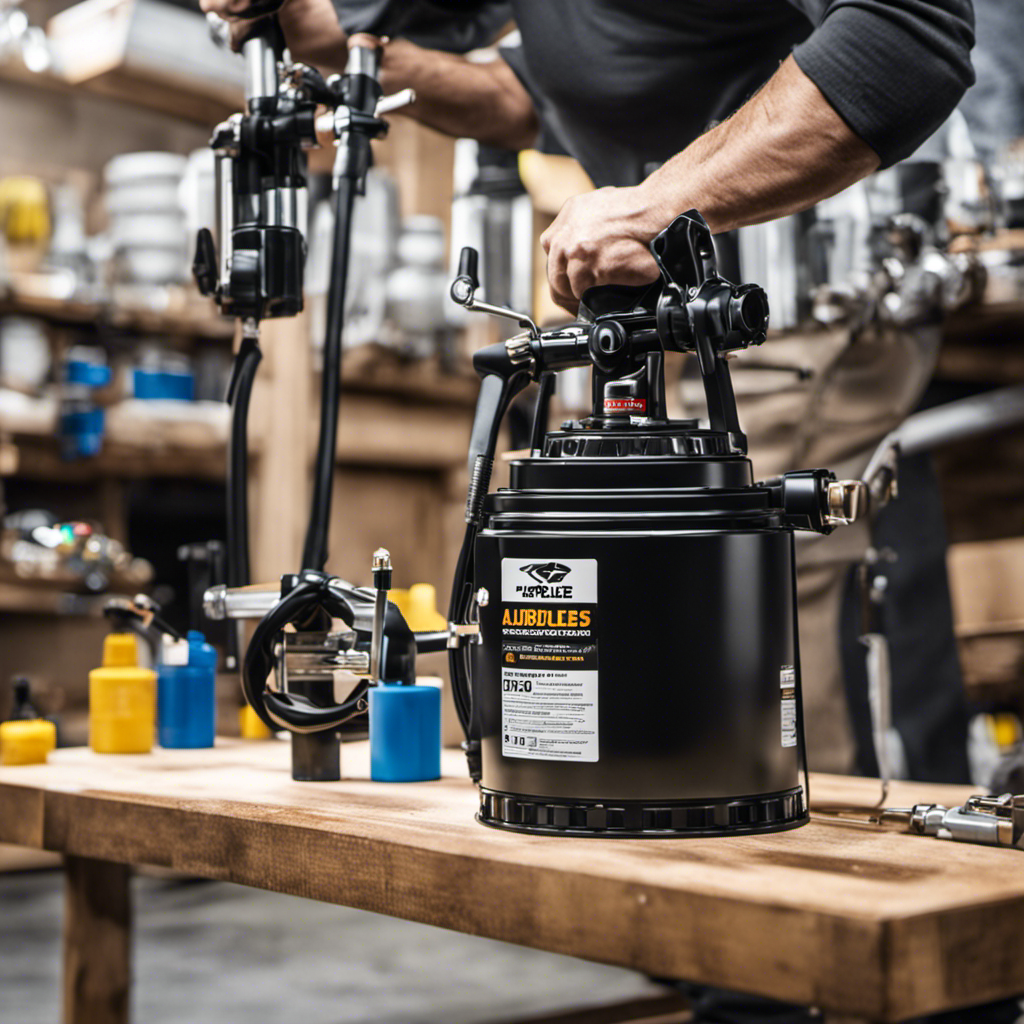
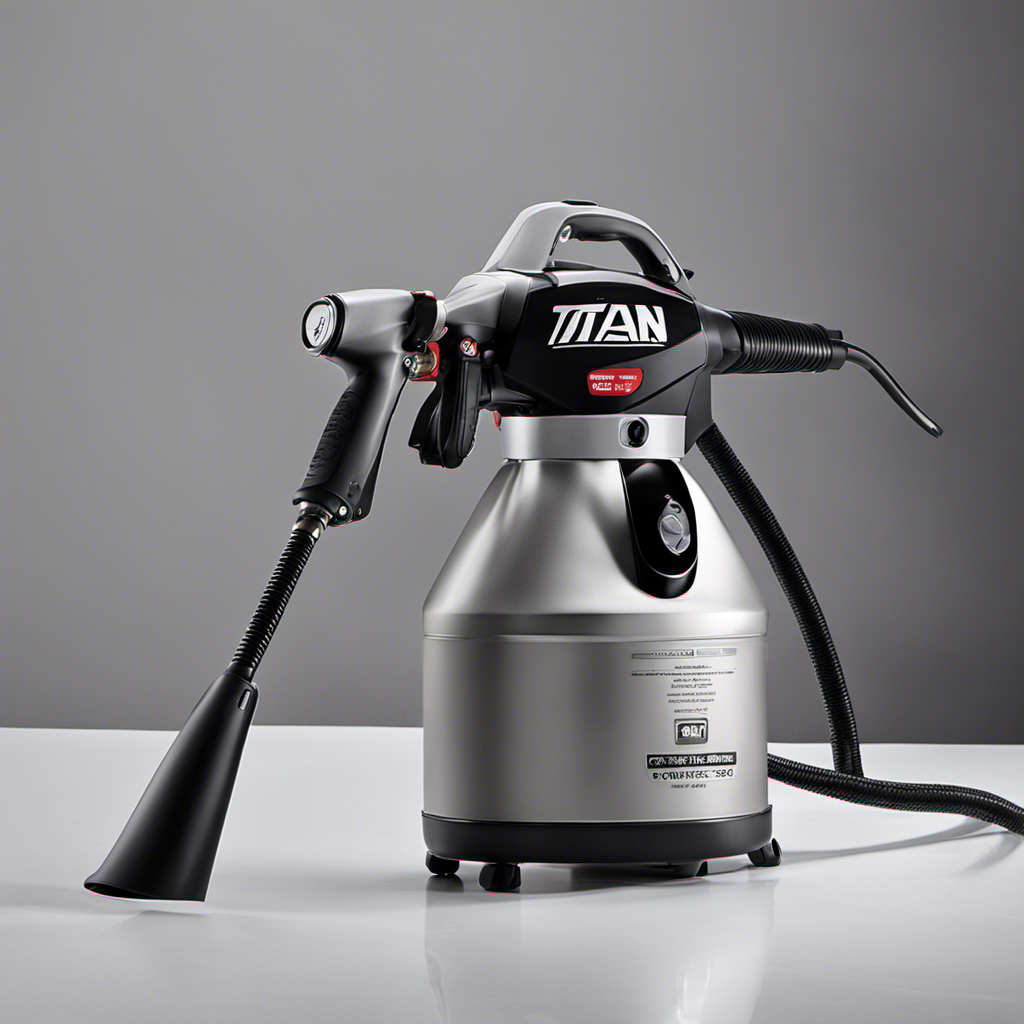
Connect with us

Paint Sprayer Maintenance and Troubleshooting

Efficient and Professional-Quality Painting With Titan Controlmax Sprayer

Published

on

An image showcasing a skilled painter effortlessly spraying a flawless coat of paint with the Titan Controlmax Sprayer, capturing the fine mist in mid-air, showcasing its precision, speed, and smooth finish

The Titan Controlmax Sprayer acts like a professional painter in a can, delivering outcomes that are both effective and of a professional quality. Due to its HEA technology, it reduces overspray by up to 55%, while maintaining a consistent spray pattern.

This powerful sprayer allows for three times faster application than traditional methods, and it can handle unthinned paints and stains with ease. Built to last, it outperforms other sprayers and comes with a two-year warranty and exceptional customer service.

Discover the capabilities of the Controlmax Sprayer for all your painting needs.

Key Takeaways

  • The HEA technology reduces overspray by up to 55% and provides a more consistent spray pattern.
  • The sprayer allows for coatings to be applied 3 times faster than with a roller.
  • The Variable Speed Pump handles unthinned paints and stains with ease.
  • The sprayer is powerful and long-lasting, lasting 3 times longer than other sprayers.

Benefits of HEA Technology

HEA technology decreases overspray and provides a more consistent spray pattern, allowing for quick and efficient project completion.

Advertisement

When compared to traditional sprayers, HEA technology offers several benefits in different applications.

Firstly, it reduces overspray by up to 55%, resulting in a cleaner work environment and less wasted paint.

Secondly, coatings can be applied three times faster than with a roller, saving valuable time and effort.

Additionally, the variable speed pump effortlessly handles unthinned paints and stains, making it versatile for various projects.

The sprayer itself is powerful and long-lasting, lasting three times longer than other sprayers on the market.

Advertisement

With its professional-quality results and affordable price, the HEA technology in the Titan ControlMax sprayer is a reliable choice for DIYers and handymen alike.

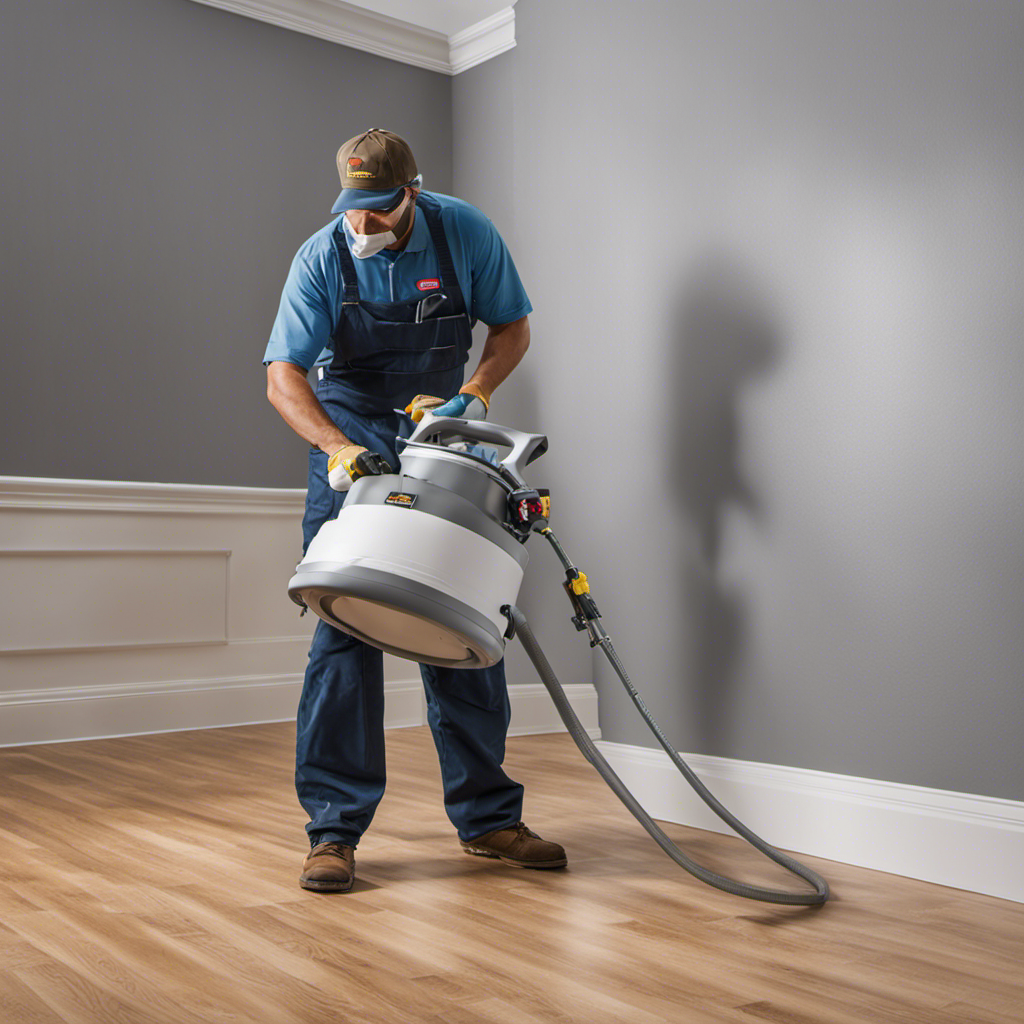
Faster Application With the Controlmax Sprayer

The ControlMax sprayer allows for quicker application of coatings compared to using a roller. With its powerful and long-lasting performance, this sprayer can apply coatings three times faster than traditional rollers.

For efficient painting and maximizing productivity, there are a few tips to keep in mind.

First, ensure that the sprayer is properly calibrated and adjusted for the specific type of coating being used. This will help achieve an even and consistent application.

Second, take the time to properly prepare the surface before painting, including cleaning, sanding, and priming if necessary. This will ensure better adhesion and a smoother finish.

Advertisement

Lastly, practice proper technique by maintaining a consistent distance from the surface, using smooth and even strokes, and overlapping each pass slightly.

Handling Unthinned Paints and Stains With Ease

The Variable Speed Pump of the ControlMax 1500 effortlessly handles unthinned paints and stains, increasing paint efficiency and providing numerous benefits.

When using unthinned paints, the sprayer is able to deliver a consistent and even finish, saving time and effort. This feature allows for a smooth application without the need for thinning the paint, reducing the risk of streaks or uneven coverage.

Advertisement

By using unthinned paints, the sprayer can also achieve a higher transfer efficiency, meaning more paint ends up on the surface and less is wasted. This not only saves money on paint, but also helps to create a more environmentally friendly painting process.

Overall, the ability of the ControlMax 1500 to handle unthinned paints and stains effortlessly greatly enhances the efficiency and effectiveness of any painting project.

Durability and Longevity of the Sprayer

Designed for durability and long-lasting performance, the ControlMax 1500 outlasts other sprayers on the market, making it a reliable choice for all types of painting projects. With its robust construction and high-quality components, this sprayer offers several advantages in terms of durability and maintaining sprayer performance:

  1. Sturdy Build: The ControlMax 1500 is built to withstand the rigors of professional use, ensuring it can handle even the toughest painting tasks without compromising performance.

  2. Quality Materials: The sprayer is made from top-grade materials that are resistant to wear and tear, ensuring it remains in excellent condition over time.

  3. Regular Maintenance: By following the recommended maintenance procedures, such as cleaning and lubricating the sprayer, users can ensure its longevity and optimal performance.

  4. Replacement Parts Availability: Titan Tool, the manufacturer of ControlMax 1500, provides easy access to replacement parts, allowing users to quickly address any issues and maintain the sprayer’s performance.

With these durability advantages and proper maintenance, the ControlMax 1500 will continue to deliver exceptional results for years to come.

Professional-Quality Results for Serious Diyers

Advertisement

With its high-performance capabilities and user-friendly features, the ControlMax 1500 empowers serious DIYers to achieve professional-level results in their painting projects.

To ensure consistent and professional-quality results, proper sprayer maintenance and technique are essential. Regular maintenance includes cleaning the sprayer thoroughly after each use, checking for any clogs or damage, and replacing worn parts as needed.

When using the sprayer, it is important to hold it at a consistent distance from the surface being painted, typically between 12 and 16 inches. Moving the sprayer in a smooth, steady motion across the surface helps to prevent streaks and uneven coverage. Additionally, adjusting the spray pattern and flow rate to match the project requirements will result in optimal results.

Decreasing Overspray for a Cleaner Work Environment

By reducing overspray by up to 55%, the ControlMax 1500 creates a cleaner work environment for DIYers. This efficient sprayer not only improves efficiency but also helps in reducing paint waste.

Advertisement

Here are some key features and benefits of the ControlMax 1500:

  1. HEA technology: With this innovative technology, overspray is significantly reduced, resulting in less wasted paint and a more consistent spray pattern.

  2. Faster application: Coatings can be applied three times faster than with a roller, saving time and increasing productivity.

  3. Variable Speed Pump: The sprayer effortlessly handles unthinned paints and stains, making the painting process smoother and more efficient.

  4. Long-lasting performance: The ControlMax 1500 is designed to last three times longer than other sprayers, ensuring durability and reliability for all your DIY projects.

With these features, the ControlMax 1500 not only provides professional-quality results but also creates a cleaner work environment by reducing overspray and minimizing paint waste.

Consistent Spray Pattern for Professional-Quality Results

The ControlMax 1500 is a sprayer that ensures a consistent spray pattern, resulting in high-quality results for any painting project. This sprayer incorporates advanced technology and design, capable of improving spray control and optimizing paint coverage. It features the Variable Speed Pump, which handles unthinned paints and stains with ease, and the HEA technology, which reduces overspray by up to 55%. This saves time and provides a more efficient and professional painting experience. The sprayer’s powerful performance and long-lasting durability make it ideal for serious DIYers and handymen who seek professional-quality results without a hefty price tag. With the ControlMax 1500, achieving a consistent spray pattern and maximizing paint coverage has never been easier.

Troubleshooting Certain Types of Paint

When troubleshooting certain types of paint, users have reported issues with Behr Premium Plus ceiling paint. This particular paint has been known to cause some common paint issues that can be frustrating for users. Here are some troubleshooting tips to help address these problems:

  1. Poor adhesion: Ensure that the surface is clean and properly prepared before applying the paint. Remove any dirt, grease, or loose paint, and use a primer if necessary.

  2. Uneven coverage: Apply the paint in thin, even coats to avoid buildup and streaks. Use a high-quality brush or roller for better control and coverage.

  3. Drying issues: Allow the paint to dry completely between coats and in proper conditions. Avoid painting in high humidity or extreme temperatures.

  4. Color inconsistency: Mix the paint thoroughly before application to ensure consistent color. If the color still appears inconsistent, contact the manufacturer for further assistance.

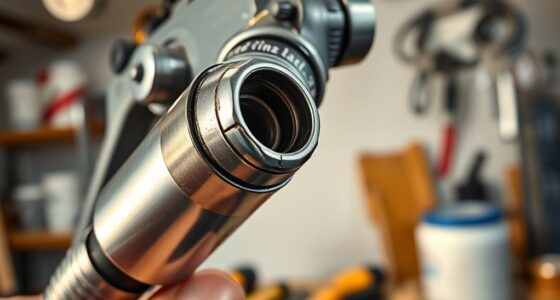
Maneuverability Challenges With Proprietary Connectors and Stiff Hose

Users have reported experiencing difficulties maneuvering the sprayer due to the stiff hose and proprietary connectors. This can be frustrating and hinder the overall painting experience.

Advertisement

To improve maneuverability, it is recommended to explore alternative connector options. By using connectors that are more flexible and easier to connect and disconnect, users can have a smoother and more efficient painting process.

These alternative connector options can provide a solution to the stiffness and difficulty in maneuvering the sprayer. It is important to consider the compatibility of these connectors with the sprayer to ensure seamless operation.

Tips for Thinning and Straining Paint for Better Results

To achieve better results, DIYers and handymen can improve the performance of their paint by properly thinning and straining it. Here are some effective thinning techniques and straining methods to consider:

  1. Read the paint can instructions: Different paints may require different ratios of paint thinner or water for proper thinning. Always refer to the manufacturer’s instructions for the correct ratio.

  2. Gradually add the thinner: Start by adding a small amount of paint thinner or water to the paint and mix thoroughly. Gradually add more until the desired consistency is achieved. This helps prevent over-thinning.

  3. Use a paint strainer: Before pouring the paint into the sprayer, strain it through a paint strainer to remove any lumps, debris, or dried paint particles. This ensures a smooth and consistent application.

  4. Test and adjust: Before starting the project, test the thinned and strained paint on a small area to ensure it sprays evenly and covers well. Adjust the thinning ratio if needed.

Improving Flexibility of the Hose

The hose of the sprayer could be more flexible, which would make maneuvering easier during painting projects. Currently, the ControlMax sprayer has a stiff hose that can be difficult to bend and position in tight spaces. This lack of flexibility can hinder the user’s ability to reach certain areas and achieve an even coat of paint.

To improve hose flexibility, one option is to invest in a different sprayer model that offers a more pliable hose. Alternatives to the ControlMax sprayer, such as the Wagner Flexio series or the Graco Magnum X7, have hoses that are designed to be more flexible and maneuverable. These sprayers provide the same level of professional-quality results while offering increased ease of use and enhanced maneuverability during painting projects.

Advertisement

Understanding Limitations With Certain Types of Paint

One limitation to consider is the trouble that may arise when using certain types of paint with the ControlMax 1500 sprayer. Here are some troubleshooting paint issues and alternative paint options to consider:

  1. Paint Compatibility: The ControlMax 1500 may have trouble with certain types of paint, such as Behr Premium Plus ceiling paint. It’s important to check the paint manufacturer’s recommendations for compatibility with sprayers.

  2. Thinning and Straining: To achieve better results with certain paints, proper thinning and straining may be required. Follow the paint manufacturer’s instructions for thinning and strain the paint before use.

  3. Alternative Paint Options: If you are experiencing difficulties with a specific type of paint, consider using alternative paint options that are compatible with the ControlMax 1500 sprayer. Look for paints specifically designed for use with sprayers or consult with a paint professional for recommendations.

  4. Seek Assistance: If you are still experiencing issues with paint compatibility or application, reach out to the exceptional customer service available from Titan Tool. They can provide guidance and support to help troubleshoot any paint issues you may encounter.

Warranty Coverage and Customer Service

The warranty coverage for the ControlMax 1500 sprayer includes protection against defects in materials or workmanship. This coverage benefits customers by providing peace of mind knowing that their sprayer is backed by a company that stands behind its products.

In the event that any issues arise, Titan Tool’s exceptional customer service is available to assist with troubleshooting and providing solutions. This level of support reflects the commitment to customer satisfaction that Titan Tool is known for.

With this warranty in place, customers can confidently use the ControlMax 1500 sprayer, knowing that if any problems occur, they will be taken care of promptly and effectively. This dedication to quality and reliability is what sets the ControlMax 1500 sprayer apart from other sprayers on the market, making it a trusted choice for efficient and professional-quality painting projects.

Review and Score of the Controlmax 1500 Sprayer

With a score of 79.0, the ControlMax 1500 sprayer exceeded expectations in terms of performance, providing a softer spray and consistent spray pattern.

Advertisement

Here are some tips for troubleshooting paint and improving sprayer maneuverability:

  1. Thin and strain paint properly: Some limitations with certain types of paint can be overcome by ensuring proper thinning and straining. This will result in better results and smoother spraying.

  2. Use compatible paints: Trouble may arise with certain types of paint, such as Behr Premium Plus ceiling paint. It is important to use paints that are compatible with the sprayer to avoid any issues.

  3. Upgrade the hose: The proprietary connectors and stiff hose of the ControlMax 1500 can make maneuvering difficult. Consider upgrading to a more flexible and user-friendly hose for improved maneuverability.

  4. Seek professional advice: If you encounter any difficulties or have questions about troubleshooting paint or improving sprayer maneuverability, don’t hesitate to reach out to the exceptional customer service offered by Titan Tool. They are committed to customer satisfaction and can provide valuable guidance.

Ideal Projects for the Controlmax Sprayer

Projects like painting home exteriors, fences, decks, and garages are ideal for the ControlMax 1500 sprayer. This sprayer, equipped with HEA technology, provides efficient and professional-quality painting. It reduces overspray by up to 55%, resulting in a cleaner work environment. With the variable speed pump, unthinned paints and stains can be handled with ease, saving time and effort. The sprayer is powerful and long-lasting, lasting three times longer than other sprayers on the market.

However, there are some troubleshooting tips to keep in mind. Certain types of paint, such as Behr Premium Plus ceiling paint, may cause trouble. Proper thinning and straining are required for better results with certain paints. Additionally, the proprietary connectors and stiff hose may make maneuvering difficult.

Despite these limitations, the ControlMax 1500 sprayer is a reliable choice for a variety of projects.

Frequently Asked Questions

Can the Controlmax Sprayer Handle Textured or Rough Surfaces?

The Controlmax sprayer is capable of handling textured or rough surfaces. It has the power and versatility to effectively paint uneven surfaces with ease.

Advertisement

However, it is important to note that proper maintenance and cleaning are essential for optimal performance on these types of surfaces. Regularly inspecting and cleaning the sprayer’s components will ensure that it continues to deliver professional-quality results on textured or rough surfaces.

Following the manufacturer’s guidelines for sprayer maintenance will help to prolong its lifespan and maintain its efficiency.

What Is the Maximum Length of the Hose That Comes With the Sprayer?

The maximum hose length for the Titan Controlmax sprayer is 25 feet, providing a good range for most painting projects. This length allows for flexibility and ease of movement, ensuring sprayer portability and maneuverability.

Whether you’re painting a large exterior surface or a smaller area, the 25-foot hose gives you the freedom to reach various areas without having to constantly move the sprayer. This convenient feature enhances efficiency and saves time during your painting projects.

Are There Any Specific Brands or Types of Paint That the Sprayer Works Best With?

The Titan Controlmax Sprayer works well with a variety of paint brands and types. While it may have some limitations with certain paints, it provides professional-quality results when used with compatible coatings.

Advertisement

It is important to follow the manufacturer’s guidelines for thinning and straining paint for optimal performance. Overall, the sprayer is designed to handle different types of paint and is a reliable choice for efficient and professional-quality painting projects.

How Does the Sprayer Handle Corners and Hard-To-Reach Areas?

The Titan Controlmax Sprayer is versatile and excels at paint application in tight spaces. Its compact design and adjustable spray pattern allow for easy maneuvering and precise coverage in corners and hard-to-reach areas.

With the sprayer’s powerful and consistent spray pattern, users can achieve professional-quality results even in challenging spots. Whether it’s painting trim, edges, or intricate surfaces, the Controlmax Sprayer is a reliable tool for efficient and high-quality painting.

Is There a Recommended Technique for Achieving a Smooth Finish With the Sprayer?

To achieve a smooth finish with the Titan Controlmax sprayer, there are a few recommended techniques.

First, ensure that the paint is properly thinned and strained for optimal results.

Advertisement

Second, maintain a consistent distance from the surface being painted, typically around 12 inches.

Third, use smooth and overlapping strokes to ensure even coverage.

If experiencing issues, such as clogging or uneven spray, it is important to troubleshoot common problems by checking for clogs, adjusting the pressure settings, or cleaning the nozzle.

Conclusion

In conclusion, the Titan Controlmax Sprayer is a symbol of efficiency and professionalism in the world of painting. With its HEA technology, it reduces overspray and provides a consistent spray pattern, making every stroke a work of art.

The sprayer’s speed and power allow for faster application, while its ability to handle unthinned paints and stains with ease adds depth to its capabilities. Its durability and longevity make it a reliable companion on any painting journey.

Advertisement

With exceptional customer service and a two-year warranty, this sprayer is a true masterpiece for serious DIYers. Though it has some limitations with certain types of paint, its overall performance and score of 79.0 exceed expectations.

The Controlmax Sprayer is the perfect tool for tackling large projects and transforming them into stunning creations.

Continue Reading
Advertisement

Paint Sprayer Maintenance and Troubleshooting

Maximize Your Airless Paint Sprayer’s Lifespan With These Essential Tips

Published

on

By

An image showcasing a well-maintained airless paint sprayer: a clean nozzle, properly lubricated parts, and a debris-free filter

Are you fed up with your paint sprayer malfunctioning when you need it the most? No need to fret, we’ve got your back!

In this article, we’ll provide you with essential tips to maximize the lifespan of your airless paint sprayer. Imagine a paint sprayer that lasts longer, performs reliably, and saves you time and money.

By following these simple yet effective techniques, you’ll ensure proper storage, regular cleaning, and maintenance, and the use of high-quality replacement parts.

So, let’s dive in and make your airless paint sprayer last for years to come!

Key Takeaways

  • Proper storage and protection: Clean and dry the sprayer before storage, find a cool and dry place, invest in a protective case, and keep it away from extreme temperatures and moisture.
  • Regular cleaning: Clean the spray gun after each use, check and clean the filters regularly, flush out the system, and keep the storage area clean to prevent clogs and blockages.
  • Lubrication: Follow manufacturer’s recommendations for oil type and usage, regularly check oil levels, and apply oil to moving parts for smooth operation.
  • High-quality replacement parts: Invest in durable and reputable replacement parts, replace worn-out or damaged parts promptly, and use genuine parts to maintain performance and reliability.

Proper Storage and Protection

Advertisement

To maximize your airless paint sprayer’s lifespan, follow these steps:

  1. Clean the sprayer thoroughly before storage. Ensure all components are dry.
  2. Find a cool and dry place to store the sprayer.
  3. Proper sprayer maintenance and effective storage techniques are crucial for keeping your equipment in optimal condition.

After each use:

  1. Clean the spray gun and check and clean the filters regularly.
  2. Flush out the entire system with water or a cleaning solution to prevent clogs and blockages.
  3. Lubricate the sprayer with the manufacturer-recommended oil to reduce friction, wear, and corrosion.

Remember to:

  1. Invest in high-quality replacement parts to ensure durability and functionality.
  2. Cheap parts wear out quickly and require frequent replacements.

Thorough Cleaning

Regularly clean the spray gun after each use to prevent clogs and maintain optimal performance. Thorough cleaning techniques are essential to ensure the longevity of your airless paint sprayer.

Start by disassembling the spray gun and removing any paint residue or debris. Use a cleaning solution recommended by the manufacturer and thoroughly clean all the components, including the nozzle and filter.

Pay close attention to the hoses, as they can also become clogged with dried paint. Flush out the entire system with water or the appropriate cleaning solution to ensure all paint particles are removed.

After cleaning, dry all the components thoroughly before reassembling the spray gun. By following these thorough cleaning techniques and using the best cleaning solutions, you can keep your airless paint sprayer in optimal condition and avoid any performance issues.

Regular Filter Maintenance

Advertisement

Ensure you clean and inspect the filters of your airless paint sprayer on a consistent basis to maintain optimal performance. Cleaning the filters regularly is essential to prevent clogs and ensure smooth operation.

The frequency of cleaning will depend on the type and amount of paint being sprayed. As a general rule, it’s recommended to clean the filters after every use or at least once a week for heavy use.

Start by removing the filters from the sprayer and rinse them thoroughly with water or a cleaning solution. Use a soft brush or toothbrush to remove any stubborn debris. Allow the filters to dry completely before reinserting them into the sprayer.

Regularly checking and cleaning the filters will prolong the lifespan of your airless paint sprayer and ensure consistent, high-quality results.

Advertisement

Flushing the System

Flushing the system is an important step in maintaining the performance of your airless paint sprayer. Regular system maintenance ensures optimal performance and prevents clogs or blockages.

To flush the system, start by removing any remaining paint from the sprayer. Then, fill the paint container with a cleaning solution recommended by the manufacturer.

Attach the sprayer to a water source and turn it on. Allow the cleaning solution to flow through the system, flushing out any paint residue or debris. Run the cleaning solution through all components, including the hoses, filters, and nozzle.

Once the cleaning solution runs clear, disconnect the sprayer from the water source and thoroughly rinse the system with clean water.

This flushing technique will help maintain the efficiency and longevity of your airless paint sprayer.

Advertisement

Clean Storage Area

To maintain the cleanliness of your storage area, keep it free from dust or dirt that could potentially enter critical components. Here are some cleaning techniques and tips to prevent dust accumulation:

  • Regularly dust and sweep the storage area to remove any loose dirt or debris.
  • Use a vacuum cleaner with a brush attachment to clean hard-to-reach areas.
  • Wipe down surfaces with a damp cloth to remove any stubborn dust or grime.
  • Consider using air purifiers or dehumidifiers to maintain a clean and dry environment.

Store your airless paint sprayer in a protective case or bag to prevent dust from settling on it. Avoid storing the sprayer in areas prone to moisture or dust, such as basements or garages. Cover the sprayer with a cloth or plastic sheet when not in use to further protect it from dust.

Nozzle and Filter Cleaning

Now that you understand the importance of keeping your storage area clean, let’s move on to the next crucial aspect of maintaining your airless paint sprayer: nozzle and filter cleaning.

Regularly cleaning the nozzle and filters is essential for optimal performance and preventing common nozzle issues.

Advertisement

To start, always follow the manufacturer’s instructions for cleaning the nozzle. Typically, this involves removing the nozzle from the spray gun and soaking it in a cleaning solution or using a specialized cleaning brush to remove any paint residue or debris. Be sure to clean the nozzle thoroughly, as any build-up can lead to clogs or uneven spray patterns.

Additionally, it’s crucial to regularly check and clean the filters. These filters help prevent debris from entering the sprayer and can become clogged over time. Simply remove the filters and rinse them with water or a cleaning solution, ensuring all dirt and debris are removed.

Hose Inspection and Cleaning

Make sure you regularly inspect and clean the hoses of your airless paint sprayer to ensure optimal performance. Here are some troubleshooting tips for hose maintenance:

  • Check for any cracks or leaks in the hoses
  • Inspect the hose fittings for any signs of wear or damage
  • Clean the hoses thoroughly after each use to remove any paint residue or debris
  • Use a soft brush or cloth to clean the exterior of the hoses
  • Flush out the hoses with water or a cleaning solution to remove any clogs or blockages
  • Pay attention to any kinks or twists in the hoses and straighten them out if necessary
  • Replace any damaged or worn-out hoses promptly to prevent further issues
  • Store the hoses in a clean and dry area to prevent them from being exposed to moisture or dust

Lubrication Guidelines

Ensure you consult the manufacturer’s recommendations for the correct oil type to use in your airless paint sprayer. Using the right oil is crucial for optimal performance and longevity. Lightweight mineral-based oil designed for high-pressure applications is typically recommended.

Regularly check the oil level in your sprayer and top up or change the oil as recommended by the manufacturer. Following the proper oiling frequency is important to reduce friction, wear, and corrosion. Apply oil to moving parts to ensure smooth operation, but be cautious not to over-lubricate as it can attract dust and debris.

Regularly check oil levels and refill as needed to maintain the sprayer’s efficiency. By using the appropriate oil and following the recommended lubrication frequency, you can maximize the lifespan of your airless paint sprayer.

Advertisement

Correct Oil Type

Using the recommended lightweight mineral-based oil for high-pressure applications is crucial to ensure optimal performance and longevity of your airless paint sprayer. Choosing the right oil and proper lubrication techniques are essential for maintaining your sprayer.

Here are some key points to consider:

  • Use a lightweight mineral-based oil designed for high-pressure applications.
  • Regularly check the oil level in the sprayer and top up or change it as recommended.
  • Proper oil usage reduces friction, wear, and corrosion in the internal components.
  • Apply oil to the moving parts to ensure smooth operation.
  • Avoid over-lubricating, as it can attract dust and debris.
  • Follow the manufacturer’s guidelines for oiling frequency.
  • Regularly check oil levels and refill as needed.

Regular Oil Level Check

Check the oil level in your sprayer regularly to ensure optimal performance and prevent unnecessary wear and tear.

Regular oil level monitoring is crucial for maintaining the efficiency of your airless paint sprayer. Oil acts as a lubricant, reducing friction and preventing corrosion within the internal components.

By regularly checking the oil level and topping up or changing it as recommended by the manufacturer, you can ensure smooth operation and extend the lifespan of your sprayer.

Regular oil changes are important because over time, the oil can become contaminated with debris and lose its lubricating properties. By staying on top of oil changes, you can prevent damage to the sprayer and avoid costly repairs.

Advertisement

Make it a habit to monitor the oil level in your sprayer and perform regular oil changes to keep it running smoothly.

High-Quality Replacement Parts

When it comes to maintaining your airless paint sprayer, using high-quality replacement parts is essential. Genuine parts offer several benefits that can significantly impact the lifespan and performance of your sprayer.

Here are some reasons why using genuine parts is important:

  1. Superior Durability and Functionality:

    • Genuine parts are designed specifically for your sprayer model, ensuring a perfect fit and optimal performance.
    • They are made from high-quality materials, making them more durable and resistant to wear and tear.
    • Using genuine parts eliminates the risk of leaks or malfunctions, providing a reliable and efficient spraying experience.
  2. Reduced Repairs and Downtime:

    • High-quality replacement parts minimize the need for frequent repairs, saving you time and money.
    • Genuine parts are less likely to fail or break, preventing unexpected project delays.
    • By investing in genuine parts, you can avoid costly downtime and keep your sprayer working at its best.
  3. Maintenance and Reliability:

    • Genuine parts are manufactured to meet the highest standards, ensuring consistent performance and reliability.
    • Regular maintenance, including the use of genuine replacement parts, is crucial for maximizing the lifespan of your sprayer.
    • By following recommended maintenance practices and using genuine parts, you can enjoy a reliable and long-lasting airless paint sprayer.

Importance of Premium Parts

Investing in high-quality replacement parts for your airless paint sprayer is essential for durability and optimal performance. Premium parts offer several benefits. Firstly, they are designed to fit and function perfectly, eliminating leaks or malfunctions that can occur with cheaper alternatives. Additionally, premium parts have a longer lifespan, reducing the need for frequent replacements. When choosing replacement parts, consider reputable manufacturers who offer warranties for their products. Ensure that the replacement parts are compatible with your specific sprayer model. Using genuine parts is crucial to maintain performance and reliability. By investing in high-quality replacement parts, you can minimize repairs, extend the lifespan of your sprayer, and ultimately save time and money in the long run.

Reputable Manufacturers for Replacement Parts

Look for warranties provided by reputable manufacturers to ensure the quality and reliability of replacement parts for your airless paint sprayer.

When it comes to finding reliable suppliers for replacement parts, here are a few things to consider:

Advertisement
  • Warranty coverage: Reputable manufacturers often offer warranties on their replacement parts, giving you peace of mind and assurance that the parts are of high quality and built to last.

  • Reputation: Look for manufacturers with a strong reputation in the industry. Reliable suppliers are known for producing top-notch replacement parts that meet or exceed industry standards.

  • Compatibility: Ensure that the replacement parts you choose are compatible with your specific airless paint sprayer model. Reputable manufacturers provide detailed information about compatibility to help you make the right choice.

Timely Replacement of Worn-Out Parts

To ensure optimal performance, regularly replacing worn-out parts is crucial for keeping your airless paint sprayer running smoothly. Timely replacement of worn-out parts is essential for the proper functioning of your sprayer and to avoid any potential breakdowns during your painting projects.

By replacing worn-out parts in a timely manner, you can prevent further damage to your sprayer and ensure its longevity. Not only does timely replacement of parts help maintain the performance of your sprayer, but it also has numerous maintenance benefits. It reduces the risk of malfunctions, leaks, and inefficient paint application. Additionally, it minimizes the need for costly repairs and downtime, saving you both time and money.

Cost and Time Savings With Proper Maintenance

To ensure maximum longevity and performance from your airless paint sprayer, regular maintenance is crucial. By investing a little time and effort into proper care, you can save yourself both money and time in the long run.

Here are the key reasons why regular maintenance is important and the benefits of investing in a protective case:

  1. Importance of Regular Maintenance:

    • Prevents clogs and blockages, ensuring smooth operation and consistent spray patterns.
    • Reduces friction, wear, and corrosion, extending the lifespan of your sprayer.
    • Protects the sprayer from cold-related issues, such as freezing or damage to seals and valves.
  2. Benefits of Investing in a Protective Case:

    • Shields the sprayer from accidental drops, bumps, and impacts.
    • Guards against dust, moisture, and other environmental factors that can damage critical components.
    • Provides convenient storage and organization for accessories and spare parts.

Frequently Asked Questions

How Often Should I Clean the Spray Gun After Each Use?

To ensure optimal performance, clean the spray gun after each use. This is a crucial step in airless paint sprayer maintenance. Use a cleaning solution recommended by the manufacturer and thoroughly clean all components, including the nozzle and filter.

Regular cleaning prevents clogs and blockages, ensuring smooth operation. By following best practices for cleaning your airless paint sprayer, you can maximize its lifespan and avoid costly repairs.

Advertisement

Can I Use Any Type of Oil for Lubricating the Airless Paint Sprayer?

Yes, you can use any type of oil for lubricating your airless paint sprayer. However, it is important to use the correct oil recommended by the manufacturer for optimal performance and lifespan.

Using the wrong type of oil can lead to friction, wear, and corrosion, causing damage to the internal components. Avoid common mistakes in lubricating airless paint sprayers by consulting the manufacturer’s guidelines and using lightweight mineral-based oil designed for high-pressure applications.

Regularly check the oil level and refill as needed to ensure smooth operation.

How Frequently Should I Check and Clean the Filters?

To extend the lifespan of your airless paint sprayer, it’s important to regularly check and clean the filters. This ensures optimal performance and prevents clogs and blockages. The frequency of checking and cleaning the filters depends on the usage and the type of paint being sprayed.

However, as a general guideline, it is recommended to check and clean the filters after every use or at least once a week for heavy usage. Proper maintenance of the filters will help maximize the lifespan of your airless paint sprayer.

Advertisement

What Are the Benefits of Using High-Quality Replacement Parts?

Using high-quality replacement parts for your airless paint sprayer offers a multitude of benefits. These durable parts ensure proper functionality, eliminating leaks and malfunctions. By investing in premium parts, you can reduce the need for frequent repairs and project downtime.

This not only saves you time but also money in the long run. High-quality replacement parts extend the lifespan of your sprayer, providing reliable performance and enhancing efficiency. So, opt for reputable manufacturers and genuine parts to maximize the durability and longevity of your airless paint sprayer.

How Can Proper Maintenance of the Airless Paint Sprayer Save Me Money and Time in the Long Run?

Proper maintenance of your airless paint sprayer can save you both time and money in the long run. By ensuring proper storage, you protect the sprayer from damage caused by extreme temperatures, moisture, and dust.

Regular maintenance, such as cleaning the spray gun and filters, prevents clogs and blockages that can lead to costly repairs. Using high-quality replacement parts enhances efficiency and reduces project downtime.

Taking these steps will maximize the lifespan of your airless paint sprayer and provide reliable performance.

Advertisement

Conclusion

So there you have it, with these essential tips, you can maximize the lifespan of your airless paint sprayer and enjoy its reliable performance for years to come.

By properly storing and protecting your sprayer, cleaning it thoroughly after each use, and regularly maintaining the filters and system, you can ensure its longevity.

Investing in high-quality replacement parts from reputable manufacturers and timely replacements of worn-out parts will also contribute to cost and time savings.

So take care of your airless paint sprayer and witness the benefits of proper maintenance firsthand.

Advertisement

Continue Reading

Paint Sprayer Maintenance and Troubleshooting

Painting Brick Walls With an Airless Sprayer: a Complete Guide

Published

on

By

An image showcasing an airless sprayer in action, with a skilled painter effortlessly coating a brick wall with smooth, even strokes

Painting brick walls with an airless sprayer can bring them back to life. This comprehensive guide walks you through every step of the process, from preparing the surface to ensuring an even coat.

With the right tools and materials, including a high-quality primer, you can enhance the durability and resistance of your brick walls. Expert tips and safety precautions ensure a smooth finish and a transformation that will leave your walls looking brand-new.

Get ready to bring new vibrancy and timeless beauty to your space.

Key Takeaways

  • Preparation and surface cleaning is essential before painting brick walls with an airless sprayer.
  • Selecting the right paint color and gathering the necessary materials and equipment are crucial for a successful painting project.
  • Cleaning and maintaining the painted brick walls regularly will help them stay in good condition.
  • Priming the walls with a high-quality primer designed for masonry surfaces enhances adhesion, durability, and resistance to moisture and alkali.

Surface Preparation: Tools and Cleaning

The homeowner gathers the necessary tools, including a wire brush, scraper, and power washer, to remove loose paint and dirt from the brick walls. Acquiring these tools is essential for proper cleaning techniques.

Advertisement

Using the wire brush and scraper, the homeowner meticulously removes any loose paint and dirt from the surface of the brick walls. After that, a power washer is used to thoroughly clean the walls, ensuring a clean and smooth surface for painting.

It is important to allow the walls to dry completely before proceeding to the next step. By acquiring the necessary tools and following proper cleaning techniques, the homeowner ensures a clean and well-prepared surface for painting the brick walls.

Selecting the Right Paint Colors and Materials

When selecting paint colors and materials, it is important to consider the desired aesthetic and gather the necessary tools. Choosing paint colors that complement the overall look and feel of the space is crucial for achieving the desired result.

Additionally, having the right materials is essential for a successful painting project. Following a step-by-step guide for surface preparation is also crucial. This includes gathering tools such as a wire brush, scraper, and power washer. It is important to remove loose paint and dirt from the surface using the wire brush and scraper, and then thoroughly clean the area with a power washer.

Once the surface is clean and dry, you can proceed with choosing the appropriate paint color and gathering the necessary materials and equipment like paint, primer, drop cloth, painters tape, and sandpaper.

Advertisement

Essential Equipment for Painting Brick Walls

To achieve a flawless result, one must ensure they have the essential equipment necessary for painting brick walls. This includes proper airless sprayer maintenance and choosing the right paintbrush.

Here are three key items to consider:

  • Well-maintained airless sprayer: Regularly clean and inspect the sprayer to ensure it functions properly. This will ensure consistent paint application and prevent clogging or uneven spraying.

  • High-quality paintbrush: Choose a brush that is suitable for masonry surfaces and the type of paint being used. A good brush will provide smooth and even coverage, allowing for precise detailing and edges.

  • Safety equipment: Protect yourself while painting by wearing safety goggles, gloves, and a mask to prevent inhalation of fumes or particles.

Achieving Even Coverage With an Airless Sprayer

Using an airless sprayer ensures even coverage when painting brick walls. This method is great for achieving consistent results.

Advertisement

However, there are some common issues that may arise when using an airless sprayer. One common issue is overspray, which occurs when the paint is applied too heavily or the sprayer is held too close to the surface. To troubleshoot this issue, adjust the spray nozzle to a narrower setting and maintain a consistent distance from the wall.

Another common issue is clogging of the sprayer tip due to debris or dried paint. To avoid this, strain the paint before pouring it into the sprayer and clean the tip regularly during the painting process.

Proper Technique: Starting From the Top

Starting from the top ensures that the paint is applied evenly and avoids drips or streaks on the brick walls. This technique allows for better control and coverage, ensuring a professional-looking finish.

Advertisement

When starting at the bottom, gravity can cause the paint to run down the wall, leading to uneven application and potential drips. By beginning at the top, the paint can be evenly distributed downwards, avoiding any potential issues.

However, it is important to troubleshoot common issues that may arise when painting brick walls with an airless sprayer. These issues can include clogging of the sprayer nozzle, uneven spray pattern, or overspray.

Cleaning and Maintenance Tips for Painted Brick Walls

Regular cleaning and maintenance is essential for preserving the appearance and longevity of painted brick walls. To keep them looking their best, it’s important to use proper cleaning techniques and know how to remove stubborn stains.

Light dirt can be easily removed with warm water and dish soap. Gently scrub the walls with a soft-bristle brush to avoid damaging the paint.

For stubborn stains, create a solution of white vinegar and water and treat the affected areas. Rinse the walls with clean water to remove any residue.

Advertisement

The Importance of Priming Masonry Surfaces

Priming masonry surfaces is crucial for enhancing adhesion, durability, and resistance to moisture and alkali. A high-quality primer designed for masonry surfaces is essential for paint longevity and a successful painting project.

Without proper priming, paint may not adhere well to the surface, leading to peeling and chipping over time. Primer acts as a barrier, preventing moisture and alkali from seeping into the paint, which can cause it to deteriorate.

However, common issues with primer can occur, such as poor coverage, uneven application, or improper drying. To troubleshoot these problems, ensure the walls are clean and dry before applying primer, use the recommended primer for masonry surfaces, and allow sufficient drying time.

Drying Time for Primer Application

After applying primer to the masonry surfaces, it is important to allow sufficient drying time of approximately 24 hours. This drying time is crucial to ensure that the primer properly adheres to the surface and creates a strong foundation for the paint.

It also allows the primer to fully cure, enhancing its durability and resistance to moisture and alkali. While waiting for the primer to dry, it is essential to protect the surface from any potential damage or contamination.

Advertisement

Additionally, it is worth considering alternative priming methods, such as using a tinted primer or a primer/sealer combination, which can provide additional benefits like improved color coverage or added protection against stains.

Advantages of Primer: Adhesion, Durability, and Resistance

Applying a high-quality primer to masonry surfaces ensures strong adhesion, increased durability, and enhanced resistance to moisture and alkali. The advantages of using primer go beyond these benefits and extend to cost savings, as it helps paint adhere better, reducing the need for multiple coats.

Additionally, primer improves the overall appearance and finish of the painted surface, giving it a smooth and professional look. When it comes to application techniques, primer can be easily applied using a brush, roller, or sprayer, making it suitable for different preferences and skill levels.

Its quick drying time allows for efficient completion of painting projects. Overall, using primer before painting brick walls with an airless sprayer is a wise choice, offering numerous advantages in terms of cost and application techniques.

Expert Tips for a Smooth Paint Finish

To achieve a smooth paint finish on the brick walls, homeowners should consider using a high-quality paint roller for even coverage. This is one of the most important tips for paint application on brick surfaces.

Advertisement

Another common mistake to avoid is using a low-quality roller, which can leave streaks and uneven texture on the walls. It is also essential to choose the right roller nap thickness for the type of brick surface. A thicker nap is typically recommended for rough or textured brick, while a thinner nap works well for smooth brick walls.

Additionally, homeowners should apply the paint in thin, even coats to prevent drips and runs. Taking these tips into consideration can help homeowners achieve a professional-looking smooth paint finish on their brick walls.

Safety Precautions When Using an Airless Sprayer

Using an airless sprayer requires homeowners to wear protective goggles, gloves, and a respirator mask to ensure their safety. The powerful spray of the airless sprayer can create a fine mist of paint particles that can be harmful if inhaled or make contact with the eyes or skin.

To maintain the airless sprayer, regular cleaning is essential to prevent clogs and ensure proper functioning. Troubleshooting common issues like uneven spray pattern or loss of pressure can be resolved by checking for clogs, adjusting the nozzle, or cleaning the filters.

Regular maintenance and troubleshooting will help homeowners achieve a smooth and efficient painting process with their airless sprayer, allowing them to achieve professional-looking results.

Advertisement

The Transformation: Freshly Painted Brick Walls

After taking the necessary safety precautions when using an airless sprayer, the transformation of freshly painted brick walls can be truly remarkable. The impact of color choice cannot be underestimated, as it can completely change the look and feel of a space. Whether it’s a timeless neutral or a bold, vibrant color, a fresh coat of paint can breathe new life into a room. In addition to the aesthetic benefits, there are also practical benefits to consider. Professional painting services can ensure a high-quality finish, saving time and effort for homeowners. They have the expertise to properly prepare the surface, choose the right materials, and apply the paint evenly. The result is a beautifully transformed space that adds value to the home.

The Impact of Color Choice Benefits of Professional Painting Services
Completely changes the look High-quality finish
and feel of a space Saves time and effort
Timeless or vibrant options Expertise in surface preparation
Adds value to the home Proper material selection
Even application of paint

Frequently Asked Questions

How Long Does It Typically Take for Brick Walls to Dry Completely After Cleaning?

Brick walls typically take some time to dry completely after cleaning. The drying time can depend on factors such as weather conditions and the level of humidity. However, using the best cleaning methods for brick walls, such as using a power washer and allowing the walls to air dry, can help expedite the drying process.

It is important to ensure that the walls are thoroughly dry before proceeding with any painting or priming to achieve the best results.

Can I Use a Regular Primer on Brick Walls or Is There a Specific Primer for Masonry Surfaces?

When painting brick walls, it’s important to use the right primer for optimal results. While a regular primer may work on some surfaces, there are specific primers designed for masonry surfaces that are recommended for brick walls.

These masonry primers are specially formulated to enhance adhesion, durability, and resistance to moisture and alkali. By choosing the appropriate primer for brick walls, you can ensure better paint adherence and longevity of the paint job.

Advertisement

How Often Should Painted Brick Walls Be Cleaned and Maintained?

Painted brick walls should be cleaned and maintained regularly to keep them looking their best. The cleaning frequency will depend on the level of dirt and grime buildup, but generally, it is recommended to clean them at least once or twice a year.

To maintain the painted surface, homeowners should use warm water and dish soap to remove light dirt and gently scrub the walls with a soft-bristle brush. Stubborn stains can be treated with a solution of white vinegar and water.

Regular cleaning and maintenance will help preserve the appearance and longevity of the painted brick walls.

Is It Necessary to Apply Multiple Coats of Paint for a Smooth Finish?

Applying multiple coats of paint is necessary for achieving a smooth finish on brick walls. Using a roller or brush may not provide the same level of smoothness as an airless sprayer.

The multiple coats allow for better coverage and a more uniform appearance. The airless sprayer ensures even distribution of paint, resulting in a flawless finish.

Advertisement

Are There Any Potential Risks or Dangers Associated With Using an Airless Sprayer for Painting Brick Walls?

Using an airless sprayer for painting brick walls can pose potential risks and dangers. The high-pressure nature of the sprayer can create a fine mist of paint particles, which can be harmful if inhaled. Additionally, there is a risk of overspray, which can result in paint getting on unintended surfaces.

It is important to take safety precautions, such as wearing protective gear and properly ventilating the area. Proper training and experience with using an airless sprayer is also recommended to minimize these risks.

Conclusion

In conclusion, painting brick walls with an airless sprayer can provide a fresh and updated look to any space. It is important to properly prepare the surface by cleaning and removing loose paint and dirt.

Using the right paint colors and materials, along with a high-quality primer, will ensure long-lasting adhesion, durability, and resistance to moisture and alkali. Following the proper technique and safety precautions when using an airless sprayer is crucial.

An interesting statistic to consider is that painting brick walls can increase a home’s value by up to 5%.

Advertisement

Continue Reading

Paint Sprayer Maintenance and Troubleshooting

Setting Up and Cleaning the Graco 390 Airless Paint Sprayer

Published

on

By

An image capturing the step-by-step process of setting up and cleaning the Graco 390 Airless Paint Sprayer

It is essential to properly prepare and maintain the Graco 390 Airless Paint Sprayer to achieve a high-quality paint job. This paint sprayer is efficient and easy to use thanks to its simple setup and user-friendly features. Understanding how to adjust the spray settings using the pressure control knob, spray gun, and hose will help users meet their specific painting requirements.

Additionally, proper cleaning and maintenance ensure the longevity of the paint sprayer. In this article, we will guide you through the step-by-step process of setting up and cleaning the Graco 390 Airless Paint Sprayer, providing you with the knowledge and confidence to achieve outstanding paint results.

Key Takeaways

  • Inspect all equipment for good condition before assembly
  • Familiarize yourself with adjusting spray pressure for desired coverage
  • Regularly clean and maintain the paint sprayer, including the spray gun
  • Troubleshoot common issues such as paint viscosity, spray pattern, and clogs in the spray tip

Gathering and Unboxing the Necessary Equipment

The user gathers and unboxes the necessary equipment for setting up the Graco 390 Airless Paint Sprayer. Before starting the setup process, it is important to inspect all the equipment to ensure that everything is in good condition.

This includes checking the paint sprayer unit itself, as well as the spray gun, hose, and any additional accessories that may have been included. The unboxing process involves carefully opening the packaging and removing each component from its protective wrapping. It is important to handle the equipment with care to avoid any damage.

Advertisement

Once all the equipment has been unboxed, the user can proceed to the next step of assembling the components and getting ready for painting.

Assembling the Graco 390 Airless Paint Sprayer

To assemble the Graco 390 Airless Paint Sprayer, simply follow the instructions provided by the manufacturer.

Before starting the assembly process, inspect the components of the sprayer to ensure they are in good condition and nothing is missing. This includes checking the spray gun, hose, and pressure control knob.

Once the inspection is complete, understand how the pressure control works. The pressure control knob allows users to adjust the pressure of the paint being sprayed, which affects the coverage and finish of the paint job. Familiarize yourself with this feature to achieve optimal results with your paint sprayer.

Overall, assembling the Graco 390 Airless Paint Sprayer is a straightforward process that can be easily accomplished by following the manufacturer’s instructions.

Advertisement

Preparing the Surface and Adjusting Spray Settings

After gathering the necessary equipment and materials, the user inspects the surface and cleans it thoroughly before adjusting the spray settings for desired coverage. This is an important step in ensuring a smooth and even paint application.

Preparing the surface involves removing any dirt, dust, or debris that may interfere with the paint adhering properly. This can be done by using a broom, vacuum cleaner, or a damp cloth, depending on the type of surface.

Once the surface is clean, the user can then choose the paint color that best suits their preference and the overall aesthetic they want to achieve. It is important to consider factors such as lighting, room size, and personal taste when selecting paint colors.

Advertisement

Cleaning and Maintaining the Graco 390 Airless Paint Sprayer

In order to ensure optimal performance, it is essential for the user to regularly clean and maintain their Graco 390 Airless Paint Sprayer. Cleaning techniques and a recommended maintenance routine are necessary to keep the sprayer in good working condition.

After each use, it is important to disassemble and clean the spray gun thoroughly. This includes removing any remaining paint and debris from the gun’s components. Additionally, the paint sprayer system should be flushed with a cleaning solution to remove any paint residue.

Proper storage and maintenance of the sprayer is also crucial. This involves storing the sprayer in a clean and dry area, and inspecting it regularly for any signs of wear or damage.

Troubleshooting Common Issues With the Paint Sprayer

Advertisement

The user can check the spray tip for clogs and ensure that the paint viscosity and spray pattern are correct in order to troubleshoot common issues with the paint sprayer. Here are some steps to follow in order to identify and fix paint spray pattern issues:

  1. Check paint viscosity: Make sure the paint is properly mixed and thinned according to the manufacturer’s instructions. If the paint is too thick or too thin, it can affect the spray pattern.

  2. Inspect the spray pattern: Use a test board or piece of cardboard to spray a test pattern. Look for any irregularities, such as streaks, splotches, or uneven coverage. This can indicate issues with the spray tip or pressure settings.

  3. Adjust settings and clean the spray tip: If the spray pattern is not satisfactory, adjust the pressure control knob and clean the spray tip to remove any clogs or debris. A clean spray tip and proper pressure settings are essential for a consistent and even spray pattern.

Frequently Asked Questions

How Long Does It Take to Assemble the Graco 390 Airless Paint Sprayer?

Assembling time for the Graco 390 Airless Paint Sprayer depends on the user’s familiarity with the product. On average, it takes about 10-15 minutes to fully assemble the paint sprayer.

The required tools for assembly include a wrench and screwdriver. Users should carefully follow the instructions provided in the manual to ensure proper assembly and functionality of the sprayer.

What Is the Warranty Period for the Graco 390 Airless Paint Sprayer?

The warranty period for the Graco 390 Airless Paint Sprayer is an important aspect to consider. It provides peace of mind and reassurance to the user.

Additionally, knowing the assembly time required for the paint sprayer can help with planning and scheduling painting projects effectively.

Advertisement

These factors, along with the product’s features and performance, contribute to the overall satisfaction and convenience of using the Graco 390 Airless Paint Sprayer.

Can the Graco 390 Airless Paint Sprayer Be Used With Different Types of Paint?

The Graco 390 Airless Paint Sprayer is compatible with various types of paint, including latex, acrylic, and oil-based paints. This versatility allows users to tackle different painting projects with ease.

The advantages of using the Graco 390 Airless Paint Sprayer with different types of paint include efficient and even coverage, reducing the need for multiple coats. Its high-pressure system ensures excellent paint atomization, resulting in a professional finish.

Overall, the Graco 390 Airless Paint Sprayer is a reliable choice for any painting job.

What Is the Recommended Cleaning Solution for the Graco 390 Airless Paint Sprayer?

The recommended cleaning solution for the Graco 390 Airless Paint Sprayer is a mixture of warm water and a mild detergent. This solution effectively removes any residual paint or debris from the sprayer’s components.

Advertisement

It is important to thoroughly clean the spray gun, hose, and other parts after each use to maintain optimal performance. By following proper cleaning techniques and using the recommended cleaning solution, users can ensure the longevity and efficiency of their Graco 390 Airless Paint Sprayer.

How Often Should the Spray Gun of the Graco 390 Airless Paint Sprayer Be Cleaned?

The spray gun of the Graco 390 Airless Paint Sprayer should be cleaned regularly to ensure optimal performance. Cleaning the spray gun helps troubleshoot common issues such as clogs and improper spray patterns.

It is recommended to clean the spray gun after each use to prevent paint residue from building up and affecting the quality of the spray. By maintaining the spray gun properly, users can extend the lifespan of their Graco 390 Airless Paint Sprayer and achieve consistent, professional results.

Conclusion

In conclusion, setting up and cleaning the Graco 390 Airless Paint Sprayer is an essential task for achieving professional paint finishes. Following the step-by-step guide and familiarizing oneself with the equipment ensures smooth operation and efficient painting.

A clean and well-maintained paint sprayer saves time and money in the long run. It also provides exceptional painting results. Embrace the irony of the tedious cleaning process, knowing that it is the key to effortless and stunning paint jobs.

Advertisement

Continue Reading

Trending

Copyright © 2024 Paint Sprayer Zone Affiliate disclaimer As an affiliate, we may earn a commission from qualifying purchases. We get commissions for purchases made through links on this website from Amazon and other third parties.