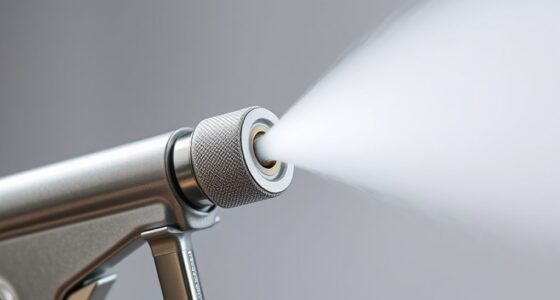
Just like a surgeon sterilizes their instruments before surgery, a paint spraying expert understands the significance of maintaining a clean airless paint sprayer for latex paint projects. They meticulously disassemble, clean, and dry the sprayer to make sure no paint residue is left behind.
As they reassemble the sprayer, replacing worn parts and tightening connections, they envision a smooth, leak-free spray.
This article will guide you through the precise steps and necessary materials to achieve optimal performance and longevity from your airless sprayer.
Key Takeaways
- Thorough rinsing and drying are important for achieving a pristine finish and effectively removing paint residue.
- Proper reassembly of the sprayer includes replacing worn or damaged parts, ensuring proper alignment and fit, and checking for loose connections or clogs.
- Optimizing performance and preventing leaks can be achieved by tightening screws or bolts securely, troubleshooting for any issues, and correctly reassembling the sprayer.
- Proper storage of the sprayer, including thorough cleaning, flushing with water or solvent, and storing in a cool and dry place, is important for future use and to protect the sprayer from damage.
Importance of Proper Cleaning for Airless Sprayers
Properly cleaning an airless sprayer is crucial for maintaining its performance and preventing paint clogs or damage. Regular maintenance is of utmost importance to ensure the longevity of the sprayer.
To extend the lifespan of an airless sprayer, there are several tips to keep in mind. Firstly, it is essential to thoroughly rinse and dry the sprayer to achieve a pristine finish and effectively remove any paint residue.
Additionally, proper reassembly of the sprayer is necessary, which includes replacing worn or damaged parts, ensuring proper alignment and fit, and checking for loose connections or clogs. Tightening screws or bolts securely and troubleshooting any issues is vital for optimizing performance and preventing leaks.
Lastly, proper storage of the sprayer, including thorough cleaning, flushing with water or solvent, and storing in a cool and dry place, is important for future use and to protect the sprayer from damage.
Necessary Materials for Cleaning an Airless Sprayer
To effectively clean an airless sprayer for latex paint, one must gather the necessary materials. These materials include a bucket, warm water, mild soap, clean rags, a brush, and safety goggles. These materials are essential for properly cleaning and maintaining the sprayer, ensuring its optimal performance and longevity.
The bucket and warm water will be used to create a cleaning solution, while the mild soap will help break down any paint residue. Clean rags and a brush will be utilized to scrub away stubborn residue and ensure a thorough cleaning. Safety goggles are crucial to protect the eyes from any splashes or debris during the cleaning process.
Step 1: Disconnecting and Relieving Pressure
The first step in the cleaning process involves disconnecting the power source and relieving any remaining pressure from the sprayer. This is an important step to ensure the safety of the operator and prevent any accidental discharge of paint during the cleaning process.
To properly disconnect the sprayer, follow these techniques:
- Turn off the power source and unplug the sprayer.
- Engage the trigger lock to prevent any accidental spraying.
- Release the pressure by slowly opening the bleed valve or trigger until all pressure is relieved.
- Disconnect any hoses or attachments from the sprayer.
- Double-check that all pressure has been relieved before proceeding with cleaning.
Step 2: Detaching and Soaking the Nozzle
After disconnecting and relieving pressure, the operator should detach the nozzle and soak it in a cleaning solution alternative, such as warm soapy water or vinegar solution, to break down dried paint. This step is crucial in removing residue and ensuring the proper functioning of the clean airless sprayer for latex paint. By soaking the nozzle in a cleaning solution, the dried paint is effectively broken down, making it easier to remove. The operator can use a small brush or toothbrush to scrub away any stubborn residue. It is important to pay attention to detail during this process to ensure that all traces of paint are removed. Once the nozzle is clean, it can be reattached to the sprayer, ready for the next use.
| Step 2: Detaching and Soaking the Nozzle |
|---|
| 1. Disconnect the sprayer and relieve pressure. |
| 2. Detach the nozzle from the sprayer. |
| 3. Soak the nozzle in warm soapy water or vinegar solution. |
| 4. Use a small brush or toothbrush to scrub away residue. |
| 5. Rinse the nozzle thoroughly and reattach it to the sprayer. |
This table provides a clear and organized representation of the steps involved in detaching and soaking the nozzle, ensuring that the operator can easily follow the instructions.
Step 3: Scrubbing Stubborn Residue
Scrubbing away stubborn residue requires using a small brush or toothbrush to effectively remove any remaining traces of dried paint. To ensure a thorough cleaning, follow these techniques for scrubbing residue on a clean airless sprayer for latex paint:
-
Use a small brush or toothbrush: This allows for precise scrubbing and targeting of the stubborn residue.
-
Apply gentle pressure: Scrub in a back-and-forth or circular motion, applying enough pressure to loosen the residue without damaging the sprayer.
-
Focus on problem areas: Pay extra attention to areas where the residue is particularly stubborn or thick.
-
Rinse and repeat: After scrubbing, rinse the area with warm water to remove loosened residue. If necessary, repeat the scrubbing process until all residue is removed.
-
Dry thoroughly: After scrubbing and rinsing, make sure to dry the sprayer completely to prevent any moisture-related issues.
Step 4: Inspecting and Cleaning the Filter
Proper maintenance of the filter is crucial for the optimal performance of a clean airless sprayer for latex paint. As a paint sprayer specialist, I cannot stress enough the importance of filter maintenance in preventing paint clogs and achieving a flawless finish.
Regularly inspecting and cleaning the filter will ensure that it is free from any paint residue or debris that can obstruct the paint flow. To clean the filter, remove it from the airless sprayer and rinse it with warm water. Use a soft brush to gently scrub away any stubborn paint particles. If necessary, soak the filter in a cleaning solution specifically designed for latex paint.
Rinse the filter thoroughly with water to ensure it is clean and ready for use. By taking these simple steps, you can prevent paint clogs and keep your clean airless sprayer for latex paint in optimal condition.
Step 5: Emptying and Filling the Container
To empty and fill the container, the user must first disconnect the sprayer from the power source and release any remaining pressure. Once this is done, the following steps should be followed with attention to detail and precision:
-
Choose the right cleaning solution: Selecting the appropriate cleaning solution is crucial for effectively removing latex paint from the container. It is recommended to use a cleaning solution specifically designed for latex paint to ensure optimal results and prevent damage to the sprayer.
-
Emptying process: Empty the remaining paint from the container by pouring it into a suitable disposal container. Proper disposal of paint is important to protect the environment and comply with local regulations.
-
Fill the container: After emptying, fill the container with the chosen cleaning solution. Ensure that the container is filled to the appropriate level for proper cleaning and avoid overfilling.
-
Reattach the container: Once the container is filled, securely attach it back onto the sprayer. Ensure that the connection is tight to prevent any leaks during the cleaning process.
-
Restart the sprayer: Turn on the sprayer and allow the cleaning solution to circulate through the system. This will help flush out any remaining paint residue and ensure a thorough cleaning.
Step 6: Circulating the Cleaning Solution
Once the container is securely attached to the sprayer, the user can turn it on and allow the cleaning solution to circulate through the system. This step is crucial for ensuring the effectiveness of the cleaning solution in removing paint residue and maintaining the sprayer’s performance.
The circulation process allows the solution to flow through the sprayer’s internal components, such as the pump, hoses, and filters, effectively flushing out any remaining paint particles and debris. By circulating the cleaning solution, the user can ensure that all parts of the sprayer are thoroughly cleaned and free from clogs or blockages.
This step is essential for maintaining the longevity and efficiency of the sprayer, as a clean and well-maintained system will provide optimal spraying results.
Step 7: Rinsing the Container
After circulating the cleaning solution, the user should rinse the container thoroughly with clean water to remove any remaining residue or cleaning solution.
Using warm water for rinsing is important to ensure that all traces of the cleaning solution and paint residue are completely eliminated.
Thorough rinsing is crucial in maintaining the integrity of the sprayer and preventing any potential issues during future use. It helps to avoid clogs, blockages, or paint buildup that could affect the sprayer’s performance.
By rinsing the container with clean water, the user can ensure that no cleaning solution or residue is left behind, which could potentially contaminate the next batch of paint.
This step is essential for achieving optimal results and ensuring the longevity of the clean airless sprayer for latex paint.
Step 8: Disassembling the Spray Gun
The user unscrews the nozzle and tip guard to begin the process of disassembling the spray gun. This step is crucial for proper spray gun maintenance and ensures optimal performance.
By disassembling the spray gun, the user can thoroughly clean each component and address any issues that may affect the sprayer’s functionality.
To disassemble the spray gun, the user should carefully remove the spray tip and filter. These components should then be rinsed with warm water and scrubbed using a brush to remove any dried paint or debris.
Once the components are clean, the user can reassemble the spray gun and test it with water to ensure it is functioning properly.
Regular disassembling and cleaning of the spray gun is essential for maintaining the longevity and efficiency of the clean airless sprayer for latex paint.
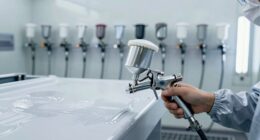
Step 9: Cleaning and Testing the Spray Gun
To ensure optimal functionality, the user should assemble the spray gun and test it with water after thoroughly cleaning each component. Proper cleaning and testing are essential steps in maintaining a clean airless sprayer for latex paint. Here are some guidelines to follow:
-
Clean and inspect all components: After disassembling the spray gun, thoroughly clean each component with warm water and a brush to remove any paint residue or debris.
-
Reassemble the spray gun: Once all the components are clean and dry, reassemble the spray gun, ensuring proper alignment and fit.
-
Test functionality with water: Before using the spray gun with paint, it is important to test its functionality by connecting it to a water source. This will help identify any clogs or blockages that need to be addressed.
-
Troubleshoot clogs: If there are any clogs or blockages, use a cleaning solution specifically designed for latex paint to unclog the spray gun. Use a small wire brush or toothpick to remove stubborn clogs.
-
Ensure proper functionality: After troubleshooting and cleaning, test the spray gun again with water to ensure that it is working properly and there are no remaining issues.
Step 10: Troubleshooting and Cleaning the Spray Gun
When troubleshooting and cleaning the spray gun, the user should carefully inspect each component for any clogs or blockages. This step is crucial to ensure the proper functioning of the clean airless sprayer for latex paint.
The spray gun consists of various parts such as the nozzle, tip guard, spray tip, and filter, all of which can accumulate paint residue and debris over time. By thoroughly examining each component, the user can identify and address any issues that may impede the spray gun’s performance.
Troubleshooting tips include using a cleaning solution specifically designed for latex paint to remove stubborn clogs and blockages. Proper maintenance of the spray gun involves rinsing and scrubbing the components with warm water, ensuring they are clean and free from any obstructions.
Step 11: Removing and Cleaning the Filters
In order to ensure the optimal performance and longevity of a clean airless sprayer for latex paint, it is crucial to properly maintain and clean the filters. Removing filters efficiently and effectively is an essential step in the cleaning process.
Here are the steps for removing and cleaning the filters:
- Turn off the sprayer and disconnect it from the power source.
- Locate the filters on the sprayer and carefully remove them.
- Rinse the filters with warm water to remove any paint residue or debris.
- Use a soft brush to gently scrub away any stubborn particles.
- Ensure that the filters are thoroughly rinsed and free from any clogs or blockages.
Proper maintenance of filters is crucial for the smooth operation of the sprayer and the prevention of any paint clogs. By regularly cleaning and inspecting the filters, you can ensure that your clean airless sprayer for latex paint performs at its best.
Step 12: Unclogging and Cleaning the Nozzle
The user should carefully remove the nozzle and use a cleaning solution to effectively unclog and clean it.
Unclogging the nozzle is an essential step in maintaining the performance and longevity of a clean airless sprayer for latex paint. Paint residue and debris can accumulate in the nozzle, leading to blockages and uneven spray patterns.
To unclog the nozzle, the user can soak it in a cleaning solution specifically designed for latex paint. This solution will break down dried paint and remove any obstructions. A small wire brush or toothpick can be used to remove stubborn clogs.
After soaking and scrubbing, the nozzle should be thoroughly rinsed with water to ensure all cleaning solution and debris are removed. Proper nozzle maintenance will ensure optimal spray quality and prevent any disruptions during the painting process.
Frequently Asked Questions
How Often Should I Clean My Airless Sprayer for Latex Paint?
To prevent clogs in an airless sprayer and ensure efficient cleaning, it’s recommended to clean the sprayer after each use or at least once a month.
Proper cleaning includes:
- Rinsing and drying the sprayer
- Reassembling it correctly
- Regularly inspecting and cleaning the filter
Additionally, there are essential steps for maintaining the sprayer’s performance and preventing clogs, such as:
- Flushing out the remaining paint
- Disassembling and cleaning the spray gun
- Cleaning the filters and nozzles
Can I Use Any Cleaning Solution for the Sprayer, or Is There a Specific One Recommended?
When cleaning an airless sprayer for latex paint, it’s recommended to use a cleaning solution specifically designed for latex paint. Using a solution specifically formulated for latex paint ensures optimal cleaning and prevents potential damage to the sprayer. There may be other cleaning options available, but it’s best to stick to a solution made for latex paint.
It’s important to follow the recommended cleaning process. This includes thorough rinsing and scrubbing of all components, as well as disassembling and cleaning the spray gun. By following these steps, you’ll help maintain the sprayer’s functionality and prolong its lifespan.
What Should I Do if I Encounter a Stubborn Clog in the Spray Gun?
To prevent clogs in your airless sprayer, it’s important to properly maintain and clean the spray gun.
If you encounter a stubborn clog, there are troubleshooting tips you can follow.
Start by disconnecting the sprayer from the power source and relieving any pressure.
Then, disassemble the spray gun and use a cleaning solution specifically designed for latex paint to remove the clog.
Rinse the components thoroughly and reassemble the spray gun before testing it with water to ensure proper functionality.
Is It Necessary to Disassemble the Spray Gun for Cleaning, or Can I Clean It While Fully Assembled?
Cleaning techniques for an airless sprayer include disassembling the spray gun for thorough cleaning.
While it may be possible to clean the spray gun while fully assembled, disassembling it offers several benefits.
It allows for better access to all the components, ensuring that no paint residue or clogs are left behind.
It also allows for a more detailed inspection of the parts, allowing any worn or damaged components to be replaced.
Regular cleaning and disassembly of the spray gun can help maintain the sprayer’s performance and prolong its lifespan.
How Long Should I Soak the Nozzle in the Cleaning Solution to Break Down Dried Paint?
To effectively break down dried paint residue on the nozzle, it is recommended to soak it in a cleaning solution for approximately 30 minutes. However, the soaking time may vary depending on the severity of the paint buildup.
If the paint is particularly stubborn, alternative solutions such as warm soapy water or a vinegar solution can be used to accelerate the cleaning process.
It is important to thoroughly rinse the nozzle after soaking to ensure all paint residue is removed.
Conclusion
In conclusion, proper cleaning of an airless sprayer for latex paint is crucial to maintain its performance and prolong its lifespan.
By following the specific instructions and guidelines provided by a paint sprayer specialist, users can ensure that their sprayer is effectively and efficiently cleaned.
Attention to detail is key in this process, from disconnecting and relieving pressure to cleaning and testing the spray gun.
Industry-specific terminology is used to explain concepts accurately and informatively.
With clarity and precision, users can understand the features, benefits, and usage of the clean airless sprayer, whether they are professionals or non-professionals in the field.

Drenched in creativity and armed with a fountain pen, Isolde weaves words as gracefully as a painter strokes their canvas. A writer for Paint Sprayer Zone, her passion for colors, textures, and spaces finds a harmonious blend with her profound knowledge of painting tools and techniques.
Having grown up in a family of artists, Isolde’s tryst with paints began early. While her relatives expressed themselves on canvas, Isolde found her medium in words. She dedicated herself to chronicling the world of painting, understanding the nuances of each tool, and the artistry behind every spritz of a paint sprayer.