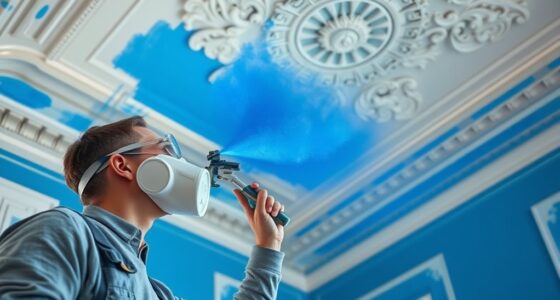

When spray painting your bathroom for mildew resistance, start by thoroughly cleaning and disinfecting surfaces, then sand any rough areas for smoothness. Use a mildew-resistant, waterproof spray paint designed for humid spaces, applying multiple thin coats in well-ventilated conditions. Protect fixtures and floors with tape and drop cloths. Regular cleaning and proper ventilation after painting help maintain the finish’s resistance. Keep these practices in mind—and you’ll discover more tips to guarantee a lasting, mildew-proof bathroom.
Key Takeaways
- Clean and disinfect surfaces thoroughly before painting to eliminate mold spores and prevent future mildew growth.
- Use mildew-resistant, waterproof spray paint formulated for bathrooms to enhance moisture protection.
- Ensure surfaces are completely dry and sanded smooth for optimal paint adhesion and mildew resistance.
- Apply multiple thin coats with proper ventilation, allowing each to dry fully to prevent moisture entrapment.
- Maintain bathroom ventilation and regular cleaning post-painting to reduce humidity and inhibit mold reappearance.

Spray painting bathrooms is an efficient way to update your space with a fresh, modern look, provided you take the right precautions. One of the most important steps to guarantee a long-lasting, mildew-resistant finish is proper surface preparation. Before you start, thoroughly clean the area to remove soap scum, dirt, and any existing mold or mildew. Use a mixture of water and a mild detergent, followed by a disinfectant to kill lingering spores. Rinse well and allow the surface to dry completely. If you notice any mold or mildew, treat the area with a solution of bleach and water, scrubbing gently to eliminate the spores. This step is vital for mildew prevention, as lingering spores can cause mold to reappear even after painting.
Once your surfaces are clean and dry, sand any rough or peeling areas to create a smooth, even surface for the spray paint to adhere to. This ensures a professional-looking finish and helps prevent peeling or chipping down the line. For areas prone to moisture, such as tiles and grout lines, use a fine-grit sandpaper to lightly scuff the surface, promoting better paint adhesion. After sanding, wipe away any dust with a damp cloth and allow the surface to dry thoroughly before moving on. Proper surface preparation not only enhances paint adhesion but also creates a barrier against moisture penetration, which is key to mildew prevention. Additionally, understanding positive thinking can help maintain a proactive attitude throughout your renovation project.
Sanding and cleaning surfaces ensures better adhesion and mildew resistance in bathroom spray painting.
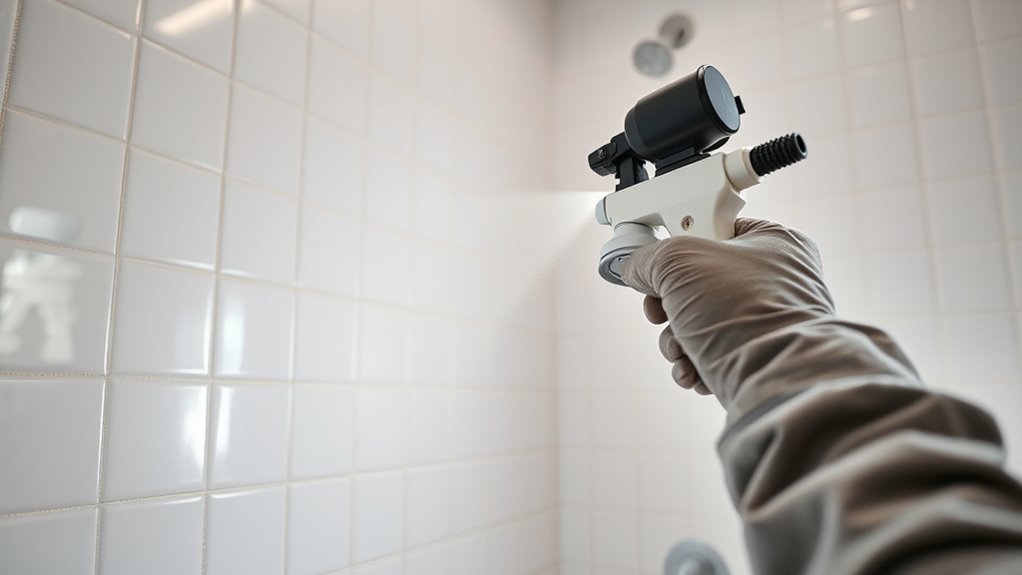
When selecting paint, opt for a mildew-resistant, waterproof spray designed for bathrooms or high-humidity environments. These paints contain additives that inhibit mold growth, making your bathroom walls more resistant over time. Before spraying, guarantee the room is well-ventilated, and cover fixtures, mirrors, and floors with painter’s tape and drop cloths to protect them from overspray. Apply the spray in light, even coats, holding the can at a consistent distance to avoid drips and uneven coverage. Multiple thin coats are better than one thick coat, allowing each layer to dry completely before applying the next.
Throughout the process, maintain good ventilation to help the paint cure properly and reduce humidity levels in the room, which can contribute to mold growth. After finishing, clean your spray equipment according to the manufacturer’s instructions. Keep an eye on the painted surfaces in the following weeks, checking for any signs of mold or peeling. Regular cleaning and proper ventilation will help maintain your freshly painted bathroom and prevent future mildew issues. By focusing on surface preparation and mildew prevention, you’ll enjoy a beautiful, durable finish that stays cleaner and mildew-free longer.
Frequently Asked Questions
What Are the Best Spray Paint Brands for Bathrooms?
You should consider brands like Rust-Oleum, Krylon, and Benjamin Moore for your bathroom spray paints. Look for mildew-resistant coatings specifically labeled as bathroom spray paints or mildew-resistant coatings, as they help prevent mold growth in humid spaces. These brands offer durable, water-resistant finishes perfect for bathrooms. Always choose a product designed for high-moisture environments to guarantee your paint job lasts longer and stays mildew-free.
How Long Does Spray Paint Last in Humid Environments?
Spray paint typically lasts 2 to 5 years in humid environments, but its durability depends on proper application and paint quality. Humidity effects can cause paint to peel or fade sooner if not sealed properly. To maximize paint durability, choose a mildew-resistant, waterproof spray paint designed for bathrooms, guarantee thorough preparation, and apply multiple coats. Regular maintenance and ventilation also help extend the life of your spray-painted surfaces.
Can Spray Painting Be Done Over Existing Tiles?
Yes, you can spray paint over existing tiles. First, you need to properly prepare the tiles by cleaning and sanding the surface to guarantee good adhesion. Use appropriate spray painting techniques, like applying thin, even coats, and hold the spray can at the right distance. This preparation and technique help achieve a smooth finish and long-lasting results, even in humid bathroom environments.
What Safety Gear Is Recommended for Spray Painting Bathrooms?
You need to gear up properly before spray painting your bathroom—think of it as safeguarding your own skin and lungs from harm. Wear protective gear like masks, goggles, and gloves, especially when working with fumes. Good ventilation strategies are also key; open windows and use fans to keep the air flowing. Don’t take shortcuts—your safety is the first priority to ensure a smooth and safe painting process.
How to Prevent Paint Fumes From Lingering After Painting?
To prevent paint fumes from lingering, make certain proper ventilation techniques during and after painting. Open windows and use fans to circulate fresh air, accelerating the fumes’ dispersal. After painting, consider using odor neutralizers to absorb any remaining smells. Keep the bathroom well-ventilated for several hours or even days if possible, and avoid closing the space immediately, allowing fresh air to thoroughly clear out the fumes.
Conclusion
Spray painting your bathroom with mildew-resistant techniques not only refreshes the space but also saves you time and money. Did you know that bathrooms are responsible for up to 60% of indoor mold growth due to moisture? By choosing the right paint and proper ventilation, you can drastically reduce mold issues. So, take control of your bathroom’s health and appearance—your walls will thank you for it! Start spray painting today and enjoy a cleaner, more vibrant space.

Franz came aboard the Paint Sprayer Zone team with a background in both journalism and home renovation. His articulate writing style, combined with a passion for DIY projects, makes him an invaluable asset. Franz has a knack for breaking down technical jargon into easy-to-understand content, ensuring that even the most novice of readers can grasp the complexities of paint sprayers.