When your spray pattern becomes uneven, distorted, or causes overspray and splattering, it’s a sign your spray tip is worn out. You might also notice reduced coverage, needing extra coats, or unusual noises and pressure fluctuations during use. To fix this, turn off the equipment, carefully remove the old tip, and replace it with a compatible new one. Keeping an eye on these signs helps you maintain peak performance—if you want to learn more, keep going.
Key Takeaways
- Look for visible cracks, chips, or buildup indicating nozzle damage or wear.
- Watch for uneven spray patterns, drips, overspray, or gaps suggesting tip deterioration.
- Notice irregular noise or pressure fluctuations during operation, signaling internal damage or clogging.
- Regularly inspect for bent, misshapen, or obstructed tips to prevent performance issues.
- Turn off and depressurize equipment before removing the old tip; then securely install and calibrate the new one.
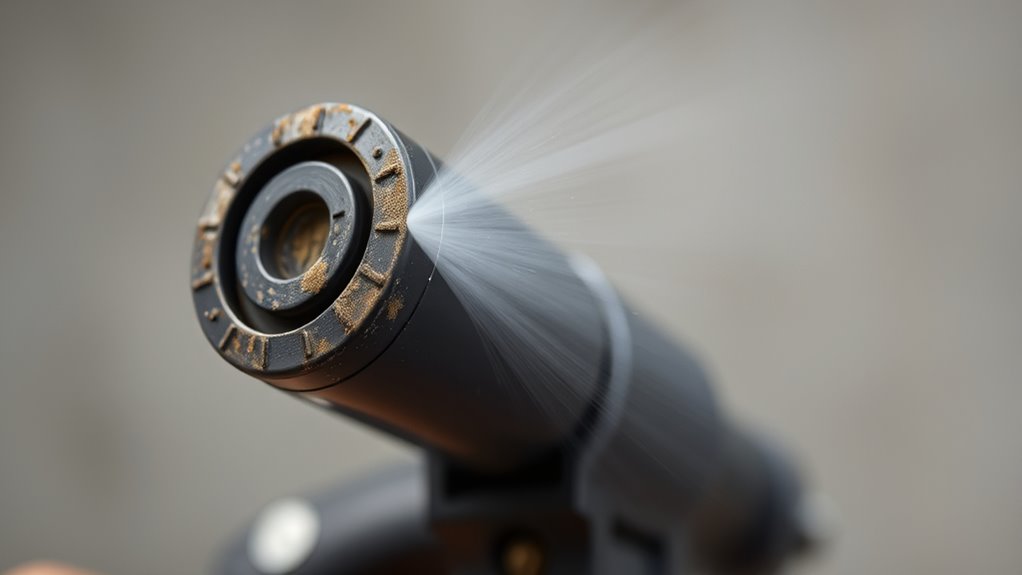
Signs of Uneven Spray Pattern
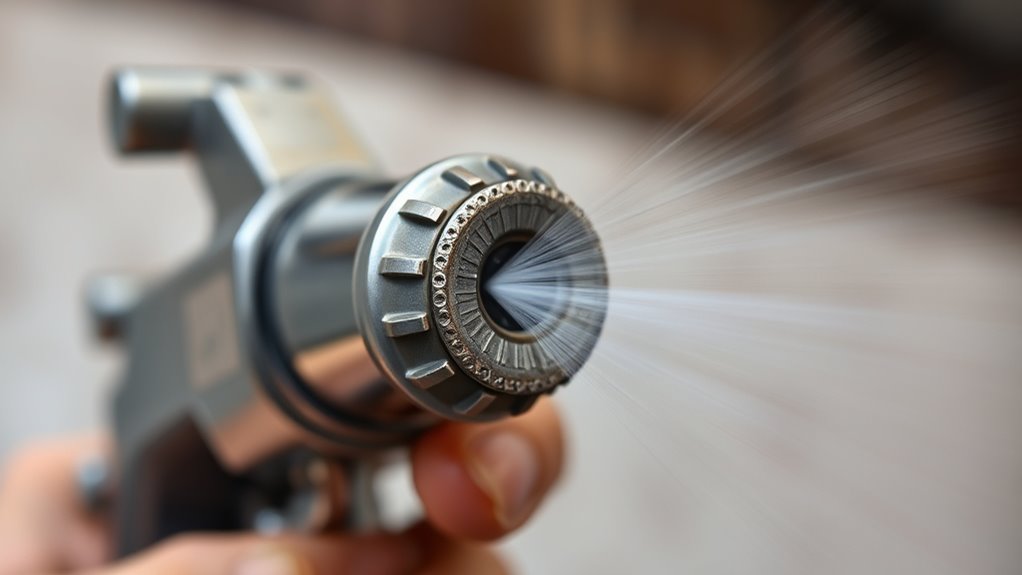
An uneven spray pattern often becomes noticeable when the spray nozzle is worn or damaged. You might see inconsistent coverage, drips, or uneven paint distribution. This issue is frequently caused by the spray tip material, which can wear down over time, especially if it’s made from softer metals or plastics. The nozzle design also plays a role; some designs are more prone to clogging or damage, leading to irregular spray flow. When the spray pattern isn’t uniform, it’s a clear sign that your spray tip may need replacing. Keep an eye out for these signs, as continuing to use a worn nozzle can result in poor finish quality and wasted material. Regular inspection helps guarantee your spray equipment performs at its best. Additionally, understanding the contrast ratio of your projector can significantly influence your viewing experience by providing deeper blacks and brighter whites. Proper maintenance, including replacing worn spray tips, contributes to consistent application and optimal performance.
Noticeable Spray Pattern Distortion
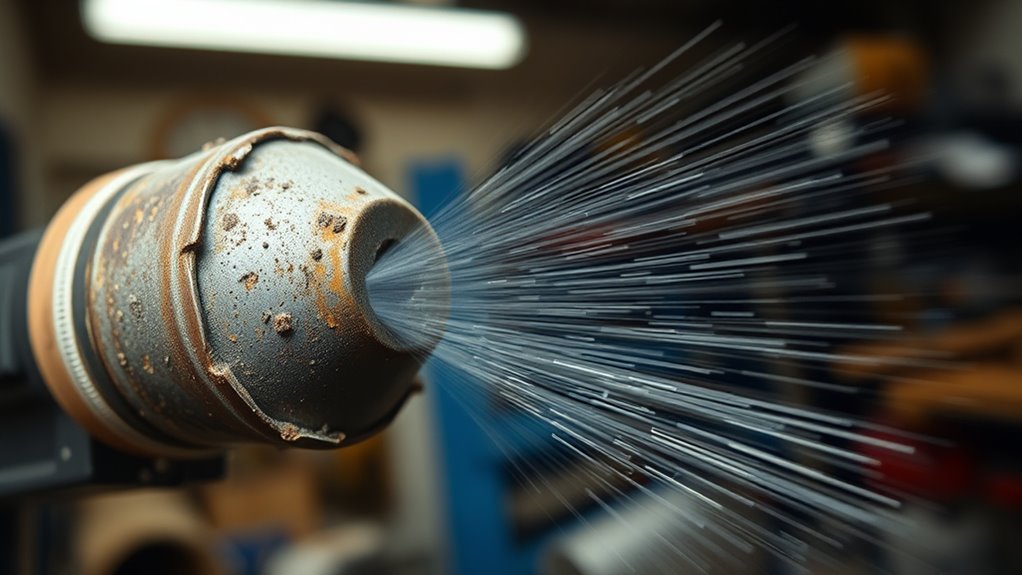
When you notice uneven spray distribution or an irregular pattern forming, it’s a clear sign of spray pattern distortion. These issues often indicate a worn or damaged tip that needs substituting. Addressing these problems quickly ensures a consistent, quality finish. Incorporating data-driven strategies can help monitor and predict when maintenance is necessary, preventing further issues. Recognizing how sound vibrations influence equipment can also assist in diagnosing underlying mechanical problems that may contribute to spray inconsistencies. Additionally, understanding wear indicators can help identify early signs of tip deterioration before noticeable pattern issues arise. Regular inspection of gelato equipment components can help detect early signs of wear and prolong the lifespan of your spray tips. Moreover, being aware of performance upgrades in equipment can lead to better maintenance scheduling and longer-lasting components.
Uneven Spray Distribution
Uneven spray distribution often results in a distorted spray pattern, making your application uneven and inefficient. This issue can stem from improper spray tip calibration, causing inconsistent paint flow. Additionally, air compressor issues, like fluctuating pressure, can lead to uneven spray patterns. When the compressor isn’t supplying steady air, the spray tip struggles to maintain a uniform spray. To fix this, check your air compressor for pressure stability and ensure it’s functioning correctly. Also, verify that your spray tip is properly calibrated and free of clogs or damage. Regular maintenance of spray equipment and timely troubleshooting are essential to prevent these issues and ensure consistent results. Ensuring your spray tips are compatible with your equipment can help maintain optimal spray patterns. Proper sprayer maintenance and timely troubleshooting are essential to prevent these issues and ensure consistent results. Addressing these issues promptly ensures a smooth, consistent application and prevents wastage or uneven coverage.
Irregular Pattern Formation
Irregular pattern formation often becomes noticeable as a distorted spray pattern that disrupts your application. When you see uneven or streaky paint, it’s a sign your spray tip may be worn out. First, try nozzle cleaning to remove any clogs or debris that might cause distortion. If cleaning doesn’t fix the issue, check your spray gun calibration—incorrect settings can also lead to uneven spray patterns. A worn spray tip can cause inconsistent atomization, resulting in an irregular pattern. Replacing the tip will restore proper spray shape and ensure even coverage. Regular maintenance, including nozzle cleaning and calibration checks, helps prevent pattern distortion. Additionally, proper maintenance of your airless paint sprayer can help identify early signs of wear and keep it functioning optimally. Sometimes, performance upgrades such as replacing worn components can improve overall spray quality. Using high-quality spray tips can also reduce the likelihood of premature wear and pattern distortion. Ensuring the correct spray pattern is achieved depends on maintaining all parts in good condition; neglecting this can lead to uneven results and additional touch-ups. When these steps don’t resolve the problem, replacing the spray tip is your best solution for achieving a consistent, high-quality finish.
Excessive Paint Overspray and Splattering
Excessive paint overspray and splattering can quickly turn a straightforward project into a messy ordeal. When you notice this, it’s often a sign that your spray tip is worn out or improperly adjusted. To fix the issue, start with proper paint mixing to guarantee consistency, and always perform spray gun cleaning before use. A worn spray tip can cause uneven atomization, leading to more overspray and splattering. To prevent this, check your tip regularly and replace it when needed. Additionally, using crochet tools for cleaning and maintenance can help ensure your spray tips stay in good condition. Staying informed about airbrush technology and technological advancements can also inspire innovative solutions for your equipment maintenance routines.
Reduced Paint Coverage and Efficiency
When your spray tips are worn or improperly adjusted, you’ll notice that the paint coverage becomes less efficient, wasting material and increasing project time. Reduced coverage often results from uneven spray patterns or inconsistent flow, which can be caused by neglecting proper spray gun calibration or incorrect paint mixing techniques. To improve efficiency, regularly check your spray tip and ensure proper calibration. Consider this table for better understanding:
| Issue | Cause | Solution |
|---|---|---|
| Uneven coverage | Worn spray tip | Replace or clean the tip |
| Low paint flow | Incorrect paint viscosity | Adjust paint mixing techniques |
| Overspray | Poor spray gun calibration | Recalibrate the spray gun |
| Wasted material | Blocked or damaged tip | Clear or replace the tip |
| Inconsistent pattern | Improper adjustment | Fine-tune spray settings |
Addressing these factors increases coverage and reduces waste.
Increased Need for Multiple Coats
When you switch to a different spray tip, you might notice that thicker paint requires more coats to achieve a smooth finish. This can lead to longer painting times and increased effort on your part. Understanding how your new tip affects coverage helps you plan for multiple coats and better manage your project. Additionally, selecting the right spray tip type can improve efficiency and ensure a more even application. Being aware of paint viscosity can also help you choose the optimal spray tip for your specific project needs. Moreover, adopting automation in manufacturing techniques can further streamline your painting process and reduce manual labor. Incorporating technological advancements can optimize your workflow and improve overall results. Recognizing the importance of proper tuning techniques can also lead to more precise application and better finish quality.
Thicker Paint Application
Have you noticed that thicker paint often requires applying multiple coats to achieve the desired coverage? When dealing with thicker paint, proper spray tip calibration becomes essential to guarantee even application. Using the right paint tip materials can prevent clogging and uneven spray patterns. Multiple coats might be necessary because:
- Thicker paint struggles to atomize properly, leading to uneven coverage
- Inconsistent spray patterns result from worn or incorrect spray tips
- Proper calibration helps maintain consistent flow and spray width
- Selecting the right spray tip material minimizes clogs and paint buildup
- Regular maintenance of spray tips ensures optimal performance and longevity in your painting projects
- Implementing automated insights from business intelligence tools can help identify when equipment like spray tips may need replacement, improving efficiency and reducing downtime.
- Ensuring the correct spray pattern can enhance coverage, especially with thicker paints, reducing the number of coats needed.
Adjusting your spray tip and ensuring it’s in good condition helps reduce the number of coats needed, saving time and paint. Always check your spray tip calibration to get the best finish on thicker paints.
Longer Painting Time
Why does painting with thicker coatings often take longer? Thicker paint layers require more drying time, meaning you’ll need to wait longer between coats. When your spray tip is worn out, it may cause uneven spray patterns, leading to the need for multiple coats to achieve a smooth finish. Proper storage of leftover paint is vital, as incompatible or poorly stored paint can clog your spray tip and worsen application issues. Using paint that’s compatible with your equipment ensures smoother, more even coverage, reducing the number of coats needed. Keep your spray tip in good condition to maintain consistent spray patterns, which speeds up the process. By managing these factors, you can minimize longer painting times and get better results faster.
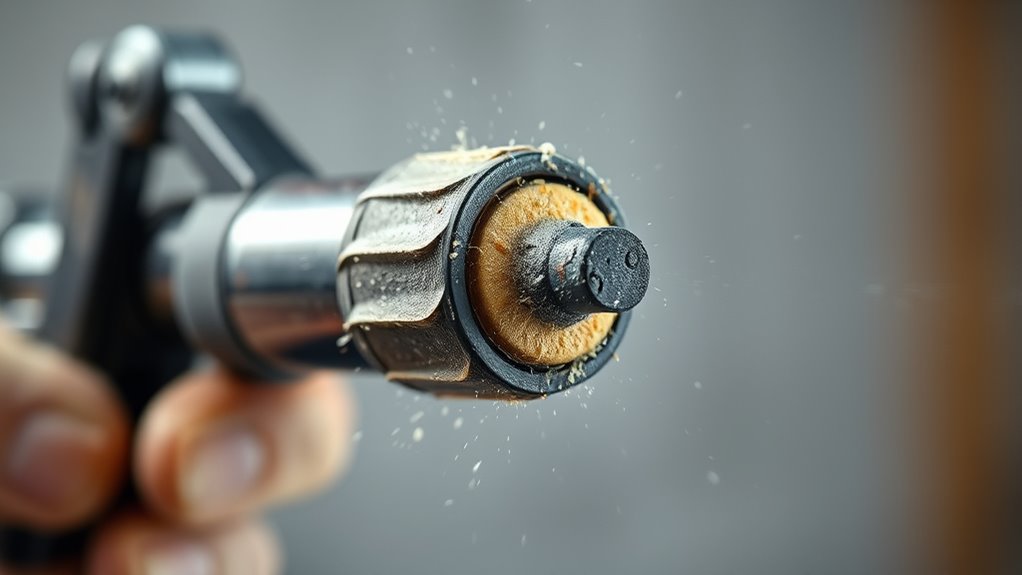
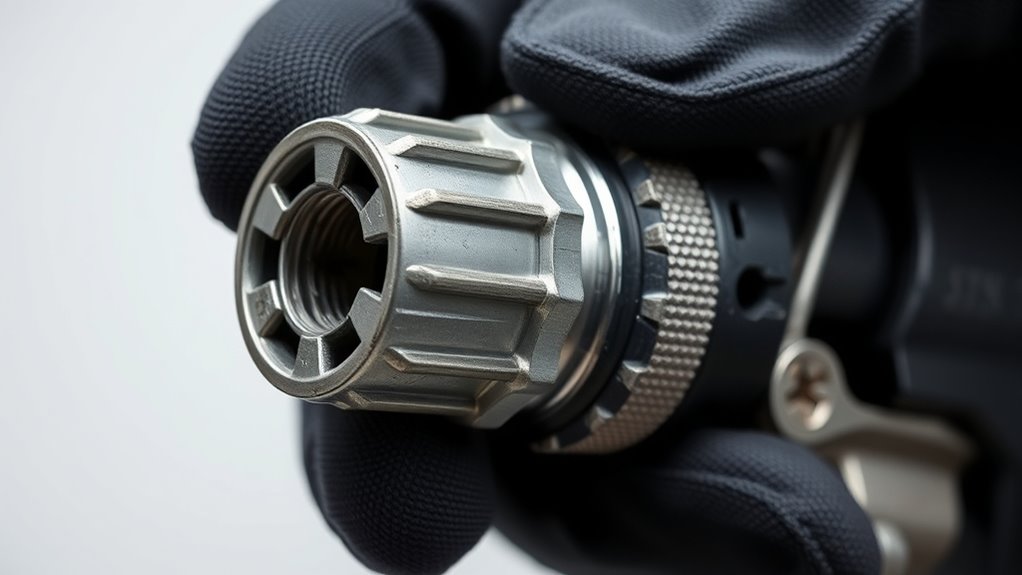
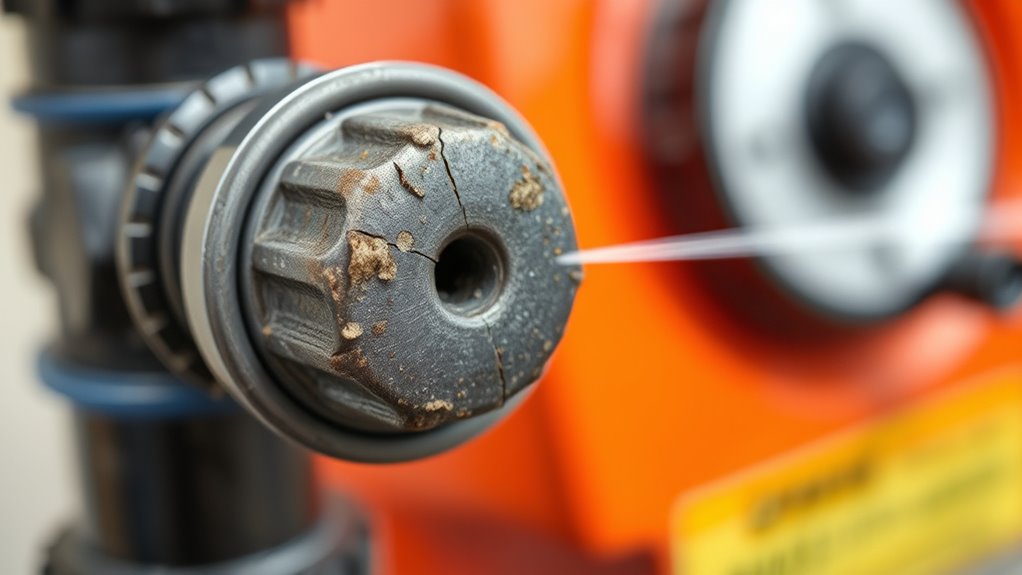
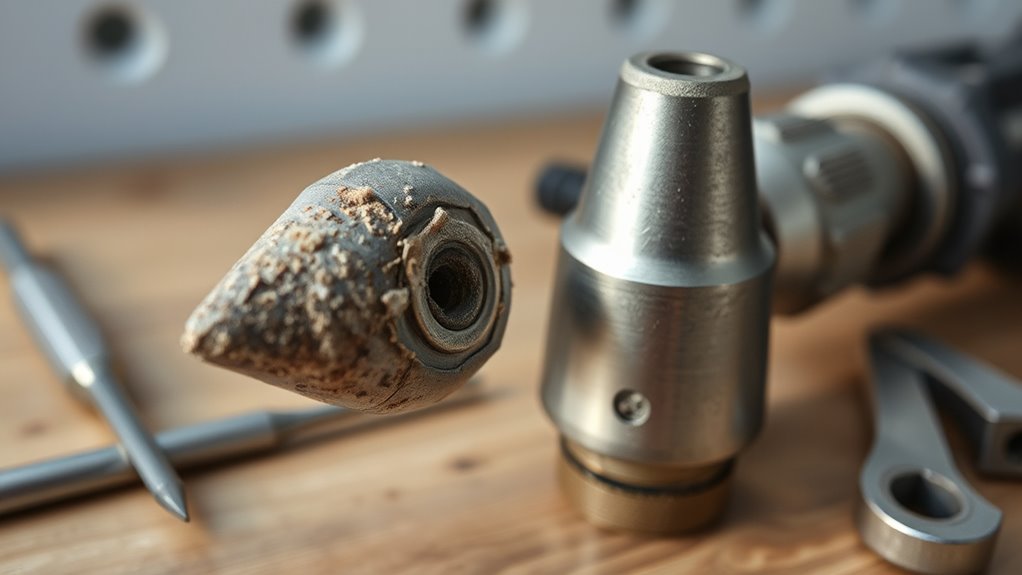
Visible Wear or Damage on the Tip
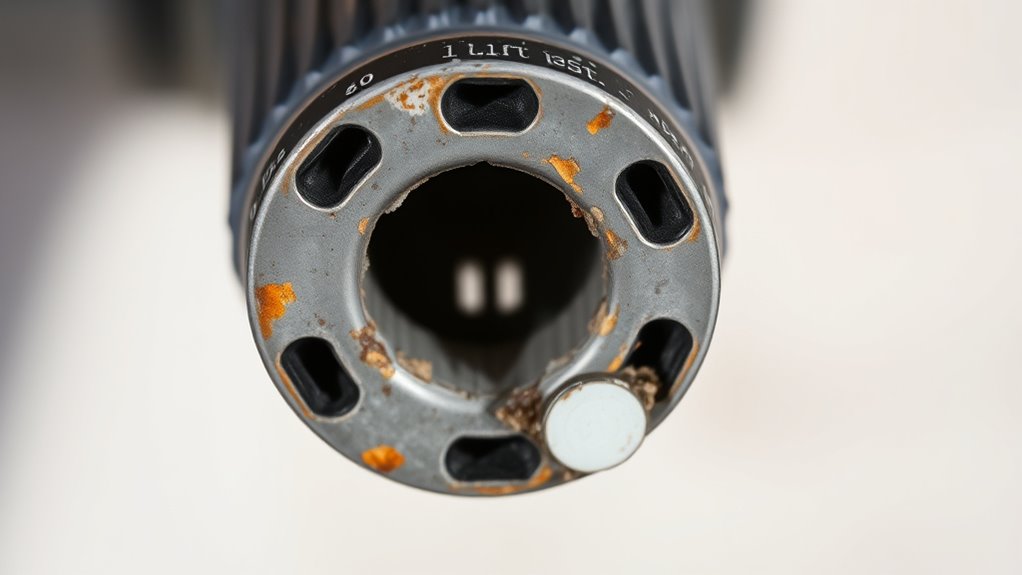
Visible wear or damage on the spray tip is a clear sign that it needs replacing. During a visual inspection, look for cracks, bends, or chipped edges, which indicate tip deterioration. These signs compromise spray quality and can lead to uneven coverage. Keep an eye out for the following:
Look for cracks, bends, or chips to identify spray tip damage early.
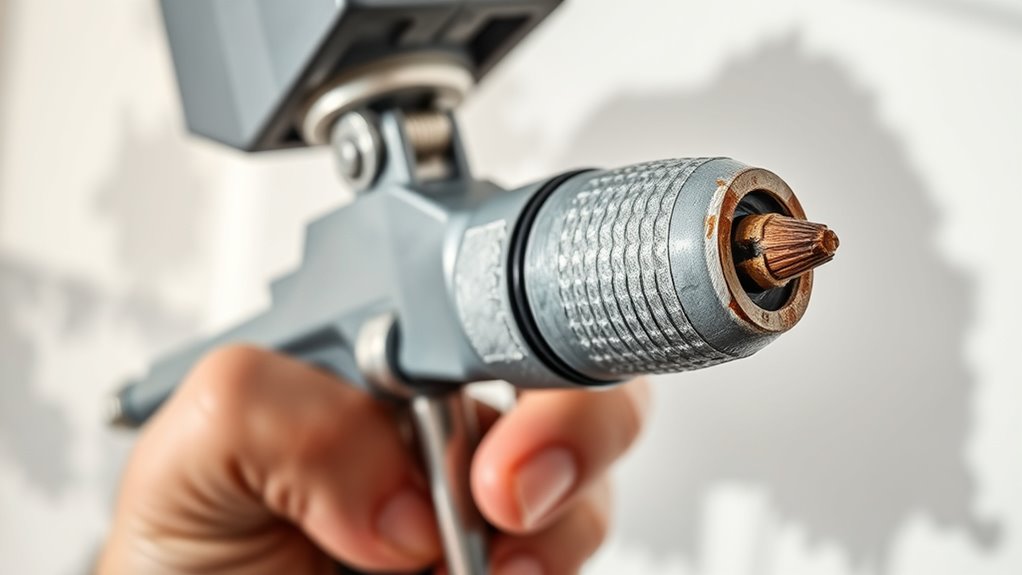
- Cracks or fractures in the tip material
- Buildup of dried paint or debris
- Bent or misshapen tip components
- Chips or worn-out nozzle edges
These issues reduce spray consistency and may cause paint to leak or spray unevenly. Addressing visible damage promptly ensures peak performance and prevents further spray pattern issues. Regular visual inspection helps you catch wear early and maintain smooth, efficient spraying.
Changes in Spray Pattern Consistency
Changes in spray pattern consistency often indicate that the spray tip is worn or damaged. When your spray pattern becomes uneven, drips, or shows irregular shapes, it’s a clear sign that nozzle wear indicators are present. A consistent spray pattern is vital for a smooth, even application. If you notice clumping, overspray, or gaps, your spray pattern isn’t uniform anymore. These issues can be caused by a worn-out tip that no longer maintains proper atomization. Regularly inspecting your spray pattern helps you catch these signs early. If you see irregularities, it’s time to replace the spray tip. Addressing spray pattern inconsistencies quickly ensures a professional finish and prevents further damage to your equipment.
Difficulty Achieving Desired Finish
When your finish isn’t coming out right, you might notice an uneven spray pattern, excessive overspray, or drips. These issues often stem from incorrect spray tip installation or settings. Addressing these problems can help you achieve a smooth, professional-looking finish.
Uneven Spray Pattern
Have you noticed your spray pattern is uneven, making it difficult to achieve a smooth, consistent finish? An inconsistent spray from your spray gun often indicates a worn or clogged paint nozzle. To fix this, inspect the nozzle for clogs or damage, as these can distort the spray pattern. Consider the following:
- Wear and tear on the paint nozzle causing uneven spray
- Incorrect spray gun settings affecting spray consistency
- Dirt or debris blocking the nozzle opening
- Improper technique leading to inconsistent coverage
Replacing the spray tip can restore proper atomization and pattern. Make sure to select the correct size and type of nozzle for your project. Regular maintenance keeps your spray gun functioning smoothly and helps you achieve professional results.
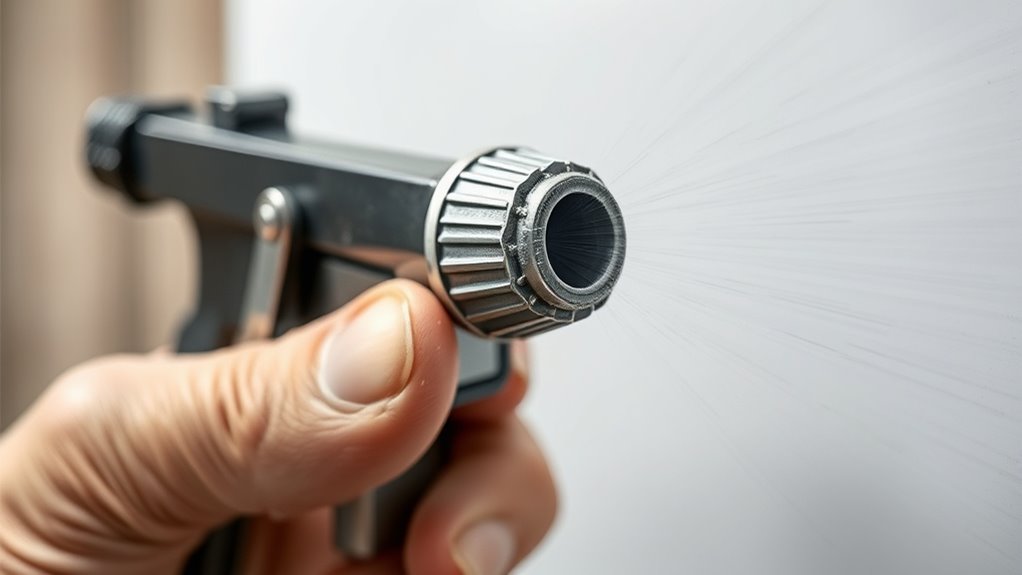
Excessive Overspray or Drips
Excessive overspray or drips often occur when your spray gun is set too close to the surface, or the spray pattern is too wide for the project. This can cause uneven coverage and a messy finish. To fix this, check your paint tip selection; a tip that’s too large may produce too much spray, leading to drips. Adjust your distance from the surface—usually about 6-12 inches—and reduce the spray pattern if possible. Regular spray equipment maintenance helps keep the spray tip clean and functioning properly, preventing issues that cause overspray. Ensuring proper technique and using the right paint tip selection will give you a smoother, more controlled finish. Consistently maintaining your equipment is key to avoiding excessive overspray and achieving professional results.
Inconsistent Paint Flow
Inconsistent paint flow can hinder your ability to achieve a smooth, even finish, often resulting in uneven coverage or thin spots. This issue may stem from a worn or clogged spray tip, or improper maintenance. To fix it, guarantee proper tip cleaning after each use to prevent paint buildup, which can cause flow issues. Check the spray tip material; some materials are more prone to wear and clogging, affecting flow consistency. Consider replacing the spray tip if cleaning doesn’t resolve the problem. Also, inspect for damage or deformation that can disrupt paint flow. Keep these points in mind:
- Regularly clean the tip for peak performance
- Use the correct spray tip material for your project
- Replace worn tips promptly
- Maintain proper pressure settings for even flow
Unusual Noises or Pressure Fluctuations
Unusual noises or pressure fluctuations often indicate that your spray tip isn’t functioning properly. If you notice squealing, rattling, or other noise issues, it could mean the tip is worn or clogged, causing inconsistent operation. Pressure problems, like sudden drops or surges, also signal a problem with the spray tip or its connection. These issues can lead to uneven spray patterns or overspray, impacting your project’s quality. When you hear strange sounds or experience pressure fluctuations, it’s a sign that the spray tip may need replacing. Addressing these symptoms early prevents further damage to your equipment and ensures smooth, efficient operation. Regularly check for noise issues and pressure irregularities to keep your sprayer working at its best.
Regular Maintenance and Replacement Schedule
Implementing a regular maintenance and replacement schedule for your spray tips is essential to keep your equipment functioning at its best. Consistently checking your spray gun calibration ensures ideal paint application and prevents uneven coats. Regularly inspect your spray tips for signs of wear, such as inconsistent spray patterns or clogging. Keep in mind that neglecting routine maintenance can lead to poor paint mixing and wasted material. To stay on top of this, consider these practices:
- Clean spray tips thoroughly after each use
- Replace worn tips promptly based on usage
- Calibrate your spray gun regularly for accurate paint flow
- Track maintenance and replacement dates to avoid overlooked issues
Adopting these habits helps maintain even spray patterns, reduces downtime, and extends your equipment’s lifespan.
Frequently Asked Questions
How Often Should I Replace My Spray Tip for Optimal Performance?
You should replace your spray tip based on its spray tip lifespan and your maintenance schedule. Typically, inspect the tip after every few uses, and replace it if you notice uneven spray patterns or clogs. Regular checks help guarantee peak performance. In general, plan to change it every 200-300 hours of use or when signs of wear appear, keeping your equipment working efficiently and avoiding costly repairs.
Can Using the Wrong Type of Spray Tip Damage My Sprayer?
You’re asking if using the wrong spray tip can damage your sprayer. It’s like putting a square peg in a round hole—mismatch issues can cause harm. Always check spray tip compatibility and nozzle material before switching. Using an incompatible tip may lead to clogs, leaks, or even motor strain. To keep your sprayer in top shape, confirm the nozzle matches your equipment and intended use, preventing costly damage down the line.
Are There Safety Precautions When Changing a Spray Tip?
When changing a spray tip, safety precautions are essential. Always wear safety gear like gloves and eye protection to prevent injury from paint or debris. Be aware of hazards like pressurized fluid and sharp edges. Turn off and disconnect your sprayer before replacing the tip, and release any built-up pressure. Staying alert and following safety steps keeps you safe during this process and helps avoid accidents.
What Tools Are Needed to Replace a Spray Tip?
Changing a spray tip is like swapping out a worn-out gear in your machine. You’ll need a wrench or pliers to loosen and tighten the spray tip, ensuring spray tip compatibility. A cleaning brush helps remove any debris. Before starting, check your spray tip for compatibility with your sprayer model. Keep safety gloves handy, and always clean spray tips thoroughly after replacing to maintain ideal performance and prevent clogging.
Does Replacing the Spray Tip Affect the Quality of My Finish?
Replacing the spray tip can greatly improve your finish quality and spray consistency. When you use a worn or damaged tip, it may cause uneven spray patterns, drips, or poor coverage. By swapping it out, you guarantee a smoother, more uniform application, resulting in a professional-looking finish. Regularly replacing your spray tip keeps your equipment functioning properly and helps you achieve the best possible results in every project.
Conclusion
Your spray tip is like the heartbeat of your painting project—once it falters, everything suffers. Keep an eye out for signs of wear, and don’t wait until uneven coverage or overspray become your new norm. Regularly replacing your spray tip is the key to flawless finishes and efficient work. Remember, neglecting this small component can turn your masterpiece into a mess—so listen to the whispers of your equipment and act before trouble strikes.

A seasoned painter with over 15 years in the industry, Mike transitioned from hands-on painting projects to the digital world of paint sprayers. His extensive experience gives him a unique perspective on what users truly need when it comes to painting tools. As the Editor in Chief of Paint Sprayer Zone, Mike ensures that every piece of content not only provides value but also reflects the realities of painting — the challenges, the joys, and the intricate details.