Connect with us

How-To & Tips

Proper Cleaning for Oil Paint in Airless Sprayer

Published

on

An image of an airless sprayer nozzle being meticulously cleaned with a small brush, removing every trace of oil paint

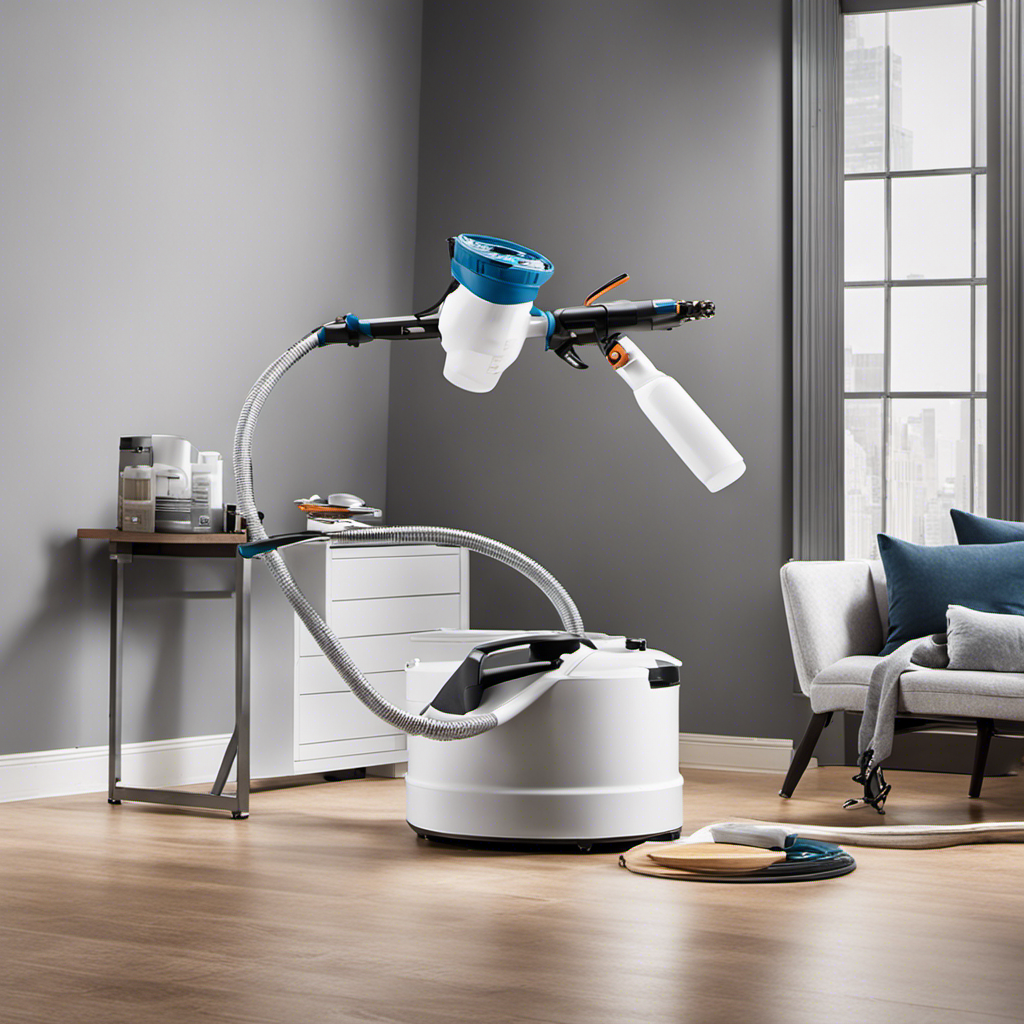
Keeping an airless sprayer in excellent condition can be quite difficult, especially when it comes to removing leftover oil paint. Nonetheless, this step is crucial to guaranteeing top-notch performance and a longer lifespan.

By following the manufacturer’s instructions and donning the necessary protective gear, one can disassemble and meticulously clean every component of the sprayer. Through the use of recommended solvents and cleaners, those hard-to-reach areas and crevices can be thoroughly cleansed, resulting in a sparkling finish.

With water, paint residues can be effectively flushed out, and the sprayer can be carefully reassembled. Testing and troubleshooting are essential to guarantee smooth performance, and proper waste disposal and regular maintenance are crucial for environmental preservation.

Key Takeaways

  • Regular maintenance and cleaning techniques are essential for optimal performance and longevity of an airless sprayer.
  • Disassembling and cleaning each part of the sprayer is necessary to ensure its excellent condition.
  • Following manufacturers’ instructions and using appropriate cleaning solutions maximize the sprayer’s lifespan and performance.
  • Proper waste disposal and adherence to regulations are crucial to prevent environmental damage and protect water sources.

Importance of Regular Cleaning for Oil Paint in Airless Sprayer

Regular cleaning of an airless sprayer is crucial for maintaining optimal performance and preventing clogs when using oil paint. The importance of regular maintenance cannot be overstated, as it ensures that the sprayer functions efficiently and prolongs its lifespan.

Advertisement

During the cleaning process, it is essential to take safety precautions to protect oneself. Wearing gloves and protective eyewear is necessary to prevent any potential harm from the cleaning solutions or paint residues. By following these safety measures, one can clean the sprayer effectively without compromising their well-being.

Regular cleaning not only prevents clogs, but it also ensures that the sprayer operates smoothly and delivers consistent results. It is a necessary step in maintaining the sprayer’s efficiency and ensuring that it remains in excellent condition for future use.

Preparing the Work Area for Effective Cleaning

To ensure a smooth cleaning process, the user should organize their work area and prioritize proper ventilation. This includes clearing clutter and creating enough space to move around comfortably.

Opening windows or using fans to ensure fresh air circulation is crucial for protecting the user’s health and preventing fume buildup in the work area.

Additionally, it is important to take safety precautions such as wearing gloves and protective eyewear while cleaning.

Advertisement

Disassembling and Cleaning the Sprayer Components

After removing the nozzle and tip guard, the user should carefully disassemble the remaining parts of the sprayer for thorough cleaning. Disassembling techniques are crucial to ensure all components are properly cleaned.

Following safety precautions, such as wearing gloves and protective eyewear, is essential during this process. The user should refer to the manufacturer’s instructions for any additional parts that need to be disassembled.

It is important to remove any leftover paint residue from each disassembled component. Using a clean, lint-free cloth, the user should wipe away excess paint, paying attention to hard-to-reach areas and crevices. For stubborn paint, a soft-bristle brush can be used.

Advertisement

Thorough cleaning prevents clogs and maintains the sprayer’s efficiency. Safety precautions, such as wearing protective gloves and goggles, should also be followed when using solvents or cleaners.

Thoroughly Cleaning Hard-to-Reach Areas and Crevices

Using a soft-bristle brush and a clean, lint-free cloth, you can effectively clean those hard-to-reach areas and crevices of the sprayer. Thoroughly cleaning these areas is essential for maintaining the sprayer’s performance and preventing clogs.

Here are some effective cleaning techniques to ensure proper maintenance:

  • Gently scrub the hard-to-reach areas and crevices with a soft-bristle brush.
  • Use a clean, lint-free cloth to wipe away any excess paint or residue.
  • Pay close attention to corners, edges, and tight spaces to remove any built-up debris.
  • Consider using a small, angled brush or cotton swabs to reach into the smallest crevices.

Achieving a Sparkling Finish With Solvents or Cleaners

They can achieve a sparkling finish on the sprayer by utilizing solvents or cleaners recommended by the manufacturer.

Advertisement

When it comes to cleaning techniques for oil paint in an airless sprayer, safety precautions should always be taken into consideration. It is important to wear protective gloves and goggles to ensure personal safety. Additionally, proper ventilation in the cleaning area is crucial to prevent the buildup of harmful fumes.

Following the manufacturer’s instructions is key to using the correct solvents or cleaners for the job. By carefully selecting the appropriate cleaning solution, users can effectively remove paint residue and achieve a pristine finish on the sprayer.

Taking these safety precautions and using the right cleaning techniques will not only extend the lifespan of the sprayer but also ensure optimal performance.

Maintaining Filters and Nozzles for Optimal Performance

To ensure optimal performance, regularly inspecting and maintaining the filters and nozzles of the sprayer is essential. Proper maintenance of these components is crucial for maintaining the spray tip and troubleshooting clogs. Here are some key points to consider:

  • Inspect filters and nozzles regularly: Regular inspection allows you to identify any issues or clogs before they become major problems.
  • Clean filters and nozzles thoroughly: Use a suitable cleaning solution and a soft brush to remove any paint residue or debris from these components.
  • Replace damaged or worn-out filters and nozzles: If you notice any cracks, breaks, or signs of wear, it’s important to replace these parts to maintain optimal performance.
  • Follow manufacturer’s guidelines: Always refer to the manufacturer’s instructions for specific maintenance procedures and recommendations for maintaining the spray tip and troubleshooting clogs.

Flushing Out Paint Residue With Water

After disassembling the sprayer and thoroughly cleaning each part, the user can flush out any remaining paint residue by attaching the hose and spraying water into a waste container until it runs clear.

This step is crucial to ensure that no traces of paint are left behind, which can lead to clogs and affect the sprayer’s performance.

Advertisement

When flushing out the paint residue, it is important to follow safety precautions such as wearing protective gloves and goggles.

Additionally, it is essential to use clean water and avoid reusing rinsing water to prevent contamination and maintain efficiency.

Proper Reassembly of the Airless Sprayer

To ensure the airless sprayer functions properly, the user must carefully reassemble all the disassembled parts, following the manufacturer’s instructions for alignment and connection. Proper reassembly is crucial for the sprayer’s performance and longevity. Here are some reassembly tips to ensure a successful and efficient process:

  • Take your time: Rushing through the reassembly process can lead to mistakes and potential damage to the sprayer.
  • Double-check connections: Ensure that all parts are securely fastened and properly aligned to avoid leaks or malfunctions.
  • Follow the instructions: Manufacturers provide specific guidelines for reassembly. It is important to follow these instructions to ensure optimal performance.
  • Avoid over-tightening: While it is important to secure connections, over-tightening can lead to damage. Use the recommended torque specifications provided by the manufacturer.

Common reassembly mistakes to avoid include incorrect alignment, loose connections, missing parts, and over-tightening. Taking the time to carefully reassemble the airless sprayer will ensure its proper functioning and longevity.

Testing and Troubleshooting for Smooth Performance

The user can ensure smooth performance of the sprayer by testing its motor, pressure gauge, and spray tip for any potential issues. Troubleshooting tips and performance testing are crucial for maintaining optimal functionality. Here are some key steps to follow:

Troubleshooting Tips Performance Testing
Check for motor issues Test motor performance
Inspect pressure gauge Verify pressure gauge function
Examine spray tip for clogs or damage Test spray tip responsiveness

To troubleshoot motor issues, the user should listen for any unusual sounds or vibrations and ensure that the motor is running smoothly. To test motor performance, the user can connect the sprayer to a power source and observe its operation. When inspecting the pressure gauge, the user should ensure that it is displaying accurate readings. To verify pressure gauge function, the user can compare the gauge readings with a calibrated pressure gauge. Finally, to examine the spray tip, the user should check for any clogs or damage that may affect the spray pattern. Testing spray tip responsiveness involves spraying water or paint to determine if it is flowing smoothly and evenly. By following these troubleshooting tips and conducting performance testing, the user can identify and address any potential issues, ensuring the smooth operation of the sprayer.

Advertisement

Waste Disposal and Maintenance Guidelines

Implementing appropriate waste disposal methods and regular maintenance maximizes the longevity and performance of the equipment.

Proper waste disposal is crucial for preventing environmental damage and protecting water sources. Compliance with waste disposal regulations is essential to minimize environmental impact and ensure the safety of drinking water sources.

In addition to waste disposal, following proper maintenance techniques is vital for optimal equipment performance. Regular cleaning, disassembling, and inspecting each part of the sprayer is necessary to maintain its excellent condition. Thoroughly cleaning the sprayer prevents clogs and maintains its efficiency.

Proper maintenance also includes inspecting and maintaining filters and nozzles for optimal performance. By implementing waste disposal regulations and following maintenance techniques, airless sprayers can continue to deliver high-quality results and last for a long time.

Frequently Asked Questions

Can I Use Alternative Solvents or Cleaners to Clean the Airless Sprayer?

Using alternative solvents or cleaners to clean the airless sprayer is not recommended. It is crucial to follow proper cleaning techniques and use compatible cleaning solutions recommended by the manufacturer.

Advertisement

Using incompatible solvents or cleaners can damage the equipment and affect its performance. To ensure optimal results and maintain the sprayer’s efficiency, it is best to stick to the recommended cleaning methods and solutions.

Always prioritize safety and environmental considerations when cleaning the airless sprayer.

How Often Should I Clean the Filters and Nozzles of the Airless Sprayer?

Regular maintenance is crucial for ensuring the optimal performance and longevity of an airless sprayer. Cleaning the filters and nozzles is an essential part of this maintenance routine.

To clean the filters and nozzles properly, start by disassembling the sprayer and removing these components. Rinse them with a suitable cleaning solution and use a soft brush to remove any stubborn paint residue. Allow them to dry completely before reassembling.

Following these steps will help maintain the sprayer for long-lasting use.

Advertisement

What Safety Precautions Should I Take When Cleaning the Airless Sprayer?

When cleaning an airless sprayer, it is important to take proper safety precautions. This includes wearing protective gloves and eyewear to prevent any harm.

Adequate ventilation in the cleaning area is also necessary to avoid inhaling harmful fumes.

Following the manufacturer’s instructions for the cleaning process is crucial to ensure safety.

Can I Reuse the Water Used for Rinsing the Sprayer?

Reusing water used for rinsing the sprayer is not recommended because it can lead to contamination and inefficiency in the cleaning process.

Proper disposal of cleaning solvents is crucial for safety and environmental reasons.

Advertisement

When cleaning oil paint from an airless sprayer, it is important to use compatible cleaning solutions recommended by the manufacturer.

Alternative cleaners, such as mineral spirits or paint thinner, can be used for efficient removal of paint residue.

It is always best to follow the manufacturer’s instructions for the proper cleaning process.

Are There Alternative Methods or Tools for Cleaning Oil Paint in the Airless Sprayer?

There are indeed alternative methods and cleaning tools available for efficiently removing oil paint from an airless sprayer.

One option is to use a solvent, such as mineral spirits or paint thinner, specifically designed for cleaning oil-based paints.

Advertisement

Additionally, there are specialized brush cleaners that can effectively remove paint residue from the sprayer.

It’s important to explore these alternative methods and tools while considering the manufacturer’s recommendations to ensure the best cleaning results for your airless sprayer.

Conclusion

In conclusion, proper cleaning of an airless sprayer is crucial for maintaining its performance and longevity, especially when using oil paint. By following the manufacturer’s instructions and wearing protective gear, one can effectively disassemble and clean each part of the sprayer, removing leftover paint residue.

Using solvents or cleaners recommended by the manufacturer ensures a thorough cleaning, while regular maintenance prevents build-up and clogs. One interesting statistic to note is that a well-maintained airless sprayer can last up to 10 years, providing reliable performance for painting projects.

Remember to always dispose of cleaning waste responsibly to protect the environment.

Advertisement

Continue Reading
Advertisement

How-To & Tips

The Importance of Lubrication for Airless Paint Sprayers

Published

on

By

An image showcasing the significance of lubrication for airless paint sprayers

Properly lubricating airless paint sprayers is essential for optimizing their performance and extending their lifespan. Regular lubrication helps prevent expensive repairs and prolongs the equipment’s service life by promoting smooth operation, preventing clogs, and reducing wear. By minimizing friction and wear on the working components, lubrication ultimately enhances overall functionality.

Different types of lubricants, such as silicone, mineral oil, and synthetic lubricants, can be used. Following manufacturer instructions for regular maintenance, including cleaning the sprayer before lubrication and applying the appropriate amount, is essential for optimal performance.

Troubleshooting tips and maintenance advice are also provided in this article.

Key Takeaways

  • Using the right lubricant is crucial for maintaining an airless paint sprayer.
  • Regular lubrication helps prevent costly repairs and extends the lifespan of the equipment.
  • Proper lubrication is important for smooth and efficient operation, preventing clogs or damage.
  • Lubricating reduces friction and wear on moving parts, extending the lifespan and enhancing efficiency.

The Benefits of Regular Lubrication

Regular lubrication helps prevent costly repairs and extends the lifespan of the equipment. It also ensures smooth and efficient operation of airless paint sprayers. The importance of regular lubrication cannot be overstated. Lubrication plays a crucial role in enhancing the efficiency and lifespan of the equipment. By reducing friction and wear on moving parts, lubrication helps to maintain consistent performance and prevent clogs or damage. It also minimizes the risk of breakdowns and costly repairs.

Advertisement

Proper lubrication ensures that the airless paint sprayer operates smoothly and efficiently, resulting in a high-quality paint finish. Regular maintenance and lubrication are essential for optimal working condition and to maximize the longevity and efficiency of the equipment.

Types of Lubricants for Airless Paint Sprayers

Silicone lubricants provide excellent lubrication, high heat resistance, and water repellency for airless paint sprayers. When it comes to choosing the best lubricant for your airless paint sprayer, silicone lubricants are the top choice. They offer superior lubrication properties that ensure smooth and efficient operation of the equipment.

Additionally, silicone lubricants have high heat resistance, preventing the lubricant from breaking down under the high temperatures generated by the sprayer. They also provide water repellency, protecting the equipment from moisture damage.

As for the lubrication frequency, it is recommended to lubricate your airless paint sprayer according to the manufacturer’s instructions. Regular lubrication is essential for maintaining the longevity and optimal performance of your equipment.

Steps to Properly Lubricate Your Equipment

Advertisement

To properly lubricate the equipment, the user should first clean the sprayer to remove any debris or paint residue. This ensures that the lubricant can effectively coat the necessary parts and provide optimal performance. After cleaning, the following steps should be followed for proper lubrication techniques:

  1. Refer to the manufacturer’s instructions: Different airless paint sprayers may have specific lubrication requirements, so it’s important to follow the guidelines provided.

  2. Use the recommended lubricant: Using the wrong type of lubricant can lead to inadequate lubrication or even damage to the equipment. It’s essential to use the lubricant recommended by the manufacturer for optimal results.

  3. Apply the lubricant to the appropriate parts: Focus on lubricating the moving components of the sprayer, such as the piston rod, packings, and seals. Apply the lubricant evenly and ensure proper coverage.

  4. Avoid over-lubrication: Applying too much lubricant can cause excess buildup, leading to clogs and decreased performance. Use the correct amount of lubricant as specified by the manufacturer.

Troubleshooting Common Lubrication Issues

Properly maintaining the equipment includes troubleshooting common lubrication issues to ensure optimal performance.

Airless paint sprayers may encounter a few common lubrication problems that can affect their efficiency and lifespan.

One common issue is the presence of debris or paint residue in the lubrication system, leading to clogs and reduced lubrication. This can be resolved by thoroughly cleaning the sprayer before applying lubricant.

Advertisement

Another problem is the use of incorrect lubricant or using too much of it, which can cause build-up and interfere with the sprayer’s operation. It is important to use the recommended lubricant and apply the correct amount.

Additionally, improper storage or lack of regular maintenance can also result in lubrication issues.

Maintenance Tips for Extending the Lifespan of Your Sprayer

Regular maintenance and proper storage are key factors in extending the lifespan of an airless paint sprayer. To ensure the longevity of your equipment, follow these storage techniques and cleaning methods:

Advertisement
  1. Store in a clean and dry area: Keep your paint sprayer in a clean and dry environment to prevent dust and moisture buildup, which can lead to clogs and damage.

  2. Clean after each use: Thoroughly clean the sprayer after each use to remove any paint residue or debris that may affect its performance. Use appropriate cleaning solutions and follow the manufacturer’s instructions.

  3. Protect sensitive parts: Cover the spray tip and other sensitive parts with protective caps when not in use to prevent damage and maintain their effectiveness.

  4. Use quality storage containers: Store your paint sprayer in a sturdy and well-sealed container to protect it from accidental damage and ensure its safety during transportation or storage.

Commonly Asked Questions About Lubrication for Airless Paint Sprayers

Using the correct type of lubricant is crucial for maintaining the optimal performance and longevity of an airless paint sprayer. The frequency of lubrication and the choice of lubricant are important factors to consider. To help you make an informed decision, here are some commonly asked questions about lubrication for airless paint sprayers:

Question Answer
Can I use any type of lubricant on my airless paint sprayer? It is recommended to use lubricants specifically designed for airless paint sprayers.
How often should I lubricate my airless paint sprayer? The lubrication frequency depends on the manufacturer’s guidelines, but typically, it is recommended to lubricate the sprayer after every 50 hours of use.
Can I over-lubricate my airless paint sprayer? Yes, over-lubrication can lead to clogs and other issues. Follow the manufacturer’s instructions for the correct amount of lubricant to use.
What are the signs that my airless paint sprayer needs lubrication? If you notice increased friction, unusual noises, or decreased performance, it may be time to lubricate your sprayer.
Are there any specific maintenance tips I should follow to keep my airless paint sprayer in good condition? In addition to regular lubrication, proper storage, cleaning, and inspection of parts are essential for maintaining your airless paint sprayer’s longevity.

Expert Tips for Maintaining Optimal Performance

To ensure optimal performance, experts recommend following the manufacturer’s guidelines for lubrication frequency and choice of lubricant for maintenance of an airless paint sprayer. Proper maintenance is essential for maintaining the longevity and efficiency of the equipment.

Here are some expert tips to help you maintain optimal performance:

  1. Determine the maintenance frequency: Consult the manufacturer’s guidelines to determine how often your airless paint sprayer needs to be lubricated. Regular lubrication is essential for smooth and efficient operation.

  2. Choose the right lubricant: Selecting the appropriate lubricant is crucial for preventing wear and tear on moving parts. Consider factors such as heat resistance, water repellency, and rust prevention when choosing the lubricant.

  3. Clean before lubrication: Before applying the lubricant, ensure that the sprayer is clean and free from any debris or paint residue. This will help prevent clogs and ensure proper lubrication.

  4. Follow the instructions: Apply the lubricant to the recommended parts as per the manufacturer’s instructions. Use the correct amount of lubricant to ensure proper coverage and performance.

Frequently Asked Questions

Can I Use WD-40 or Other General-Purpose Lubricants on My Airless Paint Sprayer?

Using WD-40 or other general-purpose lubricants on an airless paint sprayer is not recommended. Using alternative lubricants can have adverse effects on the equipment. It may not provide the necessary lubrication needed for smooth operation and can potentially cause damage to the sprayer.

It is important to use the lubricants recommended by the manufacturer to ensure optimal performance and to maintain the longevity of the equipment.

Advertisement

Is It Necessary to Use a Specific Brand of Lubricant Recommended by the Manufacturer?

Using alternative lubricants for airless paint sprayers is not recommended. The potential consequences of using the wrong lubricant on an airless paint sprayer can be detrimental to its performance and lifespan. Manufacturers usually provide specific lubricant recommendations for their equipment, and it is necessary to follow these guidelines.

Using a lubricant that is not recommended may result in decreased efficiency, increased wear and tear, and potential damage to the paint sprayer. It is best to stick to the lubricants recommended by the manufacturer to ensure optimal operation and longevity.

How Do I Know if I Have Applied Enough Lubricant to My Airless Paint Sprayer?

To ensure the lifespan of an airless paint sprayer, it’s important to know if enough lubricant has been applied. Common signs of insufficient lubrication include increased friction, sticking parts, and decreased performance.

To maintain the sprayer’s lifespan, it’s crucial to evenly apply the recommended amount of lubricant to the appropriate parts. This will prevent wear and tear, ensure smooth operation, and extend the equipment’s longevity.

Proper lubrication is essential for optimal performance and to avoid costly repairs.

Advertisement

Can I Use a Lubricant That Is Not Recommended for High Heat Resistance on My Sprayer?

Using non-recommended lubricants on airless paint sprayers can pose potential risks and consequences. It is important to use heat-resistant lubricants specifically designed for airless paint sprayers. These lubricants provide the necessary protection against high temperatures and ensure smooth operation without compromising the equipment’s performance.

Using a lubricant that is not recommended for high heat resistance may lead to overheating, damage to the equipment, and decreased efficiency. It is crucial to follow the manufacturer’s guidelines and use the appropriate lubricant for optimal results.

Are There Any Alternative Methods of Lubrication for Airless Paint Sprayers?

Alternative lubrication methods for airless paint sprayers provide additional options for maintaining optimal performance. While using the recommended lubricants is crucial, some users may prefer to explore alternatives.

However, it is important to note that alternative methods may not offer the same level of effectiveness and benefits as the recommended lubricants.

Regular lubrication, using the appropriate lubricant, helps prevent costly repairs, extends equipment lifespan, and ensures smooth operation.

Advertisement

Conclusion

In conclusion, regular lubrication is crucial for the efficient and long-lasting performance of airless paint sprayers. By reducing friction and wear on moving parts, proper lubrication enhances the sprayer’s efficiency and prevents costly repairs.

Choosing the right lubricant, following manufacturer’s instructions, and performing regular maintenance are key steps in ensuring optimal working condition. Remember, ‘a well-oiled machine’ is not just an idiom but a literal expression of the importance of lubrication in maintaining the sprayer’s functionality.

So, keep your sprayer well-lubricated to keep it running smoothly and extend its lifespan.

Continue Reading

How-To & Tips

The Importance of Filters in the Magnum Airless Paint Sprayer

Published

on

By

An image showcasing the intricate internal structure of the Magnum Airless Paint Sprayer's filters

The performance of any painting project is heavily reliant on the effectiveness of the Magnum Airless Paint Sprayer, with the filter being the unsung hero at its core. This element plays a crucial role in maintaining a clean, debris-free paint flow, essential for achieving impeccable results. The filter is essential in preventing blockages and guaranteeing a seamless finish, highlighting its significance as a key component of the device.

In this article, we will delve into the importance of filters in the Magnum Airless Paint Sprayer and explore the techniques for proper maintenance and upgrading for optimal performance.

Key Takeaways

  • Investing in high-quality filters is crucial for the longevity and durability of the Magnum Airless Paint Sprayer.
  • Proper filtration ensures clean and debris-free paint flow, resulting in a smooth and even spray.
  • Regularly cleaning and maintaining filters is essential for optimal performance and longevity.
  • Choosing the right filters enhances the efficiency and effectiveness of your Magnum sprayer.

The Significance of Proper Filtration

Proper filtration ensures clean and debris-free paint flow, resulting in a smooth and even spray. The benefits of proper filtration in the Magnum Airless Paint Sprayer are numerous.

By using long-lasting filters, impurities and contaminants are effectively removed from the paint, preventing clogs and ensuring professional finishes. Clean and debris-free paint not only saves time during painting projects but also reduces frustration.

Advertisement

Filters are crucial in achieving optimal performance and efficiency with the Magnum airless paint sprayer. Using filters improves spray performance, reduces nozzle clogging, and extends the equipment’s life.

Ensuring Clean and Debris-Free Paint Flow

To achieve a smooth and even spray, users should regularly clean and maintain their filters in the Magnum Airless Paint Sprayer to ensure clean and debris-free paint flow. Regular filter maintenance offers several benefits, including improved performance, longer filter lifespan, and enhanced paint coverage.

Clean filters prevent clogs and blockages, ensuring optimal paint flow and spray performance. This leads to professional finishes and improved paint coverage. Regular maintenance extends the life of filters, reducing the need for frequent replacement.

Choosing the right filter size is also crucial for effective filtration and paint application. The mesh size determines the level of filtration, and selecting the appropriate filter material ensures compatibility and performance.

Preventing Clogs and Achieving Professional Finishes

Advertisement

Regular maintenance and cleaning of the filters in the Magnum Airless Paint Sprayer help prevent clogs and ensure professional finishes.

Proper filtration is crucial for achieving optimal performance and efficiency. By removing impurities and contaminants, filters prevent clogs and ensure a smooth and even spray. Clean paint flow not only saves time and frustration during painting projects but also improves spray performance and extends the life of the equipment.

It is important to choose the right filters, considering size and material, to ensure proper filtration and paint application. Regular inspection, cleaning, and replacement of filters, if necessary, are essential for optimal performance.

Troubleshooting filter issues and maintaining filters through proper care and cleaning help prevent painting problems and save time and money in the long run.

Advertisement

Time-Saving Benefits of Clean and Debris-Free Paint

Achieving a clean and debris-free paint flow saves time and frustration during painting projects, resulting in more efficient and satisfying results.

  • Benefits of clean and debris-free paint:
  • Time-saving: With a clean and debris-free paint flow, painters can maintain a steady and uninterrupted workflow, saving valuable time.
  • Improved efficiency: Clean paint ensures smooth and even coverage, reducing the need for touch-ups and rework.
  • Enhanced results: By eliminating debris, the final finish is professional-looking and visually appealing, leading to greater customer satisfaction.

By investing in high-quality filters for the Magnum Airless Paint Sprayer, painters can experience these time-saving benefits. Proper filtration removes impurities and contaminants, preventing clogs and ensuring a consistent paint flow.

Regularly cleaning and maintaining the filters is essential for optimal performance and longevity. With clean and debris-free paint, painters can complete projects more efficiently and achieve superior results.

Improving Performance and Efficiency With Filters

By properly maintaining and upgrading their filters, painters can significantly enhance the performance and efficiency of their Magnum airless paint sprayer. Filters play a crucial role in increasing durability and maximizing paint coverage. These filters ensure a clean and debris-free paint flow, resulting in a smooth and even spray.

Advertisement

By removing impurities and contaminants, filters prevent clogs and ensure professional finishes. Clean and debris-free paint not only saves time during painting projects but also improves the overall quality of the final result. Regular inspection, cleaning, and replacement of filters when necessary are essential for optimal performance and longevity.

Choosing the right filter size and material, as well as upgrading to high-quality filters, can further enhance the efficiency and effectiveness of the Magnum airless paint sprayer. Proper care and maintenance of filters are crucial for impeccable painting results and improved efficiency.

Locating and Cleaning Filters in the Magnum Airless Paint Sprayer

When maintaining the Magnum airless paint sprayer, painters can easily locate and clean the filters in two main areas: the suction tube and the spray gun.

Regular filter maintenance is of utmost importance for the optimal performance and longevity of the equipment. By using high-quality filters, painters can enjoy several benefits, including a smooth and even spray, prevention of clogs and blockages, and time-saving during painting projects.

Cleaning the filters removes dirt, dust, and particles, ensuring uninterrupted paint flow. It is essential to regularly inspect and clean the filters, as well as replace them if necessary, to maintain optimal performance. Proper filter maintenance not only extends the life of the Magnum airless paint sprayer but also improves spray performance and reduces nozzle clogging.

Advertisement

The Suction Tube and Spray Gun Filter Locations

Painters can easily locate the filters in the suction tube and spray gun of the Magnum airless paint sprayer. Regular filter maintenance is of utmost importance for optimal performance and longevity.

Using high-quality filters offers several benefits, such as ensuring clean and debris-free paint flow, resulting in a smooth and even spray. Filters remove impurities and contaminants, preventing clogs and ensuring professional finishes.

The suction tube filter is situated at the bottom of the paint container, while the spray gun filter is located near the trigger. Regularly inspecting and cleaning these filters, as well as replacing them if necessary, is crucial for maintaining optimal performance.

Effective Techniques for Cleaning Filters

Regularly cleaning and maintaining the filters in the suction tube and spray gun of the Magnum airless paint sprayer is essential for optimal performance and longevity. Here are some effective cleaning techniques and maintenance tips to ensure the filters are in top condition:

  • Clean the suction tube filter by removing the container and unscrewing the filter housing. Soak the spray gun filter in a cleaning solution.

  • Regularly inspect and clean the filters to remove dirt, dust, and particles that can cause clogs and blockages.

  • Troubleshoot filter issues by thoroughly cleaning them or replacing damaged or worn-out filters.

  • Choose the right filter size and material based on the manufacturer’s recommendations for proper compatibility and performance.

  • Upgrade filters to enhance paint flow and improve coverage, ensuring efficient and effective painting.

  • Maintain filters after each use, looking out for tears or holes, to prevent clogs and affect the spray pattern.

Don’t neglect filters for impeccable painting results. Follow these cleaning techniques and maintenance tips to ensure optimal performance and longevity.

Advertisement

Regular Inspection and Maintenance for Optimal Performance

Regular inspection and maintenance are essential for ensuring optimal performance and extending the life of the Magnum Airless Paint Sprayer. By regularly inspecting the filters, users can identify any signs of wear or damage, such as tears or holes, and promptly address them. This proactive approach prevents clogs and blockages that can affect the spray pattern and overall performance of the sprayer.

Furthermore, regular maintenance, including thorough cleaning after each use, removes dirt, dust, and particles that may accumulate in the filters over time. By keeping the filters clean and in good condition, users can maximize the efficiency and longevity of their Magnum Airless Paint Sprayer.

Neglecting regular maintenance can lead to reduced performance, increased downtime, and the need for premature replacement of equipment, highlighting the importance of regular maintenance for extending the life of the sprayer.

Troubleshooting and Maintenance of Filters

When troubleshooting and maintaining the filters in the Magnum Airless Paint Sprayer, users should ensure they are cleaning the filters thoroughly after each use and promptly addressing any signs of wear or damage. This is important to ensure optimal performance and prevent painting problems.

To evoke emotion in the audience, consider the following:

Advertisement
  • Frustration: Clogged filters can cause frustration and delays during painting projects.
  • Efficiency: Regular maintenance and troubleshooting techniques improve filter efficiency, saving time and money in the long run.
  • Longevity: Proper care and cleaning of filters extend their lifespan, ensuring consistent performance and professional finishes.

Tips for Choosing and Upgrading Filters for the Magnum Airless Paint Sprayer

After understanding the importance of troubleshooting and maintaining filters in the Magnum Airless Paint Sprayer, it is crucial to focus on selecting and upgrading filters to optimize its performance. When choosing filter material, it is essential to consider the level of filtration required and the compatibility with the sprayer. To assist in this process, manufacturers often provide recommendations regarding the appropriate filter size and material. Upgrading filters offers numerous benefits, including enhanced paint flow, improved paint coverage, and increased painting efficiency. High-quality filters also tend to have a longer lifespan, resulting in cost savings in the long run. By choosing and upgrading filters, users can ensure that their Magnum Airless Paint Sprayer operates at its best, delivering impeccable painting results.

Choosing Filter Material Benefits of Upgraded Filters
Consider level of filtration Enhanced paint flow
Check compatibility with sprayer Improved paint coverage
Consult manufacturer’s recommendations Increased painting efficiency
Longer lifespan

Frequently Asked Questions

What Is the Recommended Frequency for Cleaning the Filters in the Magnum Airless Paint Sprayer?

The recommended cleaning frequency for filters in the Magnum Airless Paint Sprayer is after every use.

Proper cleaning solutions should be used to ensure thorough removal of dirt, dust, and particles.

Cleaning the filters regularly prevents clogs and blockages, maintaining optimal performance.

Neglecting filter maintenance can affect the spray pattern and overall painting results.

Can I Use Any Cleaning Solution for Soaking the Spray Gun Filter, or Are There Specific Recommendations?

When it comes to soaking the spray gun filter in the Magnum Airless Paint Sprayer, it’s important to choose compatible cleaning solutions.

Advertisement

While there may be alternative cleaning methods, it’s recommended to follow the manufacturer’s guidelines for the appropriate cleaning solution.

Using the wrong cleaning solution could potentially damage the filter or affect its performance.

Therefore, it’s crucial to choose a cleaning solution that is specifically recommended for soaking the spray gun filter to ensure optimal cleaning and maintenance.

Are There Any Specific Signs or Symptoms That Indicate a Clogged Filter in the Magnum Airless Paint Sprayer?

Signs of a clogged filter in the Magnum Airless Paint Sprayer include reduced paint flow, uneven spray patterns, and increased pressure fluctuations.

Cleaning techniques, such as removing and soaking the filters in a cleaning solution, are crucial for preventing clogged filters.

Advertisement

Regular inspection, maintenance, and replacement of filters when necessary are essential to ensure optimal performance and prevent painting problems.

Are There Any Alternative Methods for Cleaning the Filters if I Don’t Have Access to a Cleaning Solution?

If access to a cleaning solution is limited, there are alternative methods for cleaning the filters of the Magnum Airless Paint Sprayer.

One method is to use warm soapy water to soak and gently scrub the filters.

Another option is to use a mild household detergent or vinegar solution to dissolve any paint residue.

It is important to rinse the filters thoroughly after cleaning to ensure all debris is removed.

Advertisement

Regular filter cleaning is of utmost importance to maintain optimal performance and prevent clogs in the paint sprayer.

Besides the Manufacturer’s Recommendations, Are There Any Other Factors to Consider When Choosing Upgraded Filters for the Magnum Airless Paint Sprayer?

When choosing upgraded filters for the Magnum Airless Paint Sprayer, there are several factors to consider.

Firstly, one should consider the mesh size of the filter, as it determines the level of filtration.

Additionally, the material of the filter is crucial for proper compatibility and performance.

Upgraded filters offer benefits such as enhanced paint flow and improved paint coverage.

Advertisement

They also have a longer lifespan and improve painting efficiency.

Considering these factors ensures optimal performance and longevity of the paint sprayer.

Conclusion

In conclusion, the importance of filters in the Magnum Airless Paint Sprayer cannot be overstated. These filters act as the gatekeepers, ensuring a smooth and even spray by removing impurities and contaminants from the paint flow. They prevent clogs, enhance performance, and achieve professional finishes.

Just like a vigilant guard, regular inspection and maintenance of filters are crucial for optimal performance. Choosing the right filter size and material is like selecting the perfect tool for the job.

So, remember to treat your filters with care and watch as they effortlessly transform your painting experience into a masterpiece.

Advertisement

Continue Reading

How-To & Tips

The Importance of Pressure Adjustment: Achieving an Even Paint Application

Published

on

By

An image showcasing a professional painter adjusting pressure on a spray gun while applying paint to a smooth surface

To achieve a perfect paint job, it is crucial to properly adjust the pressure. Imagine a painter carefully working on a surface, only to end up with streaks and uneven patches. This highlights the importance of adjusting the pressure correctly.

By fine-tuning the pressure on a paint sprayer, one can ensure consistent and even paint coverage, resulting in a smooth and professional finish.

In this article, we will explore the importance of pressure adjustment and provide valuable tips for achieving an even paint application.

Key Takeaways

  • Adjusting pressure ensures even and consistent paint application
  • Using proper tools, such as a pressure gauge and wrench/screwdriver, is important for accurate pressure readings
  • Conducting a test spray on a scrap piece of cardboard helps determine if pressure needs adjustment
  • Fine-tuning pressure settings and experimenting with techniques can improve the spray pattern and coverage

The Basics of Pressure Adjustment

Adjusting the pressure ensures that the paint is applied evenly and consistently, allowing for the desired coverage and avoiding streaks or uneven spots. Proper pressure adjustment is of utmost importance when using a paint sprayer.

One common mistake in pressure adjustment is using the wrong tools. It is crucial to gather the necessary tools such as a pressure gauge and a wrench or screwdriver to accurately measure and adjust the pressure.

Another mistake is not consulting the sprayer’s manual. The manual provides instructions for pressure adjustment settings and troubleshooting solutions to common issues.

Advertisement

Neglecting to test the spray before starting the actual painting is another error. Conducting a test spray on a scrap piece of material helps determine if pressure needs adjustment and allows for the identification of clogs or issues with paint viscosity.

Selecting the Right Tools for Pressure Adjustment

Using the correct tools for pressure adjustment is crucial to ensuring accurate readings and maintaining the quality of the paint job.

When it comes to choosing the correct pressure gauge, there are a few factors to consider. First, make sure the gauge is compatible with your sprayer model. Different sprayers may require different types of gauges, so it’s important to check the manufacturer’s recommendations.

Additionally, understanding pressure adjustments is essential for achieving the desired paint application. The pressure gauge allows you to monitor and adjust the pressure levels to ensure even and consistent coverage.

Conducting a Test Spray for Pressure Adjustment

Advertisement

To determine if the pressure needs adjustment, the user can start by conducting a test spray on a scrap piece of cardboard. This step is crucial to achieving an even paint application.

By using a pressure gauge for the test spray, the user can accurately measure and monitor the pressure. This ensures that the desired coverage and consistency are achieved.

Adjusting the pressure is especially important when working with different paint viscosities. Thick or thin paints require different pressure settings to achieve optimal results.

Using a pressure gauge allows the user to make precise adjustments and avoid streaks or uneven spots.

Advertisement

Fine-Tuning and Experimenting With Pressure Settings

The user can experiment with different pressure settings to achieve a variety of spray patterns and enhance their painting skills. By fine-tuning the pressure, they can control the overspray and minimize wastage.

Adjusting the spray distance from the surface also allows for different spray patterns to be created. It is important to practice and experiment with different techniques to improve painting skills.

The user can adjust the pressure and distance to achieve a smooth and even finish on their painting project. It is crucial to avoid over-adjusting the pressure, as this can lead to potential risks.

Cleaning and Maintenance for Optimal Pressure Adjustment

Advertisement

Regularly cleaning and maintaining the sprayer ensures optimal performance and longevity, allowing for accurate pressure adjustment and a smooth painting process. To prevent paint clogs, it is important to use a recommended cleaning solution.

After each use, thoroughly clean the sprayer by flushing the system to remove paint residue from the gun, nozzle, and filters. Regularly inspect and clean filters to prevent blockages. Lubricate moving parts to ensure smooth operation. If the nozzle gets clogged, clean it with a cleaning solution and remove stubborn clogs.

Troubleshooting Common Issues With Pressure Adjustment

Cleaning and maintaining the sprayer regularly ensures that common issues with pressure adjustment can be effectively troubleshooted. Adjusting pressure for different surfaces and preventing overspray and wastage are crucial for achieving an even paint application. Troubleshooting common issues with pressure adjustment requires attention to detail and proper knowledge.

Here are five steps to help troubleshoot common issues:

  • Check for clogs in the nozzle or hose and ensure suitable paint viscosity.
  • Inspect hoses and connections for air leaks and tighten loose connections.
  • Clean clogged nozzle with a cleaning solution and remove stubborn clogs.
  • Adjust pressure or thin paint to achieve a consistent spray pattern.
  • Regularly inspect and clean filters to prevent blockages.

Best Practices for Achieving an Even Paint Application

To achieve a smooth and flawless finish, painters should start by conducting a test spray on a scrap piece of material. This allows them to observe the spray pattern and coverage and determine if any pressure adjustment techniques are needed. Fine-tuning the pressure settings is crucial for achieving smooth finishes.

Experimentation and practice with different techniques can also enhance skills. Adjusting the pressure and distance from the surface can create different spray patterns. It is important to clean and maintain the sprayer regularly to ensure optimal performance. Troubleshooting common issues, such as clogs or air leaks, is essential for a smooth painting process.

Advertisement

Frequently Asked Questions

Can Pressure Adjustment Be Done on Any Type of Paint Sprayer?

Pressure adjustment can be done on most types of paint sprayers. However, it is important to note that different types of sprayers may have different methods of adjusting pressure. Some sprayers have built-in pressure adjustment settings, while others may require the use of additional tools such as a pressure gauge and wrench.

It is essential to consult the sprayer’s manual for specific instructions on how to adjust pressure for optimal paint application. Understanding the pros and cons of different types of sprayers can help determine which one is best suited for a particular project.

What Are the Potential Risks of Not Adjusting the Pressure Properly?

Improper pressure adjustment while using a paint sprayer can lead to various risks and negatively impact the quality of the paint application. It may result in uneven coverage, streaks, or spots, which can be visually unappealing.

Additionally, if the pressure is too high, it can cause overspray and wastage of paint. On the other hand, if the pressure is too low, it may result in a thin and insufficient coating.

Therefore, it is crucial to properly adjust the pressure to achieve an even and satisfactory paint application.

Advertisement

How Often Should Pressure Adjustments Be Made During a Paint Job?

Frequency of pressure adjustments during a paint job depends on various factors. These include the type of paint being used, the surface being painted, and the desired coverage and finish.

It is recommended to make pressure adjustments as needed to achieve an optimal spray pattern and coverage. Regularly monitoring the pressure and fine-tuning as necessary will ensure an even paint application.

Additionally, referring to the sprayer’s manual for recommended pressure ranges can help achieve the desired results.

Are There Any Safety Precautions to Take When Adjusting the Pressure?

When it comes to pressure adjustment and safety precautions, it’s important to take the necessary steps to ensure a smooth painting process. Proper pressure adjustment techniques can help achieve an even paint application and avoid any potential risks.

Safety precautions include wearing protective gear such as gloves and goggles, ensuring proper ventilation in the painting area, and following the manufacturer’s guidelines for the specific sprayer being used.

Advertisement

Can Pressure Adjustment Affect the Drying Time of the Paint?

Pressure adjustment can have an effect on the drying time of paint. By adjusting the pressure, the paint can be applied more evenly and consistently, which can impact the quality of the paint job. Proper pressure adjustment can also improve paint adhesion to the surface.

However, it is important to note that excessive pressure can lead to overspray and longer drying times. It is recommended to follow the manufacturer’s guidelines and conduct test sprays to ensure optimal pressure adjustment for the desired drying time.

Conclusion

In conclusion, achieving an even paint application is of utmost importance, and pressure adjustment plays a vital role in accomplishing this goal.

By using the correct tools and conducting a test spray, one can fine-tune the pressure settings for optimal results.

Regular cleaning and maintenance are necessary to ensure the sprayer’s performance remains at its best.

Advertisement

Troubleshooting common issues is also essential to overcome any obstacles.

By following these best practices, painters can enjoy the satisfaction of a smooth and flawless paint finish.

Continue Reading

Trending

Copyright © 2024 Paint Sprayer Zone Affiliate disclaimer As an affiliate, we may earn a commission from qualifying purchases. We get commissions for purchases made through links on this website from Amazon and other third parties.