
To prep a room for paint spraying, start by gathering all necessary supplies like painter’s tape, drop cloths, and protective gear, then remove or cover furniture and fixtures with plastic or drop cloths. Mask edges, windows, and door frames carefully to prevent overspray, using painter’s tape for sharp lines. Cover floors thoroughly and ensure good ventilation. For detailed tips on perfect masking and covering techniques, keep exploring further guidance.
Key Takeaways
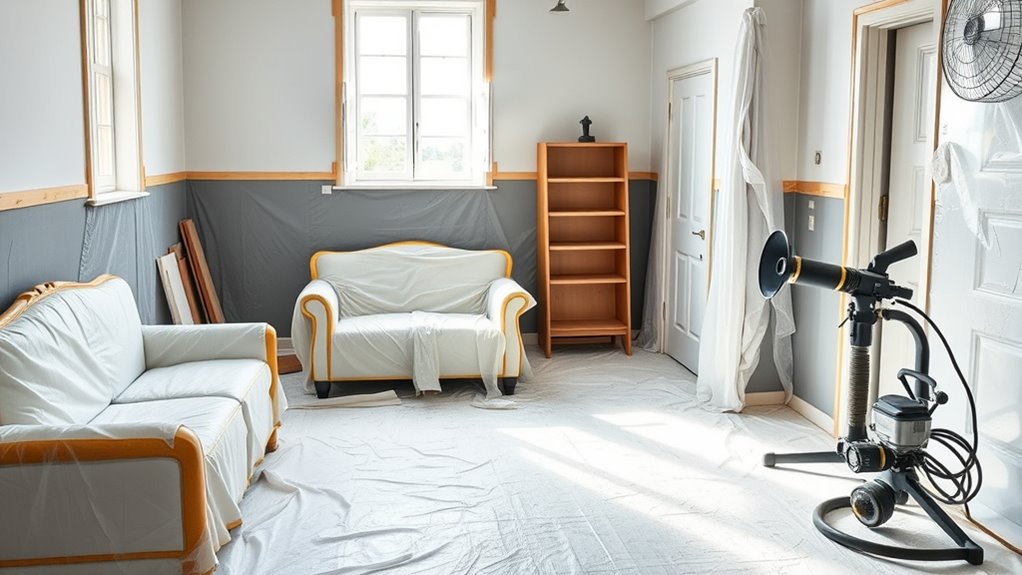
- Remove or cover furniture and fixtures with plastic sheets, drop cloths, and painter’s tape to protect surfaces from overspray.
- Mask windows, doors, and edges precisely with painter’s tape for clean paint lines and to prevent seepage.
- Cover floors and large surfaces with drop cloths or sheets, securing them with tape to prevent slipping and ensure full coverage.
- Protect small fixtures like doorknobs and switches by taping around hardware and covering with masking materials.
- Ensure all masking and coverings are secure and free of gaps before starting to maintain a clean, professional finish.
Gathering Essential Supplies and Tools
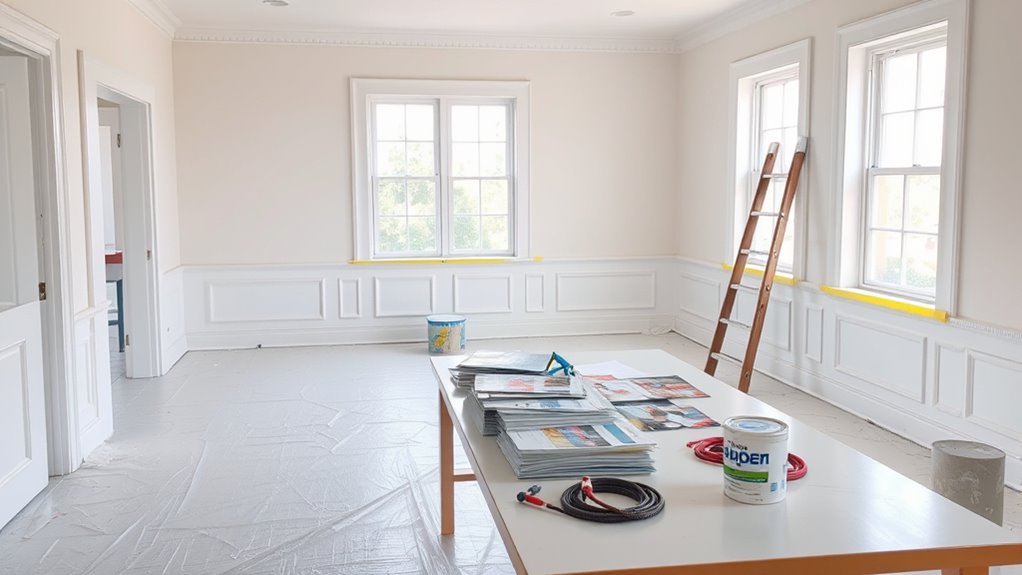
Before you start painting, it’s essential to gather all the necessary supplies and tools to guarantee a smooth process. First, ensure your paint sprayer is in top condition by performing proper paint sprayer maintenance—clean all parts and check for clogs. Next, gather your paint, brushes, drop cloths, painter’s tape, and protective gear. When selecting colors, keep color selection tips in mind: choose shades that complement your space, and consider testing small samples first. You’ll also want to have ladders or step stools handy to reach high areas. Having everything ready helps prevent interruptions once you begin. Being organized and prepared allows you to focus on your technique, ensuring a professional finish without unnecessary delays. Proper preparation reduces errors, and understanding contrast ratio can help ensure your project yields vibrant and accurate color results, especially when working with different lighting conditions. Additionally, considering paint compatibility ensures your chosen products work well together and adhere properly, preventing issues down the line. To maximize your efficiency, using an airless paint sprayer can significantly speed up your project and provide a smooth, even coat, making your prep work even more worthwhile.
Clearing and Protecting Furniture and Fixtures
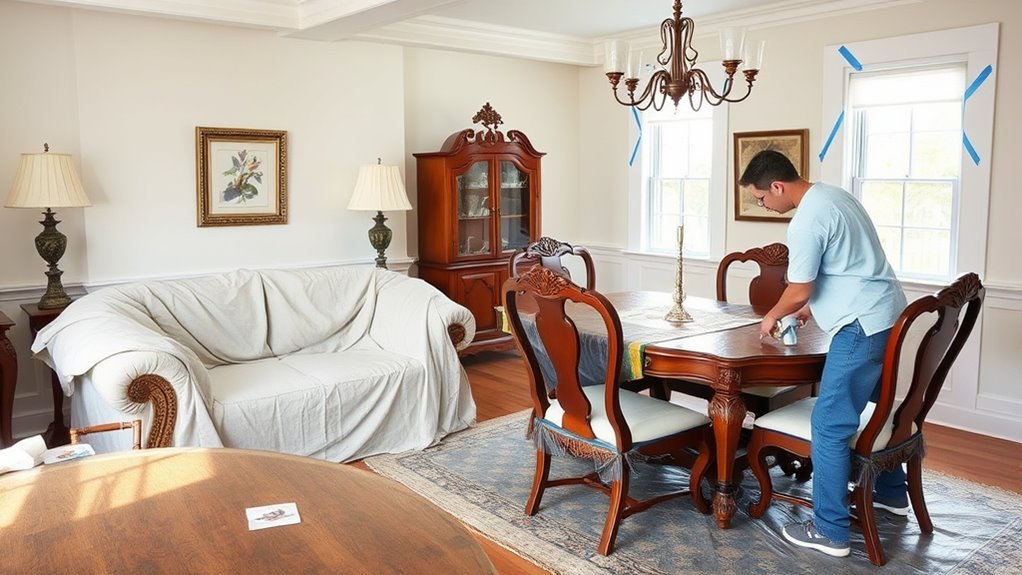
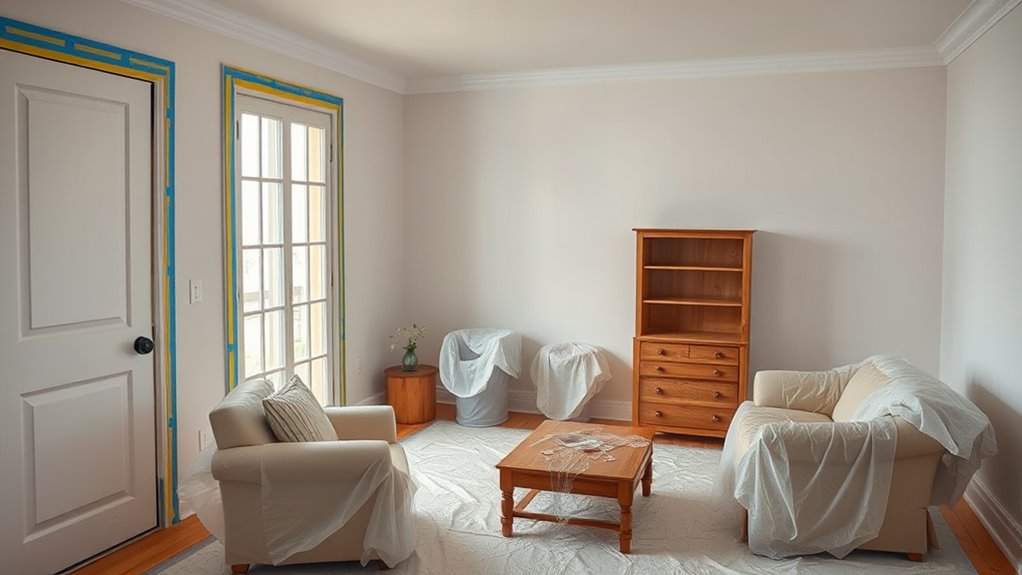
To guarantee your paint job stays clean and professional-looking, start by clearing out or covering your furniture and fixtures. Furniture removal is the best option if possible, as it completely eliminates the risk of paint splatters or drips damaging your belongings. If removal isn’t practical, use protective coverings like plastic sheets, drop cloths, or painter’s tape to shield fixtures and furniture in place. Secure covers tightly to prevent shifting or accidental exposure during spraying. Pay special attention to delicate items or fixtures that can’t be moved, ensuring they’re fully protected from paint overspray. Proper fixture protection not only keeps your furniture safe but also makes cleanup easier, saving you time and effort after the painting is complete. Additionally, understanding the horsepower of electric dirt bikes can help you appreciate the importance of proper handling and safety measures during any project involving power tools or equipment.
Taping Off Windows, Doors, and Edges
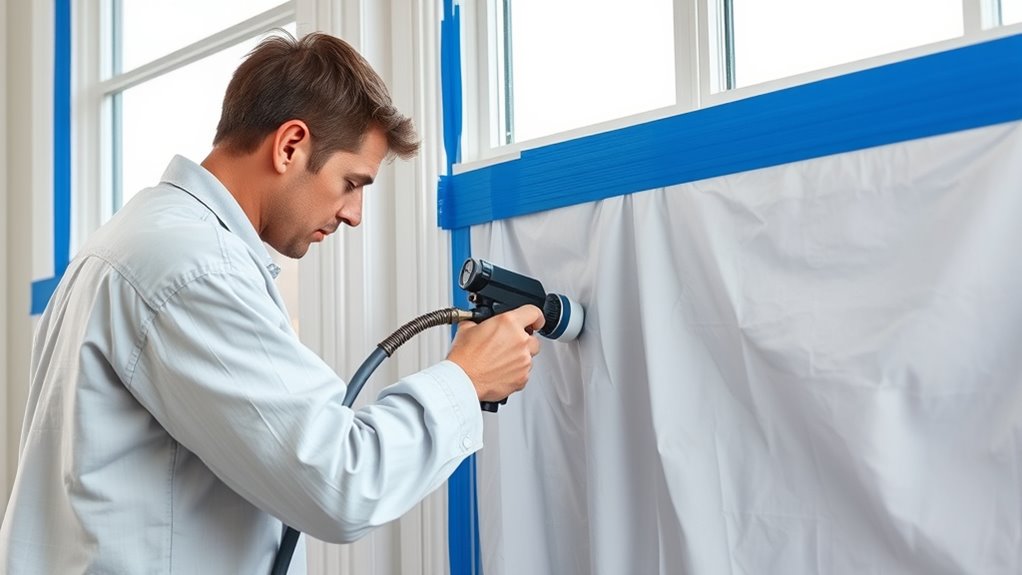
Taping off windows, doors, and edges is essential for achieving clean, sharp lines and preventing paint from bleeding onto areas you want to keep untouched. Use painter’s tape for precise decorative masking, ensuring it adheres smoothly without gaps. Apply the tape carefully along edges, pressing firmly to prevent paint seepage. When you’re done painting, patience is key during tape removal; peel it back slowly to avoid damaging freshly painted surfaces. Proper taping makes your final work look professional and neat. Additionally, choosing the right tape material can improve adhesion and reduce the risk of paint bleeding. For best results, consider the tape’s compatibility with your surface type to prevent peeling or damage during removal. Being aware of the filtration systems in your equipment can also help maintain a clean workspace, reducing dust and debris during prep. Using proper masking techniques can further enhance the quality of your paint job and save time on cleanup. Incorporating surface preparation techniques before taping can also improve tape adhesion and overall results.
Covering Floors and Large Surfaces
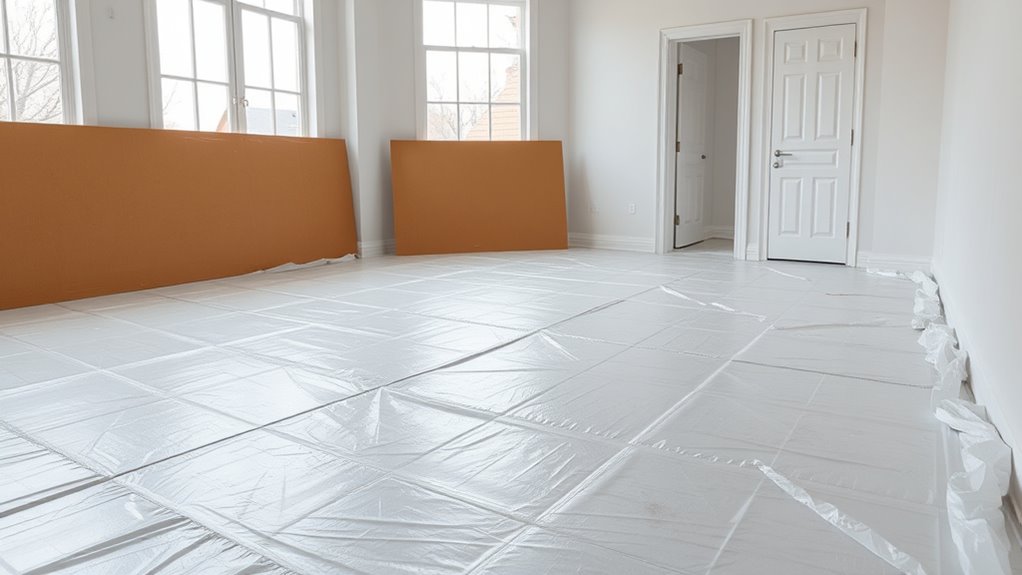
Covering floors and large surfaces is an essential step to protect your space from paint splatters and spills. Use drop cloths or drop sheets to cover areas like carpets, hardwood, or tile. Make sure they’re large enough to cover the entire surface and extend beyond the edges. Secure the cloths with painter’s tape to prevent slipping or shifting while you work. When choosing drop sheets, consider plastic for easy cleanup or canvas for durability. Lay the sheets flat, smoothing out any wrinkles to avoid tripping hazards or missed spots. Keep a few extra drop cloths handy for unexpected splashes or spills. Proper covering minimizes cleanup time and keeps your space looking pristine after painting. Incorporating sound vibrations into your preparation process can also help create a calming atmosphere, reducing stress during the project. Additionally, understanding software testing methodologies can improve your planning and execution of protective measures, ensuring thorough coverage and fewer mistakes. Utilizing material compatibility knowledge can help select the most effective coverings for different surfaces, ensuring optimal protection and longevity.
Masking Details and Small Areas

To guarantee clean lines and safeguard fixtures, you need to apply tape carefully and precisely. Cover small details like doorknobs and light switches to prevent overspray. Using edge blending techniques helps create seamless shifts between masked areas and the surfaces you’re painting.
Precise Tape Application
Achieving clean, sharp paint lines requires careful attention to masking small areas and intricate details. Precise tape application is key to avoiding bleed and ensuring professional results. When working on tight corners or delicate edges, take your time to press down the tape firmly, especially around curves. Use painter’s tape designed for fine lines to prevent paint from seeping underneath. For color matching and paint mixing, guarantee the paint is thoroughly blended before applying tape, so color consistency remains intact. Small detail work might involve trimming tape with a craft knife for accuracy. Keep the surface clean and dry before taping. Additionally, selecting the appropriate masking tape for your project can significantly influence the crispness of your paint lines. Proper surface cleaning helps ensure that the tape adheres well and prevents paint bleed. Using self watering plant pots as an analogy, ensuring the surface is properly prepared and free of debris is essential for achieving a flawless finish. Remember, meticulous taping makes your edges crisp and your overall finish flawless.
Cover Small Fixtures
After confirming your tape is applied smoothly for sharp edges, focus on protecting small fixtures and intricate details. Cover decorative fixtures like light sconces, curtain rods, and other hardware with painter’s tape or masking paper to prevent overspray. For electrical outlets, turn off the power and carefully tape around the cover plates, removing the covers afterward to avoid paint buildup. Use small brushes or detail tools to precisely mask tight corners and delicate areas. If fixtures are removable, take them off to spray behind or around them more effectively. Secure all coverings firmly so they don’t shift during painting. Properly masking small fixtures minimizes touch-ups later and ensures a clean, professional finish for your painted space. Additionally, selecting the right electric bike conversion kit can provide a convenient and eco-friendly transportation option for your projects. Being aware of pregnancy considerations can also help in planning your workspace to ensure safety and comfort.
Edge Blending Techniques
Mastering edge blending techniques is essential for creating seamless shifts between painted areas, especially when working with intricate details and small spaces. To achieve smooth transitions, focus on edge feathering, which softens harsh lines and ensures uniform color blending. Use a high-quality brush or sponge to gently feather the paint edges, blending them into adjacent areas without creating visible borders. Keep your tools damp for easier control and avoid overloading with paint. Additionally, understanding cultural nuances in your workspace can help you adapt your techniques to diverse environments, ensuring a more precise and respectful approach. Incorporating proper ventilation can also improve drying times and prevent paint smudging during delicate edge work.
- Use a light touch to gradually blend colors at the edges
- Work in small sections for precision
- Maintain consistent pressure for uniform feathering
These methods help prevent streaks and ensure your project looks polished. Proper edge feathering enhances overall color blending, giving your room a professional finish.
Ventilation and Safety Precautions
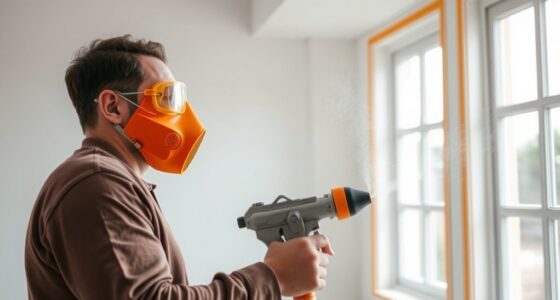
You need to set up proper ventilation to keep fumes from building up and make certain fresh air flows through the room. Always wear protective safety gear like masks, goggles, and gloves to shield yourself from harmful particles. Taking these precautions helps you stay safe and achieve a professional paint job. Additionally, ensure your fire safety equipment is readily accessible in case of emergencies.
Proper Ventilation Setup
Proper ventilation is essential to guarantee safe and effective paint spraying. It helps optimize airflow, reducing lingering fumes and controlling odors. To set up proper ventilation, consider these steps:
- Use exhaust fans or open windows to create a strong airflow path, ensuring fresh air enters while fumes exit.
- Position fans strategically to maximize airflow optimization and prevent paint mist from settling in unwanted areas.
- Install or use air purifiers with activated carbon filters to enhance odor control and improve air quality during and after the job.
- Be aware that cybersecurity vulnerabilities can be exploited if ventilation systems are connected to smart home networks, so ensure these devices are secured and updated.
Protective Safety Gear
When spraying paint, wearing the right safety gear is essential to protect yourself from fumes, overspray, and potential skin or eye irritation. Respiratory protection, like a mask or respirator, helps filter harmful fumes and particles, preventing breathing issues. Always wear protective clothing, such as coveralls or long sleeves, to shield your skin from overspray and splatters. Safety goggles or glasses are necessary to guard your eyes from splashes. Make sure your safety gear fits properly and is rated for paint fumes. Using this gear minimizes health risks and keeps you safe during the spraying process. Proper safety gear is a critical step in ensuring a safe, efficient painting experience. Additionally, understanding financial aspects such as the importance of safety investments can help prioritize safety equipment costs in your project budget, ensuring you’re fully protected. Selecting high-quality safety gear, including respirators rated for fumes, is vital to maximize protection and comfort during the job.
Final Checks Before Painting Begins
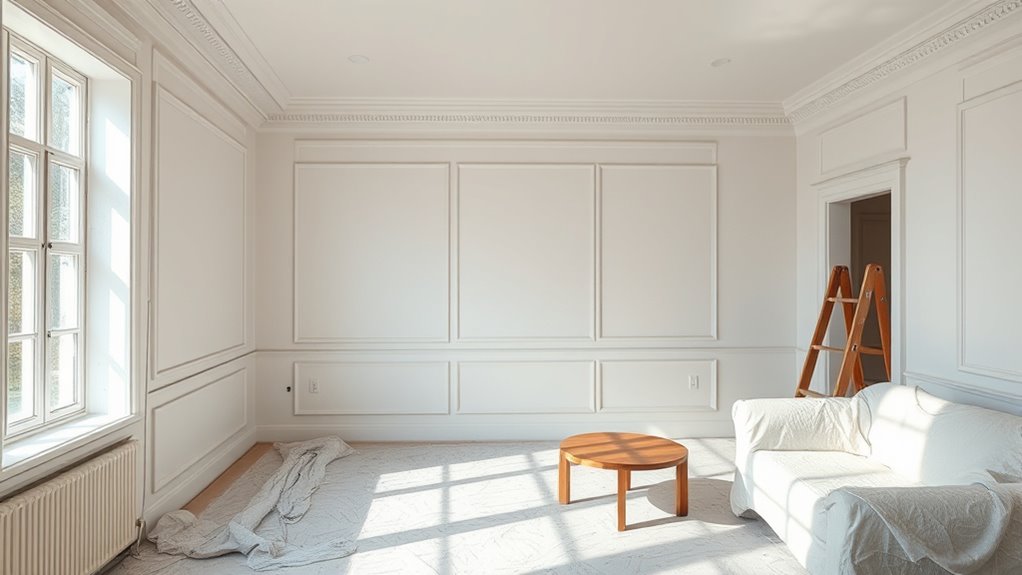
Before starting to paint, it’s essential to perform a thorough final check to guarantee everything is properly prepared. Confirm your paint color choices are correct, and that you’ve selected the appropriate paint type considerations for the room. Make sure all masking and covering are secure and complete, with no gaps or loose edges. Check that surfaces are clean, dry, and free of dust or debris. Verify your tools and equipment are ready to go, including sprayers, brushes, and rollers. Finally, review your workspace for proper ventilation and safety measures.
Ensure all surfaces are clean, tools ready, and workspace well-ventilated before beginning to paint.
- Confirm paint color choices and paint type considerations
- Inspect masking and covering for security
- Ensure surfaces are clean and tools are ready
Frequently Asked Questions
How Do I Choose the Right Masking Tape for Different Surfaces?
When choosing masking tape for different surfaces, you want to take into account its adhesive strength to prevent peeling or damage, especially on delicate materials. Also, select the right tape width; wider tape offers more coverage and protection, while narrower tape fits tighter spaces. For painted walls, use painter’s tape with low adhesive strength, but for rough surfaces, opt for stronger, high-adhesion tape to ensure it stays put during your project.
What Are the Best Materials to Cover Delicate or Textured Surfaces?
Like a knight preparing for battle, you want the best materials to protect delicate or textured surfaces. Use protective drop cloths for larger areas, and delicate surface covers for intricate details. These special covers prevent paint from seeping in and damaging the surface. Make sure you secure them well, so they stay in place during spraying. This way, your surfaces stay pristine, and your work looks professional.
How Can I Prevent Paint Bleeding Under the Masking Tape?
To prevent paint bleed under the masking tape, you should focus on paint bleed prevention and tape adhesion techniques. First, clean the surface thoroughly to guarantee good tape adhesion. Use high-quality painter’s tape designed for clean lines, pressing it down firmly along the edges. Applying a thin coat of primer or sealing the edges with a small brush before painting also helps create a barrier, reducing the chances of paint seeping underneath.
What Are Effective Ways to Protect Electrical Outlets and Switches?
To make certain electrical safety and protect outlets and switches, you should turn off the power at the breaker box first. Cover outlets and switches with painter’s tape or outlet covers, pressing firmly to seal edges. Use plastic sheeting or painter’s tape to safeguard larger electrical fixtures. Always double-check that power is off before working, and avoid spraying paint directly over electrical components to prevent accidents or damage.
How Do I Handle Masking in Tight or Hard-To-Reach Corners?
When masking in tight or hard-to-reach corners, you should corner cut by carefully trimming masking tape to fit snugly. Use a small brush or detail tool to press the tape firmly into edges, preventing paint bleed. For extra security, add tape reinforcement along the edges, ensuring the masking stays intact. Patience is key—taking your time in these tricky spots results in a cleaner, professional-looking finish.
Conclusion
Now that your room is perfectly prepped, you’re ready to release your inner artist. Think of the space as a blank canvas waiting for your brushstrokes—protected from splatters and drips. With everything masked and covered, you can focus on applying paint with confidence, knowing your masterpiece will turn out flawless. Just remember, a well-prepared room is like a well-guarded treasure chest—keeping your work beautiful and your cleanup smooth sailing.

Franz came aboard the Paint Sprayer Zone team with a background in both journalism and home renovation. His articulate writing style, combined with a passion for DIY projects, makes him an invaluable asset. Franz has a knack for breaking down technical jargon into easy-to-understand content, ensuring that even the most novice of readers can grasp the complexities of paint sprayers.