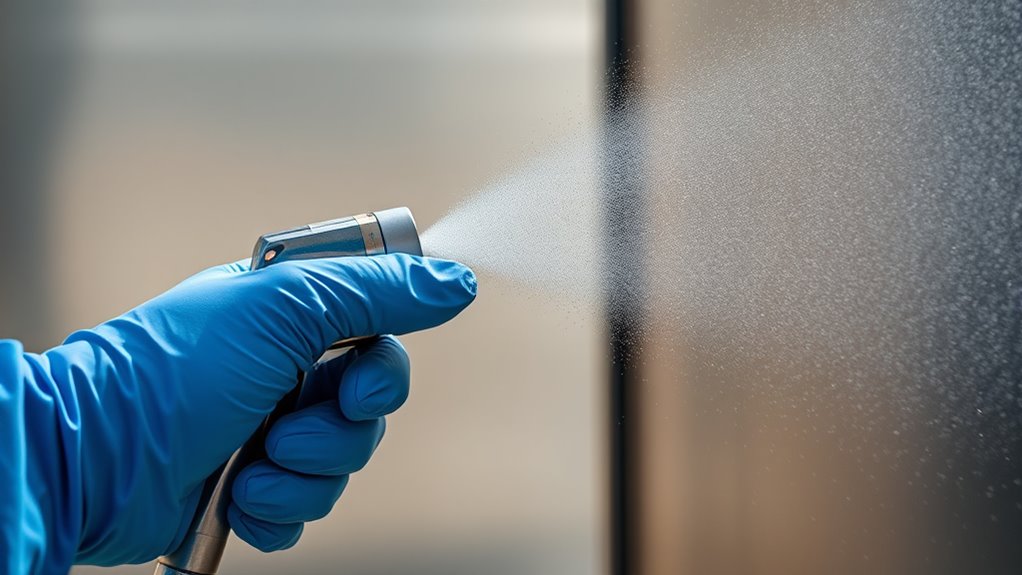

To guarantee maximum adhesion when spraying primer, start by thoroughly cleaning and sanding the surface to create a rough texture. Hold your spray gun 6-12 inches away, applying thin, even coats with smooth, overlapping passes. Practice your technique first and spray in a well-ventilated, low-humidity area. Always wait for each coat to dry before applying the next. For more tips on perfecting your spray job, keep going to learn additional details.
Key Takeaways
- Properly clean and sand the surface to ensure a smooth, debris-free base for primer adhesion.
- Maintain a steady hand and consistent distance (6-12 inches) while spraying for uniform coverage.
- Apply multiple thin coats, allowing each to dry completely before the next to enhance bonding.
- Practice spray technique on scrap material to achieve even application and optimal coverage.
- Spray in a well-ventilated, moderate-temperature environment with low humidity for best drying and adhesion.

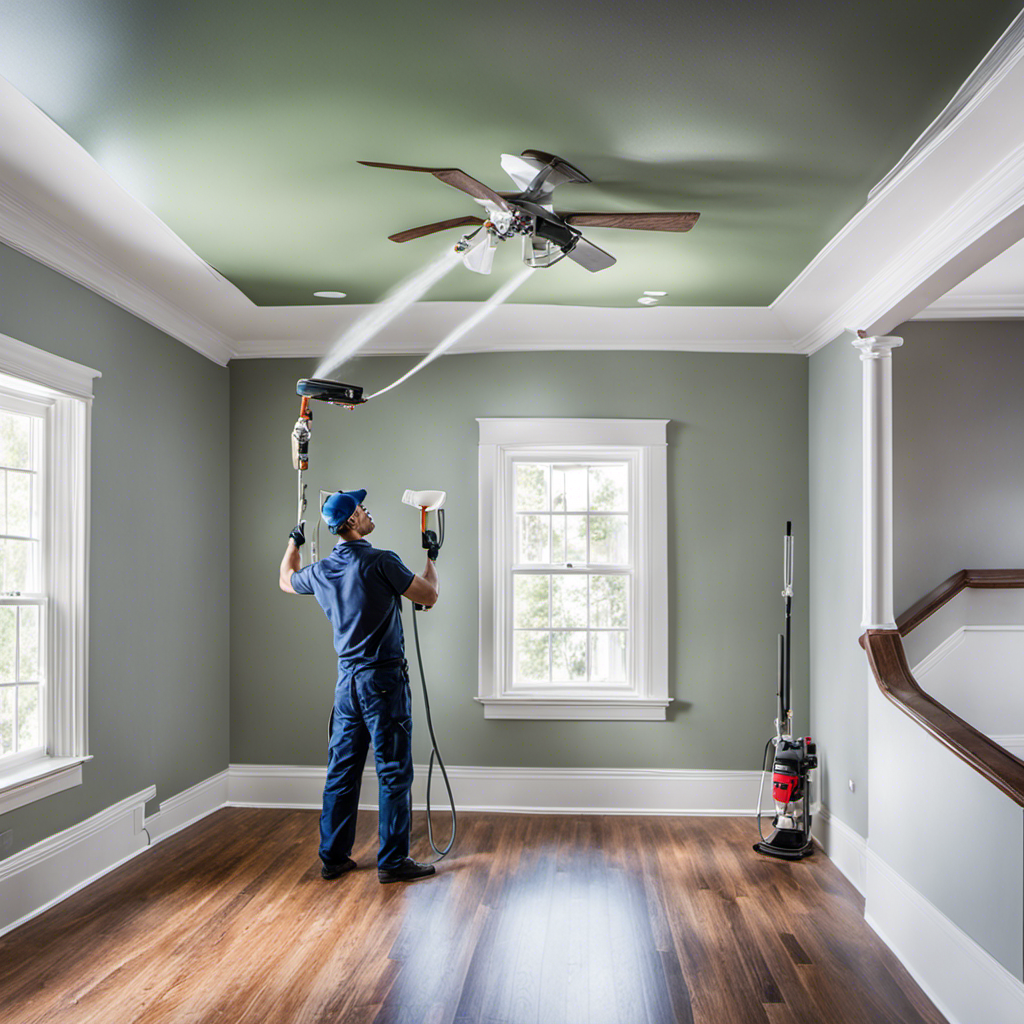
Have you ever wondered how to achieve a smooth, professional finish when applying primer? The secret lies in proper surface preparation and mastering your spray technique. Before you even reach for the spray gun, you need to ensure the surface is thoroughly prepared. Start by cleaning the area to remove dirt, grease, or old paint, because any debris can cause uneven adhesion or a rough finish. Sand the surface with fine-grit sandpaper to create a slightly textured, clean surface that allows the primer to grip better. Wipe away dust with a tack cloth or a damp rag, making sure no particles remain. This meticulous surface preparation sets the foundation for a flawless primer application.
Once your surface is properly prepped, focus on your spray technique. Hold the spray gun at a consistent distance, typically about 6 to 12 inches from the surface. Keep your hand steady and move smoothly in even, overlapping passes—about 50% overlap each time—so that the primer layers blend seamlessly. Start spraying off the edge of the surface and move across, avoiding stopping in the middle of a section, which can cause uneven buildup or drips. Maintain a steady speed; too slow, and you risk runs and sags, too fast, and the primer won’t cover well. Practice your spray motion on a scrap piece beforehand to get a feel for the right speed and distance.
Temperature and humidity also influence your spray technique. Ideally, spray in a well-ventilated area with moderate temperature and low humidity because these conditions help the primer dry evenly and reduce imperfections. Before applying the primer, shake the spray can vigorously or stir the contents of a spray gun thoroughly to ensure the primer is evenly mixed. Use light, even coats instead of trying to cover everything in one heavy layer, which can cause drips and uneven drying. Multiple thin coats will give you better adhesion and a smoother surface.
Frequently Asked Questions
Can I Spray Primer on Wet or Humid Surfaces?
You shouldn’t spray primer on wet or humid surfaces because it can compromise surface preparation and reduce primer compatibility. Moisture prevents proper adhesion, leading to peeling or bubbling later. For the best results, make certain the surface is thoroughly dry and free of humidity before applying primer. Proper surface prep and choosing a compatible primer help achieve maximum adhesion and a long-lasting finish. Always check the primer’s instructions for specific conditions.
How Do Temperature Variations Affect Primer Adhesion?
Sure, temperature swings are the DIY painter’s nemesis. When temps fluctuate, moisture control becomes tricky, and primer’s sticking power weakens. Too hot or cold, and you risk poor adhesion—think of it as your paint’s awkward first date. Keep temperature stability in mind, guarantee proper curing conditions, and avoid applying primer during extreme weather. Your project will thank you with a smooth, lasting finish, not a flaky mess.
Should I Sand Between Primer Coats?
Yes, you should sand between primer coats to guarantee proper sanding prep and improve adhesion. Lightly sanding the primer layers with fine-grit sandpaper smooths out any imperfections, removes dust or debris, and creates a better surface for the next coat. This step enhances the overall finish, promotes better paint adhesion, and prevents peeling or bubbling. Always clean off dust after sanding before applying the next primer layer.
What Type of Spray Gun Is Best for Primer?
You should use a HVLP (High Volume Low Pressure) spray gun for primer, as it delivers a smooth, even coat with minimal overspray. Consider gravity feed spray guns for better control and reduced waste. When applying primer, use steady, overlapping strokes and keep a consistent distance from the surface. These spray gun types and application techniques ensure ideal primer adhesion and a professional finish.
How Long Should I Wait Before Applying the Topcoat?
You should wait for the primer to dry completely, which typically takes about 1 to 2 hours, depending on the product and environmental conditions. Make certain the surface is properly prepared and the primer is fully dry before applying the topcoat. Rushing this step can compromise adhesion, so check the manufacturer’s instructions and look for a dry, tack-free surface to guarantee the best results.
Conclusion
Now that you’ve mastered the art of spraying primer, think of it as planting seeds for a lasting bond. With each careful stroke, you’re laying the foundation for your project’s success, like a painter setting the stage for a masterpiece. Remember, patience and precision are your brushes—trust them to turn a simple task into a work of craftsmanship. When you finish, you’ll see your effort bloom into a surface that’s ready to shine, built to withstand the test of time.

Franz came aboard the Paint Sprayer Zone team with a background in both journalism and home renovation. His articulate writing style, combined with a passion for DIY projects, makes him an invaluable asset. Franz has a knack for breaking down technical jargon into easy-to-understand content, ensuring that even the most novice of readers can grasp the complexities of paint sprayers.