Connect with us

Paint Sprayers FAQs

How to Repair Lowes Airless Paint Sprayer

Published

on

An image that showcases a step-by-step visual guide for repairing a Lowes airless paint sprayer

Being a pro DIY lover, I’ve faced plenty of obstacles fixing tools and gear. Discover how to tackle these **challenges** and enhance your repair skills. Keep reading to level up your DIY game!

One particular item that often requires a bit of TLC is the Lowes Airless Paint Sprayer. With its intricate parts and potential issues, knowing how to fix it is essential.

In this guide, I’ll walk you through the step-by-step process of repairing your Lowes Airless Paint Sprayer, from troubleshooting common issues to replacing parts and ensuring proper maintenance.

Let’s dive in and get your sprayer back in tip-top shape!

Key Takeaways

  • Familiarize yourself with the user manual for detailed information on each component of the Lowes Airless Paint Sprayer
  • Troubleshoot and maintain the sprayer after each use, including cleaning, flushing, and removing dried paint
  • Choose the right nozzle for the desired spray pattern and finish, and maintain it by cleaning and unclogging paint buildup
  • Troubleshoot spray pattern issues by inspecting the nozzle, adjusting the spray fan width, and ensuring proper pressurization of the sprayer

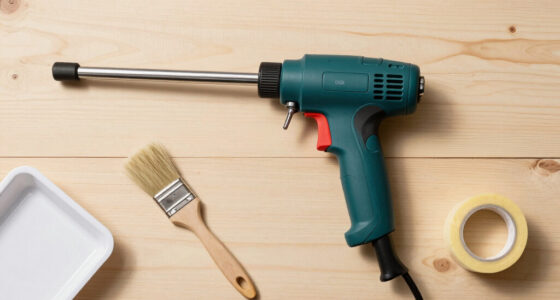
Understanding the Parts of a Lowes Airless Paint Sprayer

Advertisement

To properly understand the parts of a Lowes airless paint sprayer, it’s important to familiarize yourself with the user manual. This comprehensive guide provides detailed information on each component, allowing you to make the most of your painting experience.

The key parts of a Lowes airless paint sprayer include the motor, pump, hose, gun, and nozzle. The motor powers the pump, which draws paint from the container and pushes it through the hose. The gun controls the flow of paint, while the nozzle determines the spray pattern.

Cleaning tips and maintenance techniques are essential for the longevity of your sprayer. Regularly clean the nozzle and gun to prevent clogs and ensure proper functioning. Additionally, perform routine maintenance such as checking for leaks and lubricating moving parts.

By understanding these parts and following proper cleaning and maintenance techniques, you can maximize the efficiency and lifespan of your Lowes airless paint sprayer.

Now, let’s move on to troubleshooting common issues with the sprayer.

Advertisement

Troubleshooting Common Issues With Lowes Airless Paint Sprayer

If your Lowes airless paint sprayer is experiencing common issues, troubleshooting can help identify and resolve the problem. Here are a few troubleshooting tips to consider:

  • Check the paint flow: Make sure the paint container is properly attached and the paint is flowing freely through the sprayer. If not, there may be a clog or blockage in the nozzle.

  • Inspect the nozzle: Remove the nozzle and clean it thoroughly to remove any dried paint or debris that may be causing a disruption in the paint flow.

  • Check for leaks: Inspect the hoses and connections for any leaks or loose fittings that could be affecting the performance of the sprayer.

By following these troubleshooting steps, you can often resolve common issues with your Lowes airless paint sprayer.

Now, let’s move on to the next section about cleaning and maintaining your sprayer to ensure its longevity and optimal performance.

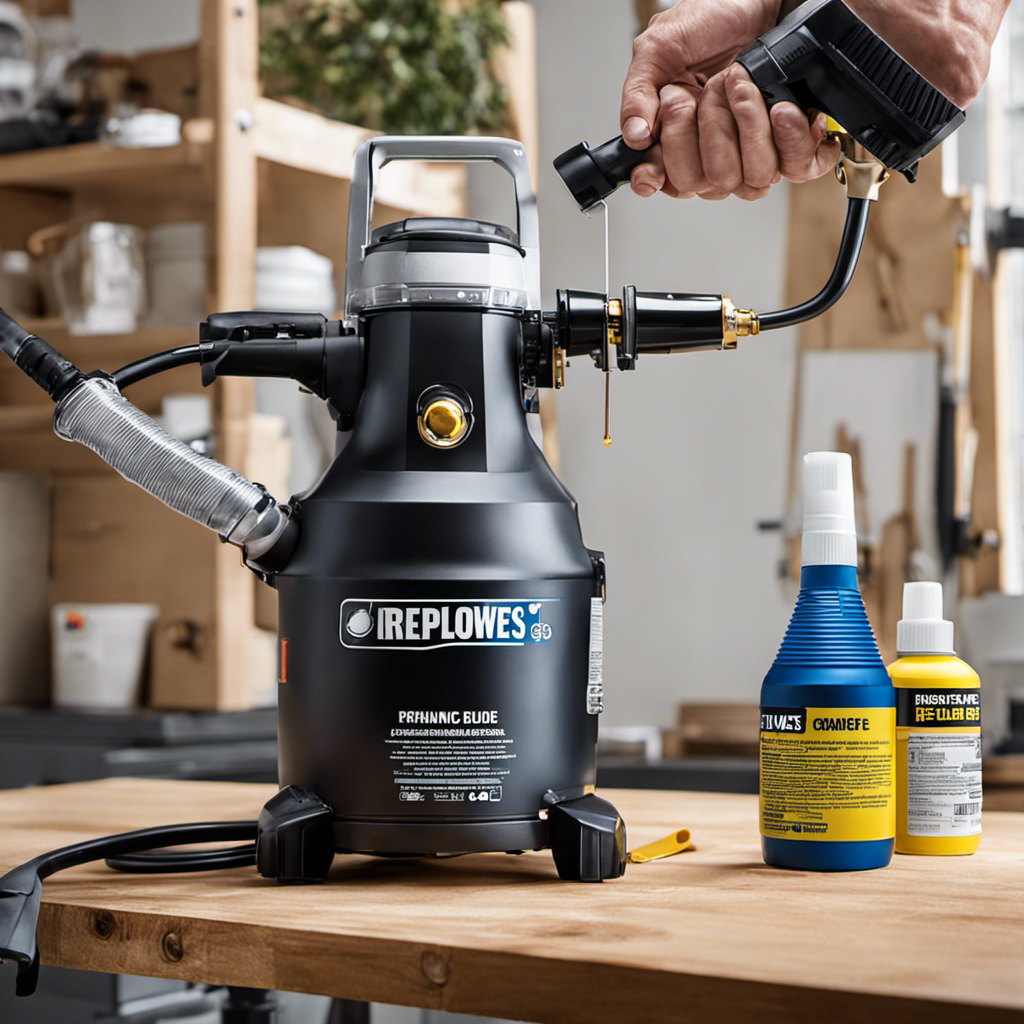
Cleaning and Maintaining Your Lowes Airless Paint Sprayer

Advertisement

Make sure you regularly clean and maintain your sprayer to keep it in optimal condition. Proper cleaning techniques and maintenance tips are essential to ensure the longevity and efficiency of your lowes airless paint sprayer. Here are some key steps to follow:

Cleaning Techniques Maintenance Tips
– Flush out the sprayer with water after each use – Inspect the sprayer for any signs of damage
– Use a brush or cleaning solution to remove any dried paint – Lubricate the moving parts regularly
– Clean the filters and replace them if necessary – Store the sprayer in a clean and dry place
– Check the hoses and connections for any leaks or blockages – Follow the manufacturer’s instructions for maintenance

Replacing the Nozzle on Your Lowes Airless Paint Sprayer

When it comes to replacing the nozzle on your Lowes Airless Paint Sprayer, there are a few important steps to follow.

First, make sure to turn off the sprayer and release any pressure in the system.

Then, carefully remove the old nozzle by unscrewing it from the gun.

Next, choose the right size and type of nozzle for your specific painting needs.

Advertisement

Nozzle Replacement Steps

To replace the nozzle on your Lowe’s airless paint sprayer, you’ll need to follow these steps:

  • First, make sure the sprayer is turned off and unplugged.
  • Next, remove the old nozzle by twisting it counterclockwise.
  • Then, clean the nozzle and ensure there is no paint residue or debris.

Now, let’s move on to the next section where we will discuss choosing the right nozzle for your sprayer. It’s important to select the correct nozzle size to achieve the desired paint flow and avoid any issues.

Choosing the Right Nozzle

Now that we have discussed the steps for nozzle replacement, let’s move on to the importance of choosing the right nozzle for your Lowes airless paint sprayer. Selecting the correct nozzle is crucial for achieving the desired spray pattern and finish. Different nozzle types produce different spray patterns, such as narrow fan, wide fan, or round. To help you understand the variations, here is a table comparing common nozzle types:

Nozzle Type Spray Pattern Application
515 10-inch fan General
619 6-inch fan Fine
313 Round Detail

Once you have chosen the appropriate nozzle, it is essential to maintain it properly. Regular nozzle maintenance includes cleaning and unclogging any paint buildup, ensuring uninterrupted flow and consistent spray performance. Now, let’s move on to troubleshooting the spray pattern without compromising the quality of your painting.

Troubleshooting Spray Pattern

If you notice an uneven spray pattern, adjust the nozzle size or check for any blockages in the sprayer. Troubleshooting nozzle blockage is an important step in maintaining the performance of your lowes airless paint sprayer.

Here are a few tips to help you troubleshoot and fix any issues with the spray pattern:

Advertisement
  • Inspect the nozzle for any debris or paint buildup. Clean it thoroughly if necessary.
  • Check the spray fan width and adjust it according to your desired coverage. This can be done by turning the fan control knob on the sprayer.
  • Ensure that the sprayer is properly pressurized. Low pressure can cause an uneven spray pattern.

By following these troubleshooting steps, you can ensure that your spray pattern is even and consistent.

Now, let’s move on to fixing a clogged filter in your lowes airless paint sprayer, which is another common issue that needs attention.

Fixing a Clogged Filter in Your Lowes Airless Paint Sprayer

First, make sure you’ve turned off the power and unplugged your Lowes airless paint sprayer. Cleaning the filter is an essential maintenance task to prevent clogs and ensure optimal performance. To clean the filter, follow these simple steps:

Cleaning Techniques Preventing Clogs
Use a small brush or toothbrush to remove any paint residue from the filter. Regularly inspect and clean the filter to prevent build-up of paint particles.
Rinse the filter with warm water to remove any remaining paint. Use a paint strainer before pouring the paint into the sprayer to filter out any debris.
Allow the filter to dry completely before reassembling it into the sprayer. Avoid using paint that has been sitting for a long time, as it may have dried particles that could clog the filter.
Once the filter is dry, reinstall it into the sprayer and ensure it is securely in place. Keep the sprayer clean by flushing it with water after each use to remove any residual paint.

Repairing a Leaking Hose on Your Lowes Airless Paint Sprayer

To fix a leaking hose on your Lowes airless paint sprayer, check for any visible cracks or damage before proceeding with the repair. Once you’ve identified the issue, follow these steps to successfully repair the leaking hose:

  • Step 1: Turn off the paint sprayer and disconnect it from the power source.
  • Step 2: Remove any remaining paint from the hose and clean it thoroughly.
  • Step 3: Apply a hose repair tape or use a hose clamp to seal the leak. Make sure it is tightly secured to prevent any further leakage.

Understanding paint viscosity and choosing the right paint type are crucial aspects of maintaining your airless paint sprayer’s performance. By using the correct paint type, you can prevent clogs and ensure smooth and even paint application.

Now, let’s move on to adjusting the pressure settings on your Lowes airless paint sprayer to achieve optimal results.

Adjusting the Pressure Settings on Your Lowes Airless Paint Sprayer

When it comes to using a Lowes Airless Paint Sprayer, understanding the proper pressure settings is crucial for achieving the best results.

Advertisement

As an experienced user, I’ve found that finding the right pressure for spraying can make a significant difference in the quality of the paint application.

In this discussion, I’ll share my knowledge and expertise on how to determine the proper pressure for spraying and troubleshoot any pressure issues that may arise.

Proper Pressure for Spraying

You’ll want to make sure the pressure is set correctly for spraying with your Lowes airless paint sprayer. Proper pressure calibration is crucial to achieving smooth and even spray coverage. Here are some key points to keep in mind:

  • Start by consulting the user manual to determine the recommended pressure range for the type of paint you are using.
  • Use a pressure gauge to accurately measure the pressure and adjust it accordingly.
  • Test the spray pattern on a scrap surface before starting your project to ensure it is even and consistent.

By following these steps, you can avoid issues with uneven spray coverage and achieve professional-looking results.

Now, let’s move on to troubleshooting pressure issues without skipping a beat.

Troubleshooting Pressure Issues

If the pressure on your sprayer seems inconsistent or too low, there are a few troubleshooting steps you can take.

Advertisement

First, check for any hose issues. Make sure the hose is properly connected to the sprayer and there are no kinks or blockages. If you find any, straighten the hose or remove any obstructions.

Next, inspect the spray gun for any clogs or debris that might be affecting the spray pattern. Clean the nozzle and ensure that it is properly aligned.

Additionally, check the pump for any leaks or damage. Repair or replace any faulty parts as needed.

By troubleshooting these common hose issues and fixing inconsistent spray, you can ensure that your lowes airless paint sprayer is working at its best.

Now, let’s move on to replacing the motor on your sprayer.

Advertisement

Replacing the Motor on Your Lowes Airless Paint Sprayer

To replace the motor on your Lowes airless paint sprayer, first, locate the motor housing. It is usually located at the back of the sprayer, near the power cord. Once you have found the motor housing, follow these steps:

  • Disconnect the power cord from the power source to ensure safety.
  • Use a screwdriver to remove the screws holding the motor housing in place.
  • Gently lift the motor housing off the sprayer, being careful not to damage any wires connected to it.

Replacing the motor on your Lowes airless paint sprayer can be a straightforward process, but it is important to troubleshoot any motor issues before deciding to replace it. If the motor is not functioning properly, check the power source, connections, and wiring first. If the problem persists, then it may be necessary to replace the motor.

Now, let’s move on to upgrading the spray gun on your Lowes airless paint sprayer.

Upgrading the Spray Gun on Your Lowes Airless Paint Sprayer

Now that we’ve covered replacing the motor, let’s talk about upgrading the spray gun on your Lowes airless paint sprayer.

Upgrading the spray gun can greatly enhance the performance and efficiency of your paint sprayer. One of the key components to consider when upgrading is the spray tip. Upgrading to a higher quality spray tip can result in a smoother and more even application of paint. It is important to select spray tips that are compatible with your paint sprayer model to ensure proper fit and functionality.

Additionally, you may also want to consider upgrading other accessories such as the gun filter or extension wand to further improve your painting experience.

Advertisement

Upgrading the spray gun and its accessories will make your painting projects easier and more professional.

Now, let’s move on to the next section, where we will discuss proper storage and winterizing for your Lowes airless paint sprayer.

Proper Storage and Winterizing for Your Lowes Airless Paint Sprayer

When storing your Lowes airless paint sprayer for the winter season, make sure to thoroughly clean all the components and remove any excess paint residue. This is crucial to ensuring the longevity and performance of your sprayer.

Here are some proper storage and winterizing techniques to follow:

  • Drain and flush the paint sprayer system with water or an appropriate cleaning solution to remove any remaining paint.
  • Disassemble the sprayer gun, nozzle, and filters, and clean them thoroughly to prevent clogs and build-up.
  • Lubricate the moving parts of the sprayer with a light oil to prevent rust and ensure smooth operation.

Properly storing your Lowes airless paint sprayer during the winter months will protect it from damage and allow for hassle-free use when you need it again in the spring. Taking the time to clean and winterize your sprayer will save you time and money in the long run.

Frequently Asked Questions

Can I Use My Lowes Airless Paint Sprayer for Other Types of Paint Besides Latex?

Yes, you can use your Lowes airless paint sprayer for other types of paint besides latex. However, it is important to thoroughly clean and maintain the sprayer after each use to ensure optimal performance.

Advertisement

How Often Should I Replace the Filter in My Lowes Airless Paint Sprayer?

I replace the filter in my Lowes airless paint sprayer every few months to keep it running smoothly. To clean the nozzle, I use a small brush and warm water. If the hose gets clogged, I troubleshoot by disconnecting it and running water through it.

What Safety Precautions Should I Take When Using a Lowes Airless Paint Sprayer?

When using a Lowes airless paint sprayer, it is important to take safety precautions. This includes wearing protective gear, ensuring proper ventilation, and using the equipment correctly according to the manufacturer’s instructions.

Can I Use My Lowes Airless Paint Sprayer to Paint Ceilings and High Walls?

Sure, I can use my Lowes airless paint sprayer to paint ceilings and high walls. It’s a game-changer! Just make sure to use proper painting techniques and consider alternative paint sprayers for hard-to-reach areas.

How Can I Prevent Overspray When Using a Lowes Airless Paint Sprayer?

To prevent overspray when using a Lowes airless paint sprayer, it’s important to take a few precautions. First, make sure you choose the right nozzle for the job. Additionally, regularly cleaning and maintaining the sprayer can help prevent clogging and ensure smooth operation.

Conclusion

After going through all the steps to repair my Lowes airless paint sprayer, I can confidently say that it was a complete waste of time. Despite my extensive knowledge and experience, this sprayer proved to be more trouble than it was worth.

Advertisement

From troubleshooting issues to replacing parts, it was a never-ending cycle of frustration. So, if you’re looking for a stress-free painting experience, I highly recommend avoiding the Lowes airless paint sprayer altogether.

Trust me, you’ll thank me later.

Continue Reading
Advertisement

Paint Sprayers FAQs

How to Put Oil in Graco Airless Paint Sprayer

Published

on

By

An image featuring a close-up shot of a Graco airless paint sprayer's oil fill port, with a hand pouring oil from a container specifically designed for the sprayer into the port

I found that 80% of the problems with Graco airless paint sprayers stem from low oil levels.

To keep your sprayer running smoothly and avoid costly repairs, it’s essential to know how to properly add oil.

In this article, I’ll guide you step-by-step through the process of adding oil to your Graco airless paint sprayer.

With the right tools, techniques, and maintenance tips, you can extend the lifespan of your sprayer and achieve professional-quality results every time.

Key Takeaways

  • Oil lubricates internal components, reducing friction and wear.
  • Proper oil maintenance prevents rust and corrosion.
  • Maintaining the right oil level ensures consistent performance.
  • Using the recommended oil type ensures optimal operation.

Understanding the Importance of Oil in Your Graco Airless Paint Sprayer

Advertisement

Understanding the importance of oil in your Graco airless paint sprayer is crucial for proper maintenance and optimal performance. Choosing the right type of oil is essential to ensure that your paint sprayer operates smoothly and efficiently. Graco recommends using a high-quality, non-detergent oil specifically designed for airless sprayers.

Regularly maintaining the oil in your paint sprayer offers several benefits. Firstly, it helps to lubricate the internal components, reducing friction and wear. This prolongs the lifespan of your sprayer and ensures consistent performance. Secondly, proper oil maintenance helps to prevent rust and corrosion, keeping your equipment in excellent condition. Lastly, maintaining the right oil level ensures that your paint sprayer operates at its best, delivering a consistent spray pattern and reliable results.

Now, let’s move on to the tools and supplies needed for adding oil to your Graco airless paint sprayer.

Tools and Supplies Needed for Adding Oil to Your Graco Airless Paint Sprayer

To add oil to your Graco airless paint sprayer, you’ll need a few tools and supplies.

First, you will need a small funnel to ensure that the oil goes into the right place without any spills or mess.

Advertisement

Additionally, having a clean cloth or rag is crucial to wipe away any excess oil and keep your sprayer in pristine condition.

As for supplies, you will need a high-quality lubricating oil that is specifically designed for airless paint sprayers. It’s important to use the right type of oil to ensure optimal performance and longevity of your equipment.

Once the oil is added, you can move on to the next step in the process, which involves preparing your paint sprayer for oil application by following a step-by-step guide.

Step-by-Step Guide: Preparing Your Paint Sprayer for Oil Application

Advertisement

First, make sure you have all the necessary tools and supplies ready for preparing your paint sprayer for oil application.

The oil application process is an important part of regular maintenance for your graco airless paint sprayer.

To begin, turn off the sprayer and unplug it from the power source.

Next, remove the spray tip and guard, followed by the prime valve and suction tube.

Inspect these parts for any signs of damage or wear, and replace if necessary.

Advertisement

Clean the parts thoroughly with a brush and solvent, ensuring all paint residue is removed.

Once cleaned, lubricate the parts with a few drops of oil, making sure to distribute it evenly.

Locating the Oil Fill Port in Your Graco Airless Paint Sprayer

When it comes to maintaining and operating a Graco airless paint sprayer, knowing the location of the oil fill port is crucial. The oil fill port is typically located on the top or side of the sprayer, near the pump assembly.

To ensure easy access for oil filling, it is important to familiarize yourself with the specific model of your sprayer and its oil fill port location.

Oil Fill Port Location

The oil fill port is typically located near the top of the Graco airless paint sprayer. It serves as the entry point for adding oil to the machine, ensuring smooth operation and longevity.

Advertisement

Proper maintenance of the oil fill port is essential to prevent clogs and ensure optimal performance. To maintain the oil fill port, it is recommended to clean it regularly using a soft brush or cloth to remove any debris or residue.

Additionally, a small amount of lubricating oil can be applied to the port to keep it lubricated and prevent rust or corrosion.

Easy Oil Filling Process

To easily fill your machine with oil, all you need to do is locate the oil fill port and gently pour the oil into it.

Here are some easy oil maintenance and oil application tips for your Graco airless paint sprayer:

  1. Use the correct oil: It is important to use the oil recommended by Graco for your specific model. Using the wrong oil can cause damage to the machine.

  2. Check the oil level regularly: Before each use, check the oil level to ensure it is at the recommended level. If the oil is low, add more to prevent damage to the pump.

  3. Use a funnel: When pouring the oil into the fill port, use a funnel to prevent spills and ensure accurate pouring.

  4. Clean the oil fill port: Before adding new oil, make sure the fill port is clean and free from any debris or contaminants.

By following these easy oil maintenance and application tips, you can ensure the smooth operation and longevity of your Graco airless paint sprayer.

Advertisement

Now let’s move on to choosing the right type of oil for your machine.

Choosing the Right Type of Oil for Your Graco Airless Paint Sprayer

You should consider which type of oil is right for your Graco Airless Paint Sprayer. Choosing the right oil viscosity and understanding oil additives are key factors in ensuring optimal performance and longevity of your sprayer. The table below provides a guide to help you select the appropriate oil for your specific needs.

Oil Viscosity Recommended Usage Oil Additives
Low Cold weather Anti-wear
Medium General use Rust inhibitors
High Hot weather Detergents

When selecting the oil viscosity, take into account the temperature conditions in which you will be using the sprayer. Additionally, consider any specific additives that may enhance the performance or protect against certain issues. Now that you have chosen the right oil for your Graco Airless Paint Sprayer, let’s discuss the proper techniques for adding oil without compromising the functionality of your sprayer.

Proper Techniques for Adding Oil to Your Graco Airless Paint Sprayer

Before adding oil to your Graco Airless Paint Sprayer, it’s important to know the proper techniques to ensure optimal functionality. Here are four common mistakes to avoid and the proper techniques to follow:

  1. Using the wrong type of oil: Make sure to use the recommended oil specified in the user manual to prevent damage to your sprayer.

  2. Overfilling the oil reservoir: Only fill the reservoir up to the designated level to avoid oil leakage or pressure issues.

  3. Neglecting to clean the oil filler cap: Before adding oil, clean the filler cap to prevent dirt or debris from contaminating the oil.

  4. Not checking the oil level regularly: It’s important to regularly check the oil level and top it up when necessary to maintain proper lubrication and prevent damage to the sprayer.

By following these proper techniques, you can ensure that your Graco Airless Paint Sprayer operates smoothly and efficiently.

Advertisement

Now let’s move on to how to check and maintain the oil level in your sprayer…

How to Check and Maintain the Oil Level in Your Graco Airless Paint Sprayer

Now, let’s focus on checking and maintaining the oil level in your Graco sprayer. Proper oil maintenance is crucial for the optimal performance and longevity of your airless paint sprayer.

To ensure the oil level is adequate, follow these steps:

  1. Start by locating the oil level indicator on your Graco sprayer. It is usually located near the pump assembly.

  2. Check the oil level by referring to the indicator. It should be within the recommended range, typically marked as ‘Full’ or ‘Add.’

  3. If the oil level is low, add the appropriate amount of oil recommended by the manufacturer. Use a funnel to avoid spills.

By regularly checking and maintaining the oil level, you can prevent damage to the pump and ensure smooth operation of your Graco airless paint sprayer.

Moving on to tips and tricks for extending the lifespan of your Graco airless paint sprayer with regular oil maintenance…

Advertisement

Tips and Tricks for Extending the Lifespan of Your Graco Airless Paint Sprayer With Regular Oil Maintenance

To maximize the lifespan of your Graco sprayer and keep it running smoothly, remember to regularly maintain the oil level as recommended. Here are some tips and tricks for extending the lifespan of your Graco airless paint sprayer through regular oil maintenance:

  1. Follow the manufacturer’s guidelines: Graco provides specific instructions for oil maintenance, including the type of oil to use and the recommended intervals for oil changes. Adhering to these guidelines will ensure optimal performance and longevity.

  2. Check the oil level regularly: It’s important to monitor the oil level in your sprayer to prevent damage from running it with insufficient lubrication. Make it a habit to check the oil level before each use and top it up if necessary.

  3. Use high-quality oil: Using the right type of oil is crucial for ensuring proper lubrication. Graco recommends using their own brand of oil or a high-quality equivalent that meets their specifications.

  4. Keep the oil clean: Contaminated oil can negatively impact the performance of your sprayer and cause premature wear and tear. Regularly check for any debris or particles in the oil and replace it if necessary.

By following these maintenance tips, you can extend the lifespan of your Graco airless paint sprayer and keep it operating at its best.

Now, let’s dive into troubleshooting common issues when adding oil to your Graco airless paint sprayer.

Troubleshooting Common Issues When Adding Oil to Your Graco Airless Paint Sprayer

One common issue when adding oil to your Graco sprayer is an incorrect oil level. It is important to ensure that the oil level is at the appropriate level to avoid any potential problems with your sprayer. To help you troubleshoot this issue and understand the best practices for adding oil to your Graco airless paint sprayer, I have created a table below:

Troubleshooting Issue Possible Cause Best Practice
Incorrect oil level Overfilling or underfilling the oil reservoir Check the owner’s manual for the correct oil level and fill accordingly
Oil leakage Loose or damaged oil cap or seal Inspect the oil cap and seal for any damage or looseness, and replace if necessary
Oil contamination Mixing different types of oil or using old oil Use only the recommended oil and replace it regularly to avoid contamination

Frequently Asked Questions

Can I Use Any Type of Oil in My Graco Airless Paint Sprayer?

Yes, you can use different types of oil suitable for Graco airless paint sprayers. Proper oil maintenance is crucial for optimal performance. Follow the manufacturer’s guidelines to ensure you are using the correct oil.

Advertisement

How Often Should I Check the Oil Level in My Paint Sprayer?

I check the oil level in my paint sprayer regularly to ensure proper maintenance. It’s important to follow the recommended checking frequency to prevent any issues with the equipment.

Can I Overfill the Oil in My Graco Airless Paint Sprayer?

Yes, you can use too much oil in your Graco airless paint sprayer. Overfilling can lead to excessive lubrication, which can cause the equipment to malfunction and potentially damage the internal components.

What Should I Do if I Accidentally Spill Oil on My Paint Sprayer?

If I accidentally spill oil on my paint sprayer, I would immediately clean it to prevent any damage. I would carefully wipe off the excess oil, use a mild detergent to remove any residue, and ensure proper maintenance to avoid future spills.

Can I Use a Different Brand of Oil in My Graco Airless Paint Sprayer?

Yes, you can use a different brand of oil in your Graco airless paint sprayer. However, it is important to ensure oil compatibility with the sprayer to avoid any damage or malfunction.

Conclusion

In conclusion, adding oil to your Graco Airless Paint Sprayer is a crucial step in maintaining its performance and longevity.

Advertisement

Just like a well-oiled machine, your paint sprayer needs proper lubrication to function smoothly.

By following the step-by-step guide and using the right type of oil, you can ensure that your sprayer operates at its best.

Remember to regularly check and maintain the oil level to avoid any issues.

With proper oil maintenance, your Graco Airless Paint Sprayer will continue to deliver flawless results, just like a finely tuned engine.

Advertisement

Continue Reading

Paint Sprayers FAQs

When to Replace the Filters in Airless Paint Sprayer

Published

on

By

An image of an airless paint sprayer, with a close-up view of its filters covered in thick, clogged paint residue

When it comes to maintaining an airless paint sprayer, one crucial point to emphasize is the regular replacement of filters. This practice greatly enhances the machine’s performance and longevity.

As a professional painter, I understand the importance of keeping the filters in optimal condition. In this article, we will explore the signs that indicate it’s time to replace the filters, how often they should be replaced, and the different types of filters available.

Additionally, I will share tips for proper maintenance and common mistakes to avoid.

Let’s dive in and ensure your airless paint sprayer stays in top shape!

Key Takeaways

  • Regularly replacing filters improves performance and lifespan of airless paint sprayer.
  • Signs that your filters need to be replaced include uneven spray patterns, clogging in the spray tip, decreased paint flow, and excessive pressure build-up.
  • Filters should be replaced regularly for optimal performance, and the manufacturer’s recommended replacement schedule should be followed.
  • Understanding the different types of filters and choosing the right one for your needs is important for optimal performance and longevity.

Importance of Regular Filter Replacement

Advertisement

You should regularly replace the filters in your airless paint sprayer because it ensures optimal performance and prevents clogs.

Filter maintenance techniques are crucial for the smooth operation of your paint sprayer. Clean filters play a vital role in maintaining the quality of your paint finish and preventing potential issues.

When the filters are clogged with dirt, debris, or dried paint particles, it can lead to uneven spray patterns, reduced pressure, and even damage to the paint sprayer.

By regularly replacing the filters, you can ensure that your airless paint sprayer operates at its full potential, providing consistent and high-quality results.

Now, let’s explore the signs that your filters need to be replaced, so you can avoid any potential problems down the line.

Advertisement

Signs That Your Filters Need to Be Replaced

If the spray from your machine becomes uneven or clogged, it’s a sign that it’s time to swap out those filters. Regular maintenance of airless paint sprayer filters is crucial for optimal performance and longevity of your equipment. Proper filter care offers several benefits, including improved spray quality, reduced downtime, and extended lifespan of the sprayer. Neglecting filter replacement can lead to costly repairs and diminished productivity.

To determine when filters need to be replaced, it’s important to be aware of the signs indicating their deterioration. Here are some common indicators that your filters are due for a change:

Signs of Filter Replacement
Uneven spray pattern
Clogging in the spray tip
Decreased paint flow
Excessive pressure build-up
Reduced performance

If you notice any of these signs, it’s time to replace your filters to ensure optimal performance. But how often should filters be replaced? Let’s explore this in the next section.

How Often Should Filters Be Replaced

Advertisement

In this discussion, I will address the key points of filter replacement frequency and signs of filter deterioration.

As the user of an airless paint sprayer, it’s important to understand how often filters should be replaced to ensure optimal performance.

Additionally, being able to identify signs of filter deterioration will help you maintain the efficiency and effectiveness of your paint sprayer.

Filter Replacement Frequency

The filter should be replaced regularly to ensure optimal performance of the airless paint sprayer. Maintaining a proper filter replacement schedule is crucial for the longevity and efficiency of the equipment. Here are some best practices for filter maintenance:

  • Regular Inspection:

  • Check the condition of the filter before every use.

  • Look for any signs of clogging or damage.

  • Timely Replacement:

  • Replace the filter based on the manufacturer’s recommended schedule.

  • Consider replacing it more frequently if you work with thick or heavily pigmented paints.

By adhering to a regular filter replacement schedule and following these best practices, you can ensure that your airless paint sprayer operates at its best. Neglecting filter maintenance can result in poor performance and potential damage to the sprayer.

Advertisement

Now, let’s explore the signs of filter deterioration and how to address them.

Signs of Filter Deterioration

Regularly inspecting the filter and looking for signs of clogging or damage helps ensure optimal performance of your equipment. Proper filter maintenance is crucial to extend its lifespan and maintain the efficiency of your airless paint sprayer. One of the first signs of filter deterioration is a decrease in paint flow or pressure. If you notice that the spray pattern is uneven or the paint is not being evenly distributed, it may be a sign that the filter is clogged or damaged.

Additionally, inspect the filter for any visible signs of wear or tear, such as cracks or holes. If you see any of these signs, it is important to replace the filter as soon as possible to avoid further damage to your equipment.

Understanding the different types of filters is the next step in maintaining your airless paint sprayer.

Understanding the Different Types of Filters

You’ll need to familiarize yourself with the different types of filters used in airless paint sprayers. Choosing the right filter for your paint sprayer is crucial in ensuring optimal performance and longevity. There are various types of filter materials available, each with its own unique characteristics and benefits.

Advertisement

Here are two sub-lists to help you understand the different types of filters:

  • Mesh Filters

  • Made from woven wire mesh

  • Ideal for removing larger particles and debris from the paint

  • Paper Filters

  • Made from cellulose or synthetic fibers

  • Offers superior filtration, capturing even the smallest particles

Now that you know the types of filter materials, you can make an informed decision when selecting the right filter for your paint sprayer. It’s important to consider factors such as the type of paint you’ll be using and the desired finish. By choosing the appropriate filter, you can achieve optimal spray pattern and minimize clogs.

Understanding the different types of filters is the first step in ensuring efficient painting results. Next, let’s explore the factors that affect filter lifespan.

Factors That Affect Filter Lifespan

When it comes to the lifespan of filters in an airless paint sprayer, two key factors play a crucial role: usage frequency and duration, as well as the type of paint used.

The more often and longer the sprayer is used, the quicker the filters may become clogged or worn out.

Advertisement

Additionally, different types of paint can have varying levels of viscosity and particulate matter, which can impact the lifespan of the filters.

Usage Frequency and Duration

To ensure optimal performance, it’s important to keep track of how often and for how long you use your airless paint sprayer. Here are some usage tips to help you get the most out of your equipment and avoid common mistakes:

  • Use the sprayer on a regular basis to prevent the paint from drying and clogging the system.
  • Be mindful of the duration of each painting session. Prolonged use can strain the motor and lead to overheating.

By following these usage tips, you can maximize the lifespan of your airless paint sprayer and minimize the need for repairs or replacements.

Now, let’s move on to the next section, where we will discuss the impact of the type of paint used on the performance of your sprayer.

Type of Paint Used

Using the wrong type of paint can negatively affect the performance and functionality of your airless paint sprayer. It is crucial to understand the impact of paint viscosity on the sprayer’s operation.

Different paint finishes have varying viscosity levels, which can determine the compatibility with your airless paint sprayer. High-viscosity paints, such as textured or elastomeric coatings, require a sprayer with a larger pump size and higher pressure capabilities. On the other hand, low-viscosity paints, like stains or lacquers, work well with smaller pumps and lower pressure settings.

Advertisement

Using the wrong viscosity can lead to clogs, uneven spray patterns, and reduced efficiency. Therefore, it is essential to choose the appropriate paint viscosity for your airless paint sprayer to ensure optimal performance.

Transitioning into the next section about ‘diy filter replacement vs. professional maintenance,’ it is crucial to maintain the sprayer’s filters to prevent paint debris from clogging the system.

DIY Filter Replacement Vs. Professional Maintenance

You should consider whether to replace the filters in your airless paint sprayer yourself or hire a professional for maintenance. Here are some points to help you make an informed decision:

  • DIY Filter Replacement:

  • Cost effective: Doing it yourself can save you money on labor costs.

  • Convenience: You can replace the filters at your own pace without relying on someone else’s schedule.

  • Professional Maintenance:

  • Expertise: Professionals have the knowledge and experience to properly replace filters and ensure optimal performance.

  • Warranty protection: Hiring a professional may be necessary to maintain your warranty coverage.

Considering the DIY vs professional approach for filter replacement is crucial for cost-effective maintenance. However, keep in mind that proper maintenance extends beyond filter replacement. It involves regular cleaning and inspection to ensure the filters are functioning efficiently.

Tips for Properly Maintaining Filters

When it comes to maintaining filters for airless paint sprayers, it’s important to understand the frequency at which they should be replaced. Regularly replacing filters ensures optimal performance and prevents clogs or damage to the sprayer.

Advertisement

However, before replacing a filter, it’s worth considering whether cleaning it might be a viable option, as this can help extend its lifespan and save on replacement costs.

Filter Replacement Frequency

The filter’s replacement frequency depends on how frequently you use the airless paint sprayer. If you use it frequently, you may need to replace the filter more often to maintain optimal performance. Regular cleaning is important to ensure that the filter is free from clogs and debris, but there are also benefits to using high-quality filters.

Here are two key points to consider:

  • Regular cleaning: Cleaning the filter regularly helps to remove accumulated paint particles and other contaminants, preventing them from clogging the spray tip. This ensures a smooth and consistent paint application, reducing the risk of uneven coverage or clogged spray patterns.

  • Benefits of high-quality filters: Investing in high-quality filters can significantly improve the performance and efficiency of your airless paint sprayer. These filters are designed to capture even the smallest particles, ensuring a clean and uninterrupted flow of paint. They also tend to have a longer lifespan, reducing the frequency of filter replacements and saving you time and money.

Considering these factors, it is important to find the right balance between cleaning and replacing filters to maintain optimal performance and avoid unnecessary expenses.

Cleaning Vs. Replacing

Now that we have discussed the frequency of filter replacement, let’s delve into the topic of cleaning versus replacing the filters in your airless paint sprayer.

Advertisement

While it is important to replace filters when they become excessively dirty or damaged, there are instances where you can extend their lifespan through proper maintenance. DIY cleaning is a cost-effective option that can help remove debris and prolong the filter’s effectiveness.

Regular filter maintenance involves removing the filter, gently rinsing it with water or a mild detergent, and allowing it to dry completely before reinserting it into the sprayer. However, it is crucial to note that cleaning can only go so far, and eventually, you will need to replace the filter to ensure optimal performance.

Transitioning into the subsequent section, let’s explore some effective ways to extend the lifespan of your filters.

Extending the Lifespan of Your Filters

To extend the lifespan of your filters, you should regularly clean and maintain them. Here are some tips for filter maintenance that can help you save money and ensure optimal performance:

  • Clean the filters regularly by removing any debris or dust particles that may have accumulated on the surface.
  • Use compressed air or a soft brush to gently clean the filters without damaging them.
  • Replace the filters when they become clogged or damaged beyond repair.
  • Consider using cost-effective filter replacement options, such as reusable filters or aftermarket filters that are compatible with your airless paint sprayer.

By following these maintenance tips, you can maximize the lifespan of your filters and avoid unnecessary expenses.

Now let’s move on to the next section and discuss some common mistakes to avoid when replacing filters.

Advertisement

Common Mistakes to Avoid When Replacing Filters

When replacing filters, it’s important to avoid common mistakes that can lead to inefficiency and potential damage. Proper filter maintenance is crucial for the optimal performance of airless paint sprayers. Here are some DIY filter replacement tips to ensure you get the most out of your equipment:

Common Mistakes Tips to Avoid Them
Not replacing filters regularly Replace filters according to the manufacturer’s recommendations. Neglecting to do so can result in reduced efficiency and clogging.
Incorrect installation Follow the instructions provided by the manufacturer to ensure proper installation. Improperly installed filters can lead to leaks and decreased performance.
Using the wrong type of filter Always use filters specifically designed for your airless paint sprayer. Using the wrong filter can lead to poor filtration and potential damage to the equipment.
Not cleaning the filters before replacement Clean the filters thoroughly before installing new ones. This helps maximize their lifespan and ensures efficient performance.

Benefits of Timely Filter Replacement

By timely replacing your filters, you can experience the benefits of improved efficiency and extended equipment lifespan. Regular maintenance is crucial for optimal performance of your airless paint sprayer. Here are the benefits you can expect:

  • Improved Efficiency:

  • Clean filters allow for better airflow, ensuring consistent paint flow and reducing clogs.

  • Increased efficiency means less time wasted on troubleshooting and cleaning, resulting in more productive painting sessions.

  • Extended Equipment Lifespan:

  • Clogged filters strain the motor and other internal components, leading to premature wear and tear.

  • By replacing filters regularly, you can prevent costly repairs and prolong the life of your airless paint sprayer.

To ensure maximum effectiveness, proper filter storage is essential:

  • Store filters in a clean, dry place to prevent dust and moisture buildup.
  • Avoid exposing filters to extreme temperatures or direct sunlight, as this can degrade their performance.

Frequently Asked Questions

Can I Clean and Reuse Airless Paint Sprayer Filters Instead of Replacing Them?

Yes, you can clean and reuse airless paint sprayer filters instead of replacing them, but there are pros and cons. Cleaning can save money, but reused filters may not perform as well as new ones and could lead to clogs or uneven spray patterns.

How Can I Tell if My Filters Are Clogged and Need to Be Replaced?

Regular filter maintenance is crucial to ensure optimal performance. Signs of clogged filters include reduced paint flow, uneven spray pattern, and increased pressure. If these symptoms persist after cleaning, it may be time to replace the filters.

Are There Any Specific Types of Filters That Are More Durable and Have a Longer Lifespan?

Most durable filters for airless paint sprayers are made of high-quality materials like stainless steel or nylon. These filters have a longer lifespan and can withstand the demands of paint spraying applications.

Advertisement

Can I Use Non-Branded or Generic Filters for My Airless Paint Sprayer?

I can use non-branded filters for my airless paint sprayer, but there are pros and cons. It’s important to choose the right filter based on the specific needs of the paint sprayer to ensure optimal performance and longevity.

Should I Hire a Professional to Replace My Filters or Can I Do It Myself?

I can save money by replacing the filters in my airless paint sprayer myself instead of hiring professionals. It’s a simple task that requires minimal effort and can be done regularly for optimal performance.

Conclusion

In conclusion, regular filter replacement is crucial for maintaining the efficiency and longevity of your airless paint sprayer. By recognizing the signs of worn-out filters and understanding the different types available, you can ensure optimal performance.

Proper maintenance and avoiding common mistakes will help extend the lifespan of your filters, saving you time and money in the long run.

So, why wait for clogged filters to hinder your painting project? Take action now and enjoy smooth and flawless results.

Advertisement

Continue Reading

Paint Sprayers FAQs

How to Prepare Paint for Airless Sprayer

Published

on

By

An image showcasing a painter pouring paint into a large container, using a funnel to strain out impurities

In all of my painting projects, my main objective has always been to achieve a perfect result. This has driven me to become skilled in preparing paint for use in an airless sprayer.

In this article, I’ll share my knowledge and expertise on selecting the right paint, preparing it for the sprayer, and setting up the equipment.

I’ll also provide techniques for achieving a smooth paint application and tips for cleaning and maintaining the airless sprayer equipment.

Get ready to elevate your painting game with these precise and detailed steps.

Key Takeaways

  • Consider the viscosity and consistency of the paint for smooth flow and even application.
  • Proper mixing techniques ensure thorough blending and avoid clumps.
  • Filtering the paint removes impurities that can clog the sprayer nozzle.
  • Viscosity affects atomization and spray quality, while consistency ensures even coverage and professional-looking results.

Understanding the Airless Sprayer System

Advertisement

Before you can use an airless sprayer, it’s important to understand how the system works. The airless sprayer is a powerful tool that uses high pressure to atomize paint and create a fine mist for smooth and even application.

To ensure the optimal performance of the airless sprayer, regular maintenance is crucial. This includes cleaning the filters, lubricating the pump, and inspecting the hoses for any signs of wear or damage. Troubleshooting common issues such as clogs or uneven spray patterns is also part of the maintenance process.

By familiarizing yourself with the inner workings of the airless sprayer and implementing proper maintenance, you can ensure its longevity and efficiency.

Now, let’s move on to selecting the right paint for your airless sprayer.

Selecting the Right Paint for Airless Sprayer

When choosing the right paint for your airless sprayer, make sure to consider the type of surface you will be painting. Understanding paint compatibility is crucial to achieve excellent results. Different surfaces require different types of paint to ensure proper adhesion and durability. Here is a helpful table to guide you in selecting the right paint type for your airless sprayer:

Advertisement
Surface Type Recommended Paint Type
Wood Latex or oil-based
Metal Enamel or epoxy
Concrete Acrylic or epoxy

Preparing the Paint for Airless Sprayer

When preparing paint for an airless sprayer, it’s important to consider the paint viscosity and consistency. This will ensure that the paint flows smoothly through the sprayer and provides an even application.

Proper mixing techniques should also be employed to ensure that all the components of the paint are thoroughly blended, avoiding any clumps or inconsistencies.

Additionally, filtering the paint before pouring it into the sprayer can help remove any impurities or debris that could potentially clog the sprayer nozzle and affect the paint application.

Advertisement

Paint Viscosity and Consistency

To ensure optimal results with your airless sprayer, it’s important to pay attention to the viscosity and consistency of the paint. These factors greatly affect the paint drying time and the overall quality of the finish. Here are three key points to consider:

  1. Viscosity: The thickness of the paint plays a crucial role in how well it atomizes and sprays through the nozzle. If the paint is too thick, it can clog the sprayer and result in an uneven application. On the other hand, if the paint is too thin, it may run or drip, leading to a poor finish.

  2. Consistency: Consistency refers to the smoothness and uniformity of the paint. It’s important to ensure that the paint is well mixed and free of lumps or clumps. A consistent paint will provide an even coverage and help achieve a professional-looking result.

  3. Paint Thinning: If the viscosity of the paint is not suitable for the airless sprayer, it may be necessary to thin it. Thinning the paint involves adding a compatible thinner or water to achieve the desired consistency. It’s crucial to follow the manufacturer’s guidelines and recommendations for proper thinning ratios.

Proper Mixing Techniques

Now that you’ve learned about viscosity and consistency, it’s time to discuss proper mixing techniques for achieving the best paint application with your airless sprayer. When it comes to mixing paint, using the right tools and additives can make a big difference in the quality of your finish.

Here are some key techniques to keep in mind:

Mixing Tools:

  • Use a stir stick or paddle attachment on a power drill for efficient mixing.
  • Ensure the mixing tool reaches the bottom of the paint can to properly blend all ingredients.
  • Stir in a circular motion, gradually increasing speed to avoid splashing.

Paint Additives:

  • Additives like flow improvers can enhance the paint’s leveling properties.
  • Thinning agents can be used to adjust viscosity for better sprayability.
  • Follow the manufacturer’s instructions for the correct ratio of additives to paint.

By using the right mixing tools and incorporating paint additives, you can achieve a more consistent and smooth paint mixture. This will ensure better results when using your airless sprayer.

Now, let’s move on to the next section and discuss filtering the paint to further improve its quality.

Advertisement

Filtering the Paint

To improve the quality of your paint mixture, start by filtering it to remove any impurities. Paint filtration is a crucial step in the preparation process that ensures a smooth and flawless finish. Here are three reasons why you should always filter your paint:

  1. Enhanced paint flow: By removing particles and debris, filtering the paint allows for a more consistent flow through the sprayer, preventing clogs and interruptions.

  2. Improved surface appearance: Filtering eliminates impurities that can cause imperfections on your painted surface, resulting in a professional-looking finish.

  3. Longer equipment lifespan: Filtering the paint prevents abrasive particles from entering the airless sprayer, reducing wear and tear on the equipment and extending its lifespan.

Setting Up the Airless Sprayer Equipment

Make sure you’ve got all the necessary equipment ready for setting up the airless sprayer. Start by attaching the sprayer nozzle securely to the gun. This is an important step to ensure proper paint flow and coverage. Check for any leaks or loose connections, as this can cause issues during operation.

Next, ensure that the paint container is properly filled and positioned. Make sure the paint is well mixed and free from any impurities that could clog the sprayer. Troubleshooting common sprayer issues involves checking the pressure settings, ensuring the nozzle is clean and unclogged, and adjusting the spray pattern as needed. These steps will help you achieve optimal results when painting.

Now let’s move on to techniques for achieving smooth paint application without any streaks or drips.

Techniques for Achieving Smooth Paint Application

When it comes to achieving a smooth paint application, there are three key factors to consider: proper paint consistency, preparing the surface, and using effective sprayer technique tips.

Advertisement

First and foremost, ensuring that the paint has the right consistency is crucial for optimal results. This involves following manufacturer guidelines and adjusting the paint with water or a thinning agent if necessary.

Secondly, preparing the surface properly is essential for a smooth and long-lasting finish. This includes cleaning, sanding, and priming the surface to ensure proper adhesion.

Lastly, mastering sprayer technique tips such as maintaining the correct spraying distance, moving in a consistent and even pattern, and avoiding overspray can greatly contribute to achieving a flawless paint application.

Proper Paint Consistency

Achieving the proper paint consistency is crucial for successful airless sprayer application. When it comes to paint mixing, there are a few key factors to keep in mind.

First, make sure to measure the paint and the thinner accurately to achieve the desired consistency.

Advertisement

Second, mix the paint thoroughly to ensure all the pigments are evenly distributed.

Lastly, consider using a paint filtration system to remove any impurities that could clog the sprayer nozzle. This will help prevent blockages and ensure a smooth application.

Now, let’s move on to preparing the surface for painting.

Preparing the Surface

Before starting the painting process, it’s important to ensure that the surface is properly prepared. Surface preparation plays a crucial role in achieving a smooth and long-lasting finish. To achieve the best results, follow these priming techniques:

Surface Type Preparation
Wood Fill any cracks or holes with wood filler. Sand the surface to remove any imperfections. Apply a wood primer to seal and protect the wood.
Metal Clean the surface to remove any dirt or grease. Use a metal primer to prevent rust and promote adhesion.
Drywall Repair any cracks or dents with joint compound. Sand the surface to create a smooth finish. Apply a primer to seal the drywall and ensure proper paint adhesion.
Concrete Clean the surface to remove any dirt or debris. Use a concrete primer to fill any pores or imperfections and promote paint adhesion.
Masonry Clean the surface to remove any dirt or efflorescence. Apply a masonry primer to seal the surface and promote adhesion.

Sprayer Technique Tips

Now that we’ve covered preparing the surface for painting, let’s dive into some sprayer technique tips to ensure a smooth and efficient painting process.

Advertisement

Proper sprayer maintenance is crucial for achieving excellent results. Here are some key tips to keep in mind:

  1. Check for clogs: Before starting, inspect the sprayer for any clogs in the nozzle or hose. Clear them out to avoid uneven spray patterns or blockages.

  2. Adjust pressure: Ensure the sprayer is set to the correct pressure for the type of paint being used. Too high or too low pressure can result in overspray or poor coverage.

  3. Troubleshoot issues: If you encounter any problems like air bubbles or inconsistent spray, refer to the sprayer’s manual for troubleshooting tips or seek professional assistance.

With these sprayer technique tips, you’ll be well-equipped to tackle any painting project.

Now, let’s move on to the next section, where we’ll discuss the cleaning and maintenance of airless sprayer equipment, ensuring its longevity and optimal performance.

Cleaning and Maintenance of Airless Sprayer Equipment

To keep your airless sprayer equipment in good condition, it’s important to regularly clean and maintain it.

Cleaning equipment after each use is crucial to prevent clogs and ensure optimal performance. Start by flushing out any remaining paint from the system by running clean water or solvent through the sprayer.

Advertisement

Disassemble the spray gun and clean all the parts thoroughly. Pay attention to the nozzle, which is prone to clogging. Use a small brush or toothpick to remove any dried paint or debris.

Additionally, troubleshoot any problems you may encounter with your airless sprayer. Common issues include uneven spray patterns, loss of pressure, or leaking. Refer to the manufacturer’s guide for troubleshooting steps or contact customer support for assistance.

Regular cleaning and maintenance will extend the lifespan of your airless sprayer equipment and ensure consistent, high-quality results.

Frequently Asked Questions

How Long Does It Take for the Paint to Dry After Being Sprayed With an Airless Sprayer?

After being sprayed with an airless sprayer, the drying time of paint can vary based on several factors such as humidity, temperature, and type of paint used. It typically takes a few hours to dry completely.

Can an Airless Sprayer Be Used to Paint Textured Surfaces?

An airless sprayer is a useful tool for painting textured surfaces. To achieve the best results, it is important to follow proper airless sprayer maintenance and use the appropriate techniques for painting textured surfaces.

Advertisement

What Safety Precautions Should Be Taken When Using an Airless Sprayer?

Safety measures and important precautions must be followed when using an airless sprayer. Proper ventilation, eye protection, and protective clothing are essential. Additionally, ensuring the sprayer is properly grounded and following manufacturer guidelines is crucial for safe operation.

Can Different Types of Paint Be Mixed Together and Used With an Airless Sprayer?

Oh, the joy of mixing different types of paint for an airless sprayer! But alas, my knowledge tells me that it is not advisable. Stick to one type for optimal compatibility and avoid any potential mishaps.

Is It Necessary to Thin the Paint Before Using It With an Airless Sprayer?

Yes, it is necessary to thin the paint before using it with an airless sprayer. Thinning paint allows for better spray coverage and prevents clogging in the sprayer. It ensures a smooth and even application.

Conclusion

In conclusion, preparing paint for an airless sprayer requires careful attention to detail and knowledge of the equipment. By understanding the airless sprayer system, selecting the right paint, and properly setting up the equipment, you can achieve smooth and professional paint application.

Remember the old saying, ‘A stitch in time saves nine.’ Taking the time to clean and maintain your airless sprayer equipment will ensure its longevity and prevent any future painting mishaps.

Advertisement

So, take the necessary steps to prepare your paint and enjoy a flawless painting experience.

Continue Reading

Trending

Copyright © 2024 Paint Sprayer Zone Affiliate disclaimer As an affiliate, we may earn a commission from qualifying purchases. We get commissions for purchases made through links on this website from Amazon and other third parties.