To correct orange peel and texture issues, start by thoroughly preparing your surface—clean, dry, and sand it smoothly with fine-grit sandpaper to remove rough areas. Use thin, even coats when applying paint or finish, and avoid thick layers that cause bumps. Proper technique and consistent pressure help reduce texture problems. If you want to learn more advanced tips to achieve a flawless finish, there’s plenty more detail to guide you.
Key Takeaways
- Properly clean and dry the surface before painting to prevent impurities that cause texture issues.
- Sand the surface with fine-grit sandpaper to smooth bumps and imperfections prior to applying paint.
- Apply thin, even coats of paint or clear coats to avoid thick layers that lead to orange peel texture.
- Use controlled, consistent techniques with your spray gun or brush to ensure smooth, professional results.
- Inspect the surface during painting and sand or correct any rough areas promptly to prevent texture from setting.
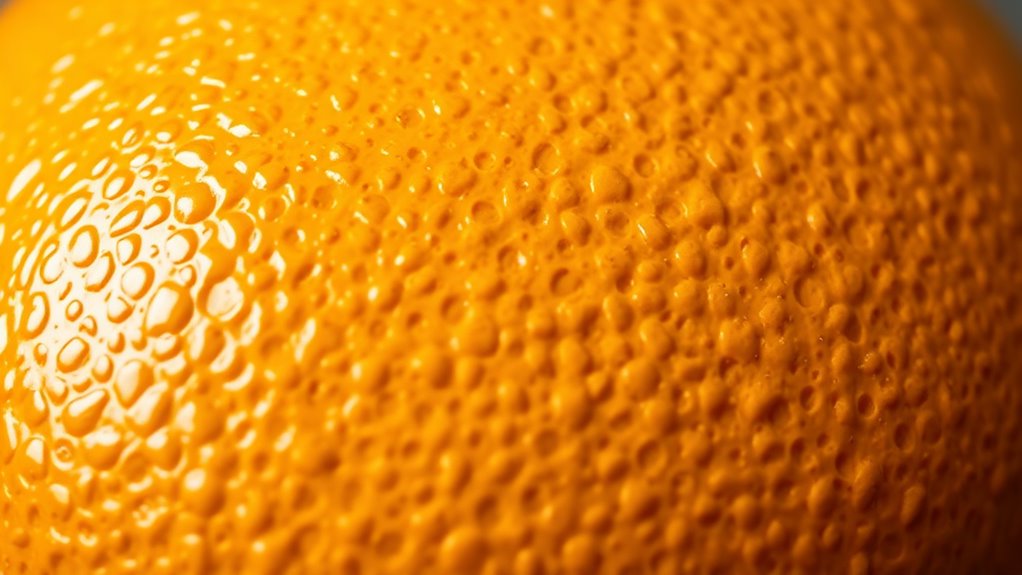
If you’ve noticed your skin developing a bumpy, uneven surface resembling the peel of an orange, you’re experiencing a common texture issue known as orange peel skin. While this term is typically associated with skin, it also describes a similar problem in painting projects. When applying paint or coating, an uneven surface can develop, making your finished work look rough and unprofessional. Addressing this issue involves understanding proper paint preparation and surface sanding techniques to guarantee a smooth, flawless finish.
Before you start painting, proper paint preparation is essential. You need to begin with a clean, dry surface free of dust, grease, or old paint. Any impurities can cause the paint to adhere unevenly, resulting in texture problems. Once the surface is clean, inspect for uneven areas, bumps, or rough patches. These imperfections often contribute to orange peel effects. To correct this, surface sanding becomes your most effective tool. Sand the surface with fine-grit sandpaper—usually between 220 and 320 grit—to smooth out rough patches and create a uniform base. Sanding helps remove minor imperfections and provides a better grip for the new coat of paint.
During surface sanding, focus on maintaining an even pressure to avoid creating deeper scratches or gouges. Use gentle, consistent strokes and go over the entire surface thoroughly. After sanding, wipe away all dust with a tack cloth or a damp rag. This step is critical because residual dust can settle into the newly applied paint, causing bumps or uneven textures. Proper surface sanding not only smooths out existing surface imperfections but also improves the overall adhesion of the paint, reducing the chances of orange peel effects reappearing.
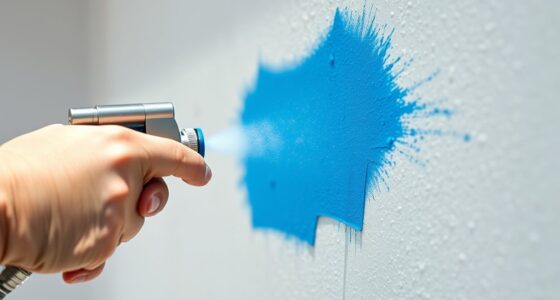
When you’re ready to paint, apply thin, even coats rather than thick layers. Thick paint tends to sag or dry unevenly, contributing to surface texture issues. Maintaining proper spray gun settings or brush techniques is also important; a controlled, consistent application helps prevent the formation of orange peel texture. If you notice the surface developing a rough or bumpy finish as it dries, it’s often due to improper surface preparation or thick application. Refining your technique with careful surface sanding before painting, combined with meticulous paint preparation, minimizes these issues and ensures a smooth, professional-looking finish.

Extra Fine Sand Paper 120 to 20000 High Grit, 22 PCS Sandpaper Sheets with 3 Finger Cots, Assorted Wet Sanding Paper Automotive Sandpaper Assortment, for Car Wood Metal Furniture 9.1 x 3.6'' (22 PCS)
All in One Set: Package comes with 22 sheets of sandpaper from 120 to 20000 grits, 3 finger…
As an affiliate, we earn on qualifying purchases.
As an affiliate, we earn on qualifying purchases.
Frequently Asked Questions
Can Orange Peel Texture Be Completely Removed Once It Appears?
Yes, orange peel texture can be completely removed, but it requires proper surface preparation and the right paint additives. You should sand the area smoothly, using fine-grit sandpaper, to eliminate the texture. Then, apply a high-quality primer and consider using paint additives designed to reduce texture, ensuring an even finish. Patience and proper technique are key to achieving a smooth surface without the orange peel effect.
Are Certain Paints More Prone to Developing Orange Peel?
Certain paints, like high-gloss or thick formulations, are more prone to developing orange peel. For example, a homeowner using a fast-drying, low-quality paint might notice texture issues after application. Your choice of paint formulations and application techniques markedly impact the outcome. To minimize orange peel, opt for paints with proper viscosity and apply with consistent, controlled spray or brush strokes, avoiding overworking the surface.
How Long Does It Take for Orange Peel to Settle?
It typically takes about 24 to 48 hours for orange peel to settle as the paint dries. During this time, you can monitor the surface and use gentle sanding techniques if the texture remains uneven. Keep in mind that environmental factors like temperature and humidity influence drying time. Patience is key; avoid rushing the process to guarantee a smooth finish and prevent further texture issues.
Does Environmental Humidity Affect Orange Peel Formation?
Yes, environmental humidity considerably impacts orange peel formation. High humidity increases moisture influence on your paint or coating, making it more likely for orange peel to develop. Conversely, low humidity can cause faster drying and uneven surfaces. To minimize this, control your workspace’s humidity levels, ideally between 40-50%, and use proper drying techniques. This helps guarantee a smooth finish by reducing the humidity impact on your project.
Can Applying a Clear Coat Fix Existing Orange Peel Texture?
A clear coat can be a gentle touch-up, but it’s not a magic fix for existing orange peel texture. Applying a clear coat might improve the appearance temporarily, yet it often doesn’t fully rectify the underlying surface irregularities. For the best texture correction, consider sanding and polishing the existing surface before applying a new, properly sprayed clear coat. This approach ensures a smoother, more professional finish that lasts longer.

VONFORN Paint Sprayer, 700W HVLP Spray Gun with Cleaning & Blowing Joints, 4 Nozzles and 3 Patterns, Easy to Clean, for Furniture, Cabinets, Fence, Walls, Door, Garden Chairs etc. VF803 Yellow
【4 Nozzles & 3 Spray Patterns】VONFORN 700W paint sprayer includes 4 nozzle sizes (1.0mm, 1.5mm, 2.0mm, 3.0mm) to…
As an affiliate, we earn on qualifying purchases.
As an affiliate, we earn on qualifying purchases.
Conclusion
Remember, tackling orange peel and texture issues is like smoothing out a wrinkled shirt—you just need the right tools and patience. By following proper prep, applying the right techniques, and patiently building up layers, you’ll transform that bumpy surface into a smooth, flawless finish. Don’t let these issues feel like an insurmountable mountain; instead, see them as hurdles you can easily clear with a little know-how and perseverance. Your perfect finish is just a few steps away!
Bates- Paint Scraper, 10 in 1 Painters Tool, Paint Scrapers for Wood, Painters Tool, Painters Knife, Paint Scraper for Painting, Putty Knife, Metal Scraper, Spackle Tool, Putty Scraper, Knife Scraper
Bates paint scraper tool 10 in 1 easy to use and convenient.
As an affiliate, we earn on qualifying purchases.
As an affiliate, we earn on qualifying purchases.

CAREGY 16Pcs Tack Cloth for Removing Dust from Woodworking, Sanding Particles, Clean & Polish, Ideal for Woodworking & Painting,Wax and Silicone Free, 18 x 36 Inches Dust Cloths
Package Includes: Each package contains a total of 16 tack cloths, with each tack cloth individually packaged for…
As an affiliate, we earn on qualifying purchases.
As an affiliate, we earn on qualifying purchases.

Franz came aboard the Paint Sprayer Zone team with a background in both journalism and home renovation. His articulate writing style, combined with a passion for DIY projects, makes him an invaluable asset. Franz has a knack for breaking down technical jargon into easy-to-understand content, ensuring that even the most novice of readers can grasp the complexities of paint sprayers.